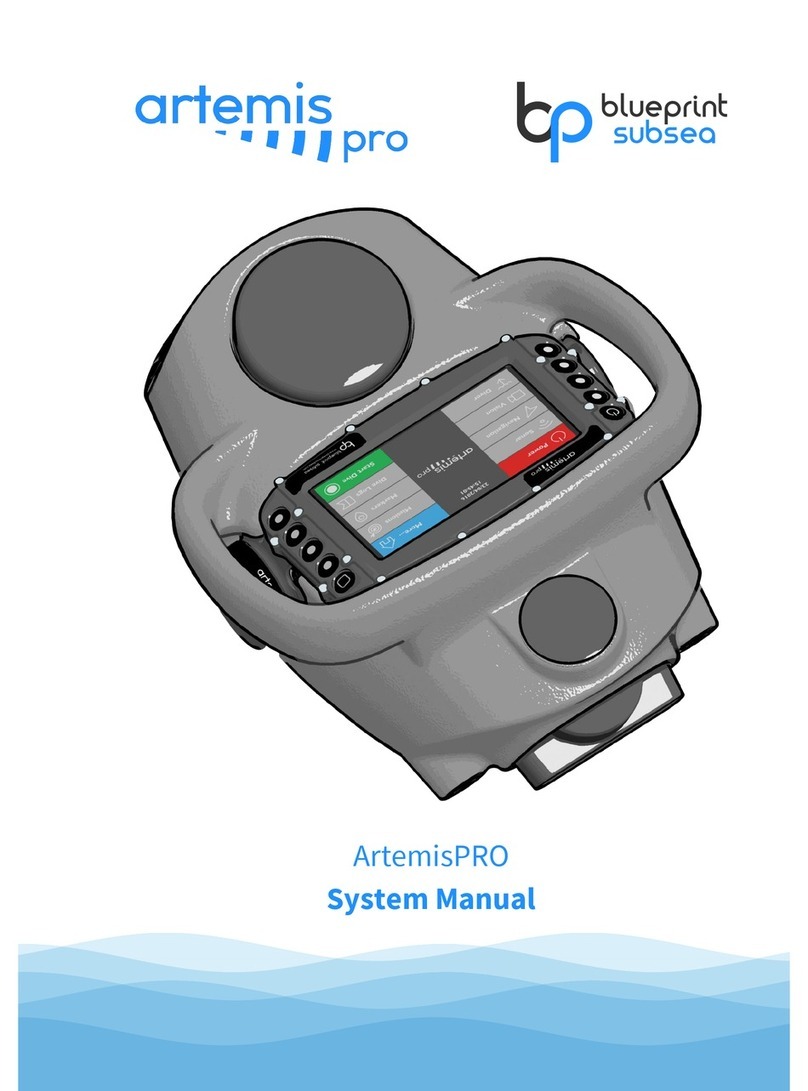
Blueprint Subsea ArtemisPRO Installation guide

ArtemisPRO
Training


ArtemisPRO
Training Manual
6-3
1. Introduction
ArtemisPRO is a self-contained diver target detection sonar and underwater navigation aid. The system combines
a forward looking multi-beam imaging sonar, Doppler-Velocity-Log (DVL) sensor, Global Navigation Satellite
System (GNSS/GPS) receiver, internal Attitude and Heading sensors (AHRS), optional video camera and dive-light.
The ArtemisPRO training course is suggested to run over a 3-to-5-day period depending on the amount of practical
swimming-pool and open-water time available to the divers, and cover all aspect of the systems operation.
Overview of system parts
Using the console and understanding the displays
Sonar system
Navigation system
NavPoint software application
The course contains 5 one-hour classroom sessions that build upon each other covering topics from basic
operation and maintenance up to using the sonar system and navigating pre-determine courses underwater with
the dead-reckoning navigation system
Classroom sessions are supported by a PowerPoint presentation and the ArtemisPRO user manual. Attendees are
encouraged to have an ArtemisPRO in-front of them, allowing them to repeat the trainer’s actions/demonstration
and build familiarity with the system.
After the first two classroom theory sessions are given, each following session is intended to followed by a hands-
on swim session, either in a pool while the diver gains experience with the system or in open-water for building
confidence with the sonar and using the navigation system to navigate longer distances underwater between
defined markers.
The final day of training is set aside for as many additional dives as required to allow the trainees to gain
experience with all parts of the systems working together while the trainers are on hand to provide support and
answer questions.
If possible, customer provision of the following resources helps deliver a comprehensive training package:
Training room with PowerPoint project facilities, and table at the front for classroom sessions
ArtemisPRO systems that small groups of attendees can have in-front of them during classroom
sessions.
For the first dive, access to a swimming pool is recommended for practice with the sonar.
For subsequent dives, access to a sheltered open-water area (with easy shore access) to allow practice
with the navigation system and sonar.
Several weighted objects that can be used as example sonar targets in the swimming pool sessions.
Three or four weighted buoys (or other suitable sub-sea marker) to act as navigation points when
swimming ‘missions’.
Tent and table for use during open-water training sessions where demonstrations can be performed or
Mission files uploaded onto the system.

ArtemisPRO
Training Manual
6-4
2. Syllabus
The following is the recommended syllabus for a 5-day training program.
(Each classroom session is intended to be no longer than 1 hours, and sessions can be moved around to
accommodate specific time requirements and resources available)
Day
Morning
Afternoon
1
Classroom Session 1 (1hr)
Introduction to ArtemisPRO
Parts of the System
Using the System
oConnecting Batteries
oPowering On & Off
oUser Interface
oStatus Bar & Main Display
Charging & Using Batteries
Classroom Session 2 (1hr)
Diving with ArtemisPRO
Pre-Dive Tasks
oMission Planning & Marker Selection
oNavigation Bubble
oWater Salinity
oStarting A Dive
Submerged Tasks
oSetting the Diver Position
oPower Saving
oSnapshots
oScuttling Data
Post-Dive Tasks
oReviewing Dive-Logs
oUSB Data Transfer
oMaintenance & Storage
Classroom Session 2 (if not delivered in the
morning)
or
Swimming Pool Session (optional)
If the schedule permits, Classroom Session 2 can be delivered
earlier in the day and the afternoon could end with a Swimming
Pool Session to give the divers their first feel of ArtemisPRO along
with some basic on-site instruction on the use of the sonar system
and how to correctly hold the device.
2
Classroom Session 3 (1hr)
Using the Sonar System
Understanding Sonar Images
oBeam Patterns
oAcoustic Shadows
oTarget Echoes
Using the Sonar
oRange, Gain & Frequency Controls
oSonar Settings (Palettes etc.)
oLogging & Reviewing Sonar Data
Swimming Pool Session
Objectives:
Gives the divers their first experience swimming with ArtemisPRO
and allows them to start using the Sonar to investigate targets and
see how the on-screen imagery relates to their surroundings and
the previous classroom session.
Review of sonar data performed on the ArtemisPRO console.
Equipment:
It is recommended that some targets/objects of different sizes be
placed in the pool that can be imaged by the sonar.
3
Classroom Session 4 (1hr)
Using the Navigation System
Overview of Sensors
Using Navigation
oDead-Reckoning Navigation
oCorrect Operation of the DVL
oCompass Calibration Procedure
oStarting A Dive
Navigation Display
Open-Water Session
Objectives:
This session builds on the previous classrooms session giving
divers experience in selecting missions and using markers to swim
to predetermined navigation destinations using dead-reckoning
positioning.
The sonar system is not used during this session.
Review of navigation data is performed on the ArtemisPRO
console either during or at the end of the session.
Equipment:
If possible, several navigational markers (such as buoys on shot-
lines) are placed about 100m-200m apart forming a route that the
diver can practice swimming over.
The in-built satellite receive in ArtemisPRO can be used to obtain
the coordinates of the markers at the start of the mission and a
Mission file created from these.

ArtemisPRO
Training Manual
6-5
Day
Morning
Afternoon
4
Classroom Session 5 (1hr)
Using the NavPoint Software
Mission and Dive-Log Files
Using the Usb Cable
Installing the Divers & Software
Mission Planning
Working with S-63 Charts
Dive-Log Review
Exporting Data
Hands-on Session
Hands-on Mission Planning session allowing divers to time
to use NavPoint and produce a Mission File that can be
used on ArtemisPRO in the afternoon session.
The session covers using the USB cable to upload the
mission onto the ArtemisPRO.
Open-Water Session
Objectives:
Builds on the previous day’s session, but using NavPoint and pre-
determined coordinates to build a mission file that is uploaded
onto ArtemisPRO prior to diving.
Additionally, divers may wish to include sonar targets along the
length of the swim to practice search-and-identification tasks
At the end of the session (or following day), divers can use the USB
cable to transfer their dive log files onto a PC and review is using
NavPoint.
Equipment:
Same as previous open-water session. PC equipment for NavPoint
and USB transfer cables.
5
Open-Water Session
This session allows the diver to combine all the previous
skills and practice performing sonar based search-and-
identification tasks combined with navigation activities
over Mission files that may be planned either on the
console or separately using the NavPoint application.
Most of the preparatory work (including running through
the checklists) should be undertaken by the diver, but the
trainer will be on-hand to answer any questions or cover
any previous areas of the syllabus as required.
Open-Water Session
As per morning session, objectives adjusted based on divers
specific requirements, questions raised etc.
After the final dive completes, a briefing on correct storage and
maintenance procedures.


ArtemisPRO Introduction
1
Session 1
Introduction To ArtemisPRO
Overview
Parts Of The System
•ArtemisPRO is an integrated
handheld diver sonar and
navigation system.
•ArtemisPRO assists divers
navigate along a pre-planned
course or to specific
destinations.
•ArtemisPRO records all sensor
data into a Dive-Log that can be
reviewed after a dive. •ArtemisPRO connects to a PC via
a USB link allowing pre-planned
Mission Files to be uploaded and
recorded Dive-Log files to be
downloaded and reviewed.
What is ArtemisPRO?
The ArtemisPRO transit and storage
case should contain the following
system parts:
Transit & Storage Case
ArtemisPRO
Battery Pods (2)
Battery Charger & Mains Lead
Satellite Receiver Float
USB Adapter & USB Lead
User Manuals, Software Media
(CD/USB) & ENC S-63 USB Dongle (option)
System Contents
The main component parts of
ArtemisPRO are:
Mounting Chassis & Float
Console Display & Keypad
Battery Pod
Navigation Pod
USB Connector Blanking Plug (& Cover)
Forward-looking Multibeam Sonar
Dive-Light (option)
Video Camera (option)
System Parts
Battery Pods
ArtemisPRO is powered by interchangeable Nickel-Metal Hydride (NiMH)
rechargeable Battery Pods:
Battery Connector
Pressure Relief Valve
Securing Groove

ArtemisPRO Introduction
2
Battery Charger
The Battery Charger will recharge flat Battery Pods in about 4 hours.
Mains Power Connector
Power Switch
Battery Pod Connector
Charge Status Indicators (one
for each cell)
Ventilation Grille
Navigation Pod
The Navigation Pod is
located at the rear of the
ArtemisPRO chassis.
Internal Satellite
Position Receiver
(GNSS)
Attitude & Heading
Reference System
(AHRS)
Doppler Velocity Log
(DVL)
Water Pressure &
Temperature Sensor
USB Connector
ArtemisPRO has a USB connection that is used for the Surface Float or to
upload Mission Files and download Dive-Log and Snapshot Files to a PC
(running the NavPoint software).
The USB connector is accessed by removing the combined cover and
blanking-plug on the rear of ArtemisPRO.
USB Blanking Plug
It is VERY IMPORTANT that when the USB connector is NOT BEING
USED, the cover and blanking plug is REPLACED to prevent the
connector pins from getting wet, damage and corrosion.
A warning message will be shown on the display when the Blanking
Plug or suitable USB cable is not fitted.
USB Cable
ArtemisPRO can be connected to a PC to allow files to be transferred
between the two.
USB Adapter Lead
USB Cable
Satellite (GNSS) Receiver Float
An external GNSS receiver float can be connected to allow the diver to get
continuous satellite position fixes during the dive.

ArtemisPRO Introduction
3
NavPoint Software
NavPoint is a Windows software
application that helps plan
dives and reviews data
collected during them.
Documentation
ArtemisPRO is supplied with the following supporting documentation:
•Quick Reference Guide
•Pre and Post Dive Checklists
•System Manual (with Sonar,
Navigation & NavPoint Sections)
•Technical Manual
Getting Started
Powering On & Off
Using The Console & Battery Pods
Status Bar
Main Information Displays
Connecting Battery Pods
First check the Pressure Relief Valve is pushed full inwards and sealed.
Align the Battery Pod connector with the and push firmly into place.
The securing groove snaps into place on the opposite side of the housing.
To remove the Battery Pod, push the end of the Battery Pod with both
thumbs to release it.
Battery Safety
Pressure Relief Valve
Before use, always check the
Pressure Relief Valve has been
sealed by pushing it firmly inwards.
Connector
Do not allows the pins on the connector to get wet otherwise they
may short-circuit and be damaged by corrosion.
Handling
Do not use the battery if the housing is damaged or cracked.
The battery will get warm at the end of charging. If it gets hotter than
60°C the charger will stop to prevent damage.
Insert a charged Battery Pod and press the POWER button.
After approximately 20 seconds the Home Screen should appear.
Turning Power On

ArtemisPRO Introduction
4
Power Button
The top-left button is POWER
POWER turns ArtemisPRO on, or toggles from the current display to the
Power Management display.
Home Button
The top-right button is HOME.
Pushing this switches from the current display back to the Home Screen,
where the diver can choose other displays.
Press HOME again to show the Tools Screen.
The Home Screen is
shown when ArtemisPRO
starts up.
You can show it at any
time by pressing HOME.
Pressing HOME again shows the Tools Screen.
Pressing the Function Buttons (F1-F8) next to
each label will select the corresponding
display or function.
Home & Tools Screen
Function Buttons
The remaining eight buttons are multi-
purpose function buttons called F1 to F8.
The buttons perform actions specific to each display which are identified by
text labels down the sides of the screen.
Display Layout
Display Area
The contents of this area
are chosen by selecting one
of the options from the
HOME Screen, and change
depending on the task
being performed by the
diver.
Status Bar
Shows a summary of sensor information at the bottom of all the main
displays.
Contains the “Navigation Bubble” providing guidance for towards the
divers chosen destination.
Press the POWER button at any time to show the Power Management
Display:
Power Management Display
This shows the battery capacity and status of hardware sensors.
Allows sensors like the sonar to be switched on and off to save power.

ArtemisPRO Introduction
5
Press the POWER button (top left) from any screen .
Press the function button next to the word OFF .
Press the function button at the bottom left (POWER OFF) to confirm,
and ArtemisPRO will shut down.
Turning Power Off
Status Bar
The Status Bar is shown along the bottom of most displays:
Status Bar
The Status Bar will turn red to alert the diver is there is a problem:
The Status Bar can also show other condition icons:
Main Displays
ArtemisPRO has 4 main information displays
available from the Home Screen:
•Sonar
•Navigation
•Vision
•Diver
Sonar Display
The Sonar Display shows the images from the forward-looking sonar.
When ArtemisPRO is powered up the Sonar is off, but can be turned on from
the Power Management Display.
A separate presentation covers the operation of the Sonar in detail.
Navigation Display
The Navigation Display shows a history of the divers swim, and where they
are relative to pre-defined Markers from a Mission File.
A separate presentation covers the operation of the Navigation system and
its sensors in detail.

ArtemisPRO Introduction
6
Diver Display
The Diver Display shows a history of the divers depth below the surface and
height above the seabed.
A “Compass Ribbon” is shown along the top of the display.
A Stopwatch function is available to help the diver time activates.
Vision Display
If ArtemisPRO is fitted with the Camera and Light options, the Vision Display
shows the video image and allows the light to be controlled.
Settings
ArtemisPRO is configured by
options specified in the Settings
Menus.
The Settings Display is shown
from the Tools Screen.
The Up/Down arrows on the left
side of the screen are used to
highlight a menu option.
The Up/Down arrows on the
right side of the screen are used
to select the value of the option.
Help
ArtemisPRO includes an
electronic help system that
contains an overview on the
most commonly uses tasks,
including:
•Hardware Reference
•Compass Calibration
•Software Driver
Installation
•Using The Sonar
•Using The Navigation
System
Using Battery Pods
Charging
Performance
Connect the main lead to
the charger and mains supply
socket
Connect the Battery Pod
to the charger.
Turn the Charger on and
the red power switch should
illuminate.
The two Charge Status
Indicators should go from
Yellow to Orange to show
charging has started (within
about 15 seconds).
Charging Battery Pods

ArtemisPRO Introduction
7
Charging Status
Each Battery Pod contains two cell-packs, labelled as “1” and “2” by the
Status Indicators on the Chargers label.
Each cell-pack has its own independent charging module and during charge
these indicators may differ depending on the state of each cell-pack.
During charging, the two
Charge Status Indicators
will go through the
following colour sequence:
Not Connected or Initialising
Yellow
Fast Charge
Orange
Top
-Off Charge
Green withYellow Pulse
Complete (Trickle Charge)
Green
Error (Charge Stopped)
Orange and Green Flashing
Charging Complete
Charging should take approximately 4
hours to complete.
When charging of a Battery Pod is
complete, both charge status indicators
will turn continuously GREEN (trickle-
charge).
Battery Pods may be left to trickle charge for up to 24-36 hours, but they
should not be connected for longer than this (as performance may be
degraded).
If you want to charge another Battery Pod immediately after one has
completed, disconnect the Battery Pod and wait until both status indicators
turn YELLOW before connecting the next battery.
Charging Errors
The Battery Pods will start to get warm as they near completion of charging
(Top-off Charge).
If the Battery Pod gets to hot (greater than 60°C
internally), then one or both of the charger modules
will show an ‘error’ condition (Orange and Green
alternating flash) and charging will stop.
If an overheat error occurs, you should:
•Turn off the charger and disconnect the Battery Pod.
•Leave the Battery Pod to cool down to room temperature (this may take
several hours).
•Reconnect the Battery Pod and try charging again. If possible, move the
charger and Battery Pod to a cooler location.
Battery Performance
New Batteries
It will take 3 to 4 complete charge discharge cycles for new batteries to
supply their full energy capacity. During this time, batteries may get warmer
that usual when charging and show an ‘error’ condition.
Self-Discharge
Battery Pods will self-discharge over time, and may loose up to 10% of their
charge in the first 24 hours, and then 10% per month after that.
It is recommended to always charge Battery Pods prior to use.
Heating
Battery Pods will become warm towards the end of the charge cycle –this is
normal.
If possible, for best performance charge Battery Pods at room temperature
(10°C to 25°C), with good airflow around them and the charger.
Battery Performance
Interrupting a Charge
If you stop a battery charging before its cycle is complete, allow it to cool
before resuming charging if it feels warm.
The charger will always with a period of Fast-Charge and this may cause an
‘error’ state if the battery is already close to completion and warm.
Storage
Battery Pods can be stored in a discharged (flat) state for periods of up to 3
to 5 years. However, during this time they may loose some of their capacity.
It is recommended to store batteries in a charged state if possible, and
check/recharge them at regular intervals (6-12 months).

ArtemisPRO Diving
1
Session 2
Diving With ArtemisPRO
Pre-Dive Tasks
Mission Planning
Marker Selection
Configuring & Calibrating Sensors
Starting A Dive
Markers & Mission Files
ArtemisPRO uses Mission Files and Markers to help the diver perform
underwater tasks:
Markers –define geographic
locations, and can have a name,
colour and type (such as Target,
Hazard, Waypoint etc) assigned to
them .
Mission Files –contain lists of
Markers that are defined before the
dive starts, and can define the route
the diver should swim, or locations
they should visit during the dive.
Mission Manager
The Mission Manager display
allows:
•Selection of Missions
created using the
NavPoint software (and
imported with the USB
cable)
•Creation of New
Missions using the
console, where markers
can be added at the
current position or
manually entered.
Mission Manager
•Use the UP and DOWN buttons to highlight an existing Mission.
•Press SELECT to choose the highlighted Mission. Its details will be shown
on the right side of the display.
•Press NEW to create a blank Mission.
•Press DELETE to erase the highlighted Mission. Use SCUTTLE from the
Tools Screen to delete all Missions and Dive-Logs.
Marker Manager
Markers in the current Mission
File are shown in the Marker
Manager display, which allows:
•Selection of the current
Navigation Destination
•Addition of new markers to
the Mission (and Dive-Log) at
the divers current location
•Removal of Markers from
the list and Mission.
•Editing of Marker positions,
types and colours.

ArtemisPRO Diving
2
Marker Manager
•Use the UP and DOWN buttons to highlight a Marker.
•Press SELECT to choose the highlighted Marker as the Navigation
Destination –its name and details will be shown in the Status Bar as well
as the details on the right hand side of the display.
•Press ADD to create a new Marker at the divers current location.
•Press EDIT to show the editor for the selected Marker.
Marker Editor
•Use the UP and DOWN buttons to cycle the ‘highlight box’ through the
properties that can be edited.
•Use the +10, +1, -1 and -10 buttons to modify the value of the properties.
•The Type and Colour properties modify the Markers appearance.
•Press DONE to accept changes, or CANCEL to reject them.
Navigation Marker Selection
A Marker from the Mission File can be selected as the divers required
destination, and guidance information provided to help them reach it.
Markers can be selected either from the Marker Manager or the Navigation
Display.
Navigation Marker Selection
•The NEXT and PREV buttons cycle through the list of Markers in the
current Mission File.
•The selected marker name is shown in the middle of the Status Bar, with
distance to swim to it.
•The ‘Navigation Bubble’ shows the bearing to swim.
Using The Navigation Bubble
The “Navigation Bubble” in the middle of the Status Bar provides bearing
and distance information for the Diver to swim to reach the selected Marker.
The Marker is more than ±90° away.
The Marker is more than ±60° away.
The Marker is more than ±30° away.
The Marker is within ±30° of the Divers heading.
Turn to align the bubble with the centre of the
line.
The Diver is on course to reach the Marker.
Calibrating the Compass
The compass heading can be
effected by the presence of
magnetic materials in
surrounding structures or the
environment.
The compass can be
calibrated to ensure that any
error is reduced to a
minimum.

ArtemisPRO Diving
3
Calibrating the Compass
Calibration involves rotating the compass through 360° in six orientations
and takes a couple of minutes to perform.
A separate presentation for the Navigation system covers the calibration
procedure in more detail.
True North Correction
The compass can either read Magnetic North, or have a Magnetic
Declination automatically calculated based on the Divers current position.
Options are available in the Sensors Menu of the Settings Display.
Setting Water Salinity
To convert times echoes are received into ranges, both the Sonar and DVL
sensors need to know the Velocity-Of-Sound (VOS) for the current
environment.
To calculate Velocity-Of-Sound (VOS), the sonar uses a water pressure and
temperature sensor, but Salinity needs to be manually specified.
The Salinity value can be specified in the Sensors Settings Menu.
Typical Salinity values (in parts-per-thousand, PPT or Τ
000) are:
•Fresh Water = 0ppt
•Sea Water = 35ppt
Water Salinity
•There are some exceptions to the sea water salinities, such as:
oBaltic Sea at about 10ppt
oCaspian Sea at about 12ppt
oBlack Sea at about 13-23ppt
oMediterranean Sea at about 38ppt
oRed Sea at about 36-41ppt
An incorrectly specified Salinity can cause small range errors on the
display (and errors in Navigation when using Dead-Reckoning).
Zeroing Depth
The Divers depths is calculated from the water pressure measured by the
sensor on the bottom of the Navigation Pod.
As changes in atmospheric pressure can affect when the sensors reads zero,
it is recommended to ensure that Depth is set to Zero before the Diver
leaves the surface.
Options to Zero the Depth are available in the Sensor Settings Menu.
Satellite Receiver Float
The external float connects to ArtemisPRO through the USB connector.
When connected, ArtemisPRO ignores fixes from the internal GNSS receiver.
Do not use the plug as the
only means of securing the
float.
Do not plug and unplug the
float underwater.

ArtemisPRO Diving
4
Satellite Position Fixes & Quality
The Satellite Display (from the Tools Screen) shows details on the current
satellite fix –either from the internal receiver or external float.
Lower values of HDOP indicate a better quality fix –a good value is around
0.6 to 0.9.
The polar display shows
where satellites are in the
sky.
The top of the circle
represents North.
The edge of the circle
represents the horizon.
USB Blanking Plug
Before diving, it is IMPORTANT to
check that the blanking plug is
fitted to prevent the connector
pins from getting wet, damage and
corrosion.
A warning message will be shown
on the display when the Blanking
Plug or suitable USB cable is not
fitted.
Starting A Dive
When the Diver is ready to enter the water they can use START DIVE to
initialise the Navigation System and start recording all sensor data in a
Dive-Log file.
Starting A Dive
ArtemisPRO can still be used by the Diver without “Starting A Dive”, but no
sensor data will be recorded.
A separate presentation covers the use of Navigation system in greater
detail, including:
•Satellite Positioning vs Dead-Reckoning.
•Mission Planning.
•Choosing a Navigation Mode.
Starting A Dive
ArtemisPRO will ask several questions to determine what navigation mode
is required and check the hardware is ready to start…
Pre-Dive Checklist
The ArtemisPRO documentation
includes a laminated Pre-Dive
checklist.
It is recommended that the Diver
work down this list to ensure that
all preparations have been made
before entering the water.

ArtemisPRO Diving
5
Submerged Tasks
Combined Buttons
Combinations of buttons can be pressed together for special functions.
These are:
SNAPSHOT (F1+F2 )
Saves the contents of the screen
as a PNG image which can be
viewed in the Gallery or
downloaded via the USB link.
BRIGHTNESS (F3+F4)
Toggles between the brightness
level set in the Settings menu, or
low-brightness ‘Night’ mode.
Snapshot Gallery
Snapshot images captured by pressing F1+F2 can be reviewed (and
deleted) in the Snapshot Gallery (from the Tools Screen).
Before a dive, additional
reference images can be
uploaded with the USB cable
into the “Log Data” folder.
These will be available in the
gallery.
Images should be PNG format,
and ideally 1024x600 in size.
Setting The Divers Position
When the diver reaches a known destination and their position on the
display includes an error, they can reset their position to the Marker
location by pressing POSITION.
A Satellite fix can also be used to reset the Dead-Reckoning position if the
divers surfaces or deploys the float.
Power Saving & Mission Duration
To increase battery life, the Sonar can be switched off or put into lower
power modes of operation.
Pressing MODE will change how the sonar operates, and can save power to
extend battery life:
•Low Power –Range resolution
is decreased and the sonar
updates at 2Hz.
•Normal –The sonar updates at
5Hz to 8Hz.
•High Performance –The
Sonar updates at rates above
10Hz.
Power Saving & Mission Duration
In addition to changing the Sonar Mode, further power savings can be made
by:
•Reducing the Sonar Range (the sonar consumes more power when set to
longer ranges).
•Turning off the Dive-Light and Video Camera (if fitted).
•Turning the display brightness down (can extend battery life by up to 30
minutes).

ArtemisPRO Diving
6
Data Scuttle
During a dive, there may be
situations where the Diver
feels compromised and
want to quickly delete all
stored data.
The Scuttle function deletes all Mission
Files, Dive-Logs and Snapshot images
in the “Log-Data” folder.
Post-Dive Tasks
Reviewing Dive-Logs
File Transfers using the USB Cable
Storage & Maintenance
Post-Dive Checklist
The ArtemisPRO documentation
includes a laminated Post-Dive
checklist.
After a dive is complete, it is
recommended that the Diver work
down this list as it covers
shutdown, storage and
maintenance procedures.
Reviewing Dive-Logs
When a dive is complete, choose STOP DIVE
from HOME Screen.
To review the Dive-Log file on the console,
choose DIVE-LOGS from the HOME Screen.
Select the Dive-Log to replay –names are
automatically generated to contain the date
and time they were recorded.
On the Playback Display, use the
PLAY/PAUSE button to control playback
and arrow buttons to navigate back and
forwards through the file.
The DISPLAY button changes the screen
layout.
USB Cable
Dive-Logs can be downloaded to a PC for review using NavPoint.
To connect ArtemisPRO to a PC you will need the supplied USB Adapter
Lead and the USB Cable .
USB Driver
The first time ArtemisPRO is
connected to a specific PC, you
will need to configure the USB
“Remote NDIS Compatible Device”
(RNDIS) driver before a connection
can be made.
(Full details can be found in the User Manual)

ArtemisPRO Diving
7
USB File Transfers
Once the USB driver is configured (and this only needs to be done once per
PC), you can access files on ArtemisPRO by opening a Windows Network File
Explorer and after a few minutes “ARTEMISPRO” should appear.
Alternately, starts a File Explorer
and browse to the location
“\\ARTEMISPRO” (or “\\192.168.11.1”)
Mission Files, Dive-Logs and
Snapshot images can be found in
the “Log Data” folder.
The console Firmware can be updated by copying new releases into the
“Update” folder and cycling the power.
(Full details are in the Technical Manual)
Storage & Maintenance
•Submerge and wash in clean fresh water to remove any salt and silt
deposits
•Do not let connector pins get wet during washing.
•Only use fresh water as a cleaning agent, do not use any other solvents
or glass cleaning products as this may damage rubber seals.
•Leave to dry in an open and well-ventilated space to reduce corrosion
and prevent the growth of mould or mildew
•Clean the display glass and camera lens with a soft lint free cloth if
required
•Recharge the Battery Pod - do not leave on trickle charge for periods
longer than 24 hours after charging completes.
Other manuals for ArtemisPRO
3
Table of contents
Other Blueprint Subsea Sonar manuals
