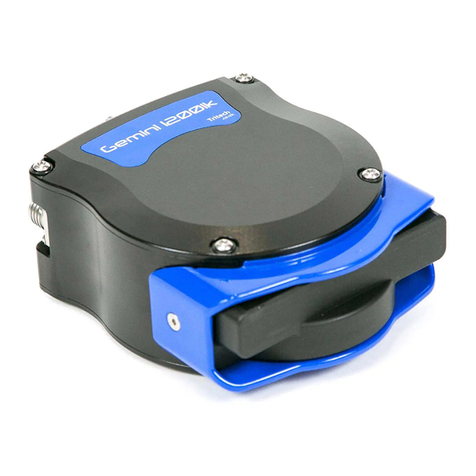
Tritech Gemini 720ik User manual

Gemini 720ik
0742-SOM-00002-2 1 © Tritech International Ltd.
Gemini 720ik
Product Manual
0742-SOM-00002-02

Gemini 720ik
0742-SOM-00002-2 2 © Tritech International Ltd.
© Tritech International Ltd
The copyright in this document is the property of Tritech International Ltd. The document is supplied by Tritech International Ltd on
the understanding that it may not be copied, used, or disclosed to others except as authorised in writing by Tritech International Ltd.
Tritech International Ltd reserves the right to change, modify and update designs and specifications as part of their ongoing
product development programme.
All product names are trademarks of their respective companies.

Gemini 720ik
0742-SOM-00002-2 3 © Tritech International Ltd.
Table of Contents
Help & Support ........................................................................................................... 5
Warning Symbols ........................................................................................................ 6
Head Variations .......................................................................................................... 7
1. Introduction ............................................................................................................. 8
1.1. General Overview ........................................................................................ 8
1.2. Communications ........................................................................................... 8
1.3. Electrical Connection .................................................................................... 8
1.4. Software Version .......................................................................................... 8
2. Technical Specification .......................................................................................... 10
3. Hardware Installation & Configuration ..................................................................... 11
3.1. Installing the Sonar Head ........................................................................... 11
3.2. Electrical & Communication Notes ............................................................... 11
3.3. Sonar Head Pin-Out Diagrams .................................................................... 12
4. Gemini Software Installation .................................................................................. 14
4.1. System Requirements ................................................................................. 14
4.2. Installing the Gemini Software ..................................................................... 14
4.3. Configuring the Gemini ............................................................................... 15
4.3.1. Check the operation of the Gemini ................................................... 16
5. Gemini Software Operation .................................................................................... 17
5.1. User Screen ............................................................................................... 17
5.1.1. Overview ......................................................................................... 17
5.1.2. Online Button .................................................................................. 18
5.1.3. Record Button ................................................................................. 19
5.1.4. Player Controls ................................................................................ 19
5.1.5. Capture Screen ............................................................................... 21
5.1.6. Record Video .................................................................................. 22
5.1.7. Acoustic Zoom button ...................................................................... 22
5.1.8. CHIRP button .................................................................................. 23
5.1.9. Invert Display (Up/Down) ................................................................. 23
5.1.10. Flip Image (Left/Right) ................................................................... 23
5.1.11. Rotate Image ................................................................................. 24
5.1.12. Draw Grid ...................................................................................... 24
5.1.13. Zoom Button .................................................................................. 24
5.1.14. Filter Selector ................................................................................ 25
5.1.15. Sound Velocity Indicator ................................................................. 25
5.1.16. Palette Selector ............................................................................. 25
5.1.17. Gain Control .................................................................................. 26
5.1.18. Range Control ............................................................................... 26
5.1.19. Indicators ...................................................................................... 26
5.1.20. Sonar Swathe ................................................................................ 26
5.1.21. Measurements ............................................................................... 27
5.1.22. Warnings ....................................................................................... 27
5.2. Advanced Screen ....................................................................................... 28
5.2.1. System Data ................................................................................... 29
5.2.2. Configuration Options ...................................................................... 29
5.2.3. Application Settings ......................................................................... 33
5.2.4. Filter Settings .................................................................................. 35
5.2.5. Device Network Settings .................................................................. 36
5.2.6. Distance Marker .............................................................................. 36
5.2.7. Target Tracking ............................................................................... 37
5.3. Serial Data Input ........................................................................................ 41
5.3.1. Sonars & Sensors ........................................................................... 41
5.3.2. Gemini Hub ..................................................................................... 42
5.3.3. COM Ports ...................................................................................... 43
5.3.4. Aux Power ...................................................................................... 45

Gemini 720ik
0742-SOM-00002-2 4 © Tritech International Ltd.
5.4. Gemini Firmware updates ........................................................................... 45
5.5. Multiple Head Operation ............................................................................. 47
5.6. Offline Mode .............................................................................................. 49
5.7. Automatic Online ........................................................................................ 49
5.8. Settings Files ............................................................................................. 49
5.9. Keyboard Shortcuts .................................................................................... 50
6. Seanet Pro Installation .......................................................................................... 51
6.1. System requirements .................................................................................. 51
6.2. Installing Seanet Pro .................................................................................. 51
7. Seanet Pro Operation ........................................................................................... 54
7.1. Seanet Setup for Gemini ............................................................................ 54
7.2. Gemini Sonar Application ........................................................................... 57
7.2.1. Sonar Settings ................................................................................. 57
7.2.2. Application Tools ............................................................................. 59
7.3. Outputting data via REMV4 ........................................................................ 66
8. Maintenance ......................................................................................................... 67
8.1. After using Sonar ....................................................................................... 67
8.2. If storing the sonar for extended periods ...................................................... 67
8.3. Regular maintenance .................................................................................. 67
9. Troubleshooting .................................................................................................... 69
A. Setting the computer IP address in Windows® XP .................................................. 71
B. Setting the computer IP address in Windows® 7 or Windows® 10 ........................... 73
C. Setting the Gemini Device IP Address in Gemini Software ...................................... 75
D. Setting the Gemini Head IP Address in Seanet Pro ................................................ 76
E. Gemini Software String Decode ............................................................................. 78
F. Gemini Software String Encode ............................................................................. 80
Glossary ................................................................................................................... 81

Gemini 720ik
0742-SOM-00002-2 5 © Tritech International Ltd.
Help & Support
First please read this manual thoroughly (particularly the Troubleshooting section, if present).
If a warranty is applicable, further details can be found in the Warranty Statement, 0080-
STF-00139, available upon request.
Tritech International Ltd can be contacted as follows:
Mail
Telephone
Email
Website
Tritech International Ltd
Peregrine Road
Westhill Business Park
Westhill, Aberdeenshire
AB32 6JL, UK
+44 (0)1224 744111
www.tritech.co.uk
Prior to contacting Tritech International Ltd please ensure that the following is available:
1. The Serial Numbers of the product and any Tritech International Ltd equipment connected
directly or indirectly to it
2. Software or firmware revision numbers
3. A clear fault description
4. Details of any remedial action implemented
Contamination
If the product has been used in a contaminated or hazardous environment you
must de-contaminate the product and report any hazards prior to returning the
unit for repair. Under no circumstances should a product be returned that is
contaminated with radioactive material.
The name of the organisation which purchased the system is held on record at Tritech
International Ltd and details of new software or hardware packages will be announced at
regular intervals. This manual may not detail every aspect of operation and for the latest
revision of the manual please refer to www.tritech.co.uk
Tritech International Ltd can only undertake to provide software support of systems loaded
with the software in accordance with the instructions given in this manual. It is the customer's
responsibility to ensure the compatibility of any other package they choose to use.

Gemini 720ik
0742-SOM-00002-2 6 © Tritech International Ltd.
Warning Symbols
Throughout this manual the following symbols may be used where applicable to denote any
particular hazards or areas which should be given special attention:
Note
This symbol highlights anything which would be of particular interest to the reader
or provides extra information outside of the current topic.
Important
When this is shown there is potential to cause harm to the device due to
static discharge. The components should not be handled without appropriate
protection to prevent such a discharge occurring.
Caution
This highlights areas where extra care is needed to ensure that certain delicate
components are not damaged.
Warning
DANGER OF INJURY TO SELF OR OTHERS
Where this symbol is present there is a serious risk of injury or loss of life. Care
should be taken to follow the instructions correctly and also conduct a separate
Risk Assessment prior to commencing work.

Gemini 720ik
0742-SOM-00002-2 7 © Tritech International Ltd.
Head Variations
The Gemini 720ik comes in the following configurations:
350m Single Port
• Anodised Aluminium Housing
350m Dual Port
• Anodised Aluminium Housing
The Gemini 720ik is currently only available with the following connector configurations:
• Single Titan Impulse MKS-307-FCR (Single Port Version – MAIN only)
• Titan Impulse MKS-307-FCR (Main Port) Titan Impulse MKS-307-FCR (Aux Port)
Pin outs for each specific model can be found in later sections of this manual.

Gemini 720ik
0742-SOM-00002-2 8 © Tritech International Ltd.
1. Introduction
1.1. General Overview
The Gemini 720ik is a 2D imaging sonar. It is a multibeam sonar, offering a 120° field of view
with update rates of up to 97Hz (30Hz typical - range dependant) giving rapid feedback to
the user (hardware is capable of 97Hz, Seanet Pro is limited to 15Hz).
The system consists of the Gemini sonar head(s) and either Gemini or Seanet Pro control
and display software. The software communicates with the sonar over Ethernet (100Mbit·s-1).
The software is Windows® based and will run best on a display of resolution 1280x1024 or
greater with 32-bit colour resolution.
Note
Within this manual there may be references to the Gemini 720is Sonar. The
Gemini 720is is the larger version of the Gemini 720ik, but features many of the
same capabilities of the Gemini 720ik. Therefore where these references are
made it can be safely assumed that it will apply to the Gemini 720ik.
1.2. Communications
Communication is 100Mbit·s-1 Ethernet. When using an Ethernet connection it should be
noted that the Gemini Sonar can fully utilise a 100Mbit·s-1 link while returning the sonar data.
If the Gemini Sonar is to share an Ethernet link with other high bandwidth devices, such as
video cameras, it is recommended that the 100Mbit·s-1 devices share a gigabit (or faster) link
to the surface to reduce possible network congestion.
1.3. Electrical Connection
Please refer to Section 3.3, “Sonar Head Pin-Out Diagrams” for details on the connector fitted
and the appropriate communication mode supported.
Caution
Power should only be applied to the MAIN port of the Gemini. The AUX port, if
fitted, provides an un-regulated pass through power supply taken directly from
the MAIN port input supply - please refer to Chapter 2, Technical Specification
for more information.
1.4. Software Version
Note
The instructions within this manual apply to the following software versions:

Introduction Gemini 720ik
0742-SOM-00002-2 9 © Tritech International Ltd.
• Gemini software - 2.0.20 onwards
• Seanet Pro - 2.23 build 540 onwards
Screenshots and images within the software may differ slightly from the ones
used within this manual. The latest version of software can also be downloaded
from www.tritech.co.uk.

Gemini 720ik
0742-SOM-00002-2 10 © Tritech International Ltd.
2. Technical Specification
Acoustic
Operating frequency 720 kHz, CHIRP selectable
Angular resolution 1.0° acoustic, 0.25° effective
Range 0.2m - 120m
Number of beams 512
Horizontal beamwidth 120°
Vertical beamwidth 20° (±10° about horizontal axis)
Update rate 5 - 97Hz (range dependent)
Range Resolution 8mm
CHIRP support Yes
Speed of Sound VoS sensor
Interface
Supply Voltage 19V to 74V DC
Power requirement 16W - 27W (range dependent)1
Main port protocol Ethernet
Auxiliary port (optional) RS232, TTL in, pass-through power
Connector types Main port: Impulse MKS(W)-307-FCR
AUX port: Impulse MKS(W)-307-FCR
Physical specifications
Depth rating 350m
Weight in air 1.40kg
Weight in water 0.43kg
Temperature rating -10°C to 35°C(operating), -20°C to 50°C (storage)
1The power consumption range quoted is accurate for a standalone unit and ignores cable
losses.

Gemini 720ik
0742-SOM-00002-2 11 © Tritech International Ltd.
3. Hardware Installation & Configuration
Caution
Although the sonar head is rugged, it should be handled with care, particularly
the connector and receiver/transmitter elements. The plastic guard fitted to the
unit will not be able to protect the sonar against significant impacts.
3.1. Installing the Sonar Head
The sonar should be mounted with the receiver element on the top. The transmit and receive
elements are arranged such that they are angled at ± 10° about the horizontal axis which
should be taken into account when mounting the Sonar.
Any metallic clamps should be electrically insulated from the sonar body by either rubber or
plastic strips or mounting brackets of at least 3 mm thickness and extending at least 3 mm
beyond the clamp boundary to reduce any galvanic corrosion effect. Non-metallic clamps are
preferable; if metallic clamps are used (especially if they are different in composition to the
material used by the sonar) they should be painted or lacquered with at least two or three
coatings.
Caution
When deploying the aluminium version of the Gemini 720ik, alloys containing
copper such as brasses or bronze should be avoided.
3.2. Electrical & Communication Notes
A cable whip supportingEthernet communications can be supplied. The other end of this
cable whip should be terminated with a suitable connector for the user application.

Hardware Installation & Configuration Gemini 720ik
0742-SOM-00002-2 12 © Tritech International Ltd.
Connector Maintenance Guidelines
Mating surfaces should be lubricated with 3M Silicone Spray or equivalent, DO NOT
GREASE. Connectors must be lubricated on a regular basis. Clean plugs and receptacles
with soap and fresh water.
Caution
When attaching a connector make sure that both connector and socket are
completely dry. Any water trapped in the connection could result in an electrical
short.
If the Gemini has two ports then the unused connector must have a blanking cap
fitted prior to immersing in water. Failure to do this will cause permanent damage.
If using alcohol or IPA to clean out the connector take care that it does not come
into contact with any other part of the sonar.
Ground Fault Monitoring
The power supply within the Gemini includes an electrically isolated DC-DC converter front-
end. There is a small capacitive connection between the isolated ground and the sonar
chassis which should not noticeably affect any impressed current ground fault indicator (GFI)
equipment.
Power
Caution
Never try to make the Gemini work down a long cable by increasing the PSU
output voltage above 74V DC.
Caution
Power should only be supplied to the Gemini through the MAIN port. The AUX
port power is supplied via pass through from the MAIN port.
Warning
The Gemini PSU that is supplied with the Gemini system is intended for INDOOR
USE ONLY and should not be placed in a position where it could get wet.
3.3. Sonar Head Pin-Out Diagrams
Warning
Power should only be applied to the MAIN port of the Gemini. The AUX port, if
fitted, provides an un-regulated pass through power supply taken directly from
the MAIN port input supply

Hardware Installation & Configuration Gemini 720ik
0742-SOM-00002-2 13 © Tritech International Ltd.
Main Port Aux Port
Bulkhead view Pin Function Pin Function
1 0 VDC 1 0 VDC
2 +V 2 +V
3 SHIELD 3 SHIELD
4 Ethernet RX+ 4 TTL IN
5 Ethernet RX- 5 RS232 GND / TTL GND
6 Ethernet TX+ 6 RS232 Tx
4
1
2
53
6
7
7 Ethernet TX- 7 RS232 Rx

Gemini 720ik
0742-SOM-00002-2 14 © Tritech International Ltd.
4. Gemini Software Installation
The Gemini head is supplied with software to control the functions of the sonar and to display
the captured images. The software is supplied as an installer package which installs the
software and a number of supporting files and documentation.
Note
The software is also available for download from www.tritech.co.uk
4.1. System Requirements
Minimum Recommended
Processor 2GHz 2GHz dual core
RAM 1GB 2GB
Graphics 3D hardware accelerated graphics card.
Display 1280x1024 (32bit colour) 1600x1200 (32bit colour)
Disk space Install is 20MB, greater than 160GB recommended for log files
Networking 100Mbit·s-1 (fast Ethernet) 1000Mbit·s-1 (Gigabit Ethernet)
Software Windows® XP 32bit Windows® 7 32 or 64bit
4.2. Installing the Gemini Software
The Gemini software is supplied on a CD-ROM which has been designed to auto-run
upon disc insertion. The latest commercial release of software is always available from
www.tritech.co.uk.
Once loaded, the main menu of the CD will be shown on screen.

Gemini Software Installation Gemini 720ik
0742-SOM-00002-2 15 © Tritech International Ltd.
Click on the Multibeam button and the following screen will display all the appropriate
software packages for installation.
Click on the appropriate installation option and then follow the onscreen prompts and
instructions.
Note
Do not attempt to remove the CD-ROM from your computer during the installation
process.
4.3. Configuring the Gemini
The Gemini head uses Ethernet to communicate with the computer running the Gemini
software. Depending on the configuration of the system, this may be partly carried over a
VDSL link. Before the head can be connected to the LAN, the IP address needs to be set
to a suitable value for that network. Also the subnet mask needs to be appropriate for the
network and the address chosen.
Configuring the IP address of the Gemini is a four stage process. Firstly the IP address of
the computer is set to a value which will communicate with the head. The Gemini software is
then used to change the IP address of the Gemini. The third stage is to reset the IP address
of the computer. The final stage is to check the operation of the Gemini on the network (by
running the Gemini software and verifying that the Gemini head is able to communicate).
The following instructions use addresses 192.168.2.201 for the Gemini and 192.168.2.100
for the computer. These addresses are only appropriate for a new Gemini which has just
been delivered from the factory. If the IP address of Gemini has already been changed, an
appropriate address for the computer will need to be selected first to allow communication
with the Gemini before it can be configured.
The Gemini head should be given an IP address appropriate for the network it will be running
on. The address at manufacture is 192.168.2.201 and the process of setting the sonar IP
address involves talking to the unit via the 192.168.2.201 address to change the IP address
to a value suitable for the network.

Gemini Software Installation Gemini 720ik
0742-SOM-00002-2 16 © Tritech International Ltd.
Note
For instructions on setting the computer and Gemini IP address please
refer to Appendix A, Setting the computer IP address in Windows® XP or
Appendix B, Setting the computer IP address in Windows® 7 or Windows® 10
and Appendix C, Setting the Gemini Device IP Address in Gemini Software.
4.3.1. Check the operation of the Gemini
If the correct changes have been made to the Gemini it should now show as connected in
the Gemini software. If nothing is displayed, check that all values entered were correct and
it may be necessary to rerun the Gemini software to establish a link. The Gemini software
retains its settings between runs, and so all the values which were used whilst the Gemini
was programmed will be retained.
When the Gemini software is started, select the Advanced tab to show details of the
connected Gemini and if it is able to communicate, it will be listed in the status window and
automatically go online after five seconds.

Gemini 720ik
0742-SOM-00002-2 17 © Tritech International Ltd.
5. Gemini Software Operation
Note
To access the online help hover the mouse pointer over a control and press the
F1 key.
Note
In order to communicate with a Gemini Imaging Sonar, the Gemini software must
be set to run in Imager mode. This is done by setting the Sonar Type to "Imager"
in the Section 5.2.2, “Configuration Options”.
When the Gemini software is running, it presents a choice of two screens, which are selected
by clicking on the tabs at the top left hand of the screen. The two screens are the User screen
and the Advanced screen. The User screen allows the maximum amount of screen to be
used for data display and the Advanced screen enables adjustment of the sonar settings.
5.1. User Screen
5.1.1. Overview
The 120° cone in the middle of the display shows the sonar image that the Gemini Sonar is
producing. Around this display are the most commonly used controls.
On the upper left hand corner are the controls for starting the sonar imaging, starting the
software logging of the images received from the sonar, replaying previously logged data,
and capturing images.
On the upper right hand corner are the controls for orienting the displayed sonar image,
controlling the zoom window, selecting the post processing filtering to be applied to the image,
and the sound velocity indicator.
In the middle of the left hand side of the screen is the palette selector.

Gemini Software Operation Gemini 720ik
0742-SOM-00002-2 18 © Tritech International Ltd.
On the lower left hand side of the screen are the range and gain controls for the sonar.
On the lower right hand side of the screen are the indicators showing the pointer position
within the display area.
Note
If serial sensor data is available and enabled from the Advanced tab, a subset
of the data will be shown at the bottom of the User screen as well.
5.1.2. Online Button
The Online button starts communication with the Gemini head. When the
software is started the head will not be running and the Online button will
be grey.
Clicking the Online button will start the Gemini head; the button and the sonar
cone image next to it will change to green. Clicking the button a second time
will stop communication with the head, and the button and sonar cone will
return to grey.
If the Online button is pressed while no heads are visible to the Gemini software, the
following message will be displayed.
Clicking OK will acknowledge the message, and the software will not go online.
If the Sonar ID entered in the Sonar box of the configuration settings is not one of the heads
visible to the Gemini software when the Online button is pressed, the software will present
one of two messages.
If only one head is visible, the software will offer the chance to start imaging from that head.
Clicking Yes will cause the software to select the head which is visible to it. Clicking No will
acknowledge the message, and the software will not change the selected head and will not
go online.
If there are multiple heads that are available, the software will display a message asking you
to change the Sonar ID to one of the detected units.

Gemini Software Operation Gemini 720ik
0742-SOM-00002-2 19 © Tritech International Ltd.
If the head is not able to connect due to being on a different network or having different
network settings the following will be displayed:
Note
To correctly set up the network refer to Appendix B, Setting the computer IP
address in Windows® 7 or Windows® 10 (or Appendix A, Setting the computer
IP address in Windows® XP) and Appendix C, Setting the Gemini Device IP
Address in Gemini Software.
5.1.3. Record Button
The Record Button controls the recording of the image being displayed by
the software. When the button is clicked the software will start recording data
and the button will be highlighted. Recording can be stopped by clicking on
the button again.
The Log Directory selector controls which directory the data is recorded in. The directory
displayed in the Log Directory selector is the root directory where all recorded data will
be stored. Below that, a directory will be created using the current date, and each log data
filename will include the time when recording started.
The software has a maximum file size for the logged data files. Once this size has been
reached, the software will stop logging to the current file and open a new file to resume
logging. The name of the new file will be based on the time the file was opened. If data is
logged for a significant period of time, a number of files will be created, each with a different
filename indicating when the data was first logged to that file.
For example, if the Log Directory selector is showing that the directory selected is
C:\GeminiData, and recording was started at 4:30:02pm on 18th of October 2014, the
data would be recorded in the file 163002_IMG.ECD in the directory C:\GeminiData
\LD20141018.
The software will automatically create any directories needed for recording.
5.1.4. Player Controls
The player controls manage the replay of Gemini data previously recorded by the software.

Gemini Software Operation Gemini 720ik
0742-SOM-00002-2 20 © Tritech International Ltd.
From left to right they are Play, Stop, Repeat and Load. The controls that are enabled will
depend on what the software is doing, for example, it is not possible to do anything with the
player controls whilst the software is acquiring data from the Gemini head, nor is it possible
to open a file whilst another file is already playing.
Play Button
The Play button is a play/pause control for the file player. When the data from
a file is loaded but not playing, the image is a green triangle.
Clicking the image will start the file playing and the image will change to a
Pause control (two vertical lines).
Clicking the image again will pause the file replay and the image will change back to the Play
control (triangle).
Stop Button
The Stop button stops file replay and resets the play progress to the start.
Repeat Button
If the Repeat button is active and the player reaches the end of the file it is
playing, it will return to the start of the file and continue. Clicking the Repeat
button will alternate between the repeat being active and inactive.
Load Button
When the Load button is pressed, the software will open a file selector to allow
the user to select a previously recorded data file to be replayed. To replay the
data recorded at 4:30:02pm on 18th October 2014, file selector would look like
this and the file 163002_IMG.ecd should be selected.
Multiple files may be selected in the file selection dialogue. The software will attempt to replay
the log files in sequential order according to filename. Replay order is not guaranteed if the
selected files are from different dates.
When replaying a log file, the filename, together with the date and time of recording, will be
displayed at the bottom of the screen (below the Gemini data) in green text, for example:
Other manuals for Gemini 720ik
1
Table of contents
Other Tritech Sonar manuals
Popular Sonar manuals by other brands
Interphase
Interphase Sonar Engine SE-200 Operation manual
Edgetech
Edgetech 6205S USER HARDWARE MANUAL
Garmin
Garmin AQUAMAP 10x2 Series owner's manual

Lowrance
Lowrance X-20A Installation and operation instructions
Marcum Technologies
Marcum Technologies VX-1P user manual
Raymarine
Raymarine CP450C installation instructions
Marcum Technologies
Marcum Technologies LX-7L quick start guide
Eagle
Eagle CUDA 350 S/MAP Installation and operation instructions
Marcum Technologies
Marcum Technologies M Series quick start guide

Furuno
Furuno FSV-85-MARK-2 Operator's manual
Chasing
Chasing PING 360 SONAR KI user manual
Garmin
Garmin Panoptix Livescope LVS32-TH installation instructions
