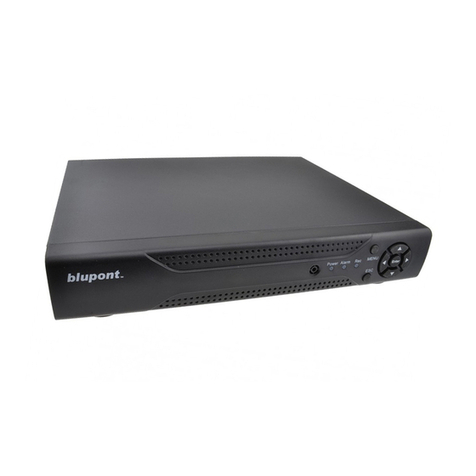
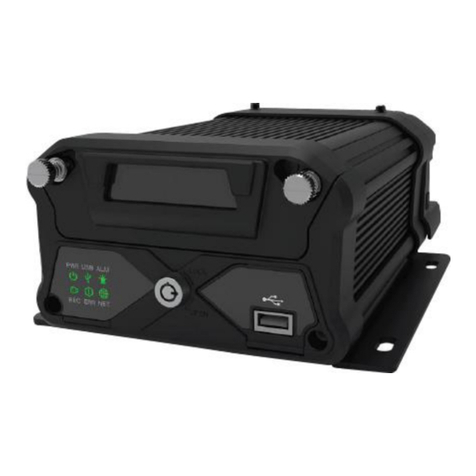
Blupont DVR-4CH-H265-BP User manual

blupont
DVR-4CH-H265-BP
DVR-8CH-H265-BP
DVR-16CH-H265-BP
BLUPONT XVR Quick Start Guide
Please read the Quick Start Guide carefull before using the product and keep it.
Related tools and documents of products, please download from www.herospeed.net.
1.Statement
This manual is for BLUPONT XVR C/CB/ D/DB/PG/PGH /L housings.
This manual may con ain some con en s ha are echnically inaccura e or inconsis en wi h
produc func ions and opera ions or wrongly prin ed. The con en s of his manual will be upda ed
according o he enhancemen of produc s wi hou prior no ice. If he descrip ion of produc in he

manual does no ma ch wi h he ac ual objec , please prevail in kind.
2.Safety In truction
This equipment should be installed in well-ventilated environment. When installing,
please keep proper space with the ground. It is good for machine heat dissipation
that keeping proper space with the ground when install. Keep the equipment awa
from heat source and high temperature environment.
The device should be installed horizontall , to avoid the installation in a strong
vibration position.
This device is not waterproof. To avoid fire or other hazards caused by short-circuit, shall
prevent the device from getting wet.
Please use the hard disk recommended by the manufacturer (generally recommend
monitor level hard disk of Seagate and estern Digital) to meet the requirements of long
time reading and writing of big data. Please buy from form channels to ensure the quality
of hard disk.
This product can not withstand heav loads. Do not place heav objects or multi-
la er overla s on this product.
BLUPONT XVR installation and construction must meet the specifications, ma refer
to the relevant national or local standards.
3.Hard di k in tallation
NOTE:
1) Please use the BLUPONT XVR dedicated SATA hard disk recommended b the
device manufacturer. Make sure the power is off before installation.
2) The following pictures and installation diagrams for reference only, subject to the available
products.
3.1 Hard di k in tallation guide for BLUPONT XVR PG / PGH erie
1) Unscrew the screws and remove upper cover.
2) Align the hard disk screw holes to the chassis backplane, and then tighten lock the screws.

3) Connect one end of the hard disk power cable and data cable to the motherboard and the
other end to the hard disk.
4)Install the cover and fix it by screws.
3.2 Hard di k in tallation guide for BLUPONT XVR CB /C / DB / D erie
1) Unscrew the screws on the back and sides of the chassis and remove the cover.
2) Connect one end of the hard disk power cable and data cable to the motherboard and the
other end to the hard disk.
3) Align the hard disk screw holes to the chassis backplane, and then tighten lock the screws.

4) Install the cover and fix it by screws.
3.3 Hard di k in tallation guide for BLUPONT XVR L erie
1) Unscrew the back panel screws and take off the cover.
2) Remove the hard disk rack.
3) Install the hard disk to the rack from top to bottom.
4) Fix the hard disk by screws.
5) Install the rack and fix it.
6) Connect the hard disk power cable and data cable.
7) Install the cover and fix it by screws.

4.Rear panel interface de cription
4.1 BLUPONT XVR rear panel interface de cription

4.2 8 Channel D erie BLUPONT XVR rear panel interface de cription

4.3 32 Channel L erie BLUPONT XVR rear panel interface de cription
NOTE:
BLUPONT XVR rear panel interface is similar with above picture, but the product
appearance, including interfaces and la out, for reference onl , please prevail in kind.
5.Local Ba ic Operation
5.1 Boot up
NOTE:
1. It is recommended that ou refer to international standards for power suppl input with
stable voltage values and low ripple interference.
2. Some devices do not have power button and will boot up directl when plug into an

electric power suppl .
Make sure the input voltage matches the BLUPONT XVR consumption. Connect the
device to the monitor and to the power adapter (if available). Plug in the power, switch on
the power button (if available), then the device boot up.
5.2 Boot Wizard
You can perform ba ic configuration on the device through the Power-on Wizard.
Step 1: The device automaticall enters the Boot Wizard page after it is powered on.
Click "Next", enter the administrator password, select the language, click "Login",
"Modif ", modif the login password, and click "Save" to enter the boot wizard "General"
page.
Step 2: After configuring the basic settings such as language, record mode, video
standard, and device time, click “Next” to set related parameters for other interfaces.

NOTE:
1. If ou do not need to set the device, ou can click "Cancel" to exit the boot wizard
interface. You can also turn off the boot wizard in " Menu > Configuration> General ".
2. You should rese he device adminis ra or password ( he sys em defaul username is "admin" and he
password is "12345") when boo ing for he firs ime. To ensure the securit of the device,
please save the admin login password and modif it regularl .
5.3 Network Setting
Network parameters must be properl configured before operating the device over the
network.
Procedure: Choose “Menu > Configuration > Network”. The s stem displa s the IP/Port
interface. Modif the IP address of the device according to the actual network plan. (The
default IP address of the BLUPONT XVR is 192.168.1.88.).

5.4 Channel Configuration
Step 1: Choose “Menu> Configuration> Channel Config”.
Step 2: Select the signal access t pe of each channel as required.
Step 3: Click “Appl >Confirm”, the device restarts and the modified Channel configuration
takes effect.
NOTE:
1. Single channel select signal access mode to follow certain rules, the interface will be

automaticall reflected in the optional options.
2. The actual access signal should be checked with the signal mode. If a channel
selected "HD" mode, ou can access the TVI/CVBS/AHD/CVI signal; when switching
signals cause abnormal displa , ou can reconnect the video cable; if a channel is
selected "IP" mode, is the IP channel , Can access IP equipment.
3. In the preview interface, when the HD (TVI/CVBS/AHD/CVI) channel has no image
source, the channel displa s “HD VIDEO”; when there is no signal source in the IP
channel, the channel displa s “NO CONFIG”. When there is no image source, the
channel displa s “NO VIDEO”.
5.5 Add IP device
Before accessing and configuring the IP channel, make sure that the BLUPONT XVR
network connection is correct and valid.
Step 1: Choose "Menu> Camera> Add Camera" to enter the Add Camera interface.
Step 2: Add IPC b automaticall or manuall .
Automaticall add, click "Auto add" button.
Manuall add a device, click "Add", the Device Search interface automaticall searches
for "Onvif" or "Private" protocol (if our compan IPC recommends selecting "Private"),
select the IP device to be added, and click "Add".
5.6 Recording Setting
NOTE:
The device opens all channels by default for 24 hours record.
Step 1: Choose "Menu> Record > Schedule" to enter the Schedule interface.
Step 2: Select the channel and recording t pe according to the actual needs. Hold down
the left mouse button and drag the mouse in the time period diagram or click “ ” to
set the recording schedule.
5.7 In tant playback
Step 1: When the mouse clicks an where in the current channel screen, the control bar
will automaticall pop up below the channel.
Step2: Click” ” to enter the instant pla back interface, can pla the first 5 minutes of
the current channel video.
5.8 Playback
Step 1: Choose "Menu > Pla back" or right click on the preview interface and select
"Pla back" to enter the Pla back interface.
Step 2: Choose "Date > Channel > More". Double click to search for the file, and the

interface will start pla ing the file. Or select the "time > channel", left mouse click on the
time progress bar below the pla back interface to pla the video.
5.9 Shut down
Choose "Menu> Shut Down", click "Shut Down".
6.WEB Operation
6.1 Login
BLUPONT XVR LAN login(the PC and the device are in the same router)
Step 1: Make sure the BLUPONT XVR and PC are in same network segment. If not, the
network segment of PC need to be set up to the same segment with BLUPONT XVR, such
as "192.168.1.99".
Step 2: Open IE browser, select Tools > Internet Options > Securit > Custom Level >
ActiveX controls and plug-ins, all options are enabled.
Step 3: Open "Search Tool", double-click he arge device from he search resul o en er he login
in erface, or open the IE browser to enter the BLUPONT XVR address: such as
“http://192.168.1.88/ “(If the http port of the BLUPONT XVR is changed to 89, enter
"http:// 192.168.1.88:89/”) to enter the login interface.
Step 4: Enter the device user name (default is “admin”), password (default is “12345”),
and click “Login”.

6.2 Preview
In the preview interface, click the pla button at the bottom. For he firs ime connec ing, you
have o download and ins all he plugin before previewing.
NOTE:
The Web-side can also perform the operations such as s stem, network, storage,
pla back, download, upgrade, maintenance, and factor reset on the Web.
7. Mobile App Operation
Step 1: Download and In tall
Use the Android or iOS phone to scan the corresponding QR code or search "BitVision" from
the application store to download and install the BitVision App.
Android download QR iOS download QR
Step 2: Account login

Run BitVision App, click " " in the sliding sidebar, enter the account name and
password, and click “Login” (Note: no account is required to register first).
Step 3: Add device
After login, click "Device manage" , " " and " Add device" , select "SN Add", enter
the device user name, password and verification code after scan the QR code (the verification
code printed on the label), click "Add" to set device note and group, click "Send" after add
successfully.
Step 4: Live preview
Select "Real time" and " " to enter the device list in the main interface, select the
touching pen and the channel to be previewed in the group, you will see the live video after
click "Done ".
8.Di claimer
The following exemptions or limitations of liabilit , please pa special attention to:
1. As a result of the following reasons, if the product interrupts or terminates the service for
any of the following reasons, the company shall not be liable for personal injury or property
damage to you or a third party. Failure to install or use properly as required; for the sake of
national or public interest; force majeure; your own or third-party reasons (including but not
limited to the use of third-party products, software or components, etc.
2. The company has not expressed or implied that this product is applicable to special
purpose.This product ma not be used in medical / safet equipment or other applications
where there is a breakdown of the product that could result in life-threatening or personal
injur , as well as hazardous or non-humanitarian hazards such as weapons of mass
destruction, biological and chemical weapons, nuclear explosions or an unsafe use of
nuclear energ use. An loss or liabilit arising out of the above use will be at our own
risk.
3. This product, when properly installed and used, can detect unauthorized intrusion during a
particular delight but can not avoid accidents or personal injury or property damage. In your
daily life, you should be vigilant and strengthen your safety awareness.
4. The Compan is not responsible for an indirect, incidental, special punitive damages,
claims, loss of propert or loss of an data or documents. To the maximum extent
permitted b law, the liability for compensation of company is not exceed than the amount
you paid for this product.

This manual suits for next models
2
Table of contents
Other Blupont DVR manuals
Popular DVR manuals by other brands
Vitek
Vitek VT-EH Series datasheet

iTronics
iTronics HDCVI Series user manual

Toshiba
Toshiba RD-XS52SU owner's manual

VideoComm Technologies
VideoComm Technologies IPO-720iDVR owner's manual
EverFocus
EverFocus VANGUARD 16x8H Plus Quick installation guide
EverFocus
EverFocus PowerPlex EDR-920 Installation & operation
