9CH DVR Quick Start Guide V1.0(N04)- P.5
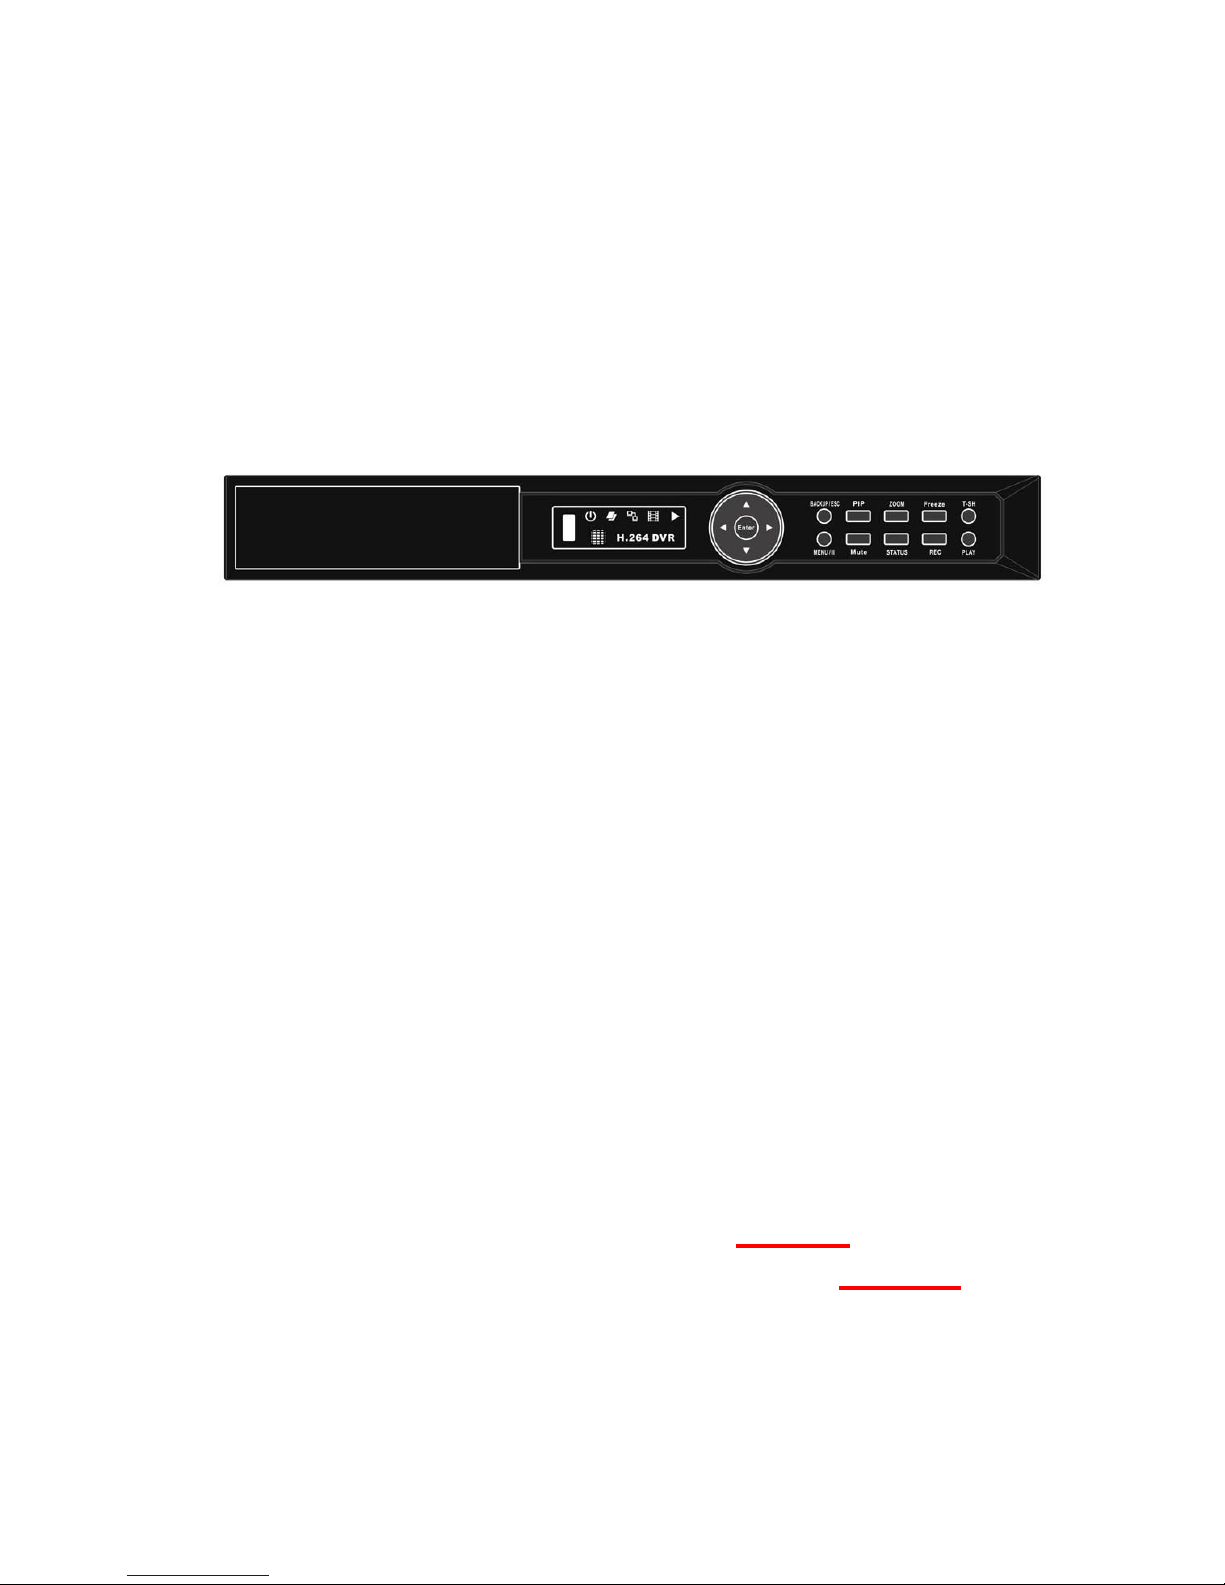
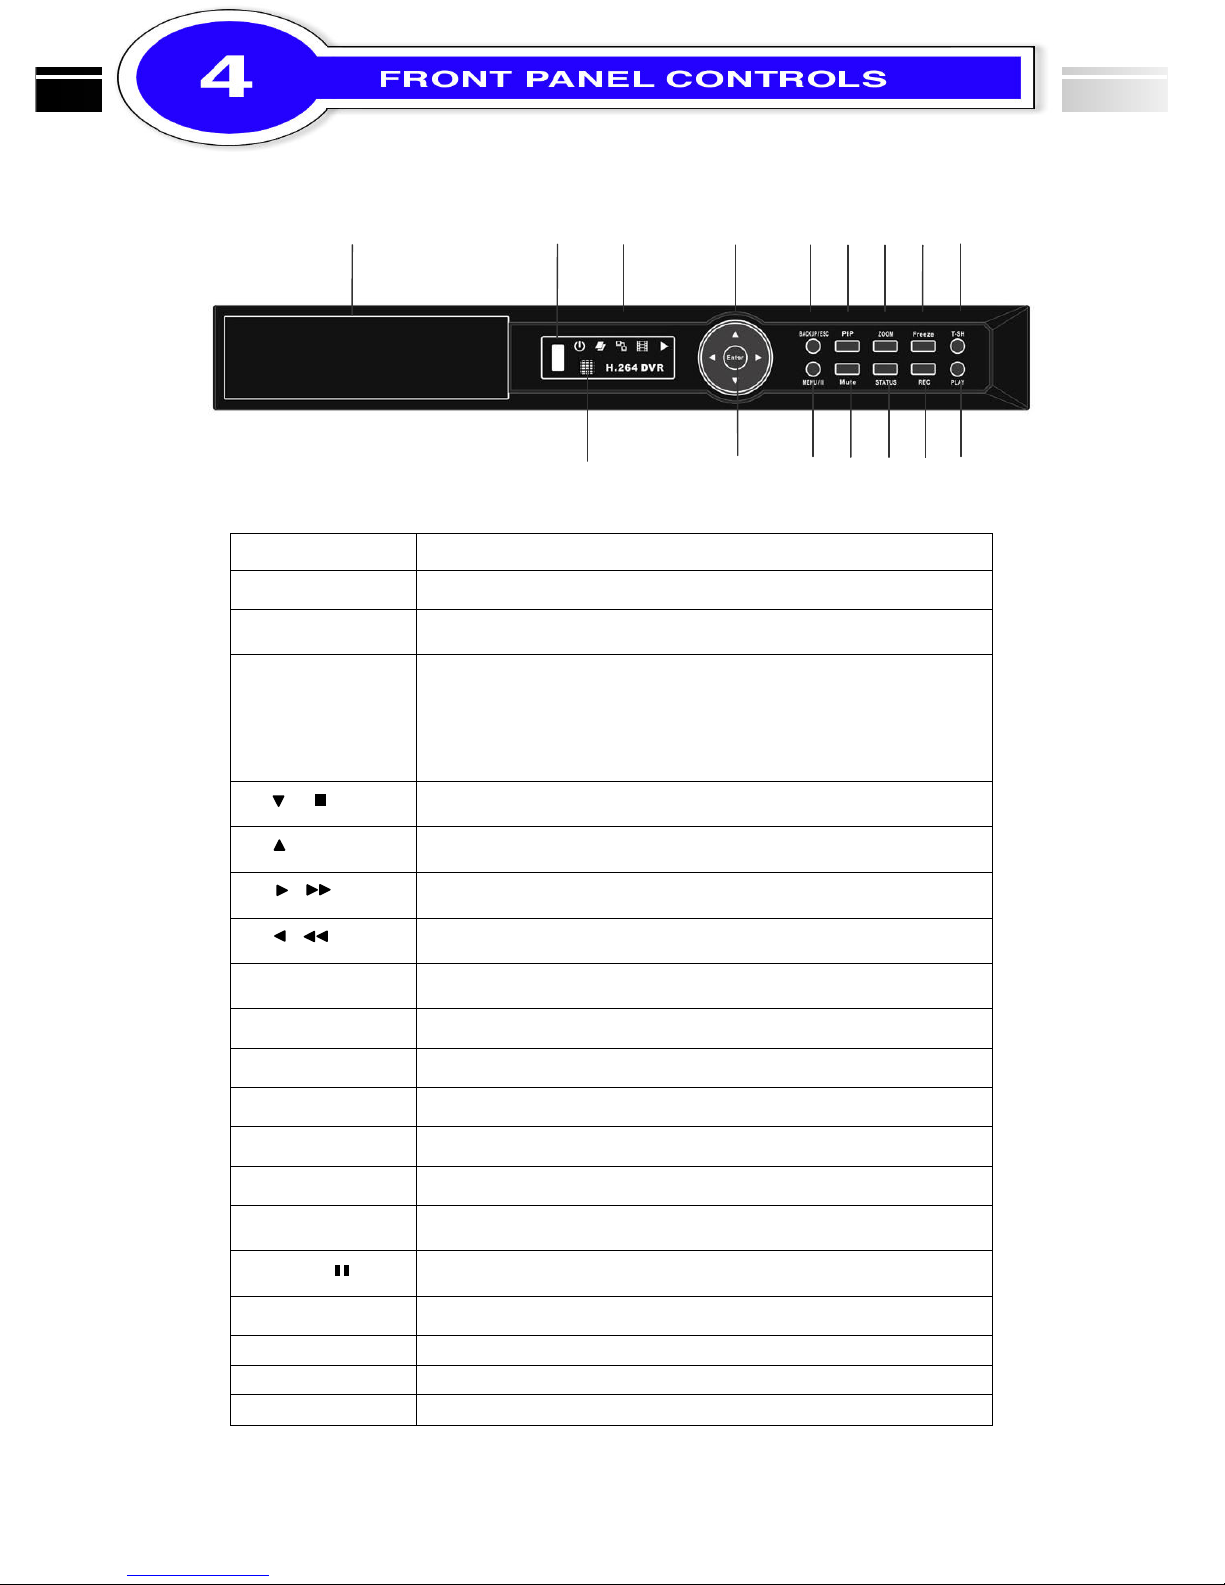
① ② ③ ④ ⑤ ⑥ ⑦ ⑧ ⑨
⑩ ⑪
Control Keys Description
○
1
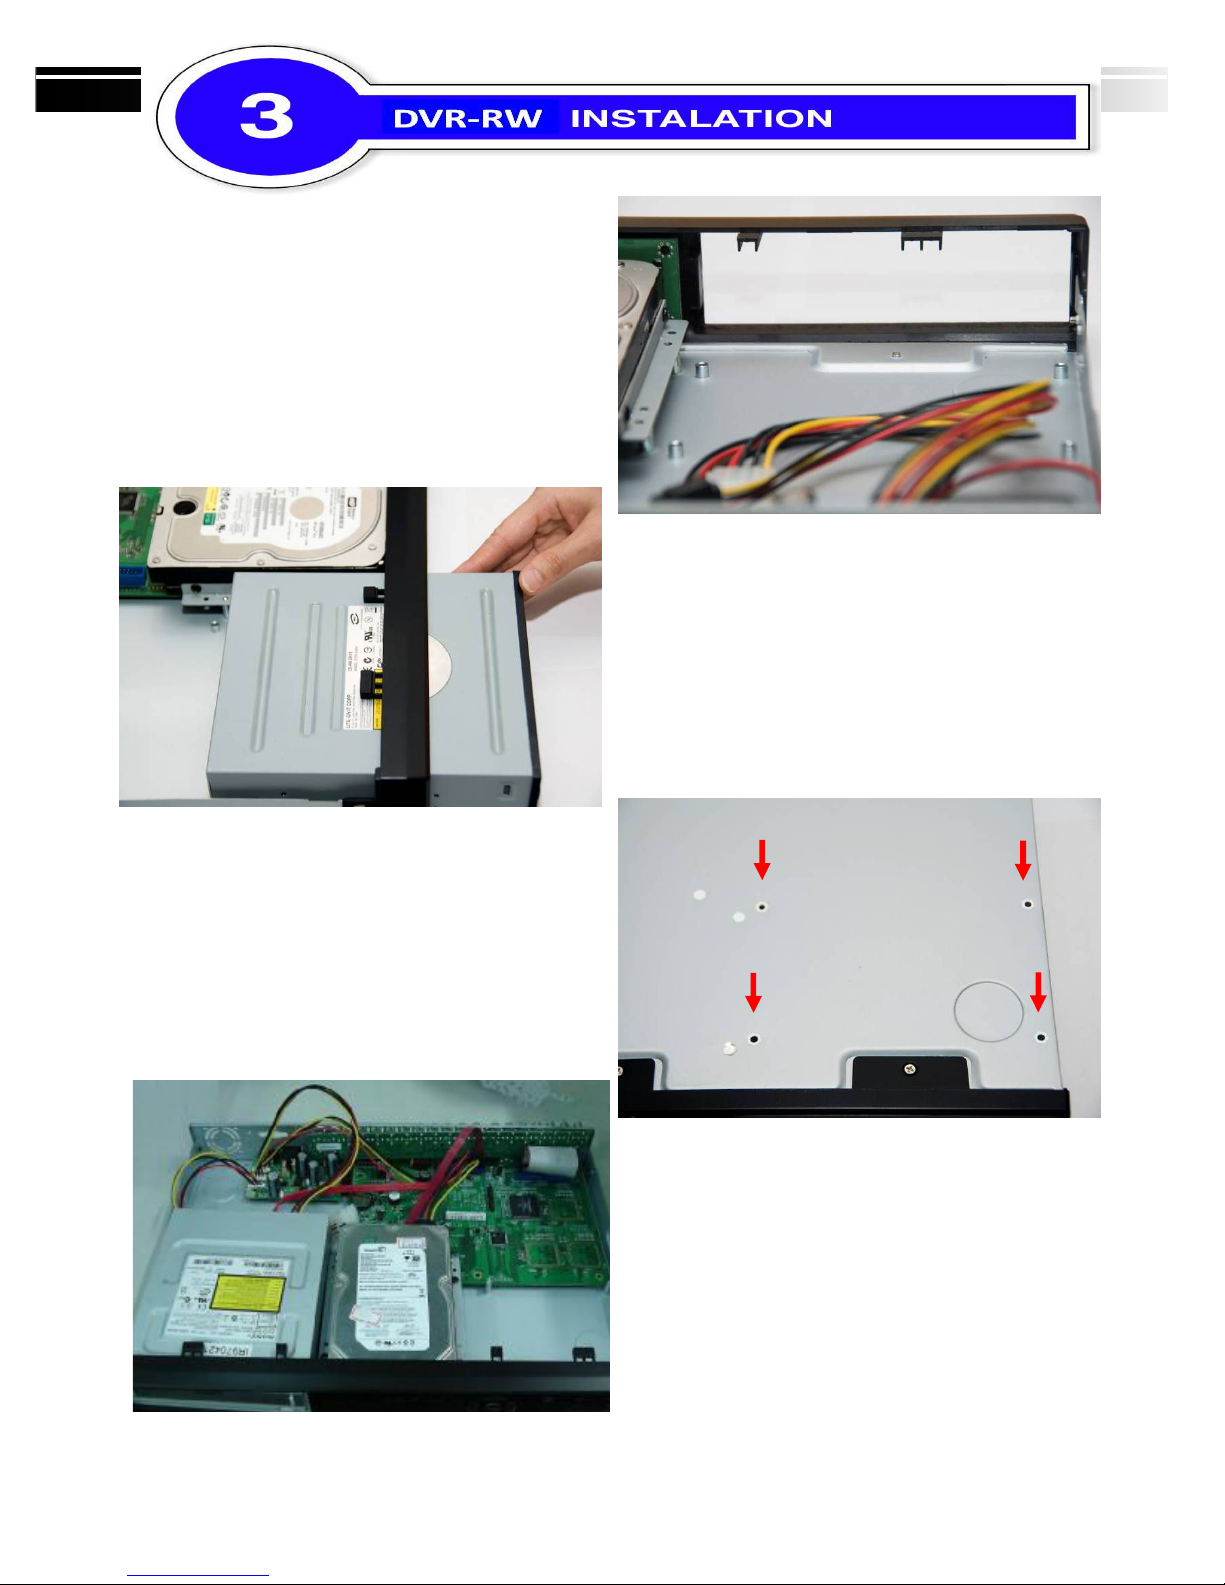
DVD Writer
Optional DVD-RW backup device.
○
2
USB 2.0 Port
Port or USB external devices (USB lash drive devices use, the mouse
behind the back o the USB ports installed)..
○
3
LED Display
(From le t to right)
Po er: Power is on.
HDD: Hard disk is in use.
LAN: Connected to the internet (in red): Remote user logged in.
REC: Recording.
PLAY: Playing back.
○
4
/
In SETUP mode, press to move cursor down. In PLAYBACK mode, press
to stop playing back.
/
SLOW
In SETUP mode, press to move cursor up. In PLAYBACK mode, press to
slow down.
/
In SETUP mode, press to increase value. In PLAYBACK mode press to
play orwards.
/
In SETUP mode, press to reduce value. In PLAYBACK mode, press to
play rewind.
○
5
BACKUP/ESC
In LIVE mode, press to display the BACKUP menu. In SETUP mode,
press to return to previous page.
⑥
PIP
In LIVE mode, display with picture in picture ormat.
○
7
ZOOM
In LIVE or PLAYBACK mode, enlarge the display o a channel.
○
8
FREEZE
In LIVE mode, display can be FREEZE.
○
9
T-SRH
Display the search menu.
○
10
IR Sensor
Input sensor or the remote control.
○
11
ENTER/MODE
In SETUP mode, press to enter values. In PLAYBACK mode, switch
between ull, quad, 9-channel, 16-channel display in order.
○
12
MENU
/
In LIVE mode, press to display menu. In PLAYBACK mode, press to pause
playback.
○
13
MUTE
Enable / Disable Key Tone.
STATUS
Show DVR Status.
REC Start or stop recording.
PLAY
Play back in normal speed.