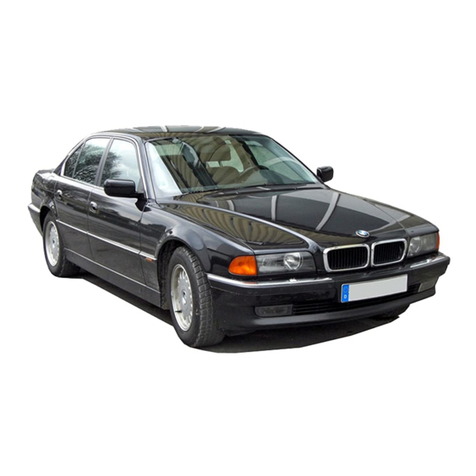
BMW 7 2002 Series User manual

BMW
7 Series
Sedan
The most important
functions of your
BMW 7 Series
at a glance

2002 BMW 7 Series
Quick Reference Guide
Your new BMW 7 Series offers a wide
range of equipment for your ultimate
driving experience.
This Quick Reference Guide contains only the most
important items for you to immediately familiarize
yourself with the basic functions of your new BMW 7
Series. For your own safety and the safety of others,
please read the Owner’s Manual thoroughly. There
you will find more detailed information about your
vehicle.
BMW wishes you all the best and years of driving
pleasure with your new 7 Series.
Remote Control

Unlocking the vehicle
• Press button 1 to unlock driver’s Door and Fuel
Filler Flap.
• Press button 1 again to unlock all other Doors and
Trunk.
• This function can be changed by your BMW center
so that all Doors unlock simultaneously on the first
press of button 1.
• You may also manually unlock the vehicle by
inserting the Key in the Door Lock and turn to the
left.
Locking the vehicle and arm the Alarm System
• Press button 2.
• You may also manually lock the vehicle by inserting
the Key in the Door Lock and turn to the right.
Opening the Trunk
• Press and hold button 3 for more than 2 seconds.
Switching on the Interior Lights and the Door
Mounted Proximity Lights from outside the
vehicle
• With vehicle unlocked press button 1.
• Or, with the vehicle locked press button 2.
Setting off the Alarm (Panic Mode)
• Press and hold button 4 for more than 2 seconds.
Opening the Windows and the Sunroof from
outside of the vehicle
• Press and hold button 1.
• You may also do this manually by inserting the key
in the Door Lock, then turn it to the left and hold it
in the “unlock position”.
REMOTE
CONTROL

Spare Keys & Valet Parking
Using the Spare Key Adapter
In case you have misplaced the Remote Control, the
Spare Key must be used in conjunction with the
Adapter in order to start the vehicle. This Adapter is
located in the Tool Kit mounted to the Trunk Lid. The
Spare Key should be kept in a safe place, such as
your wallet.
• Slide up the Cover 1.
• Insert the Spare Key 2 into the Adapter.
• Close Cover 1 and insert the Spare Key Adapter
into the Ignition Lock.
SPARE KEYS &
VALET PARKING

Valet Parking
If you do not wish the valet parking attendant to have
access to the Trunk, you can disconnect the Trunk
Lock from your vehicle’s central locking system:
• Release the Integrated Key from the Remote
Control by pressing button 1.
• Switch the “Valet Switch” into lock position 1. This
will lock the Trunk and prevent unauthorized access
into the Luggage Compartment.
• Lock the Center Console with the Integrated Key.
• Keep the Integrated Key with you and give the valet
parking attendant the Remote Control.
Note: While the vehicle is in the valet mode, you
may enter the trunk using the integrated key or the
spare key.
SPARE KEYS &
VALET PARKING

Driver’s Controls
Driving Area
1Parking Brake Push Button
2Parking Lights and Low-beam Lights
3High-beam Headlights, Headlight Flasher, Turn
Signals and Check Control
4Transmission Selector Lever
5Ignition Lock
6Hood Release
7Horn
8Wiper System
9Start/Stop Button
DRIVER’S
CONTROLS

Comfort and Convenience Areas
10 Control Display
11 Hazard Warning Flashers
12 Automatic Climate Control
13 Controller
You can conveniently familiarize yourself with the
operation of the functions described in this Quick
Reference Guide by inserting the Remote Control into
the Ignition Lock (5).
DRIVER’S
CONTROLS

Adjustments
Adjusting the Seat
Pre-select the appropriate (1-4) button, and then
adjust the Seat by using the Electric Control Knob.
Button 1 is always activated first.
1Slide for Seat front-rear and up-down
adjustments. Rotate for Seat tilt position.
2Thigh support and tilt angle.
3Lumbar support, backrest width.
4 Shoulder support, Head restraint* height.
Adjusting the Head Restraint*
The Head Restraint* automatically adjusts to the
standard height for the seat’s current front-to-rear
setting. You can further adjust the height of the Head
Restraint* using the Electric Control Knob. The height
of the Headrests on the Basic Seat can be manually
adjusted by hand.
*Comfort Seat option only
ADJUSTMENTS

Adjusting the Steering Wheel
The Steering Wheel can be adjusted in four directions
by pushing the button in the desired direction.
Adjusting the Rear View Mirrors
1Adjust
2Select left or right Mirror
When the transmission is in Reverse, the passenger
side mirror will tilt down. This function can be
deactivated by sliding Switch 2 right.
Note: To prevent damage, please fold the Rear View
Mirrors in by hand before entering an automatic car
wash.
ADJUSTMENTS

Lights & Wiper System
High-beam Headlights, Headlight Flasher, and
Turn Signals
1High-beam Headlights (Blue indicator light)
2Headlight Flasher (Blue indicator light)
3 Turn Signals (Green indicator light flashes with
periodic ticking sound)
Parking Lights, Low-beam Lights, and Fog Lights
1Parking (Side Marker) Lights
2Low-beam Lights
3Automatic Headlight Control
LIGHTS &
WIPER SYSTEM

4Fog lights
Wiper System
1Standard Wipe Speed: push up
Fast Wipe Speed: push up twice
2Wipers Off or Brief Wipe
3Rain Sensor Activation/Deactivation
Please deactivate the Rain Sensor before entering
a Car Wash (indicator lamp in the lever goes out).
4Windshield Cleaning
5Rain Sensor Sensitivity Adjustment
LIGHTS &
WIPER SYSTEM

Parking Brake
Manual Engagement
With the ignition on, briefly press the Parking Brake
push button. When a Red indicator light in the
Instrument Cluster is illuminated, the electro-
mechanical Parking Brake is engaged. This indicator
light will go out when the ignition is switched off. The
Parking Brake can only be disengaged with ignition
on. When the Parking Brake is disengaged, the
indicator light is not illuminated. The Parking Brake
can still be engaged at any time the Remote Control
is released from the Ignition Lock.
Important: Always release the Remote Control from
the Ignition Lock whenever you leave the vehicle. This
precaution prevents unintentional disengagement of
the Parking Brake by children.
Dynamic Braking (In Case of Emergency)
Pressing the Parking Brake push button with the
ignition on when the vehicle is rolling will activate the
hydraulic Service Brakes to decelerate the moving
vehicle. When this Dynamic Braking is activated, Red
and Red “Auto P” are illuminated in the
Instrument Cluster.
Automatic Hold
You can activate this Parking Brake feature to
automatically engage and disengage the Parking
Brake in a stop-and-go traffic situation. When this
PARKING
BRAKE

Automatic Hold feature is activated, Green “Auto P” is
illuminated in the Instrument Cluster. Please refer to
the Owner’s Manual page 63 for a complete system
description.
Malfunctions
In the event of malfunctions, Yellow and Yellow
“Auto P” are illuminated in the Instrument Cluster.
For more detailed information, please refer to page
65 in the Owner’s Manual.
Automatic Car Wash Position
• Deactivate the Rain Sensor by pressing the button
in the Wiper System Lever (the indicator light will go
out).
• Disengage the Parking Brake:
– If Automatic Hold is activated (Green “Auto P”),
press the Parking Brake push button twice to
disengage the Parking Brake.
– If Parking Brake is engaged (Red ), press the
Parking Brake push button once to disengage
the Parking Brake.
• The engine can be switched off, but the Remote
Control must remain in the Ignition Lock (ignition on).
• Set the vehicle in N(Neutral) position.
Note: N(Neutral) is automatically set when the engine
is switched off and the Remote Control remains in the
Ignition Lock. For safety reason, the vehicle
automatically sets to P(Park) position after 30
minutes.
PARKING
BRAKE

Driving
Starting the Engine
• Insert the Remote Control into the Ignition Lock until
it clicks into position.
• Depress the Brake pedal, and then briefly press the
Start/Stop button to start the engine.
Important: For safety reasons, the Brake pedal must
be depressed when the vehicle is stationary before
you can shift the Transmission Selector Lever out of
P(Park) or N(Neutral).
DRIVING

Driving
• Pull the Transmission Selector Lever gently toward
the Steering Wheel (1) and slide it downward for
D(Drive) or upward for R(Reverse).
• Release the Parking Brake if it is engaged.
• Slowly depress the Accelerator pedal to start
driving.
Switching the Engine off
• Depress the Brake pedal.
• Push button (2) for P(Park) position.
• If required, engage the Parking Brake.
• Briefly press the Start/Stop button to switch the
Engine off.
• Press in the Remote Control and remove it from the
Ignition Lock. Holding down the Start/Stop button
for more than 2 seconds will also release the
Remote Control from the Ignition Lock.
DRIVING

Climate control
1Automatic Air Distribution, left-hand side
2External Air/Automatic Re-circulated Air Control
3Windshield and Front Windows Defroster
4 Temperature Control, left-hand side
5Maximum Cooling
6Air Supply Fan Speed, left-hand side
7Automatic Climate Control Off
8Air Supply Fan Speed, right-hand side
9Temperature Control, right-hand side
10 Residual Heat
11 Rear Window Defrosters
12 Air Conditioner
13 Automatic Air Distribution, right-hand side
14 Interior Temperature Sensor
15 Parked-car Ventilation Systems
Obtaining Maximum Cooling
• Press the “Max”-cooling button (5) to obtain the
maximum cooling as quickly as possible.
• The Air Conditioning and Re-circulated Air are
turned on with the Fan blows at maximum speed
until cancelled.
CLIMATE
CONTROL

Canceling Maximum Cooling
• Press the “Max” button (5) again and the previous
climate control setting returns.
• Or, press the appropriate “Auto” button (1or 13).
• Or, press the “Off” button (7).
Obtaining Maximum Heating
• Set the desired temperature by turning the
Temperature Control dials (4and 9).
• Set the Fan Speed to high by turning the dials (6
and 8).
• You will see your selection represented by bar lines
in the Control Display.
Canceling Maximum Heating
• Press the appropriate “Auto” button (1or 13). The
Fan Speed and Air Ventilation settings are
automatically adjusted for maximum efficiency and
comfort by maintaining the desired temperature.
• Or, press the “Off” button (7).
• Or, turn down the Temperature Control dials (4and
9) and Fan Speed dials (6and 8).
Defrosting
• Press the Defrost button (3) to defrost the
Windshield and Front Windows.
• Press the Rear Window Defrost button (11) to
defrost the Rear Window.
Residual Heating
• Press Residual Heat button (10) for heating by using
the engine heat after the engine is switched off. Up
to 15 minutes of heating is available when the
engine has warmed up to its normal operating
temperature.
CLIMATE
CONTROL

Child-restraint System
Commercially available child-restraint systems are
designed to be secured with a lap belt or with the lap
belt portion of a lap and shoulder belts combination.
Improperly or inadequately installed restraint systems
can increase the risk of injury to children. Always read
and follow the instructions that come with the system.
Important: Never install a rearward facing child-
restraint system in the front passenger seat. For more
detailed information, refer to page 57 of the Owner’s
Manual.
Tether Strap
Three tether anchorage points are provided in the rear
passenger area. Depending on selected seat location,
the tether strap can be attached to the corresponding
anchorage point shown in the above illustration.
Outer seating position: lift the headrest and pass the
tether strap between the headrest and the seat back.
Center seating position: pass the tether strap over
the headrest.
Note: The headrest must be adjusted to the lowest
possible position. Adjust the tether strap according to
the child-restraint manufacturer’s instructions.
CHILD
RESTRAINT

LATCH Child-restraint System
It is necessary to return the
rear seats into the standard
position before using the
LATCH (Lower Anchors and
Tethers for Children) child-
restraint system.
Note: The LATCH child-restraint system installation
guide can be obtained at your BMW center.
The above illustrations show the left rear seat as an
example. Engage the buckle on the center belt and
then pull the belt away from the anchorage point.
Firmly press the installation guide into the gap
between the seat upholstery and backrest. Continue
to press until the two funnel-shaped guides snap into
place in the LATCH support braces. The installation
guide can be removed by pulling.
Child-safety Locks
When the Safety Lever on
the rear door is pulled
down, the corresponding
rear door can only be
opened from the outside.
CHILD
RESTRAINT

Control Center
Controller
You can use the Controller to operate all of the
display functions in the Control Display. You can slide,
turn and press the Controller.
Important: For safety reason, do not operate the
Controller unless traffic and road conditions allow.
CONTROL
CENTER
Table of contents
Other BMW Automobile manuals

BMW
BMW G07 Installation guide

BMW
BMW 135i User manual

BMW
BMW 740i SEDAN User manual

BMW
BMW 2006 M6 User manual

BMW
BMW Z4 sDrive28i User manual

BMW
BMW 2004 Z4 2.5i User manual

BMW
BMW 5 2019 Series User manual

BMW
BMW X6 2012 Instruction Manual

BMW
BMW M6 convertible 2012 User manual

BMW
BMW M3 CONVERTIBLE 2001 User manual

BMW
BMW 4 series User manual

BMW
BMW X1 SDRIVE18D - 2010 User manual

BMW
BMW M2 COUPE User manual

BMW
BMW 3 SERIES CONVERTIBLE - CATALOGUE User manual

BMW
BMW M3 CONVERTIBLE 2002 User manual

BMW
BMW 5 series sedan User manual

BMW
BMW M3 User manual

BMW
BMW 3 SERIES SEDAN - PRODUCT CATALOGUE User manual

BMW
BMW 3 SERIES CONVERTIBLE - CATALOGUE User manual

BMW
BMW iX 2024 User guide