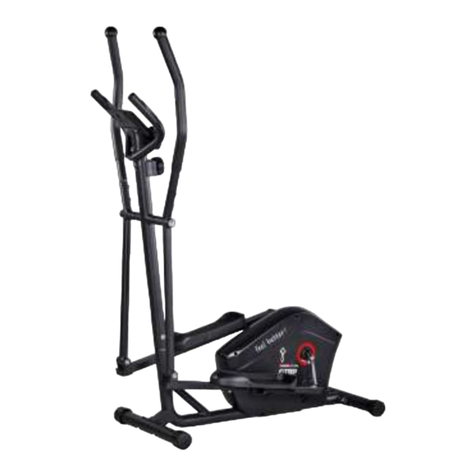
Body Break 16117380 User manual

Elliptical
OWNER`S
MANUAL
Model No.
16117380
•Assembly
•Operation
•Exercise
•Parts
•Warranty
CAUTION:
You must read and
understand this
owner’s manual
before operating
unit.
RETAIN FOR
FUTURE REFERENCE
MAURICE PINCOFFS CANADA INC. 6050 DON MURIE STREET
,
NIAGARA FALLS
,
ONTARIO L2E 6X8

Customer Service 1-888-707-1880 2 Maurice Pincoffs Canada Inc.©2008
Manufacture’s One-Year Limited Warranty
Your Body Break Magnetic Elliptical is warranted for one year from the date of purchase
against defects in material when used for the purpose intended, under normal conditions and
provided it receives proper care. Any part found defective or missing will be sent at no cost
when returned in accordance with the terms of this warranty.
This warranty is not transferable and is extended only to the original owner.
The warranty shall not apply to exercise units which are (1) used for commercial or other
income producing purposes, or (2) subject to misuse, neglect, accident or unauthorized
repair and alterations.
This warranty provided herein is lieu of all other express warranties, any implied warranties,
including any implied warranties of merchantability of fitness for particular purpose, are
limited in duration to the first 12 months from date of purchase. All other obligations or
liabilities, including liability for consequential damages are hereby excluded.
REPAIR PARTS AND SERVICE
All of the parts for the elliptical shown in figure can be ordered from Maurice Pincoffs Canada
Inc. 6050 DON MURIE STREET, NIAGARA FALLS, ONTARIO L2E 6X8. When ordering
parts, the parts will be sent and billed at the current prices. Prices may be subject to change
without notice. Check or money order must accompany all orders. Standard hardware items
are available at your local hardware store.
To ensure prompt and correct handling of any errors, or to answer any questions, please call
our Toll Free number: 1-888-707-1880, or local number 1-905-353-8955 or fax 1-905-353-
Monday to Friday Eastern Standard Time.
Always include the following information when ordering parts
zModel number
zName of each part
zPart number of each part
TABLE OF CONTENTS
WARRANTY 2 HOW THE ELLIPTICAL WORKS 19-21
SAFETY PRECAUTIONS 3 PARTS LIST 22-23
PRE-ASSEMBLY CHECK LIST 5 DIAGRAM 24-25
HARDWARE PACKING LIST 6 TROUBLE SHOOTING 26
ASSEMBLY INSTRUCTION 7-10 TRAINING GUIDELINES 27-29
COMPUTER INSTRUCTION 11-18 EXERCISE 30-31

Customer Service 1-888-707-1880 3 Maurice Pincoffs Canada Inc.©2008
IMPORTANT SAFETY INFORMATION
THIS UNIT IS INTENDED FOR HOUSEHOLD USE ONLY
READ ALL INSTRUCTIONS BEFORE USING THIS ELLIPTICAL
▲CAUTION: Before starting any exercise program, it is recommended that you consult your
physician.
▲WARNING: Connect this unit to a properly grounded outlet only.
▲DANGER: To reduce the risk of electric shock, always unplug the treadmill from the electrical
outlet immediately after using and before cleaning.
WARNING
To reduce the risk of burns, fire, electric shock, or injury to persons:
1. Use 120 volt a.c. household current on a dedicated circuit.
Grounding Instructions
This product must be grounded. If it should malfunction or breakdown, grounding provides a
path of least resistance for electric current to reduce the risk of electric shock. This product is
equipped with a cord having an equipment-grounding conductor and a grounding plug. The
plug must be plugged into an appropriate outlet that is properly installed and grounded in
accordance with all local codes and ordinances. See diagram below for grounding methods.
2. It is the responsibility of the owner to ensure that all users of this elliptical are adequately
informed of all warnings and precautions.
3. The use of an extension cord with this product is not recommended. If an extension cord
is needed, use a short (less than 10 feet) heavy gauge (14 gauge or better) extension cord
with a three prong (grounded) plug and receptacle.
4. Never leave the elliptical unattended when plugged in. Always unplug the power cord
immediately after use and before cleaning the elliptical.
5. Never operate the treadmill if it has a damaged cord or plug, if it is not working properly, if
it has been dropped, damaged, or exposed to water.
6. Do not pull the elliptical by the power supply cord or use cord as a handle. Keep cord
away from heated surfaces and open flames.
7. Fitness equipment must always be installed and used on a flat surface. Do not use
outdoors or near water. Do not place the unit on a loose rug or uneven surface. It is
recommended to use an equipment mat to prevent the unit from moving while it is being
used, which could possibly scratch or damage the surface of your floor. It is
recommended to have a minimum of 3 metres safe clearance on all sides of the elliptical
while in use.
8. Keep the elliptical indoors, away from moisture and dust. Do not put the elliptical in a
garage, covered patio or near water.
9. Do not operate the elliptical where aerosol products are used or where oxygen is being
administered.

Customer Service 1-888-707-1880 4 Maurice Pincoffs Canada Inc.©2008
10.Do not insert any objects into any openings.
11.Inspect and properly tighten all parts of the elliptical regularly.
12.Keep children and pets away from this equipment at all times while exercising.
13.Handicapped individuals should have medical approval and close supervision when using
this elliptical.
14.Do not place hands or feet under the elliptical. Always keep hands and legs off of the
elliptical when others are using it.
15.Always hold the handlebars when mounting, dismounting, or using the elliptical. Keep
your back straight when using your elliptical; do not arch your back. When you stop
exercising, allow the pedals to slowly come to a complete stop. The elliptical does not
have a free wheel; the pedals will continue to move until the flywheel stops.
16.To disconnect, turn all controls to the off position, then remove plug from outlet.
17.Use the elliptical only for its intended use as described in this manual. Do not use any
attachments that are not recommended by the manufacturer.
18.User weight should not exceed 265lbs (120 kg).
19.Never allow more than one person on the elliptical at once.
20.Warm up 5 to 10 minutes before each workout and cool down 5 to 10 minutes afterward.
This allows your heart rate to gradually increase and decrease and will help prevent
straining muscles.
21.Never hold your breath while exercising. Breathing should remain at a normal rate in
conjunction with the level of exercise being performed. If dizziness, nausea, chest pains,
or any other abnormal symptoms are experienced while using this equipment, STOP the
workout at once. CONSULT A PHYSICIAN IMMEDIATELY.
22.The pulse sensor is not a medical device. Various factors, including the user’s movement,
may affect the accuracy of heart rate readings. The pulse sensor is intended only as an
exercise aid in determining heart rate trends in general.
23.Start your program slowly and very gradually increase your speed and distance.
24.Always wear suitable clothing and footwear while exercising. Do not wear loose fitting
clothing that could become entangled with the moving parts of your elliptical. Do not walk
or jog barefoot, in stocking feet or loose fitting shoes or slippers.
25.This elliptical is intended for in-home use only. Do not use the elliptical in any commercial,
rental or institutional setting.
▲WARNING: Before beginning any exercise program consult your physician. This is
especially important for individuals over the age of 35 or persons with pre-existing health
problems. Read all instructions before using any fitness equipment. We assume no
responsibility from personal injury or property damage sustained by or through the use of this
product.
SAVE THESE INSTRUCTIONS

Customer Service 1-888-707-1880 5 Maurice Pincoffs Canada Inc.©2008
PRE-ASSEMBLY CHECK LIST
NO.45
NO.24NO.23
NO.49NO.18NO.5
NO.48NO.36
NO.1
NO.25
PART NO. DESCRIPTION Q’TY
1 Main frame 1
36 Front stabilizer 1
48 Rear stabilizer 1
25 Front post 1
5 Stationary handlebar 1
18 Computer 1
49 Pedals (L&R) 2
23 Upper Handlebars (L&R) 2
24 Lower handlebars (L&R) 2
45 Footrest support arms (L&R) 2
Inner Box 1
Manual 1

Customer Service 1-888-707-1880 6 Maurice Pincoffs Canada Inc.©2008
HARDWARE PACKING LIST
Part
NO Description Q’ty Drawings
7 Arc washer D8 x R10 5
9 Allen bolt M8 x 32 4
12 Domed nut M8 4
13 Allen bolt M6 x 12 4
14 Carriage bolt 4
19 Domed nut M10 4
22 PVC cap 8
26 Arc washer D10 x R30 5
27 Allen bolt M8 x 16 5
30 Hex head bolt M8 x 45 4
33 Spacer 2
34 Carriage bolt M10 x 73 4
38 Nylon Locknut M10 2
39 Flat washer D10 2
40 Hex head bolt M10 x 78 2
44 Club knob 4
63 Flat washer D8 4
86 Arc washer D8 8
4
Allen Key L4 1
Allen Wrench S17*S13 2
Allen Key L6 1

Customer Service 1-888-707-1880 7 Maurice Pincoffs Canada Inc.©2008
ASSEMBLY INSTRUCTION
This manual is designed to help you easily assemble, adjust and use this machine. Please
read this manual carefully. For the sake of familiarizing yourself with the parts identified in the
instruction, first study the overview drawing.
Set all parts in a clear area on the floor and remove the packing material. Refer to the parts
list for help to identify the parts.
It will take two people to assemble your unit.
STEP 1
1. Attach the Front Stabilizer (36) to the Main frame (1) and tighten with two carriage bolts
(34), two Arc washer (26) and two Domed nut (19).
2. Attach the Rear Stabilizer (48) to the Main frame (1) and tighten with two carriage bolts
(34), two Arc washer (26) and two Domed nut (19).
STEP 2
1. Slide the Round Ring (29) and the Post Cover (55) on to the Front Post (25).
2. Connect Extension Computer Wire (28) to the Lower Computer Wire (56).
3. Insert the Front post (25) into the Main frame (1) and tighten with five Arc washer (7) and
five Allen bolt (27).
4. Slide the Post Cover (55) and the Round Ring (29) down the Front Post (25) to the main
frame (1).

Customer Service 1-888-707-1880 8 Maurice Pincoffs Canada Inc.©2008
STEP 3
1. Install the left Lower Handlebar (24L) to the axle of the Front Post (25). Secure with one
Flat Washer (58), one Spring Washer (20), one Hex Head Bolt (21) and one Cap (22).
Hand tighten only.
2. Slide the Upper Handlebar (23L) to the Bottom Handlebar (24L). Secure with two
Carriage Bolts (14) and two Allen Bolts (13). Hand tighten only.
3. Repeat for the right handlebar (24R / 23R)
STEP 4
1. Slide the spacer (46) on to the left Crank Disk (68L). Attach the left Footrest Support
Arm (45L) to the left Crank Disk (68L). Secure with one Flat Washer (58), one Nylon
Locknut (43) and one cap (22).
2. Connect the front of the left Footrest Support Arm (45L) to the bottom of the left
Handlebar (24L). Secure using with one Hex Head Bolt (40), one Spacer (33), one Flat
washer (39), one Nylon nut (38) and two Covers (22). Hand tighten only.
3. Attach the left Foot Pedal (49L) to the left Footrest Support Arm (45L). Secure using two
Hex Head Bolt (30), two Flat Washers (63) and two Lock Knobs (44).
4. Repeat for the right Support Arm (45R).

Customer Service 1-888-707-1880 9 Maurice Pincoffs Canada Inc.©2008
STEP 5
1. Attach the Stationary Handlebar w/handpulse (5) to the bracket of the Front post (25).
Secure using four Allen bolts (9), eight Arc washer (86) and four Domed nuts (12). Hand
tighten only.
2. Connect the Extension Handpulse wire (87) from the back of the front post (25) to the
Handpulse wire (11). Connect the Extension Handpulse wire (87) to the wire from the
back of the monitor (18). Connect the Extension Computer Wire (28) to the wire from
the back of the Monitor (18).
3. Slide the Monitor (18) on to the top bracket of the Front post (25). Secure the Monitor
(18) using two screws (8). Note: Ensure that the wires are away from the bracket when
sliding on the monitor.
NOW FIRMLY TIGHTEN ALL NUTS AND BOLTS
YOUR UNIT IS NOW FULLY ASSEMBLED

Customer Service 1-888-707-1880 10 Maurice Pincoffs Canada Inc.©2008
The computer can only be powered by using the AC adaptor(57).

Customer Service 1-888-707-1880 11 Maurice Pincoffs Canada Inc.©2008
MONITOR INSTRUCTION
The things you should know before exercise
A. Input Power
Plug the adaptor into the equipment. The computer will produce a beep sound and turn on the
computer at the Manual mode.
B. Program select and setting value
1. Turn the toggle wheel “UP or DOWN” to select the program mode, then press ENTER to
confirm your program mode.
2. The Manual mode, the computer will use the toggle wheel “UP or DOWN” to set the target
value of your exercise for TIME, DISTANCE, CALORIES, PULSE. Press ENTER to confirm
your target value.
3. Press the START/STOP key to start exercise.
4. When you reach the target, the computer will produce beep sounds and then stop.
5. If you set up more than one target and you would like to reach next target, press START/STOP
key to keep exercising.
Functions and Features:
1. TIME: Shows your elapsed workout time in minutes and seconds. Your computer will
automatically count up from 0:00 to 99:59 in one second intervals. You can also program your
computer to count down from a set value by using the UP and DOWN keys. If you continue
exercising once the time has reached 0:00, the computer will begin beeping, and reset itself to the
original time set, letting you know your workout is done.
2. DISTANCE: Displays the accumulative distance traveled during each workout up to a maximum of
99.9KM/MILE.
3. RPM: Your pedal cadence.
4. WATT: The amount of mechanical power the computer is receiving from your exercise.
5. SPEED: Displays your workout speed value in KM/MILE per hour.
6. CALORIES: Your computer will estimate the cumulative calories burned at any given time during
your workout.
7. PULSE: Your computer displays your pulse rate in beats per minute during your workout.
8. AGE: Your computer is age-programmable from 10 to 99 years. If you do not set an age, this
function will always default to age 35.
9. TARGET HEART RATE (TARGET PULSE): The heart rate you should maintain is called your
Target Heart Rate in beats per minute.

Customer Service 1-888-707-1880 12 Maurice Pincoffs Canada Inc.©2008
10. PULSE RECOVERY: During the START stage, leave the hands holding on grips or leave the
chest transmitter attached and then press “PULSE RECOVERY” key, all function displays will stop
except “TIME”. Time starts counting from 00:60 - 00:59 - - to 00:00. As soon as 00:00 is reached,
the computer will show your heart rate recovery status with the grade F1.0 to F6.0.
1.0 means OUTSTANDING
1.0<F<2.0 means EXCELLENT
2.0≦F≦2.9 means GOOD
3.0≦F≦3.9 means FAIR
4.0≦F≦5.9 means BELOW AVERAGE
6.0 means POOR
Note: If no pulse signal input then the computer will show “P” on the PULSE window. If the computer
shows “ERR” on the message window, please re-press the PULSE RECOVERY key and please
make sure your hands are keeping well on the grips.
11. TEMPERATURE: Display the current temperature.
Key function:
There are 6 button keys and the function description as follows:
1. START/STOP key:
a. Quick Start function: Allows you to start the computer without selecting a program.
Manual workout only. Time automatically begins to count up from zero.
b. During the exercise mode, press the key to STOP exercise.
c. During the stop mode, press the key to START exercise.
2. UP key:
a. Turn the toggle wheel to increase the resistance during exercise mode.
b. During the setting mode, turn the toggle wheel to increase the value of Time,
Distance, Calories, Age and select Gender and Program.
3. DOWN key:
a. Press the key to decrease the resistance during exercise mode.
b. During the setting mode, press the key to decrease the value of Time, Distance,
Calories, Age and select Gender and Program.
4. ENTER key:
a. During the setting mode, press the key to accept the current data entry.
b. At the stop mode, by holding this key for over two seconds the user can reset all
values to zero or default value.
c. During setting the Clock, press this key can accept the setting hour and setting
minute.
5. BODY FAT key: Press the key to input your HEIGHT, WEKGHT, GENDER and AGE then to
measure your body fat ratio.
6. PULSE RECOVERY key: Press the key to activate heart rate recovery function.
Program Introduction & Operation:
Manual Program:
P1 is a manual program. User can start exercise by pressing START/STOP key. The default
resistance level is 5. User may exercise in any resistance level (Adjusting by UP/DOWN keys during
the workout) with a period of time or a number of calories or a certain distance.

Customer Service 1-888-707-1880 13 Maurice Pincoffs Canada Inc.©2008
Operations:
1. Scroll the toggle UP/DOWN to P1 to select the MANUAL program.
2. Press the ENTER key to accept the MANUAL program.
3. The TIME will flash and you can scroll the toggle UP or DOWN to set your exercise TIME.
4. Press ENTER key to confirm your desired TIME.
5. The DISTANCE will flash and you can scroll the toggle UP/DOWN to set your target DISTANCE.
6. Press ENTER key to confirm your desired DISTANCE.
7. The CALORIES will flash and you can scroll the toggle UP/DOWN to set your target CALORIES.
8. Press ENTER key to confirm your desired CALORIES.
9. The PULSE will flash and then you can scroll the toggle UP/DOWN to set your target PULSE.
10. Press ENTER key to confirm your desired Pulse.
11. Press the START/STOP key to begin your exercise.
Preset Program: Steps, Hill, Rolling, Valley, Fat Burn, Ramp, Mountain, Intervals,
Random, Plateau, Fartlek, Precipice Program
PROGRAM 2 to PROGRAM 13 are the preset programs. Users can exercise with different level of
resistance in different intervals as the profiles show. Users may exercise in any resistance level
(Scrolling the toggle UP/DOWN during the workout) with a target period of time or a target number of
calories or a target distance.
Operations:
1. Scroll the toggle UP/DOWN keys to select one of the above programs from P2 to P13
2. Press ENTER key to enter your selected workout program.
3. The TIME will flash and you can scroll the toggle UP/DOWN to set your exercise TIME.
4. Press ENTER key to confirm your target TIME.
5. The DISTANCE will flash and you scroll the toggle UP/DOWN to set your target DISTANCE.
6. Press ENTER key to confirm your target DISTANCE.
7. The CALORIES will flash and you scroll the toggle UP/DOWN to set your target CALORIES.
8. Press ENTER key to confirm your target CALORIES.
9. The PULSE will flash and you can scroll the toggle UP/DOWN to set your target PULSE.
10. Press ENTER key to confirm your target Pulse.
11. Press the START/STOP to begin your program.
User Setting Program: User 1, User 2, User3, User4
Program 14 to 17 are the user setting program. Users are free to create the values in the order of
TIME, DISTANCE, CALORIES and the resistance level in 10 columns. The values and profiles will be
stored in the memory after setup. Users may also change the ongoing level of tension in each column
by scrolling the toggle UP/DOWN and they will not change the resistance level stored in the memory.
Operations:
1. Scroll the toggle UP/DOWN to select the USER program from P14 to P17.
2. Press ENTER key to enter your select user program.
3. The column 1 will flash, toggle the scroll UP/DOWN to create your personal exercise profile.
Press ENTER to confirm your first column of exercise profile. The default resistance level is 1.
4. The column 2 will flash, scroll the toggle UP/DOWN to create your personal exercise profile.
Press ENTER to confirm your second column of exercise profile.
5. Continue the above until you have finished all 10 columns.
6. Press ENTER to confirm your desired exercise profile.
7. The TIME will flash and you can scroll the toggle UP/DOWN to set your exercise TIME.
8. Press ENTER key to confirm your target TIME.
9. The DISTANCE will flash and you can scroll the toggle UP/DOWN to set your target DISTANCE.
10. Press ENTER key to confirm your target DISTANCE.
11. The CALORIES will flash and you can scroll the toggle UP/DOWN to set your target CALORIES.
12. Press ENTER key to confirm your target CALORIES.
13. The PULSE will flash and then you can scroll the toggle UP/DOWN to set your target PULSE.
14. Press ENTER key to confirm your target Pulse.
15. Press the START/STOP key to begin your program exercise.

Customer Service 1-888-707-1880 14 Maurice Pincoffs Canada Inc.©2008
Heart Rate Control Program: 55% H.R.C., 65% H.R.C., 75% H.R.C., 85% H.R.C., Target H.R.C.
Program 18 to Program 22 is the Heart Rate Control Programs and Program 22 is the Target Heart
Rate Control program.
Program 18 is the 55% Max H.R.C. - - Target H.R. = (220 – AGE) x 55%
Program 19 is the 65% Max H.R.C. - - Target H.R. = (220 – AGE) x 65%
Program 20 is the 75% Max H.R.C. - - Target H.R. = (220 – AGE) x 75%
Program 21 is the 85% Max H.R.C. - - Target H.R. = (220 – AGE) x 85%
Program 22 is the Target H.R.C. - - Workout by your target heart rate value.
Users can exercise according to your desired Heart Rate program by setting your AGE, TIME,
DISTANCE, CALORIES or TARGET PULSE. In these programs, the computer will adjust the
resistance level according to the heart rate detected. For example, the resistance level may increase
every 20 seconds while the heart rate detected is lower than the TARGET H.R and then the computer
will show “SLOW DOWN” on the message window. Also the resistance level may decrease every 20
seconds while the heart rate detected is higher than the TARGET H.R and then the computer will
show “HURRY UP” on the message window. As a result, the user’s heart rate will be adjusted to close
the TARGET H.R. between the range of TARGET H.R. +5 and TARGET H.R. -5 and then the
computer will show “KEEP GOING” on the message window.
Operations:
1. Scroll the toggle UP/DOWN to select the HRC program from P18 to P22.
2. Press the ENTER key to enter your workout program
3. The AGE will flash at P18 to P21 programs. Scroll the toggle UP/DOWN to set your AGE. The
default age is 35. Press the ENTER to enter your age.
4. For program 22, the TARGET PULSE will flash and you can scroll the toggle UP/DOWN to set
your TARGET PULSE between 80 to 180. The default TARGET PULSE is 120. Press the
ENTER key to enter your target heart rate.
5. The TIME will flash and you can scroll the toggle UP/DOWN to set your exercise TIME. Press
the ENTER key to confirm your TIME.
6. The DISTANCE will flash and you can scroll the toggle UP/DOWN to set your target DISTANCE.
Press the ENTER key to confirm your target DISTANCE.
7. The CALORIES will flash and you can scroll the toggle UP/DOWN to set your target CALORIES.
Press the ENTER key to confirm your target CALORIES.
8. Press the START/STOP key to begin your program.
Watt Control Program: Watt Control
Program 23 is a Speed Independent Program. Press ENTER key to set up the values of TARGET
WATT, TIME, DISTANCE and CALORIES. During the exercise mode, the level of resistance is not
adjustable. For example, the level of resistance may increase while the speed is too slow. Also the
level of resistance may decrease while the speed is too fast. As a result, the calculated value of
WATT will close to the value of TARGET WATT setup by users.
Operations:
1. Scroll the toggle UP/DOWN to select the WATT CONTROL (P23) program.
2. The TIME will flash and you can scroll the toggle UP/DOWN to set your exercise TIME. Press
the ENTER key to confirm your TIME.
3. The DISTANCE will flash and you can scroll the toggle UP/DOWN to set your target DISTANCE.
Press the ENTER key to confirm your target DISTANCE.
4. The WATT will flash and you can scroll the toggle UP/DOWN to set your target WATT value.
Press the ENTER key to confirm your target WATT. The default WATT value is 100.
5. The CALORIES will flash and you can scroll the toggle UP/DOWN to set your target CALORIES.
Press the ENTER key to confirm your target CALORIES.
6. The PULSE will flash and then you can scroll the toggle UP/DOWN to set your target PULSE.
Press ENTER key to confirm your target Pulse.
7. Press the START/STOP key to begin your program.
NOTE: 1. WATT = TORQUE (KGM) * RPM * 1.03
2. In this program, the WATT value will keep constant value. It means that if you peddle
quickly, the resistance level will decrease and if you peddle slowly, the resistance level will
increase. Always try to keep you in the same watt value.

Customer Service 1-888-707-1880 15 Maurice Pincoffs Canada Inc.©2008
Body Fat Program: Body Fat
Program 24 is a special program design to calculate users’ body fat ratio and to offer a specific
loading profile for users. There are 3 body types divided according to the FAT% calculated.
Type1: BODY FAT% > 27
Type2: 27 ≧BODY FAT% ≧20
Type3: BODY FAT % < 20
The computer will show the test results of FAT PERCENT, BMI and BMR.
Operations:
1. Scroll the toggle UP/DOWN to select the BODY FAT (P24) program.
2. Press the ENTER key to enter your workout program.
3. The HEIGHT will flash and you can scroll the toggle UP/DOWN to set your HEIGHT. Press
ENTER key to confirm your HEIGHT. The default HEIGHT is 170cm or 5’07” (5feet 7 inches).
4. The WEIGHT will flash and you can scroll the toggle UP/DOWN to set your WEIGHT. Press
ENTER key to confirm your WEIGHT. The default WEIGHT is 70kgs or 155lbs.
5. The GENDER will flash and you can scroll the toggle UP/DOWN to set select your gemder.
Number 1 means man and number 0 means female. Press ENTER key to confirm your Gender.
The default gender is 1 (MAN).
6. The AGE will flash and you can scroll the toggle UP/DOWN to set your AGE. Press ENTER key
to confirm your AGE. The default AGE is 35.
7. Press the START/STOP key to begin body fat measurement. If the window show E on the
window, please make sure your hands are attached well on the grips. Then press the
START/STOP key again to begin body fat measurement.
8. After finished your measurement, the computer will show the values of BMR, BMI and FAT
PERCENT on the LCD display. Furthermore, the computer will show your own exercise profile
for your body type.
9. Press START/STOP key to begin exercise.
Operation guide:
1. Sleep Mode:
The computer will enter the sleep mode when there is no signal input and no keys be pressed
after 4 minutes. You can press any key to wake up the computer.
2. BMI (Body Mass Index): BMI is a measure of body fat based on height and weight that applies
to both adult men and women.
3. BMR (Basal Metabolic Rate): Your Basal Metabolic Rate (BMR) shows the number of calories
your body needs to operate. This doesn’t account for any activity, it’s simply the energy needed
to sustain a heartbeat, breathing and normal body temperature. It measures the body at rest,
not sleep, at room temperature.

Customer Service 1-888-707-1880 16 Maurice Pincoffs Canada Inc.©2008
LCD Workout Graphics
PRESET PROGRAM PROFILES:
PROGRAM 1 PROGRAM 2 PROGRAM 3
MANUAL STEPS HILL
PROGRAM 4 PROGRAM 5 PROGRAM 6
ROLLING VALLEY FAT BURN
PROGRAM 7 PROGRAM 8 PROGRAM 9
RAMP MOUNTAIN INTERVALS
PROGRAM 10 PROGRAM 11 PROGRAM 12
RANDOM PLATEAU FARTLEK
PROGRAM 13
PRECIPICE
USER SETTING PROGRAM
PROGRAM 14
USER 1

Customer Service 1-888-707-1880 17 Maurice Pincoffs Canada Inc.©2008
PROGRAM 15
USER 2
PROGRAM 16
USER 3
PROGRAM 17
USER 4
HEART RATE PROGRAM PROFILES:
PROGRAM 18
55% H.R.C.
PROGRAM 19
65% H.R.C.
PROGRAM 20
75% H.R.C.
PROGRAM 21
85% H.R.C.

Customer Service 1-888-707-1880 18 Maurice Pincoffs Canada Inc.©2008
PROGRAM 22
TARGET H.R.C.
WATT CONTROL PROGRAM
PROGRAM 23
WATT CONTROL
BODY FAT TEST PROGRAMS:
PROGRAM 24
BODY FAT (STOP MODE) BODY FAT (START MODE)
One of the Following Six Profiles Will Display Automatically after Measuring Your BODY FAT:
Workout Time: 40 minutes Workout Time: 40 minutes Workout time: 20 minutes
Workout Time: 40 minutes Workout Time: 40 minutes Workout time: 20 minutes

Customer Service 1-888-707-1880 19 Maurice Pincoffs Canada Inc.©2008
HOW THE ELLIPTICAL WORKS
The elliptical allows your feet to move in a natural elliptical path, minimizing the impact on your knees
and ankles.
The elliptical provides smooth, quiet and variable exercise capabilities with:
xDual Action Handles for total body workout
xStationary handlebar for stability

Customer Service 1-888-707-1880 20 Maurice Pincoffs Canada Inc.©2008
Getting on / off your elliptical
IMPORTANT
The elliptical comes with two Dual Action Handles and a Stationary Handlebar.
Always hold the Stationary Handlebar when getting on and off the elliptical.
First time users should familiarize themselves with using the elliptical by using the
Stationary Handlebar first and then progressing to the Dual Action Handles.
Once you have familiarized yourself with using the elliptical, you can progress to using the
Dual Action Handles to provide a total body workout. Hands can be positioned on the Dual
Action Handles at the most appropriate position for your height and arm length.
Caution should always be taken when getting on and off any exercise machine.
Please follow the safety steps below.
Ensure the left Foot Pedal is in the lowest position and grasp
the Stationary Handlebar with both hands.
Place your left foot on the left Foot Pedal and get secure.
Lift your right foot over machine and place on right Foot
Pedal. Get balanced and begin your workout.
Important
To get off, come to a complete stop and reverse the procedure.
Always wear rubber-soled shoes, such as tennis shoes.
It is recommended that you keep at least one hand on the Stationary Handlebar
at all times, especially when getting on or off. If you are performing a walking
action with your arms, or doing upper body strength training exercises, ensure
you are well balanced.
All equipment should be set-up and operated on solid, level surfaces.
Table of contents
