6
NOTE:
Production residue or dust may have collected on the
appliance. We recommend cleaning the appliance
according to chapter
“Cleaning and Maintenance”.
Appliance Equipment
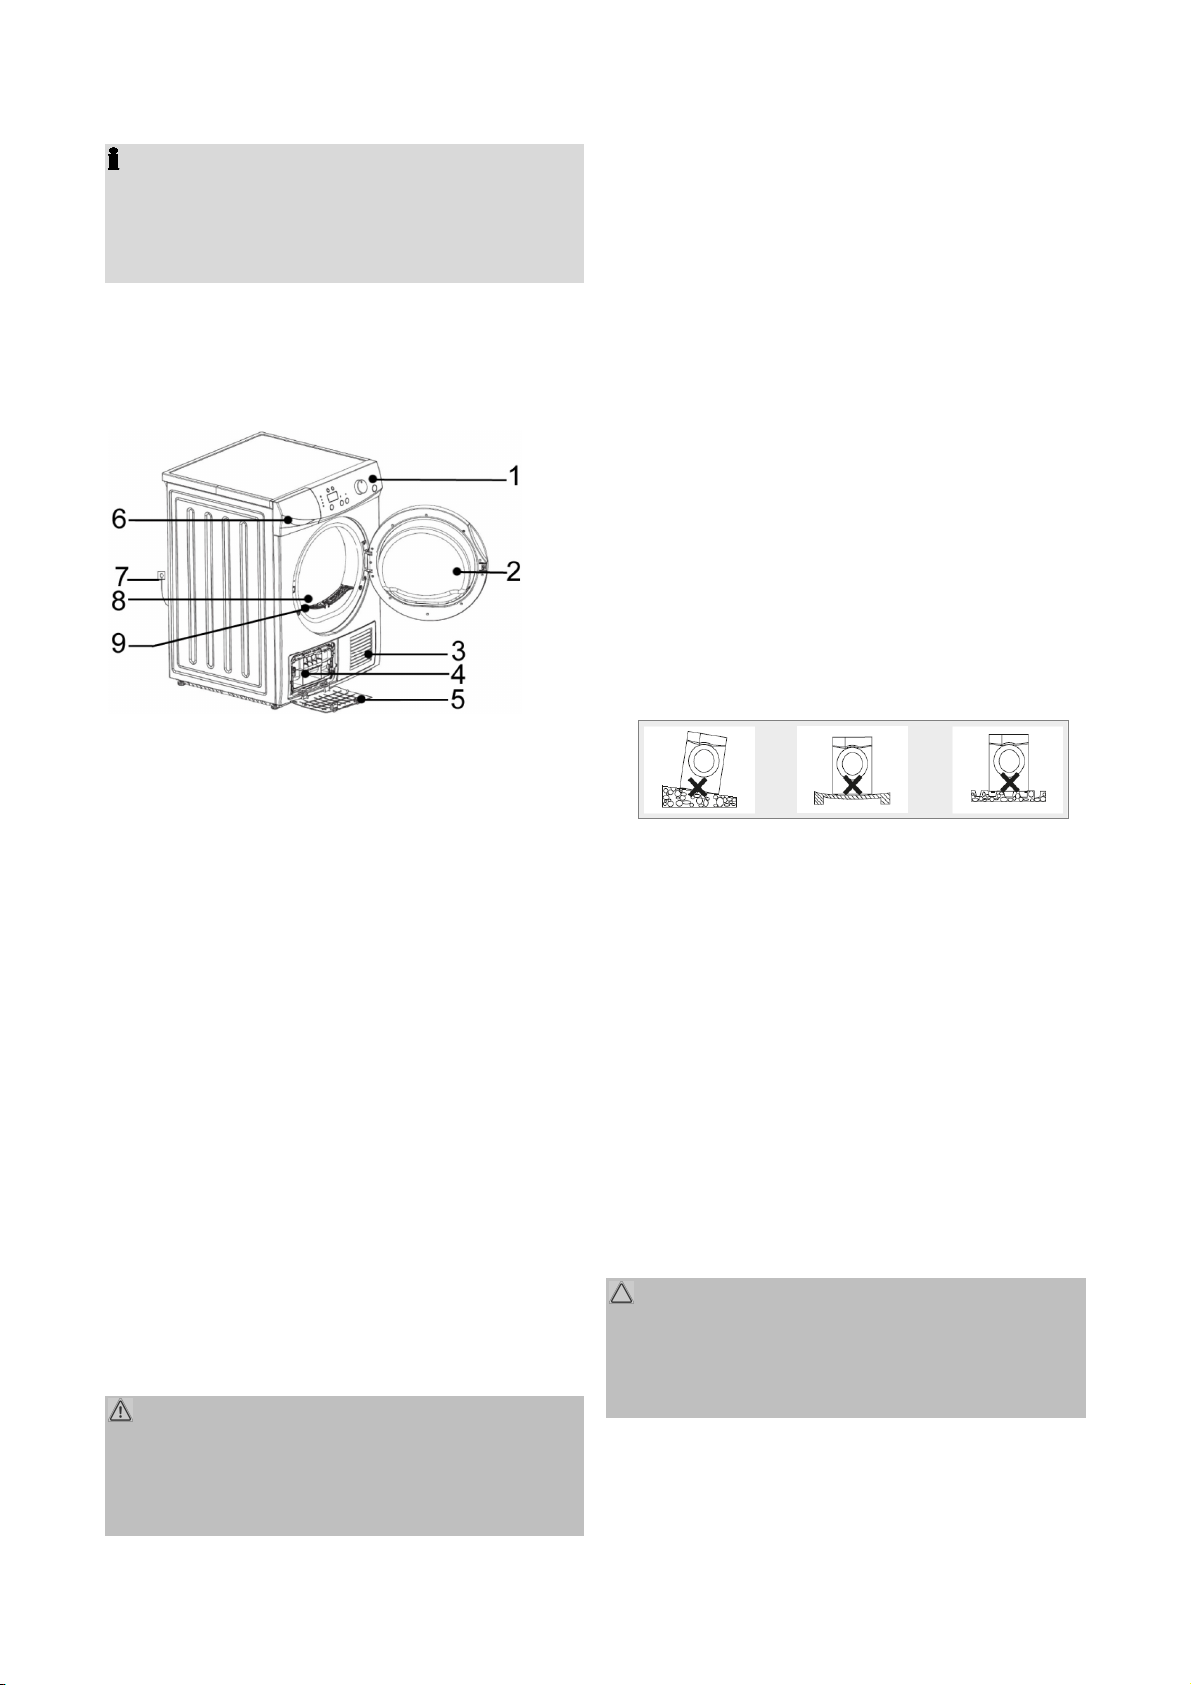
Appliance Overview
1
Control panel 6
Condensation tank
2
Unit door / Bull’s eye 7
Mains plug
3
Ventilation grille 8
Unit drum
4
Filter base 9
Lint filter
5
Service cover
Working principle heat pump
Hot process air flows through the drum and thereby
the therein wet laundry.
The humidity of the laundry is absorbed by the air,
and then discharged in the heat pump. There, the air
is cooled using a refrigerant, which stores the ex-
tracted energy.
Energy is not (hardly) getting lost, because this is
used to warm the cooled air, which is then trans-
ferred to the laundry and thus the circle is closed.
Installation
WARNING:
The unit must not be connected to the mains during
installing. Otherwise there is danger to life or electric
shock hazard!
Installation location
The site should be located near a properly
grounded power socket. The socket must be
freely accessible.
Good ventilation around the appliance is required,
to dissipate the heat properly. Enough clearance
must be created for this purpose.
The free space in front of the unit should be so
that the appliance door can be opened without
hindrance.
Make sure that the floor on which the appliance is
installed, is even, heat-resistant and clean.
Take care of a solid and horizontal position of the
appliance. If the appliance is not horizontally lev-
eled, adjust the feet accordingly (see
“Adjust the
feet”
).
Avoid the installation:
- near heaters, next to a stove, direct sunlight or
any other heat sources;
- at locations with high humidity (e.g. outdoors),
as metal parts would be susceptible to corro-
sion under such circumstances;
- in places where the temperature could drop
below 5°C and rinse above 35°C. Do not ex-
pose the appliance any weather.
- near volatile or flammable materials (e.g. gas,
fuel, alcohol, paint, etc.).
Adjusting the feet
CAUTION:
The feet must never be removed. Do not restrict the
floor clearance through carpets, strips of wood or
similar. Danger of heat accumulation!
Loosen the lock nuts with a wrench.
Turn the feet to the right to let down the appli-
ance; turn to the left to lift it up.