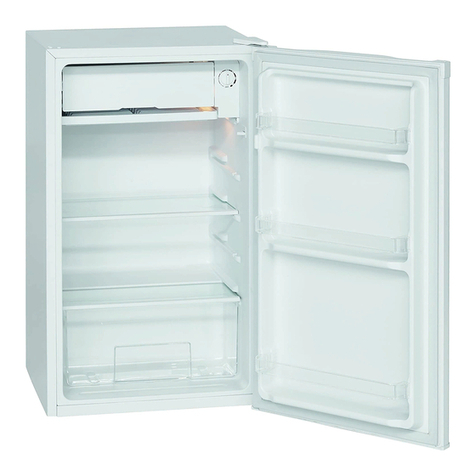
BOMANN KS 163 User manual

Busca este producto en Gatoo.es
www.gatoo.es
Gatoo.es es una plataforma del grupo Sanelmann.

1 07/2010
User Manual
REFRIGERATOR WITH
FREEZER SHELF
KS 163
Please read this manual carefully and keep for future reference!

2 07/2010
TABLE OF CONTENT
OVERVIEW 3
MEANING OF THE “DUSTBIN” SYMBOL 3
IMPORTANT USE AND SAFETY INSTRUCTIONS 3
General safety precautions 3
Riskofinjury 4
Coolant 4
Intended use 4
Unpacking 4
PRODUCT DESCRIPTION 5
Deliveryscope 5
Specifications 5
INSTALLATION 6
Location 6
Powersupply 6
REVERSE THE DOOR OPENING 7
STARTUP/ OPERATION 8
Priortofirstuse 8
Turningon 8
Storing food 8/9
Defrosting 9/10
Operating noise 10
Turningoff 10
TIPS FOR SAVING ENERGY 10
MAINTENANCE AND CLEANING 11
Cleaning and care 11
Reverse the bulb 11
Repairs 11
What if . . . Troubleshooting 11/12

3 07/2010
OVERVIEW
Please read this user manual thoroughly before first time operation. It includes impor-
tant information with regard to installation, operation and maintenance of the device.
Improper use may cause hazardous situations, especially for children.
Keep this manual for future reference. Pass it on to any future owner of this product. In
case of any doubt regarding questions or topics which are not extensively described in this manual,
please contact your distributor or a technician.
MEANING OF THE “DUSTBIN” SYMBOL
This product is marked in accordance with the European waste regulation
2002 / 96 / EC - WEEE
It regulates the proper disposal of the product. Environmentally friendly disposal will pre-
vent possible negative consequences to health caused by improper disposal.
This symbol on the product or its packaging indicates that this product must not be dis-
posed of with the regular household waste. The user has to return the product to a collection point for
the recycling of electric and electronic equipment.
The disposal must comply with the local regulations in place.
For further information please contact your local authorities or waste collection service.
Disable waste equipment before disposal:
•Disconnect the mains plug from the wall socket.
•Disconnect the plug from the mains cable.
•Remove or disable any existing spring or latch locks.
This will prevent children from locking themselves (risk of suffocation!) or from getting into perilous
situations. Children might not understand the risks that arise from handling household devices.
Therefore, observe children and make sure they do not play with the device.
IMPORTANT USE AND SAFETY INSTRUCTIONS
General safety precautions
All safety information in this user manual are marked with a warning symbol. They indicate possible
dangers precociously. It is imperative to read and follow these information.
WARNING
Do not touch the plug at the mains cable with wet or moist hands when connecting or
disconnecting. Risk of death by electric shock!
•In case of emergency, unplug the device immediately.
•Hold the plug when disconnecting the mains cable; do not pull the cable.
•Disconnect the plug before cleaning or servicing.
•Regularly check the device and cable for signs of damage. Do not continue to operate the device in
case of damage.
•A damaged mains cable must be replaced by the manufacturer or a technician and without any
delay. Do not use the device with a damaged cable or plug.
•Do not repair the device by yourself. Please contact authorized personnel. In order to avoid ha-
zards. A damaged mains cable must be replaced with an equivalent cable by the manufacturer or
qualified specialist.
•Except for cleaning and maintenance work described in this manual, no other alterations of this
device must be executed.
•Do not place vases or other containers filled with liquids on the device.

4 07/2010
Risk of injury!
•So that you can disconnect the appliance quickly in event of an emergency, do not use extension
cables.
•This device may not be operated by children or persons with physical, sensory or mental abilities or
lack of experience and knowledge, unless they are supervised or guided.
•Children should be supervised to ensure that they do not play with the device.
•Transport the unit never with content.
WARNING
Packaging materials (e.g. plastic bags, polystyrene) are dangerous for children.
Risk of suffocation! Keep packaging materials out of reach of children.
WARNING
Containers with flammable gases or liquids can leak due to cold ambient temperatures.
Risk of explosion! Do not store combustible materials such as aerosol cans or refill car-
tridges for lighters in your device.
Coolant
CAUTION
The coolant circuit of this device contains the refrigerant isobutane (R600a), a natural
gas that is flammable and of high environmental compatibility. Make sure no parts of
the Coolant circuit gets damaged during transport and installation of the device.
If the coolant circuit is damaged:
•it is imperative to avoid any open flames or ignition source.
•thoroughly air the room in which the device is installed.
Intended use
•This device is intended for private use. It is suitable for cooling/freezing food.
•The manufacturer is not reliable for any damage resulting from improper or other then intended
use.
•For safety reasons, alterations or modifications of the device are prohibited.
•Please keep in mind that the manufacturer is not reliable for any damage resulting from commercial
or any other use then cooling/freezing food.
Unpacking
The packaging must be undamaged. Check the device for any possible transport damage. Do not
install a damaged device. In case of damage, please contact your distributor.
Packaging material
The packaging for transportation of the device and individual parts is produced of recyclable materials.
•corrugated cardboard / paperboard (mainly of waste paper)
•form part of PS (foamed, CFC-free polystyrene)
•Films and bags of PE (polyethylene)
•Strapping strips of PP (polypropylene)
WICHTIG
Make sure you dispose of packaging materials environmentally friendly (see page 3).
Removing the transport protection
The device and parts of the interior are protected for transport. Remove all adhesive tapes from the
right and left side of the door. You may remove adhesive residue with a cleaning solvent. Also remove
any adhesive tapes and packaging materials from the inside of the device.

5 07/2010
PRODUCT DESCRIPTION
Delivery scope
The delivery scope of this device includes one height-adjustable glass shelf, a vegetable box with
glass cover, three door shelves, an egg tray and an ice-cube tray.
Specifications
All device-specific data of the energy label have been determined by the manufacturer under laborato-
ry conditions in accordance with pan-European standardized measuring methods. These are regulated
by EN ISO 15502. The actual energy consumption depends on the usage and might therefore also be
above the values determined by the manufacturer under standard conditions.
An expert knows these relations and will execute the tests with special measurement instruments in
accordance with the regulations in place.
MANUFACTURER DATA
Product is subject to changes and improvements.
BOMANN Model No. KS 163
Energy efficiency class(1) A+
Climate class(2) N
Gross / net capacity, total 101 l / 98 l
Net capacity refrigerator / freezer shelf 87 l / 11 l
Freezing capacity 1 kg / 24 h
Storage time in case of defect 10 h
Power consumption(3) 0,45 kWh/24h - 164 kWh/year
Power supply 220-240 V, 50 Hz
Input power 90 W
Operating noise 42 dB(A)
Dimensions H x W x D 84,7 x 49,4 x 49,4 cm
Gross / net weight 31,0 / 28,0 kg
Coolant R600a
(1)
A= economical - G= less economical
(2) Climate class SN (Subnormal): ambient temperature of +10°C up to +32 C
Climate class N (Normal): ambient temperature of +16 C up to +32 C
Climate class ST (Subtropics): ambient temperature of +18 C up to +38 C
Climate class T (Tropics): ambient temperature of +18 C up to +43 C
(3) The actual energy consumption depends on the use and installation of the device.

6 07/2010
INSTALLATION
Location
Sufficient ventilation around the device is necessary in order for the heat to dissipate properly and to
guarantee efficient cooling operation at low power consumption. For this purpose, leave sufficient
space around the device.
•Minimum clearance of 10 cm between rear side and wall,
•at least 2 cm on both sides and 5 cm on top of the device.
•Leave proper space in front of the device in order to open the door at an angle of 160°.
IMPORTANT
•Do not expose the device to direct sunlight.
•Do not place near heaters, next to a stove or any other heat sources.
•Do not use the device outdoors.
•Only install at a location with an ambient temperature suitable for the climate class of the device.
For information on the climate class, please refer to chapter “Specifications“ or to the rating label
located in the interior or on the rear side of the device.
•Avoid installation at locations with high humidity (e.g. outdoors, bathroom), as metal parts would be
susceptible to corrosion under such circumstances.
•Do not place the device near volatile or combustible materials (e.g. gas, fuel, alcohol, paint, etc.)
and in rooms which may have poor air circulation (e.g. garages).
•Only place on a steady and safe surface.
•If the device is not horizontally leveled, adjust the feet accordingly.
Power supply
The kind of current (AC) and the voltage must be conform with the data of the rating label, located
inside or outside on the back of the unit. In case of heavy voltage fluctuations, it is recommended to
use an automatic alternating current regulator.
The plug, together with the grounding conductor, must fit into the wall socket. The mains plug must be
freely accessible.
Mains cable
•Do not extend or roll up the cable during operation.
•Also, the cable must not be near the compressor on the rear side, since latter one gets hot during
operation. In case of any contact, the isolation would be damaged resulting in electric leakage.
•The use of extension cables is not recommended.
•Do not connect the device to the mains with wet hands.
•Install the device for the wall socket to be freely accessible.

7 07/2010
REVERSE THE DOOR OPENING
If required, the door opening can be moved from the right (supplied condition) to the left side.
WARNING
When replacing the door stop, the device must be disconnected from the power supply.
Always unplug the device first.
1. Use a screw-driver to remove the screw covers (11) at the device top cover. Unscrew the below
screws (10) and remove the device cover (9).
2. Put the blind cap (8) of the device top cover (9) at the opposite side.
3. Dismount the upper door hinge (5) by unscrewing the screws (6).
Open the door a little, take the door carefully from the lower door hinge (2).
4. Put the blind cap (7) of the device door at the opposite side and place the door on a padded sur-
face to prevent it from scratches.
5. Tilt the device slightly backwards and block it in this position.
Unscrew both feet (3) and (4) and remove the lower door hinge (2) by unscrewing the screws (1).
6. Move the hinge (2) to the other side of the device accordingly and fix it with the screws (1).
Screw both feet (3) and (4) on again.
7. Replace the device in the upright position again. Insert the device door on the hinge pin of the low-
er door hinge (2) and fix the door to the property position.
8. Attach the upper door hinge (5) by using the screws (6) to the opposite side accordingly.
9. Put the in point 1 removed device top cover on again, tight the screws (10) and clip the screw cov-
ers (11) on.
Check if the door is arranged vertical as well as horizontal, so that a smooth opening and closing of
the door is ensured.
Reverse the freezer flap opening
Open the freezer flap a little. Press the spring of the lower bracket up
slightly with a small screw-driver and remove the bracket incl. freezer flap.
Place the blind cap (M) at the opposite side. Turn the freezer flap about
180° and press the lower flap bracket into the appropriated fixture of the
freezer flap.
Lift the freezer flap a little and fix it in the upper door bracket, at the same
time you press the lower door bracket in the square hole. Small adjust-
ments to the top and bottom will easily the mounting of the flap.

8 07/2010
STARTUP / OPERATION
Prior to first use
ATTENTION
After transport, the device should be left standing for 4 hours in order for the oil
to be collected in the compressor.
Nonobservance could cause damage to the compressor and hence result in failure of the device. This
would void your warranty claim.
•Clean the interior of the device including all accessory parts located inside.
Connect the device to the mains supply
IMPORTANT
The device must be earthed properly. For this purpose the plug of the mains cable has
been fitted with the intended lead.
IMPORTANT
Contact an electrician if the plug does not fit in the wall socket.
IMPORTANT
In case you disconnect the device or in case of power failure: Wait for 5 minutes before
restarting the device.
Turning on
Turn on the device by connecting the plug to a wall socket and turning the temperature control, which
is located at the right side of the interior. Please also refer to chapter “Settings“.
Settings
Setting 0 – OFF indicates the device is turned off.
Turn the temperature control clockwise, starting from this setting; the device will turn on automatically.
The Settings 1 MIN – 7 MAX regulate the inside temperature. When opening the door, the interior
lamp will turn on.
Setting 0 (or OFF) = Off
Setting 1 (or MIN) = lowest setting (warmest inside temperature)
Setting 7 (or MAX) = highest setting (coldest inside temperature)
Turning the temperature control clockwise will lower the inside temperature. Please keep in mind that
the temperature changes with the ambient temperature (of the location), with the frequency of opening
the door and the amount of food in the device.
During initial operation, turn the temperature control to the highest setting first, until the device has
reached the desired operating temperature. Afterwards It is recommended to turn the control back to a
medium setting, correcting the temperature at a later point would then be easier.
Storing food - Refrigerator
Note: Always store food covered or packed in order to prevent drying-out and transfer of odor or taste
onto other food items.
You may pack the food with:
•Polyethylene plastic bags or foil
•Plastic containers with a lid
•Special elasticated plastic covers
•Aluminum foil
The following safety precautions are recommended
•The device is suitable for storing fresh food and drinks.
•Store fresh packed items on the glass shelves and fresh fruits and vegetables in the vegetable box.
•Place bottles in the shelves of the inside of the door.

9 07/2010
•Store meat well packed and only for 2 to 3 days. Avoid contact with cooked dishes.
•Let warm food cool down before putting it in the device.
Storing food – Freezer shelf
The - freezer allows you to store frozen food at a temperature of -18°C or below (from a middle
temperature control setting) for several months, to produce ice cubes and to freeze fresh good.
The temperature of the device is automatically controlled by the temperature control in the refrigerator.
Due to external influences such as room temperature, placements, frequency of opening the door and
the amount of food the temperature in the freezer can be influenced.
Freezing
•24 hours before freezing we recommend to turn the temperature control to the max. setting and to
keep this setting even after freezing for a few hours.
The device is not compromised if the setting will not revert to a normal operating temperature (tem-
perature control in middle setting) after the freezing process, but for economic reasons you should
possibly avoid it.
•Fresh food should be frozen as fast as possible to the core. Therefore during freezing operation,
the temperature of fresh food should be lowered as fast as possible in order to keep formation of
ice crystals as little as possible and not to damage the food structure.
•If the freezing process is too slow, ice crystals build up and the food quality might get affected.
•Frozen food should be kept in contact with the bottom of the compartment.
•Keep a space between the single items for air circulation.
Storing frozen food
•Packed frozen merchandise should be stored in a 4-star-freezer compartment in accordance with
the manufacturer’s data. Make sure the food items do not defrost after purchase and to store them
as fast as possible in the freezer.
•It is possible to store food for longer periods of time, up to three months. This period might vary, so
please observe the storage information on the packaging of the merchandise.
IMPORTANT
Make sure that the temperature in the freezer does not rise above -18°C.
Moreover the device should be defrosted regularly. A thick layer of ice on the wall dete-
riorates the cooling effect and the power consumption increases.
Safety precautions
•Do not store sizzling drinks in this device, such as mineral water, beer, sparkling wine, coke etc.
(risk of explosion).
•Once products have been defrosted halfway or completely, they should be consumed as soon as
possible and should not be frozen again, except they have been processed to a ready meal.
•In case of power failure, do not open the door. If the failure does not take longer than 10 hours, the
food will not be affected.
•Do not store bottles or cans. These can break when the contents freeze – or even explode, if they
contain carbonated drinks.
•Do not eat food that is still frozen. Do not allow children to eat ice cream directly from the freezer.
The cold can cause injuries in the oral cavity.
•Touching metal parts inside the device can cause symptoms similar to burns if the skin is very sen-
sitive.
•Do not touch frozen food with moist or wet hands; they could freeze to the items.
Defrosting
The refrigerator has a automatic defrosting system.
During defrosting the water drops drain off at the rear side of the cooling chamber.
The water running through a flume, is collected in a container underneath the compressor, where it will
evaporate. Make sure the flume does not get clogged. Clean it carefully with a pipe cleaner or knitting
needle. A light formation of ice on the rear side during operation is normal.
To achieve better cooling and to save energy, defrost the freezer shelf regularly. To start the defrost-
ing process turn the temperature control to the position 0 - OFF and disconnect the plug.
Remove the food items and keep covered at a cool location.
10 07/2010
When the ice has melted, pour the condensate away and dry the interior of the device.
You may then restart the device by connecting the plug and turning the temperature control.
WARNING
Never use metal objects (e.g. knives) for removing ice from the vaporizer. The vaporizer
could be damaged. A defect vaporizer could cause serious damages.
Operating noise
NORMAL NOISE
TYPE OF SOUND CAUSE/ SOLUTION
Mumbling Caused by the compressor during its operation.
This is stronger when it turns on or off.
Liquid sounds Caused by the circulation of the refrigerant in the
device.
Click sounds The temperature control turns the compressor on or
off.
Disturbing noises Vibration of the shelves or cooling coils – check if
those are securely fastened.
Turning off
Turn the temperature to setting 0 – OFF in order to turn off the device.
If the device will not be operated for a longer period of time:
•Remove the entire food from the device.
•Turn the temperature control to setting 0 - OFF.
•Disconnect the plug or turn off / unscrew the fuse.
•Thoroughly clean the device (refer to chapter of “Cleaning and Care”).
•Keep the door open in order to prevent bad odors.
TIPS FOR SAVING ENERGY
•Disconnect the plug if you do not use the device.
•Do not install the device near stoves, heaters or other heat sources. In case of higher ambient
temperatures, the compressor will run more frequently and longer.
•Ensure sufficient ventilation at the bottom and rear side of the device.
Never block any ventilation openings.
•Allow warm dishes to cool down before putting them in the device.
•Do not open the door longer then necessary.
•Only set the temperature as low as needed. The ideal temperature in the fridge is 7°C.
It should be measured in the upper shelf, as far as possible in the front.
•Make sure that the temperature in the freezer does not rise above -18°C.
•The freezer should be defrosted regularly.
•Always keep the condenser – metal grid on the rear side (if existing) – clean.
•Make sure the door sealing is in good order for the door to close properly.

11 07/2010
MAINTENANCE AND CLEANING
Cleaning and care
For hygienic reasons, clean the interior and accessory parts regularly.
•Remove all food and keep covered at a cool location.
•Use warm water and a mild detergent for cleaning the interior (including rear side and bottom).
•Check the discharge opening.
•After thorough drying, restart operation.
•Clean the condenser - metal grid on the rear side (if existing) once a year, using a soft brush or
vacuum cleaner.
WARNING
Do not bend the cooling coils.
Do not use arenaceous abrasives.
Reverse the bulb
Lamp specifications: 220-240V, max. 15W
To turn off the device, set the temperature control to setting 0 - OFF.
Disconnect the plug or turn off the fuse!
•Remove the screw from the lamp cover.
•Press on the lamp cover and remove to the back.
•Replace defect illuminant.
•Reattach the lamp cover and fasten the screw.
•Reconnect the device and turn on.
Repairs
WARNING
Servicing of electric devices must be conducted by qualified experts only. Incorrect or
improper repairs constitute a risk for the user and will void the warranty!
What if . . . Troubleshooting
The design of the device ensures a trouble-free operation as well as a long life cycle. Nevertheless, if
any defect occurs during operation, please check if it is caused by improper operation.
The following problems can be solved by you by checking for the possible cause.
PROBLEM POSSIBLE CAUSE SOLUTION
The device is
not cooling
properly or at
all
Is the plug securely connected to the
mains? Has the safety mechanism of the
wall socket been triggered?
Is the temperature control properly set?
Is the place unqualified?
Do food items prevent the door from closing
properly?
Is the ventilation of the device hedged?
Connect the plug properly to the socket,
turn on the fuse, and contact a technician if
necessary.
Check the settings.
Check the ambient temperature.
Arrange the food properly.
Clear the ventilation slits, install the device
freely
WARNING
Always disconnect the plug or turn off/ unscrew the fuse before cleaning. Pull the plug
and not the cable.
WARNING
Do not use steam cleaners for cleaning the device; moisture could enter electrical com-
ponents. Risk of electric shock! Hot steam could damage the plastic parts. The device
must be dry before restarting operation.
IMPORTANT
Essential oils and organic solvents, such as the juice of lemon or orange skin, butanoic
acid or cleaning agents containing acetic acid can damage plastic parts. Prevent con-
tact of any part with such substances. Do not use abrasive cleaning agents.

12 07/2010
Loud noise
during opera-
tion
Does the device not stand vertical or hori-
zontal? Adjust the feet accordingly.
Liquid flow sounds in the cooling circuit are
normal.
Water on the
bottom. Is the temperature control set properly?
Is the condensate flume clogged? Check the temperature settings.
Clean the discharge opening with a pipe
cleaner or knitting needle.
Interior lamp
does not
work.
Is the plug not connected to the mains?
Has the safety mechanism of the wall
socket been triggered?
Is the illuminant defect?
Connect the plug properly to the socket,
turn on the fuse, and contact a technician if
necessary.
Disconnect the plug and replace the illumi-
nant (refer to chapter “Replacing the illumi-
nant”).
Note. On days of high humidity, condensation might occur on the outer surface of the device. This is
no malfunction; you may simply wipe the water off.
If a problem still persists after following the steps above, please contact your distributor or a techni-
cian.
Are you interested in other Bomann products? Please visit our website:
www.bomann.de
Distribution: C. Bomann GmbH • Heinrich-Horten-Str. 17 • D-47906 Kempen
This manual suits for next models
1
Table of contents
Other BOMANN Refrigerator manuals

BOMANN
BOMANN 734000 User manual

BOMANN
BOMANN KG 185 User manual

BOMANN
BOMANN KB 7245 User manual

BOMANN
BOMANN DTR 353 User manual

BOMANN
BOMANN VS 2185.1 User manual

BOMANN
BOMANN KG 7312 User manual

BOMANN
BOMANN VS 2185.1 User manual

BOMANN
BOMANN KG 7305 User manual

BOMANN
BOMANN VS 2195 User manual

BOMANN
BOMANN VS 7231 User manual

BOMANN
BOMANN SBS 2192 IX User manual

BOMANN
BOMANN KG 180 User manual

BOMANN
BOMANN KGE 7808.1 User manual

BOMANN
BOMANN GS 2181 User manual

BOMANN
BOMANN SBS 7335 IX User manual

BOMANN
BOMANN KSE 336 User manual

BOMANN
BOMANN VS 2195.1 User manual

BOMANN
BOMANN KS 263 User manual

BOMANN
BOMANN KG 7300 User manual

BOMANN
BOMANN DT 7318 User manual