Boost BLGL-Al-A60-20-A66-Al User manual

LED GROW LIGHT
1 PACK BLGL-Al-A60-20-A66-Al
INSTALLATION GUIDE
WARNING:
These products may represent a possible shock or fire hazard if improperly installed. Products should be installed in accordance
to the manual, current electrical codes and/or the current National Electric Code (NEC).
PLANNING YOUR INSTALLATION
PACKAGE CONTENTS
Grow light (1) 5ft plug-in power cord (1) Assistive Template (1)
HARDWARE INCLUDED
DD
TOOLS TYPICALLY USED FOR INSTALLATION
Installation
1. Remove the clear wrap on Light fixture before installation.
2. Choose your desired installation location.
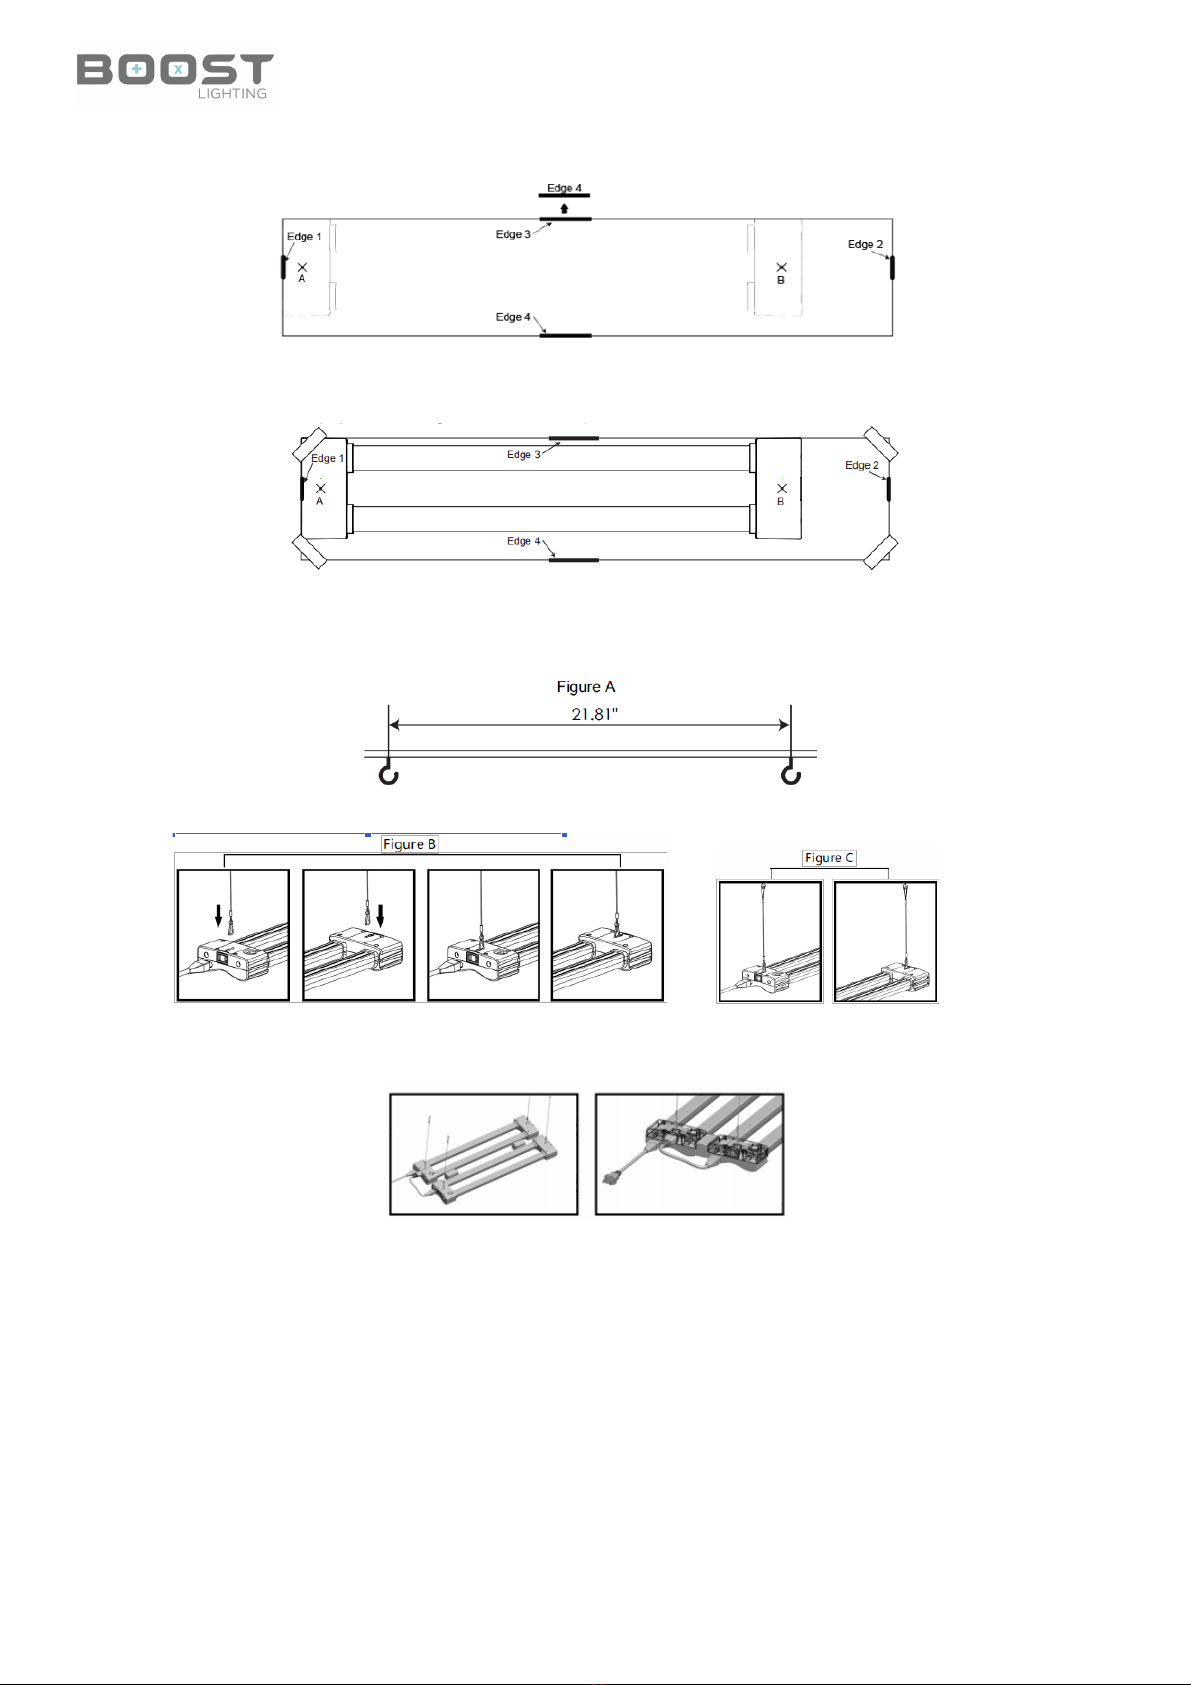
3. On the Assistive Temp l at e provided, make two small holes at marks A and B (see below illustration).
LED GROW LIGHT
4. Tap e Assistive Temp l at e to desired installation location (see below illustration; use this step if mounting directly to a
hard surface vs using hooks and hanging cables).
5. Drill two small holes at the marks A and B at your desired installation location (note distance between the holes).
6. Remove Assistive Temp la t e, then screw hooks into the holes at your desired installation location (Figure A).
7. Hook the hanging cable to end-cap. (Figure B) 8. Hang cable to ceiling hook. (Figure C)
9. Slide small connection boxes from the space between two fixtures to end-cap. (Figure D below)
10. Plug in the products power cord to desired outlet or extension cord.
LIMITED WARRANTY
This product is warranted to be free from defects in workmanship and materials for up to 5 years from date of purchase. If it fails
to do so, please contact BOOST Lighting: info@booslightinginc.com for instructions on replacement. Do not return the product
to the store. For comments please write to:
BOOST Lighting, lnc.
c/o: Customer Service Department
3235 Satellite Place, Bldg.400, Suite 358 Duluth, GA 30096
Table of contents
Other Boost Lighting Equipment manuals


Popular Lighting Equipment manuals by other brands


SloanLED
SloanLED PrismBEAM 24V installation guide

American Lighting
American Lighting OMNI Puck installation instructions

Pro Dunk Hoops
Pro Dunk Hoops Goal Light LED owner's manual

iHome
iHome iHL03 quick start guide

Armacost Lighting
Armacost Lighting GroFlex GFS2835060 quick start guide

Eaton
Eaton SafeLite Mounting and operating instructions


