borne CS-TP10 User manual
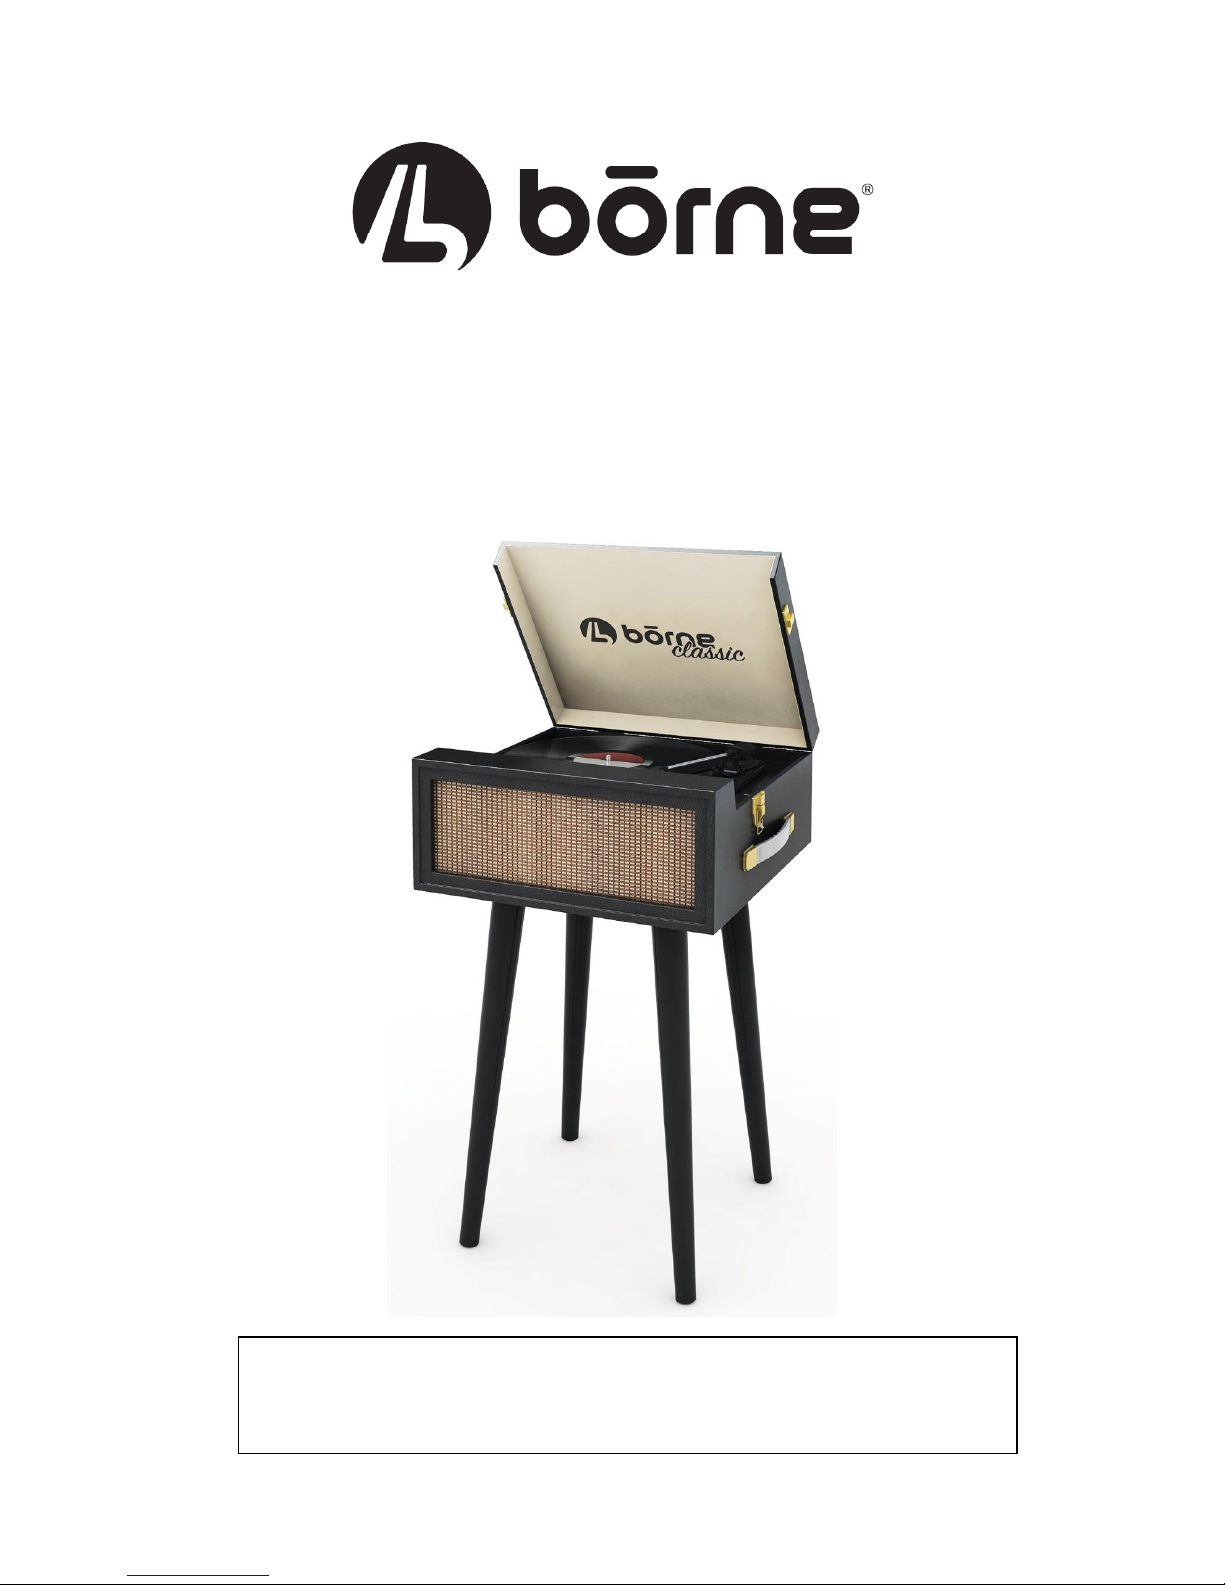
CLASSIC TUNTABLE
BLUETOOTH SPEAKER
PLEASE READ THIS USER MANUAL COMPLETELY BEFORE
OPERATING THIS UNIT AND RETAIN THIS BOOKLET FOR
FUTURE REFERENCE.
CS-TP10

E-1
WARNING
TO PREVENT FIRE OR ELECTRIC SHOCK, DO NOT USE THIS PLUG WITH AN
EXTENSION CORD, RECEPTACLE OR OTHER OUTLET UNLESS THE BLADE
TERMINALS CAN BE FULLY INSERTED TO PREVENT ANY EXPOSURE. TO
PREVENT FIRE OR SHOCK HAZARD, DO NOT EXPOSE THIS PRODUCT TO RAIN OR
MOISTURE.
IMPORTANT SAFETY INSTRUCTIONS
1. Read these instructions carefully.
2. Keep these instructions in a safe place.
3. Follow all instructions.
4. Do not use this product near water.
5. Cleaning: Unplug this product from the wall outlet before cleaning. Do not use liquid cleaners or aerosol
cleaners. Clean only with a dry cloth.
6. Do not block any ventilation openings. Install in accordance with the manufacturer’s instructions.
7. Do not place this product on an unstable cart, stand, tripod, bracket, or table. The product may fall,
causing serious injury to a child or adult and serious damage to the product. Use only with a cart, stand,
tripod, bracket, or table recommended by the manufacturer, or sold with the product. Any mounting of
the product should follow the manufacturer’s instructions, and should use a mounting accessory
recommended by the manufacturer. A product and cart combination should be moved with care-quick
stops, excessive force and uneven surfaces may cause the product and cart combination to overturn.
8. Do not install near any heat sources such as radiators, heat registers, stoves, or other apparatuses
(including amplifiers) that produce heat.
9. If the provided plug does not fit into your outlet, consult an electrician for replacement of the outlet.
10. Protect the power cord from being walked on or pinched particularly at plugs, convenience receptacles,
and the point where they exit from the product.
11. Only use attachments/accessories specified by the manufacturer.
12. Unplug this product during lightning storms or when unused for a long periods of time.
13. Refer all servicing to qualified service personnel. Servicing is required when the product has been
damaged in any way, such as the power-supply cord or the plug is damaged, liquid has been spilled or
objects have fallen into the product, the product has been exposed to rain or moisture, does not operate
normally, or has been dropped.
14. This product shall not be exposed to dripping or splashing water and that no object filled with liquids
such as vases shall be placed on the product.
15. Do not overload the wall outlet. Use power source only as indicated.
16. Use replacement part as specified by the manufacturer.
17. Upon completion of any service or repairs to this product, ask the service technician to perform safety
checks.
18. Power Sources: This product should be operated only from the type of power source indicated on the
marking label. If you are not sure of the type of power supply to your home, consult your product dealer
or local power company. For products intended to operate from battery power, or other sources, refer to
the operating instructions.
19. Object and Liquid Entry: Never push objects of any kind into this product through openings as they may
touch dangerous voltage points or short-out parts that could result in a fire or electric shock. Never spill
liquid of any kind on the product.
20. This appliance is not intended for use by persons (including children) with reduced physical, sensory or
mental capabilities or lack of experience and knowledge unless they have been given supervision or
instructions concerning the use of the product by a person responsible for their safety.
21. Damage Requiring Service: Unplug this product from the wall outlet and refer servicing to qualified
service personnel under the following conditions:
a) When the power-supply cord or plug is damaged,
b) If liquid has been spilled, or objects have fallen into the product,
c) If the product has been exposed to rain or water,

E-2
d) If the product does not operate normally by following the operating instructions. Adjust only those
controls that are covered by the operating instructions as an improper adjustment of other controls
may result in damage and will often require extensive work by a qualified technician to restore the
product to its normal operation.
e) If the product has been dropped or damaged in any way, and
f) When the product exhibits a distinct change in performance - this indicates a need for service.
FCC Warning
This device complies with part 15 of the FCC Rules. Operation is subject to the following two conditions: (1)
This device may not cause harmful interference, and (2) this device must accept any interference received,
including interference that may cause undesired operation.
NOTE 1: This equipment has been tested and found to comply with the limits for a Class B digital device,
pursuant to part 15 of the FCC Rules. These limits are designed to provide reasonable protection against
harmful interference in a residential installation. This equipment generates, uses and can radiate radio
frequency energy and, if not installed and used in accordance with the instructions, may cause harmful
interference to radio communications. However, there is no guarantee that interference will not occur in a
particular installation. If this equipment does cause harmful interference to radio or television reception, which
can be determined by turning the equipment off and on, the user is encouraged to try to correct the
interference by one or more of the following measures:
-Reorient or relocate the receiving antenna.
-Increase the separation between the equipment and receiver.
-Connect the equipment into an outlet on a circuit different from that to which the receiver is connected.
-Consult the dealer or an experienced radio/TV technician for help.
IC Warning
This device complies with Industry Canada license-exempt RSS standard(s). Operation is subject to the
following two conditions: (1) this device may not cause interference, and (2) this device must accept any
interference, including interference that may cause undesired operation of the device.
SAVE THESE INSTRUCTIONS
Thank you for your purchase.
Please visit our website at www.borne-lifestyle.com.
This equipment complies with FCC radiation exposure limits set forth for an uncontrolled environment.
This equipment should be installed and operated with minimum distance 20cm between the radiator & your body.
This equipment should be installed and operated with minimum distance 20cm between the radiator and your body.
Cet appareil radio est conforme au CNR-247d’Industrie Canada. L’utilisation de ce dispositif est autorisée seulement auxCet appareil radio est conforme au CNR-247d’Industrie Canada. L’utilisation de ce dispositif est autorisée seulement auxCet appareil radio est conforme au CNR-247d’Industrie Canada. L’utilisation de ce dispositif est autorisée seulement aux
Le pr¨|sent appareil est conforme aux CNR d'Industrie Canada applicables aux appareils
radio exempts de licence. Son fonctionnement est soumis aux deux conditions suivantes :
(1)l’appareil ne doit pas produire de brouillage, et
(2)l’utilisateur de l’appareildoit accepter tout brouillageradioélectrique subi, mêmesi le
brouillage est susceptible d’en compromettre le fonctionnement.
Cet équipement doit être installé et utilisé à une distance minimale de 20 cm entre le radiateur et votre corps.
CAN ICES-3(B)/NMB-3(B)
Changes or modifications not expressly approved by the party responsible for compliance could void the user’s
authority to operate the equipment.

E-3
LOCATION OF CONTROLS
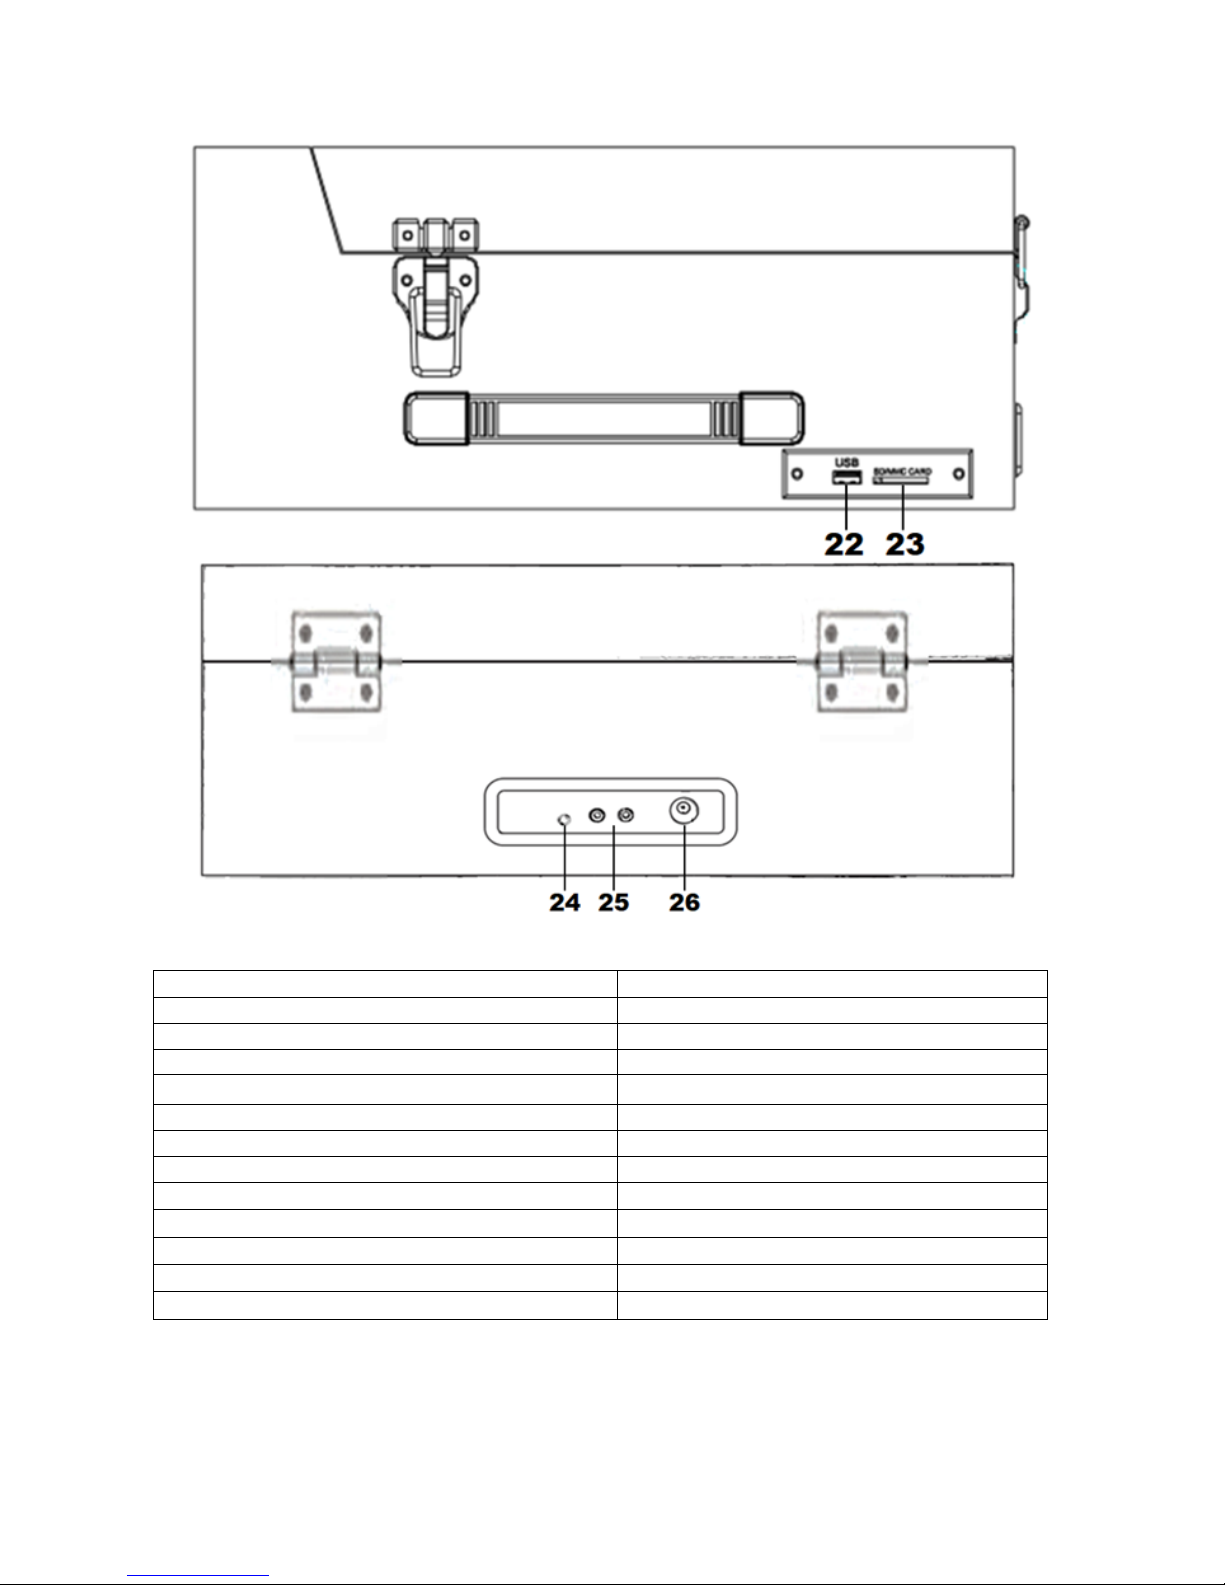
E-4
1. Latch 14. Skip Backward Button
2. Turntable Cover 15. Speed Selection Switch (33/45/78 RPM)
3. Latch 16. Tone Arm Clip
4. Carry Handle 17. Power Indicator Light
5. Legs 18. Power & Volume Knob
6. Speakers 19. Earphone / Headphone Jack
7. 45 RPM Adapter 20. Stylus Cartridge
8. Tone Arm 21. Turntable Platter
9. Lift Lever 22. USB Port
10. Mode Button (REC/USB/SD/Bluetooth) 23. SD Card Input
11. Auto Stop & ON/OFF Control 24. Aux-in Port
12. Skip Forward Button 25. RCA Audio Output Jack
13. Play/Pause/Delete Button 26. DC IN Power Adapter Jack

E-5
POWER SUPPLY
This unit operates on 100-240V~ 50/60Hz. Do not attempt to operate the product on any other power source.
You could cause damage to the unit and void your warranty. Please be sure the power outlet you plug this
unit into is working and receives constant (un-switched) power.
Insert the power adapter into the DC IN Jack on the back of the unit, then plug other end into an AC wall outlet.
TURNTABLE OPERATION
NOTE: The turntable has a protective cap over the Stylus Cartridge. Please make sure to remove the
protective cap before playing records. Do not dispose of the protective cap. You can use this to
protect the Stylus Cartridge during transporting the turntable.
1. Release the Latch on both sides of the Turntable Cover and open the lid.
2. Turn the unit on by turning the Power and Volume Knob. The red Power Indicator Light will show the
turntable is on.
3. Place a record on the Turntable Platter and using the Speed Selector Switch, select your desired speed
(33 / 45 / 78 RPM).
NOTE: When playing a 45 RPM record, use the included 45 RPM Adapter.
4. Open the Tone Arm Clip to release the Tone Arm and push the Lift Lever to lift the Tone Arm.
5. Gently move the Tone Arm to the desired position over the record. The record will begin to spin as the
Tone Arm moves above the record.
6. Pull the Lift Lever to slowly lower the Tone Arm onto the record and it will start to play.
7. Rotate the Volume Knob to adjust to the desired output level.
8. To turn off the turntable, turn the Power and Volume Knob until the red Power Indicator Light turns off.
NOTE: By default the Auto Stop Switch is in the ON position. This will automatically stop playing the
record when it is finished. When the Auto Stop Switch is in the OFF position, the record will not
automatically stop when finished.
COVERTING RECORDS TO MP3
1. Insert a USB thumb drive into the USB Port or a SD card into the SD Card Port.
2. Following the steps above for the turntable operation, place a record on the Turntable Platter, turn on the
turntable and release the tone arm. Move the Tone Arm to the desired position over the record and the
record will begin to spin
3. Press and hold the Mode Button (RECORD Button) to start recording and you will hear 1 beep. This will
start to record and convert the music to digital MP3 files on the USB drive or SD Card.
4. Pull the Lift Lever to slowly lower the Tone Arm onto the record to start playing and recording the music.
5. To stop recording, press and hold the Mode Button (RECORD Button) and you will hear 2 beeps. You
can repeat this process to convert more songs to MP3.
NOTE: Please ensure the volume is turned up to hear the beeps to start and end recording.
6. The converted music will be stored on the USB thumb drive or SD Card in a folder named RECORD0.
USB & SD CARD PLAYBACK
1. Insert a USB thumb drive into the USB Port that contains MP3 music files.
2. Turn the unit on by turning the Power and Volume Knob and press the Mode Button repeatedly to cycle
between Bluetooth, USB and SD Card functions. Once you reach the USB function, the music will start
to play automatically.
3. Adjust the volume and use the Play/Pause, Skip Forward and Skip Backward buttons to control the
music.
4. Repeat the above steps for SD Card playback.

E-6
NOTE: To delete all MP3 music files on the USB thumb drive or SD Card, press pause during playback,
then press and hold the Play/Pause/Delete Button for several seconds until you hear a beep. This will
delete all MP3 music from the USB thumb drive or SD Card.
BLUETOOTH MODE
Pairing a Bluetooth Enabled Device for the First Time
NOTE: Refer to the user manual for your Bluetooth enabled device for instructions on pairing and connecting
Bluetooth devices.
1. Keep the turntable and your Bluetooth enabled device within 1 metre at all times during the pairing
process.
2. Make sure the Tone Arm is in its resting position and not in use. Turn the unit on by turning the Power
and Volume Knob. & you will hear an alert tone. If you have an USB thumb drive or SD Card inserted,
press the Mode Button repeatedly to cycle through the various functions until you hear an alert tone
for the Bluetooth function.
3. Turn on the Bluetooth function on your Bluetooth enabled device and search for Bluetooth devices.
When the search is complete, select “TB501” from the Bluetooth device list. (If a password is
required, use “0000” to finalize the pairing process.)
4. When the Bluetooth connection is successful, you will hear an alert tone and this means you are
connected and the speaker is ready for use.
NOTE:
•If pairing was unsuccessful, turn off the unit first and repeat the steps above to re-pair again.
•After successful pairing, paired devices will remember each other. Unless pairing information is
deleted, re-pairing is not required after the first time.
•If you want to pair the unit with other Bluetooth enabled devices, please disconnect the existing
device and pair with the new device according to the steps above.
5. Once you are successfully connected, adjust the volume and use the Play/Pause, Skip Forward and
Skip Backward buttons to control the music.
AUX-IN OPERATION
This turntable features an Aux-in (audio line in) Jack for connecting your smartphone, MP3 player or other
digital music player.
1. Connect an aux-in / audio line in cable (not included) from your external device to the Aux-in Jack located
on the back of the unit.
2. Turn the unit on by turning the Power and Volume Knob. The red Power Indicator Light will show the
turntable is on.
3. Start to play your music from the external audio device.
4. Adjust both Volume Controls on the turntable and on the external device to your desired level.
NOTE: Once an aux-in cable is plugged into the Aux-in Jack, the turntable will not play records or
music from a USB thumb drive or SD Card or play music via the Bluetooth Mode. To use any of the
other functions, you must unplug the aux-in / audio line in cable.
EARPHONE / HEADPHONE OPERATION
Whether you are listening to records or playing your music from the USB thumb drive, SD Card or the Aux-in
function, you may plug in earphones or headphones into the Earphone/Headphone Jack (3.5mm) for private
listening.

E-7
RCA AUDIO OUTPUT
If you prefer to use your own stereo speakers, you can connect them through the RCA Audio Output (cable
not included) to a stereo system or powered speakers. Do not connect the turntable to PHONO level inputs as
this may damage the device. This turntable’s RCA outputs are line level. Connecting the turntable to the
stereo system’s CD, AUX-IN or TAPE inputs are acceptable.
REPLACING THE TURNTABLE NEEDLE
To replace the Stylus Cartridge, please contact our Customer Support team noted below:
Need help? Please call us.
If you encounter any difficulties with this product, please call or email us and our
representatives will be ready to help you.
Toll free: 1-800-593-6669 (Monday to Friday: 9am –5pm EST)
Email: [email protected]
Thank you for your purchase. We want you to start enjoying your product.

E-8
LIMITED WARRANTY
Warning: Some Products may contain components that are small enough to be swallowed. Keep out of the
reach of children.
Before returning your Product for service under this Warranty, (i) please read the instruction manual carefully
and visit our website at www.borne-lifestyle.com for product updates and extended support documentation
(e.g., Frequently Asked Questions, Common Troubleshooting Guides); (ii) please contact Borne Electronics
Support if you are still having trouble with your Product.
Subject to the terms and conditions herein, Borne Electronics warrants to the original purchaser of the Product
(“Customer”) that the Product will be free from defects in material or workmanship under normal,
noncommercial use (“Defects”) for a period of 1 year.
Warranty Period encompasses separate “Coverage Periods” for Parts and Labor, with each Coverage Period
to begin from the original date of Customer purchase. Parts are covered for a period of 1yr. Labour is
covered for 90 days. If Customer returns a defective Product during the applicable Warranty Period, Borne
Electronics will, at its option during the specified Coverage Periods for Parts and Labor (as applicable), either:
(i) repair the Product or (ii) replace the Product with a new or refurbished Product, in either case free of
charge to Customer for Parts and/or Labor (as applicable) during the specified Coverage Period only, and
excluding applicable shipping charges for which the Customer is responsible. The foregoing states the
Customer’s exclusive remedy and Borne Electronics’ sole liability for breach of the limited warranty contained
herein.
This Warranty specifically excludes any Product (or, as applicable, any component thereof) that has Defects
resulting from: (a) any neglect or misuse by a Customer, an accident, improper application, violation of
operating instructions for the Product, any other Customer-induced damage, or the alteration or removal of
any Product serial number; (b) any modification or repair to Product by any party other than Borne Electronics
or a party authorized in writing by Borne Electronics; (c) any damage to Product due to power surges,
incorrect electrical voltage, misconnection to any device, or malfunction of any device used with the Product;
(d) cosmetic damage to the Product caused by normal wear and tear; (e) shipping damage that occurs while
the Product is in transit; (f) damage caused by heat sources, sunlight, electromagnetic conditions, or other
climatic conditions; or (g) any acts of God.
Product is sold to Customer for personal, non-commercial use only. Product is not warranted for Customer’s
commercial or rental use. In addition, Product is not warranted against failure, and should not be used by
Customer for any application where (i) there is a risk that any data stored on Product will be breached or
otherwise compromised, or (ii) the data stored on Product is relied upon for medical or lifesaving applications.
Borne Electronics expressly disclaims any warranty for any of the foregoing uses to the fullest extent
permitted by law. Customer assumes any and all risks associated with such uses of Product, and agrees to
indemnify Borne Electronics for any damages claimed against Borne Electronics for such uses.
This Warranty specifically and expressly excludes any Product that is purchased by Customer as a “floor” or
“display” model. Any such Product is purchased by Customer “AS IS” and Borne Electronics disclaims any
Warranties, express or implied, in relation thereto.
EXCEPT FOR THE EXPRESS WARRANTIES STATED ABOVE AND TO THE MAXIMUM EXTENT
PERMITTED BY LAW, THE PRODUCT IS PROVIDED “AS IS”, AND BORNE ELECTRONICS DISCLAIMS
ALL OTHER WARRANTIES, INCLUDING WITHOUT LIMITATION ANY IMPLIED WARRANTY OF (I)
MERCHANTABILITY, (II) FITNESS FOR A PARTICULAR PURPOSE, OR (III) NON-INFRINGEMENT OF
THIRD PARTY RIGHTS. TO THE MAXIMUM EXTENT PERMITTED BY APPLICABLE LAW, IN NO EVENT
WILL BORNE ELECTRONICS BE LIABLE TO CUSTOMER OR ANY THIRD PARTY FOR ANY INDIRECT,
SPECIAL, INCIDENTAL, CONSEQUENTIAL, EXEMPLARY OR PUNITIVE DAMAGES, INCLUDING,
WITHOUT LIMITATION, ANY LOST PROFITS OR REVENUES, LOSS OR INACCURACY OF ANY DATA
OR COST OF SUBSTITUTE GOODS, REGARDLESS OF THE THEORY OF LIABILITY (INCLUDING
NEGLIGENCE). ADDITIONALLY, EVEN IF BORNE ELECTRONICS HAS BEEN ADVISED OF THE
POSSIBILITY OF SUCH DAMAGES, BORNE ELECTRONICS’ AGGREGATE LIABILITY TO CUSTOMER
FOR ACTUAL DIRECT DAMAGES FOR ANY CAUSE WHATSOEVER SHALL BE LIMITED TO THE

E-9
CUMULATIVE PRODUCT COSTS PAID BY THAT CUSTOMER FOR THE PRODUCT CAUSING SUCH
DAMAGES, IF ANY.
This Warranty gives Customer specific rights, and Customer may also have other rights that vary from
jurisdiction to jurisdiction.
To obtain Warranty service, Customer must call Borne Electronics Support prior to making a Product Return.
Customer must include with Product Return the following items: (i) a dated sales receipt that indicates the
place of purchase, model number of Product, and amount paid; (ii) a detailed description of Customer’s
problem with Product; (iii) Customer’s full name, phone number, and return address, and; (iv) a money order
for any applicable shipping costs made out to Edco Electronics Inc. to cover return shipping charges to US
and Canadian destinations only. Borne Electronics will not make return shipments to a P.O. Box. For shipping
to international addresses, actual freight will be charged to Customer. Failure to enclose any of these items
may delay the processing of your Warranty claim. Return your Product freight-prepaid in its original
packaging, or packaging that affords an equal measure of protection. Please allow 4 to 6 weeks for the
processing of your claim.
Edco Electronics Inc.
8484 Esplanade
Montreal, Quebec H2P 2R7
Canada
Toll Free: 1-800-593-6669 (Monday to Friday: 9am to 5pm EST)
Email: support@borne-lifestyle.com
Table of contents
Other borne Speakers manuals


