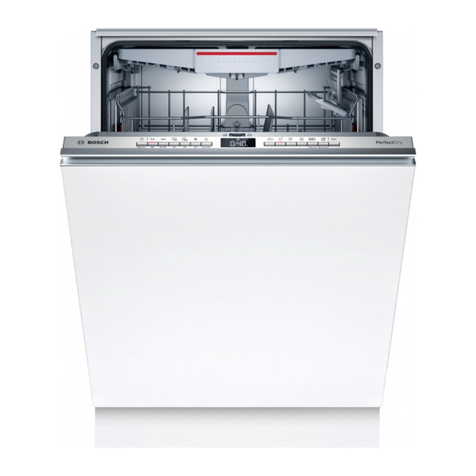
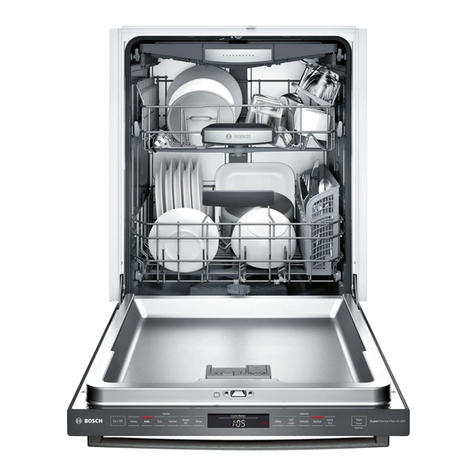
Bosch SBV8ZCX02E User manual

NL
Index
Safety.................................................. 4
General instructions .................. 4
Destination of the device .................. 4
Restriction of users ............ 4
Secure installation................................. 4
Safe use.................................................. 6
Damaged device................................. 8
Dangers for children..................... 9
Etagère .................................. 25
Folding plate supports .......... 26
Extra Clean Zone .................. 26
Cutlery basket heights ......................... 27
Before using for the first time ................ 27
First time use........ 27
Softening System .................. 28
Avoiding material damage ........ 11
Safe installation.................................. 11
Safe use.................................. 11
Overview of the water hardness
settings................................ 28
Set water softening.................. 29
Softening salt .................................. 29
Switching off water softening.......... 30
Environmental protection and
saving................................................................... .. 12 Softening system regener-
run .................................................. 30
Disposal of the packaging .......... 12
Saving energy ................................ 12 Rinse system ................................ 30
Rinse aid ......................... 30
Drying with zeolite . † † † † † † † † † † † † † † † † † †
12 Aqua sensor ................................... 13
Sensors .................................. 13 Setting the rinse aid
amount ................................................ 31
Set up and connection .................. 13
Scope of delivery .................................. 13
Switch off the rinse system... 31
Detergent .................................. 32
Suitable detergents .......... 32
Unsuitable detergent ............... 33
Setting up and connecting the
device................................................................ ..... 14
Waste water connection ................... 14
Drinking water connection .................. 14
Electrical connection.................. 15
Notes on
detergents................................................................... 33
Filling detergent ..................... 34
Getting to know your device.................. 16
Device .................................................. 16
Controls..................... 17
Crockery................................... 35
Damage to glass and crockery
good ................................................ 35
Programs .................................. 20
Notes for test institutes ..... 22
Loading crockery .................. 36
Unloading Crockery ................... 37
Favorite
Intelligent
† † † † † † † † † † † † † † † † † † † † † † † † † † † † † † † † † † † † 22
† † † † † † † † † † † † † † † † † † † † † † † † † † † † † † † † † † † 22
The Ministry in essence................. 37
Switching on the appliance .................. 37
Set program .................. 37
Set additional function .................. 37
Making time setting................................ 37
Start program .................. 38
Interrupt program .................. 38
Cancel program .................. 38
Additional Features .................................. 22
Equipment.................................................. 23
Upper basket ......................... 23
Lower basket ......................... 24
Cutlery drawer.................................. 24
2
NL
Displaying program
information................................................... .... 38
Service.................................. 64
Product number (E-Nr.), production
number (FD) and serial number (Z-
Nr.) ................................... ............... 64
Switching off the appliance.................. 38
Basic Settings .................................. 39 AQUA-STOP guarantee ..................... 64
Overview of the basic
settings ................................................... ... 39 Technical data.................. 65
Change basic settings.................. 41
Set time..................................... 41
Information on Free Software and Open
Source Software ....................... 65
Home Connect ................................ 41
Quick start with Home Connect.... 42
Home Connect settings ............... 42
Declaration of Conformity................ 66
Remote Start ................................ 42
Remote Diagnosis .................. 43
Software Update .................................. 43
Personal data protection
windows .................................. 43
Cleaning and maintenance ............... 44
Cleaning the rinse aid dispenser .......... 44
Detergent ................................ 44
Device maintenance tips........ 44
Machine cleaning . † † † † † † † † † † † † † † † † † † † †
† † † 44 Sieving System ................................... 46
Cleaning Spray Arms................. 47
Troubleshooting ......................... 48
Error code / error indication /
signal................................................... .... 48
Washing result ................................... 50
Home Connect problem................. 57
Indications on the display........... 58
Malfunctions ......................... 58
Mechanical damage ........... 60
Sounds ......................................... 61
Cleaning the drain pump..................... 62
Transport, Storage and
Disposal ................................................ 62
Disassembling the device .................. 62
Making the device frost-resistant .... 63
Transporting the device .................. 63
Disposal of your old device.... 63
3

NLSafety
Safety
Observe the following safety instructions.
General instructions
†Please read this manual carefully.
†Keep the operating instructions and product information for future reference.
for use or for subsequent owners.
†Do not connect the device in case of transport damage.
Destination of the device
Only use the device: †to wash
dishes.
†for domestic use and in enclosed spaces within the
sly environment.
†to an altitude of 2500 m above sea level.
Restriction of the users
This appliance can be used by children aged from 8 years and above
and persons with reduced physical, sensory or mental capabilities or
lack of experience and/or knowledge if they have been given
supervision or instruction concerning use of the appliance in a safe
way and understand the resulting hazards. understood. Children must
not play with the appliance.
Cleaning and user maintenance shall not be made by children
unless they are supervised.
Make sure that children under 8 years old cannot reach the device
or the connecting cable.
Safe installation
WARNING ‒ Risk of injury! Improper installations can
cause injury.
▶When setting up and connecting the device, follow the
instructions in the operating and installation instructions.
4

SafetyNL
WARNING ‒ Risk of electric shock! †Improper
installations are dangerous.
▶ Connect and operate the device only in accordance with the
information on the type plate.
▶ Always use the supplied power cord of the new appliance.
▶ Only connect the device to a mains supply with alternating
current via a properly installed earthing socket.
▶ The protective earth system of the electrical house installation must
be installed in accordance with the electrical engineering
regulations.
▶ Never power the device via an external switching device,
e.g. a time switch or remote control.
▶ When the device is installed, the mains plug of the mains
connection cable must be freely accessible or, if free access
is not possible, an all-pole disconnecting device must be
installed in the permanently installed electrical system in
accordance with the installation instructions.
▶When setting up the device, make sure that the power
cord is not pinched or damaged.
†Cutting the inlet hose or immersing it in water
peeling the AquaStop valve is dangerous.
▶ Never immerse the plastic housing in water. An electric valve
is located in the plastic housing on the supply hose.
▶ Never cut the supply hose. There are electrical connection
lines in the supply hose.
WARNING ‒ Risk of fire!
†Using an extended power cord and unauthorized
adapters is dangerous.
▶ Do not use extension cords or multiple sockets.
▶Use only manufacturer-approved adapters and power
cords.
5

NLSafety
▶ If the power cord is too short and a longer power cord is not
available, contact an electrical retailer to adjust the home
installation.
†Contact between the device and installation pipes can lead to
to a defect in the installation pipes, e.g. gas pipes and power
pipes. Gas from a corroded gas line can ignite. A damaged
power line can lead to a short circuit.
▶ Make sure that there is a distance of at least 5 cm between
the device and the installation pipes.
WARNING ‒ Risk of injury!
The hinges move when opening and closing the appliance door
and can cause injuries.
▶ If underfloor or built-in appliances are not located in a niche
and thus a side wall is accessible, the side hinge area must be
covered. The covers are available from specialist dealers or
from our after-sales service.
WARNING ‒ Danger of tipping over!
Improper installation can lead to the device tipping over.
▶Only install underfloor or built-in appliances under a
continuous worktop that is firmly connected to the
adjacent cupboards.
Safe use
WARNING ‒ Risk of serious health hazard!
Failure to observe the safety instructions and instructions for
use on the packaging of dishwasher detergents and rinse aids
can lead to serious health damage.
▶Observe the safety instructions and instructions for use on
the packaging of detergents and rinse aids.
6

SafetyNL
WARNING ‒ Risk of explosion!
†Solvents in the washing area of the appliance can cause up to
lead to explosions.
▶Never put solvents in the washing area of the appliance.
†Highly corrosive alkaline or strongly acidic cleaning agents
parts in combination with aluminum objects in the washing
area of the appliance can lead to explosions.
▶Never use highly corrosive alkaline or strongly acidic
cleaning agents, especially those for professional or
industrial use, in combination with aluminum objects (e.g.
grease filters from extractor hoods or aluminum pans) in the
dishwasher, e.g. for machine maintenance.
WARNING ‒ Risk of injury!
†An open appliance door can lead to injuries.
▶Only open the appliance door for loading and unloading
dishes to avoid accidents such as tripping.
▶Do not sit or stand on the open appliance door.
†Knives and objects with sharp points can injure
cause things.
▶Place knives and objects with sharp points pointing
downwards in the cutlery basket, knife holder or cutlery
drawer.
WARNING ‒ Risk of burns!
If the appliance door is opened during the program run, hot
water may splash out of the appliance.
▶ Only open the appliance door carefully while the program is
running.
WARNING ‒ Risk of electric shock!
†Penetrating moisture can cause an electric shock.
▶ Only use the device in closed rooms.
▶ Never expose the device to excessive heat and humidity.
7

NLSafety
▶ Do not use a steam cleaner or high-pressure cleaner to
clean the appliance.
†Damaged power cord insulation is dangerous.
▶ Never bring the connecting cable into contact with hot
appliance parts or heat sources.
▶Never bring the power cable into contact with sharp
points or edges.
▶ Never kink, pinch or alter the power cord.
WARNING ‒ Risk of burns!
The outlet opening of the zeolite reservoir becomes hot and
can lead to burns.
▶ Never touch the outlet opening of the zeolite reservoir.
Damaged device
WARNING ‒ Risk of electric shock!
†A damaged appliance or power cord has been
good.
▶ Never use a damaged device.
▶ Never use a device with a cracked or broken surface.
▶ Never pull on the power cord to disconnect the device
from the power supply. Always pull the plug on the power
cord.
▶ If the appliance or the mains cable is damaged, immediately
unplug the mains cable from the socket or switch off the
fuse in the fuse box and close the tap.
▶†Contact customer service." →
Page 64
†Improper repairs are dangerous.
▶Only qualified personnel may carry out repairs on the
device.
▶Only original spare parts may be used for repair of the
device.
▶If the power cord of this appliance is damaged, it must be
replaced with a special cord available from the
manufacturer or its service agent.
8

SafetyNL
Dangers for children
WARNING ‒ Risk of suffocation!
†Children can pull packing material over the head
and get entangled in it and suffocate.
▶Keep packaging material away from children.
▶Do not let children play with packaging material.
†Children can inhale or swallow small parts and
suffocate because of this.
▶Keep small parts away from children.
▶ Do not allow children to play with small parts.
†Children can lock themselves in the appliance and suffocate.
▶ If present, use the child lock.
▶ Never allow children to play with or operate the appliance.
WARNING ‒ Risk of health hazard! Children can lock
themselves in the appliance and endanger their lives.
▶ In the case of discarded appliances, remove the mains plug
from the socket, then cut the mains cable and damage the
lock of the appliance door so that the appliance door no
longer closes.
WARNING ‒ Risk of crushing!
Children can become trapped between the appliance door and
the cupboard doors below with appliances built high.
▶Watch out for children when opening and closing the appliance
door.
WARNING ‒ Risk of chemical burns! Dishwasher and rinse
aids can cause burns to the mouth, throat and eyes.
▶ Keep children away from detergents and rinse aids.
9

NLSafety
▶ Keep children away from the opened appliance. The water in
the washroom is not drinking water. Residual detergent and
rinse aid may still be left in this.
WARNING ‒ Risk of injury!
Children can get their little fingers caught in the slots of the
tablet tray and injure themselves.
▶ Keep children away from the opened appliance.
10

Avoid material damage NL
mm
avoid material damage †Contact between the device and
water pipes can corrode the water
pipe and cause the water pipe to
leak.
▶Make sure that there is a distance
of at least 5 cm between the
appliance and the water supply.
This does not apply to the supplied
pipes for the drinking water
connections and the water
drainage connection.
†Modified or damaged water
hoses can lead to material damage
and damage to the device.
▶ Never kink, pinch, modify or cut
water hoses.
▶ Only use supplied water hoses or
original spare hoses.
▶ Reuse never used water
hoses.
†Too low or too high water pressure
may interfere with the device function.
▶ Make sure that the water
pressure at the water supply
system is a minimum of 50 kPa
(0.5 bar) and a maximum of 1000
kPa (10 bar).
▶ If the water pressure exceeds the
specified maximum value, a
pressure reducing valve must be
installed between the drinking
water connection and the hose
set of the device.
material damage
to avoid
Avoid material damage
Safe installation
PAY ATTENTION!
†An improper installation of
the device may cause damage.
▶If the dishwasher is installed
below or above other household
appliances, the information on
installation in conjunction with
the dishwasher in the installation
instructions for the respective
household appliance must be
observed.
▶If no information is available or
if the installation manual does
not contain any instructions on
this subject, please check with
the manufacturer of these
household appliances whether
the dishwasher can be built in
above or below other household
appliances.
▶If no information from the
manufacturer is available, the
dishwasher should not be
installed above or below these
household appliances.
▶To ensure safe operation of all
household appliances, you must
also continue to follow the
installation instructions for the
dishwasher.
▶ Do not install the dishwasher
under a hob.
▶ Do not install the dishwasher
near heat sources such as a
radiator, water heater, stove or
other appliances that give off
heat.
Safe use
PAY ATTENTION!
†Emerging water vapor
can damage built-in furniture.
▶ After the program has ended,
allow the appliance to cool down
for a while before opening the
appliance door.
11

NLEnvironmental protection and saving
†The rinse aid container can be
softening salt for dishwashers
corrode.
▶ To ensure that spilled softening
salt is rinsed from the rinse aid
container, the softening salt must
be filled into the softening salt
reservoir immediately before the
program starts. †Dishwasher
detergent can damage the water
damage hardening.
▶Only fill the water softener
reservoir with dishwasher
softening salt.
†Unsuitable dishwasher detergents
can damage the device.
▶ Do not use a steam cleaner.
▶ To avoid scratching, do not use
sponges with a rough surface or
abrasive cleaning agents on the
surface of the device.
▶ To prevent corrosion on
dishwashers with a stainless
steel front, do not use sponge
cloths or rinse them thoroughly
several times before using them
for the first time.
Save energy
If you follow these directions, your
device will use less power and water.
Use the Eco 50° program.
The Eco 50° program is energy-
saving and environmentally friendly.
→
†Programs", Page 20
Change the sensor setting to
Standard.
The consumption values are
reduced.
→
†Sensors", Page 13
Drying with zeolite automatically
contributes to energy savings.
→
†Drying with zeolite ",
Page 12
Drying with zeolite
The device is equipped with a zeolite
reservoir. Energy can be saved by
drying with zeolite.
Zeolite is a mineral that can store and
release moisture and heat energy.
During the wash phase, heat energy is
used to heat the wash water and dry
the mineral.
During the drying phase, moisture
from the flushing chamber is stored in
the mineral and heat energy is
released. The heat energy is blown out
into the wash cabinet with dry air. This
allows fast and improved drying.
Drying with zeolite is therefore
very energy-saving.
mm
environmental protection and savings
environmental protection and
savings
Environmental protection and saving
Disposal of the packaging
The packaging materials are
environmentally friendly and can be
reused.
▶Dispose of the individual components
separately according to type.
12

Set up and connectNL
Tip:For proper drying with zeolite, do
not place dishes directly in front of
the suction opening and discharge
opening of the zeolite reservoir.
Do not place temperature-sensitive
crockery directly in front of the outlet
opening of the zeolite container.
→
†Device", Page 16
Sensor level
Sensitive
Description
Adjusts the program strength
even with small amounts of
dirt for effective removal of
food residues. Energy
consumption and water
consumption are matched
accordingly
stably adjusted.
Aquasensor Very sensitive Adjusts the program
strength for tougher
usage conditions, for
example heavily dried-
on food.
Recommended setting
when using organic or
ecological detergents
with lower amounts
active substances. It
energy consumption and
water consumption are
adjusted accordingly.
The aquasensor is an optical
measuring device (photocell) with
which the turbidity of the washing
water is measured. Water can be
saved with the aqua sensor.
The use of the aquasensor depends on
the specific program. In case of heavy
pollution, the washing-up water is
pumped out and replaced with fresh
water. In the case of minor soiling, the
washing water is also used during the
next washing phase and the water
consumption can be reduced by 3-6
liters. In the automatic programs, the
temperature and running time are also
adapted to the degree of soiling.
OO
set upand connect
set up and connect
Os
set up and connect
close the appliance for correct
use in an expert manner on electricity
and water. Observe the required
criteria and the installation
instructions.
Sensors
The sensor system adjusts the
program progress and the program
strength of the automatic programs
to the amount and type of soiling.
The sensor system has different
sensitivity levels that you can change
in the basic settings.
→
†Change basic settings",
page 41
Scope of supply
After unpacking, check all parts for
transport damage and the
completeness of the delivery.
For complaints, please contact the
store where you purchased the
device or our customer service.
Remark:The device has been checked
at the factory for correct operation.
Water stains may remain on the
device. The water stains disappear
after the first wash cycle.
Sensor level
Standard
Description
Optimal setting for
mixed loads and high
amounts of dirt. Energy
and water saving. The delivery consists of:
13

NLSet up and connect
†Dishwasher
†Instructions
†Assembly instructions
†Other documents containing information
tie
†mounting material
†Steam protection plate †
Salt filling aid funnel
†Power cord
†Quick guide
Waste water connection
Connect the appliance to a waste water
connection so that the contaminated
washing water can be drained.
Install waste water connection
1.The necessary steps can be found in
the supplied installation instructions.
2.Connect the drain hose to the
connection nipple of the siphon
using the supplied parts.
Set up and connect the
device
You can install your undercounter or
built-in appliance in the kitchen unit
between wooden and plastic walls. If
you subsequently install the appliance
as a free-standing appliance, you must
secure the appliance against tipping
over, e.g. by screwing it to the wall or
installing it under a continuous
worktop that is firmly connected to the
adjacent cupboards.
3.Make sure that the drain hose is not
kinked, crushed or tangled.
4.Make sure that the water does not
flow out by a plug in the waste
water connection.
Drinking water connection
Connect the device to a drinking
water connection.
1. "Observe the safety instructions." →
Page 4
Install drinking water connection
Remark
†When you replace the device,
you can use a new water supply
hose.
2. "Observe the instructions for the
electrical connection."
→
Page 15
3.Check the contents of the package
and the condition of the device. 1.The necessary steps can be found in
the supplied installation instructions.
4.The required installation dimensions can be found
in the installation instructions. 2.Connect the device to the drinking
water connection using the
enclosed parts.
5.Level the appliance using the
adjustable feet. The "technical data"
→
Page 65
consider.
Pay attention to a firm position. 3.Make sure that the drinking water
connection is not kinked, crushed
or entangled.
6. "Install the waste water connection."
→
Page 14
7. "Install the drinking water
connection." →
Page 14
8.Connect the device to the
power.
14

Set up and connectNL
Electrical connection
Connecting the appliance electrically
Comments
†Observe the "Safety
sing" →
Page 4
†
†Only connect the device
on an AC voltage of 220 - 240 V
and 50 Hz or 60 Hz.
†Please note that the wa-
The protection system only works
when the device is supplied with
power.
1.Connect the appliance plug of the
connecting cable to the appliance.
2.Plug the appliance into a mains
socket in the vicinity of the
appliance.
The connection data of the device
can be found on the type plate.
3.Check the plug for tightness.
15

NL Getting to know your device
YOUYOU
wget to know the device
get to know your device
Getting to know your device
Device
Here you will find an overview of the components of your device.
9
8
710
11
12
13
6
5
414
3
2
1
15
1Nameplate Type plate with "E number and FD number"
→Page 64.
You need this information for the "service"
→ Page 64.
1Depending on the device version
16

Getting to know your deviceNL
2Detergent dispenser Put the "dishwasher detergent" in the detergent dispenser
→ Page 32.
3Lower crockery basket
Reservoir for softening salt
"Lower crockery basket"→ Page 24
4Add softening salt to the water softening salt
reservoir.
"Softening System", page 28
5Lower spray arm The lower spray arm cleans the dishes in the
lower basket.
If the dishes do not get optimally clean, clean
the spray arms.
"Cleaning the spray arms", page 47
6Tablet tray During the wash cycle, tabs automatically fall from the
detergent dispenser into the tablet compartment where
the tabs can dissolve optimally.
7Upper crockery basket
cutlery drawer
EmotionLight
"Top crockery basket"→Page 23
"cutlery drawer"→ Page 24
8
9Interior lighting of the device.
"Overview of the basic settings", page 39
10 Etagère1
Upper spray arm
"Etagère"→ Page 25
11 The upper spray arm cleans the dishes in
the upper basket.
If the dishes do not get optimally clean, clean
the spray arms.
"Cleaning the spray arms", page 47
12 Suction opening of the zeolite
reservoir
The suction opening is used for "drying with
zeolite"→Page 12.
13 Exhaust opening of the zeolite
reservoir
The outlet opening is used for "drying with
zeolite"→ Page 12.
14 Sieving System
Rinse aid reservoir
"Sieve system"→ Page 46
15 Add rinse aid to the rinse aid reservoir.
"Rinse System", page 30
1Depending on the device version
Controls
You can set all functions of your device and obtain information about the
operating status via the control panel.
You can perform various functions with a few keys.
17

NLGetting to know your device
1 2 3 4 5 6 7 8 9
16 15 14 13 12 11 10
1ON/OFF button and Reset button "Turn on device"→ Page 37
"Turn off device"→ Page 38
"Abort program"→ Page 38
2Program keys
Info button
"Programs"→Page 20
3When you press , the display shows
information about the selected programmes,
additional functions and basic settings.
Pressing for about 3 seconds opens the
menu.
"Change basic settings", page 41
4Display The display shows information about
programmes, additional functions or basic
settings. You can change the basic settings via
the display and the setting buttons.
"Change basic settings", page 41
5WLAN indication
Setting keys
"Home Connect"→ Page 41
"Change basic settings"→ Page 41
sPage 37
gina 42
"Start program"→ Page 38
6
7
8
Startchoose time "Time tellin make g"→
Remote Start →"Remote Start", Pa
9Start button
Program keys and additional functions
10 program
p
Additional
"Additional functions", page 22
ash
mmas", Pag
tie
" rogra
c
ina 20
fun
1Depending on the device atuitvprimal
18

Getting to know your deviceNL
11 Tests With these keys you can scroll through the
basic settings.
"Change basic settings", page 41
12 Display1The display shows information about
programmes, additional functions or basic
settings. You can change the basic settings via
the display and the setting buttons.
"Change basic settings", page 41
13 Remote Start Indication1When you have activated the function and operate
the appliance via the Home Connect app, the
indicator on the appliance lights up.
14 door handle1
Refill softening salt indicator
Open the appliance door.
15 Softening System
"Filling softening salt", Page 29
16 Rinse aid refill indicator
Depending on the device version
Rinse System
"Filling rinse aid", Page 31
1
19

NL Programs
pp
programs
programs
phuh
programs
Here you will find an overview of the rinse system or lack of rinse aid
affects the run time.
The consumption values can be
found in the quick guide. The
consumption values apply under
normal conditions and a water
hardness of 13 - 16 °dH. Various
factors, such as water temperature or
pipe pressure, can lead to deviations.
adjustable programs. Depending on
the configuration, different programs
are offered on the control panel of the
device. The running time depends on
the selected program. In addition, the
running time depends on the water
temperature, amount of crockery,
degree of soiling and selected
additional function. Also a disabled
Program Usage Program sequence Additional Features
China:
†Pots, pans, non-
clean delicate crockery
and cutlery.
Degree of pollution:
†Very caked, in-
burnt or dried up
remove food residues
containing starch or
protein.
Intensive:
†Pre-rinse
†Cleaning 70 °C †
Intermediate rinse
†Rinse aid 50 °C †
To dry
All
"Additional
functions", page 22
Intensive 70°
China:
†Mixed crockery and
clean cutlery.
Degree of pollution:
†Slightly dried up, in the
household to remove
usual food residues.
Sensor-optimized: †Becomes
dependent on the
degree of contamination
of the washing water
optimized by the sensor
system.
All
"Additional
functions", page 22
Auto 45-65°
China:
†Mixed crockery and
clean cutlery.
Degree of pollution:
†Slightly dried up, in the
household to remove
usual food residues.
Most economical program:
†Pre-rinse
†Cleaning 50 °C †
Intermediate rinse
†Rinse aid 35 °C †
To dry
All
"Additional
functions", page 22
Eco 50°
1Factory setting
20
Table of contents
Other Bosch Dishwasher manuals

Bosch
Bosch SHE53T52UC/01 User manual

Bosch
Bosch SMV4HTX33E Specification sheet

Bosch
Bosch SMH6ZDX00E Specification sheet

Bosch
Bosch SPU2IKW02S User manual

Bosch
Bosch SHPM65W52N User manual

Bosch
Bosch SMU6ECW75S User manual

Bosch
Bosch SPX68B55UC User manual

Bosch
Bosch SHPM65W55N User manual

Bosch
Bosch SPU68M05AU User manual

Bosch
Bosch SMS69T08EU User manual

Bosch
Bosch SMU6ZCW03S User manual

Bosch
Bosch SMU4HTS31E User manual

Bosch
Bosch SBV4HTX33E User manual

Bosch
Bosch DISHWASHER User manual

Bosch
Bosch SMI53D02TC User manual

Bosch
Bosch SMI4IVS00I User manual

Bosch
Bosch SHV89PW53N User manual

Bosch
Bosch SBV8EDX01A User manual

Bosch
Bosch SRS4HMI3FR User manual

Bosch
Bosch SMS4IKW51T Specification sheet