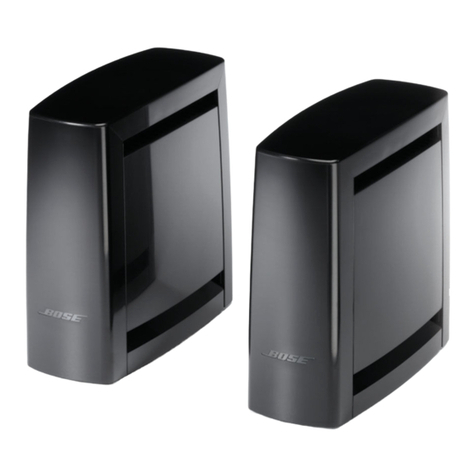
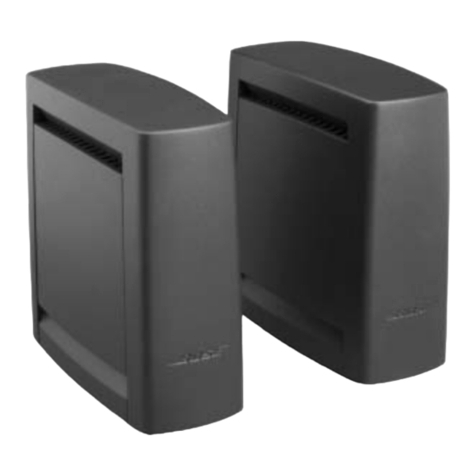
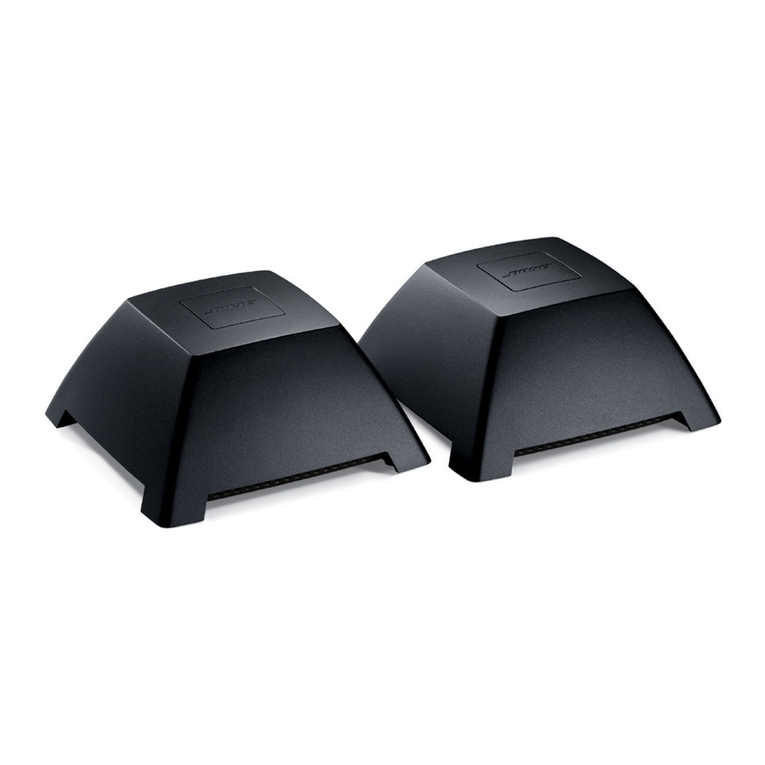
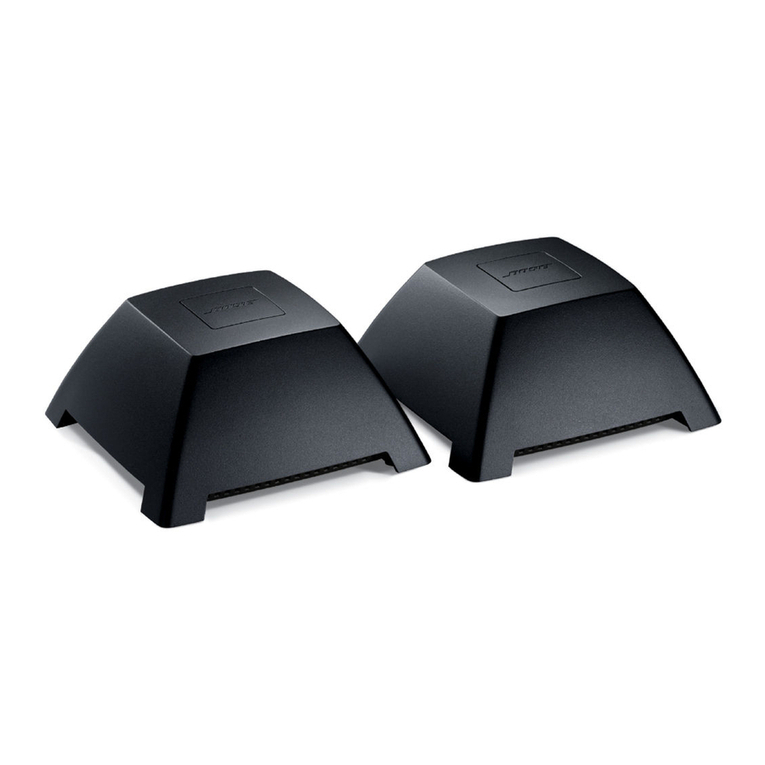
Bose Lifestyle 18 Series II User manual

This PDF includes both the English and
the French versions of this document.
Ce PDF inclut les versions anglaises
et françaises de ce document.

BOSE®Link AL8
HOMEWIDE WIRELESS AUDIO LINK
2ZQHU¶V*XLGH
*XtDGHXVDULR
1RWLFHG¶XWLOLWVDWLRQ

2
EnglishFrançais Español
SAFETY INFORMATION
Please read this owner’s guide
Please take the time to follow the instructions in this owner’s guide carefully. It will help you set up and operate your system
properly and enjoy all of its advanced features. Please save this owner’s guide for future reference.
WARNING: To reduce the risk of fire or electrical shock, do not expose the product to rain or moisture.
WARNING: The apparatus shall not be exposed to dripping or splashing, and objects filled with liquids, such as vases, shall not
be placed on the apparatus. As with any electronic product, use care not to spill liquids into any part of the system. Liquids can
cause a failure and/or a fire hazard
The lightning flash with arrowhead symbol, within an equilateral triangle, alerts the user to the presence of uninsulated
dangerous voltage within the system enclosure that may be of sufficient magnitude to constitute a risk of electric shock.
The exclamation point within an equilateral triangle alerts the user to the presence of important operating and mainte-
nance instructions in this owner’s guide.
WARNING: No naked flame sources, such as lighted candles, should be placed on the apparatus.
Note: The product label is located on the bottom of the product.
This product is intended to be used only with the power supply provided. Where the mains plug is used as the disconnect
device, such disconnect device shall remain readily operable.
This product must be used indoors. It is neither designed or tested for use outdoors, in recreation vehicles, or on
boats.
Important safety instructions
1. Read these instructions –
2. Keep these instructions – .
3. Heed all warnings –
4. Follow all instructions.
5. Do not use this apparatus near water – Do not use this product near a bathtub, washbowl, kitchen sink, laundry tub, in a
wet basement, near a swimming pool, or anywhere else that water or moisture are present.
6. Clean only with a dry cloth – and as directed by Bose Corporation. Unplug this product from the wall outlet before
cleaning.
7. Do not block any ventilation openings. Install in accordance with the manufacturer’s instructions – To ensure reliable
operation of the product and to protect it from overheating, put the product in a position and location that will not interfere
with its proper ventilation.
8. Do not install near any heat sources, such as radiators, heat registers, stoves or other apparatus (including
amplifiers) that produce heat.
9. Only use attachments/accessories specified by the manufacturer.
10. Unplug this apparatus during lightning storms or when unused for long periods of time – to prevent damage to this
product.
11. Refer all servicing to qualified service personnel. Servicing is required when the apparatus has been damaged in
any way: such as power supply cord or plug is damaged; liquid has been spilled or objects have fallen into the appa-
ratus; the apparatus has been exposed to rain or moisture, does not operate normally, or has been dropped.
©2006Bose Corporation. Nopart of this work may be reproduced, modified, distributed orotherwise used without prior written permission.
Ultra Low Delay Audio Coding licensed by Fraunhofer IIS
01_Safety.fm Page 2 Wednesday, April 19, 2006 4:56 PM

3
CONTENTS
English FrançaisEspañol
INTRODUCTION 4
The Boselink AL8 Homewide Wireless Audio Link . . . . . . . . . . . . . . . . . . . . . . . . . . . . . . . . . . . . . . . . . . . . . . . . . . 4
Unpacking the carton . . . . . . . . . . . . . . . . . . . . . . . . . . . . . . . . . . . . . . . . . . . . . . . . . . . . . . . . . . . . . . . . . . . . . . . . . . 4
What distinguishes the two units . . . . . . . . . . . . . . . . . . . . . . . . . . . . . . . . . . . . . . . . . . . . . . . . . . . . . . . . . . . . 5
Choosing a place for each unit . . . . . . . . . . . . . . . . . . . . . . . . . . . . . . . . . . . . . . . . . . . . . . . . . . . . . . . . . . . . . . . . . . 5
SETUP 6
Making the connections . . . . . . . . . . . . . . . . . . . . . . . . . . . . . . . . . . . . . . . . . . . . . . . . . . . . . . . . . . . . . . . . . . . . . . . . 6
For the transmitter . . . . . . . . . . . . . . . . . . . . . . . . . . . . . . . . . . . . . . . . . . . . . . . . . . . . . . . . . . . . . . . . . . . . . . . 6
For the receiver . . . . . . . . . . . . . . . . . . . . . . . . . . . . . . . . . . . . . . . . . . . . . . . . . . . . . . . . . . . . . . . . . . . . . . . . . 7
Instructions for non-Bose or older Bose products . . . . . . . . . . . . . . . . . . . . . . . . . . . . . . . . . . . . . . . . . . . . . . . 7
Check the indicators and settings . . . . . . . . . . . . . . . . . . . . . . . . . . . . . . . . . . . . . . . . . . . . . . . . . . . . . . . . . . . . . . . . 8
The Status LED . . . . . . . . . . . . . . . . . . . . . . . . . . . . . . . . . . . . . . . . . . . . . . . . . . . . . . . . . . . . . . . . . . . . . . . . . . 8
The transmitter Channel button . . . . . . . . . . . . . . . . . . . . . . . . . . . . . . . . . . . . . . . . . . . . . . . . . . . . . . . . . . . . . 9
Your Bose®link expansion room remote control . . . . . . . . . . . . . . . . . . . . . . . . . . . . . . . . . . . . . . . . . . . . . . . . 9
Your Bose link expansion room product . . . . . . . . . . . . . . . . . . . . . . . . . . . . . . . . . . . . . . . . . . . . . . . . . . . . . . 9
Enjoy your wireless entertainment . . . . . . . . . . . . . . . . . . . . . . . . . . . . . . . . . . . . . . . . . . . . . . . . . . . . . . . . . . . . . . . . 9
REFERENCE 10
Accessories . . . . . . . . . . . . . . . . . . . . . . . . . . . . . . . . . . . . . . . . . . . . . . . . . . . . . . . . . . . . . . . . . . . . . . . . . . . . . . . . . 10
Troubleshooting . . . . . . . . . . . . . . . . . . . . . . . . . . . . . . . . . . . . . . . . . . . . . . . . . . . . . . . . . . . . . . . . . . . . . . . . . . . . . . 10
Contacting Customer Service . . . . . . . . . . . . . . . . . . . . . . . . . . . . . . . . . . . . . . . . . . . . . . . . . . . . . . . . . . . . . . 11
Limited warranty . . . . . . . . . . . . . . . . . . . . . . . . . . . . . . . . . . . . . . . . . . . . . . . . . . . . . . . . . . . . . . . . . . . . . . . . . . . . . . 11
Technical Information . . . . . . . . . . . . . . . . . . . . . . . . . . . . . . . . . . . . . . . . . . . . . . . . . . . . . . . . . . . . . . . . . . . . . . . . . . 11
Information about products that generate electrical noise
U.S.A.
This equipment has been tested and found to comply with the limits for a Class B digital device, pursuant to Part 15 of the FCC rules.
These limits are designed to provide reasonable protection against harmful interference in a residential installation. This equipment
generates, uses, and can radiate radio frequency energy and, if not installed and used in accordance with the instructions, may cause
harmful interference to radio communications. However, this is no guarantee that interference will not occur in a particular installation.
If this equipment does cause harmful interference to radio or television reception, which can be determined by turning the equipment off
and on, you are encouraged to try to correct the interference by one or more of the following measures:
• Reorient or relocate the receiving antenna.
• Increase the separation between the equipment and receiver.
• Connect the equipment to an outlet on a different circuit than the one to which the receiver is connected.
• Consult the dealer or an experienced radio/TV technician for help.
Any modifications made to this equipment may void the user’s authority to operate this equipment.
Canada
This product complies with the Canadian ICES-003 Class B specification.
Operation is subject to the following two conditions: (1) this device may not cause interference and (2) this device must accept any
interference, including interference that may cause undesired operation of the device.
RF Guideline:
This device meets the RF Guideline FCC/OET 65 and Canadian Health code 6 for mobile devices, which assumes installation provides a
distance of at least 20 cm (8") from users and others.
For Your Records
Serial numbers are located on the bottom of the AL8 transmitter and the receiver.
Serial numbers: Transmitter _____________________________________Receiver _________________________________________________
Dealer name: ____________________________________________________________________________________________________________
Dealer phone: ________________________________________________ Purchase date: ____________________________________________
Bose recommends that you keep your sales slip and a copy of your product registration card together with this guide.
4
EnglishFrançais Español
INTRODUCTION
The Boselink AL8 Homewide Wireless Audio Link
Congratulations on your choice of Bose to provide an audio expansion solution free from the
need to run cumbersome wires between rooms.
The audio link consists of a transmitter and receiver. They deliver audio signals from your
LIFESTYLE®18 or 28 Series II system or LIFESTYLE®38 or 48 system in one area of your
house to the system or speakers you have set up in another area.
One transmitter can also send signals to as many as 8 receivers, making it simple to add on
to your system whenever you like.
Note: For future expansion possibilities, we recommend that you keep this owner’s guide as a
reference.
In combination with a Bose®link remote control or the PERSONAL®music center II, the
Bose link AL8 Homewide Wireless Audio Link gives you numerous options for expanding
your enjoyment.
Unpacking the carton
Carefully unpack the carton and save all packing materials for possible future use. They
provide the most secure way to transport the product.
Check to be sure your system includes all of the parts shown (Figure 1). If any part appears
damaged, do not attempt to use it. Notify Bose or your authorized Bose dealer immediately.
For Bose contact information, refer to the address sheet included in the carton.
Figure 1
Carton contents
Ooooooooo
T
ransmitter
Receiver
Owner’s
guide
Bose link A
cables
Power
packs
Note: Now is a good time to find the serial numbers on the bottom of the transmitter and the
receiver. Copy them onto your product registration card and in the space provided on “For Your
Records” on page 3.

5
INTRODUCTION
English FrançaisEspañol
What distinguishes the two units
The connection panel on each unit identifies it by name: TRANSMITTER or RECEIVER. Two
Bose®link jacks and a Channel button further distinguish the transmitter.
For compatibility, the two units have a matching Setup Code, set at the factory with both
switches in the “up” position (Figure 2). A Status LED lights when each unit is plugged in and
the two units are communicating.
Figure 2
Connection panels on the
two units Receiver
Transmitter
B
ose®link jacks Bose link jack
Channel switch
Status LED
Note: For information on the meaning of the different Status LED lights, refer to
“Check the indicators and settings” on page 8.
Choosing a place for each unit
Place the transmitter in the same room with the LIFESTYLE®system media center. Place the
receiver in the same room with your Bose link expansion product.
Note: Use of the audio link with products that are not Bose link compatible requires an adapter
cable. For further information, refer to “Instructions for non-Bose or older Bose products” on
page 7.
Considerations for positioning:
• Place each unit upright with all feet flat on a level surface, such as a floor, table, or shelf.
• Do not tip either unit on its side.
• Place each unit within 7 feet (2 meters) of the product to which it is connected (using the
supplied Bose link A cable).
• Keep the two units within 80 feet (24 meters) of each other.
• Be aware that the strongest signal direction is above and around, not below,
the transmitter.

6
EnglishFrançais Español
SETUP
Making the connections
You can connect one transmitter and up to 8 receivers for each LIFESTYLE®system.
The transmitter and receiver each use one of the two supplied Bose®link A cables, which are
7 feet (2 meters) long. Each unit also connects to power using one of the two supplied power
packs.
Note: Instructions for use with a non-Bose tuner/receiver vary slightly from those below. For
details, refer to “Instructions for non-Bose or older Bose products” on page 7.
For the transmitter
1. Connect one end of a Bose link A cable to the jack labeled Bose®link INPUT on the
transmitter connection panel.
2. Connect the other end of the cable to the Bose link speaker jack, below the Main
Speaker jack, on the LIFESTYLE®media center connection panel (Figure 3).
Figure 3
Transmitter connecting to a
LIFESTYLE®media center
Bose link Speaker jack
Transmitter
AC
Power
Bose®link
INPUT
LIFESTYLE®media center
Bose link
A
cable
Status
LED
Main Speaker jack
Note: If another product is already connected to the Bose link Speaker jack on the media
center, disconnect it there. You can use the wireless audio link to replace this wired connection.
Or, to continue using this connection, reconnect the cable to the jack labeled Bose®link OUTPUT
on the transmitter connection panel (Figure 4).
Figure 4
Transmitter and another
product connecting to a
LIFESTYLE®media center
Transmitter LIFESTYLE®media center
Transmitter connection
Bose®link
INPUT
Bose link
OUTPUT
Other product connection Bose link Speaker jack
3. Insert the small plug on the power pack cable into the AC Power jack on the transmitter
and plug the pack into a wall outlet.
The Status LED lights to verify this power connection.
Note: For information on the meaning of the different Status LED lights, refer to “Check the
indicators and settings” on page 8.

7
SETUP
English FrançaisEspañol
For the receiver
1. Connect one end of the second Bose®link A cable to the jack labeled Bose®link
OUTPUT on the receiver.
2. Connect the other end of the cable to the Bose link Input jack on the expansion room
system, amplifier, or powered speaker (Figure 5).
Figure 5
Connection to a Bose link
amplifier, as an example
Bose link
Input jack
Receiver
AC
Power
LIFESTYLE®SA-3 amplifier
Status
LED
Bose®link
OUTPUT Bose link
A cable
Bose link Output jack
3. Insert the small plug on the power pack cable into the AC Power jack on the receiver and
plug the pack into a wall outlet.
The Status LED lights to verify this power connection.
Note: For information on the meaning of the different Status LED lights, refer to “Check the
indicators and settings” on page 8.
Instructions for non-Bose or older Bose products
The Bose link AL8 Homewide Wireless Audio Link also works with some products that are not
Bose link compatible.
You can use non-Bose products in the following ways:
• A tuner/receiver as a sound source connected to the transmitter or in an expansion room
connected to the receiver
• Powered speakers connected to the receiver
You can use older Bose products as follows:
• Powered speakers, a radio, or system with its own volume and on/off controls and line-
level female RCA input jacks connected to the receiver
Any of the above products require the use of an RCA to DIN adapter cable for connecting to
the transmitter, the receiver, or both. An adapter kit, which contains two of these cables, is
available from Bose.
Note: To order the adapter kit, contact Bose and request Part Number 285320-207. For Bose
contact information, refer to the address sheet included in the carton.
To use an adapter cable
The RCA connectors are color coded, red for right and white for left.
1. Insert the adapter cable DIN connector into the Bose®link jack on the transmitter (INPUT)
or receiver (OUTPUT) jack, as appropriate.
2. Insert the adapter cable RCA connectors into the Audio Out jack on the connection panel
of the audio source or the Audio In jack on the expansion room product. Match left to left
and right to right.

8
SETUP
EnglishFrançais Español
Figure 6
Connections using the
adapter cable
Transmitter Receiver
Expansion Room Product
Audio Input
L
R
Source Product
Audio Output
L
R
Adapter cable
Adapter cable
Bose®link
INPUT Bose®link
OUTPUT
3. Complete the connections using the power pack:
– Insert the small plug on the power pack cable into the AC Power jack.
– Plug the pack into an AC wall outlet.
The Status LED lights to verify this power connection.
Note: For information on the meaning of the different Status LED lights, refer to “Check the
indicators and settings” below.
To control volume when a non-Bose product is the sound source:
• There is no need for an expansion room remote control.
• Use the remote that came with the tuner/receiver in the room where it is connected to the
transmitter.
• Use the volume control on the system, radio, or powered speakers connected to the
receiver in the other room.
To control non-Bose or older Bose products in the expansion room:
• Use a Bose®link remote control or the PERSONAL®music center II to select audio from the
LIFESTYLE®system in the main room.
• Use the product remote or console control for local volume adjustments.
Check the indicators and settings
Before you use the audio link, you may want to check some of the indicators and settings
that make your expansion products work together smoothly.
The Status LED
On the connection panel of both the transmitter and the receiver, the Status LED indicates
how the two units are communicating, as shown in the table below.
Status LED Blinking Green Solid Green Blinking Orange Solid Orange
On the
transmitter
Searching for
receiver Receiver
located Not
applicable Powered on,
no communication
On the
receiver
Searching for
transmitter Solid signal
received Weak signal
received Weak or no signal
received
On the receiver, a blinking or solid orange light indicates a communications problem. Reposi-
tioning the transmitter or receiver, or both, may resolve the problem and cause both LEDs to
change to solid green. For further information, refer to “Troubleshooting” on page 10.

9
SETUP
English FrançaisEspañol
The transmitter Channel button
You can use the Channel button to narrow the selection of frequencies the transmitter uses.
The transmitter is factory set to avoid WiFi channel 6. This helps prevent performance prob-
lems, such as slow or intermittent data transmissions, on a wireless network. If you have a
wireless network set up on another channel, you can set up your transmitter to avoid that
channel, or you can move the WiFi network to channel 6.
To reserve a channel for use by your WiFi network:
1. Press and hold the Channel button for more than 3 seconds to reach the setting for NO
WIFI NETWORK. The Status LED blinks red three times to confirm this move.
2. In the grouping below, locate the channel used by your nearby WiFi network:
NO WIFI NETWORK...6...11...1...2...3...4...5...7...8...9...10.
3. Count the number of forward moves it takes from the NO WIFI NETWORK setting to
reach your WiFi network channel. For example, if your WiFi network uses channel 3, you
need to move forward 5 times to reserve channel 3 for WiFi network use only.
4. Press the Channel button for less than 3 seconds for each forward move. Repeat as
many times as needed to reach the channel you want to reserve. The Status LED will
blink red to confirm each move.
If the WiFi network channel is unknown to you, use the Channel button to switch off one
channel at a time. Test the WiFi network to see which setting gives you the best effect.
If you do not have a WiFi network in your home:
Follow Step 1 above to use the entire frequency band and maximize transmitter
performance.
Your Bose®link expansion room remote control
•Roomcode
If you have more than one LIFESTYLE®
system expansion room, make sure the remote
used in each one has a unique room code.
• House code
The house code setting on the remote must match the setting on your LIFESTYLE®system.
It may not match if you changed the system house code due to interference with another
system.
For information on these house code and room code settings and how to change them, refer
to the owner’s guide that came with your remote.
Note: Setup codes for the transmitter and receiver, which must be identical to each other, do
NOT need to match house codes on the remote or LIFESTYLE®
system.
Your Bose link expansion room product
•Roomcode
Make sure the system, amplifier, or powered speaker room code setting matches that of
the remote you are using in the expansion room.
For information on room code settings and how to change them, refer to the owner’s guide
that came with your Bose®link product.
Enjoy your wireless entertainment
With the settings confirmed, your Bose link AL8 Homewide Wireless Audio Link is ready for
use. To explore and enjoy all of the capabilities provided by your expansion products, refer to
the owner’s guide provided with each product.

10
EnglishFrançais Español
REFERENCE
Accessories
Bose offers additional receivers as well as extension/expansion cables and adapter kits for
use with the Bose®link AL8 Homewide Wireless Audio Link.
For further information, contact your Bose dealer or Bose Customer Service. For Bose
contact information, refer to the address sheet included in the carton.
Troubleshooting
Problem What to do
No sound • For both the transmitter and the receiver, make sure:
– the audio source is plugged in, turned on, and working.
–theBose
®link A cable is securely connected at both ends. Refer to “Making the connec-
tions” on page 6.
– the small connector end of the power cord is inserted firmly into the AC Power jack on the
connection panel and the power pack is plugged securely into a working AC outlet.
– the Setup code switches on the connection panel of the transmitter and the receiver are set
identically. There are four options: 1 & 2 up; 1 & 2 down; 1 up & 2 down; 1 down & 2 up.
– the Status LEDs are lit a solid green to indicate solid communication between the two parts.
If not, refer to the next Problem in this table.
• For the expansion room products, make sure:
– the system, amplifier, or powered speaker is plugged in and turned on. On an SA-2 or SA-3
amplifier in that room, make sure the status LED is lit to indicate the amplifier is working.
– the room code is set on the Bose link remote control or PERSONAL®music center II to
match the room codes on the amplifier or powered speaker and are unique to this expansion
room.
– the house code is set on the Bose link remote control or PERSONAL music center II to
match the house code of the LIFESTYLE®system in the main room.
Above problem
persists and the
Status LED lights
are not solid green
• Move the receiver and transmitter closer together.
• Move the receiver, the transmitter, or both so the transmission path between them does not
intersect with large metal objects (like a refrigerator), impervious construction materials (like
thick masonry) or other obstructions (like a pool of water).
• Check to see if the Status LEDs turn green as a result of the above efforts. For details, refer to
“Check the indicators and settings” on page 8.
Interference with
a WiFi network,
telephone, TV,
or other electronic
device
• For interference with a Wifi network, use the Channel button on the connection panel of the
transmitter to alleviate the problem. For details, refer to “The transmitter Channel button” on
page 9.
• For interference with a telephone, TV or other electronic device, move the transmitter or
receiver farther from the device.
Interference from a
microwave oven • Reposition the transmitter so it is in a more open area.
• Move the receiver farther from the microwave.

11
REFERENCE
English FrançaisEspañol
Contacting Customer Service
For additional help in solving problems, contact Bose®Customer Service. Refer to the
address sheet included in the carton.
Limited warranty
This system is covered by a transferable limited warranty.
Details of the limited warranty are provided on the Product Registration Card that came with
your system. Please fill out the information section on the card and mail it to Bose. Failure to
do so, however, will not affect your limited warranty rights.
Technical Information
Power rating
9.5V , 1.0A
Frequency band
2.4000 GHz to 2.4835 GHz
Transmitter Audio Input Level
2 Vrms (fixed)
Receiver Audio Output Level
2 Vrms (fixed)
RF Transmit power
Approx. 300mW peak
Dimensions
Transmitter: 3"H x 6"W x 6"D (7.6 x 15.2 x 15.2 cm)
Receiver: 3"H x 6"W x 6"D (7.6 x 15.2 x 15.2 cm)
Weight
Transmitter: 1 lb (0.5 kg)
Receiver: 1 lb (0.5 kg)
Sound heard in the
expansion room is
not coming from
your media center
or audio source
Change the Setup code switches on both the transmitter and the receiver, making sure they are
identical. This may prevent signals from another AL8 transmitter in the vicinity from reaching your
receiver.
There are four possible switch combinations: 1 & 2 up (as set at the factory); 1 & 2 down; 1 up & 2
down; 1 down & 2 up.
Unexpected sound
from the media
center
Change the house code settings in both your LIFESTYLE®system and any remote controls you
are using with it.
This may prevent another nearby LIFESTYLE®system from affecting the operation of your system.
For further information on house codes and how to change them, refer to the owner’s guides that
came with your LIFESTYLE®system and Bose link remote controls.

6%RVH&RUSRUDWLRQ7KH0RXQWDLQ
)UDPLQJKDP0$86$
$05HY02&&0

BOSE®Link AL8
HOMEWIDE WIRELESS AUDIO LINK
2ZQHU¶V*XLGH
*XtDGHXVDULR
1RWLFHG¶XWLOLWVDWLRQ

2
EnglishFrançais Español
INFORMATIONS RELATIVES À LA SÉCURITÉ
Veuillez lire cette notice d’utilisation
Prenez le temps de lire attentivement les instructions de cette notice d’utilisation. Elles vous seront précieuses pour installer
et utiliser correctement votre système et vous aideront à tirer le meilleur parti de sa technologie. Conservez cette notice
d’utilisation pour référence ultérieure.
AVERTISSEMENT : Afin de limiter les risques d’incendie ou d’électrocution, n’exposez pas l’appareil à la pluie ou à l’humidité.
AVERTISSEMENT : Protégez-le de tout risque de ruissellement ou d’éclaboussure. Ne placez pas d’objets contenant des
liquides, tels que des vases, sur l’appareil. Comme avec tout appareil électronique, veillez à ne pas renverser de liquides sur
aucune partie de l’appareil. Les liquides peuvent provoquer des pannes et/ou un risque d’incendie.
Le symbole représentant un éclair avec une flèche à l’intérieur d’un triangle équilatéral est utilisé pour prévenir
l’utilisateur de la présence d’une tension électrique dangereuse non isolée à l’intérieur de l’appareil. Cette tension est
d’un niveau suffisamment élevé pour représenter un risque d’électrocution.
Le symbole représentant un point d’exclamation à l’intérieur d’un triangle équilatéral signale à l’utilisateur la présence
d’instructions importantes relatives au fonctionnement et à l’entretien de l’appareil dans cette notice d’utilisation.
AVERTISSEMENT : Ne placez jamais d’objets enflammés, tels que des bougies allumées, sur l’appareil.
Remarque : L’étiquette d’identification du produit est située au-dessous de l’appareil.
Utilisez exclusivement le cordon fourni avec ce produit. Lorsque la fiche d’alimentation est utilisée comme dispositif de
débranchement de l’appareil, elle doit rester facilement accessible.
Ce produit doit être utilisé à l’intérieur. Il n’a pas été conçu ni testé pour une utilisation en extérieur, dans des
véhicules ou sur des bateaux.
Importantes instructions liées à la sécurité
1. Veuillez lire ces instructions avant d’utiliser le produit. Elles sont valables pour tous les composants.
2. Conservez-les pour toute référence ultérieure.
3. Respectez tous les avertissements, qu’ils soient donnés sur le produit lui-même ou dans la notice d’utilisation.
4. Suivez toutes les instructions.
5. N’utilisez pas cet appareil à proximité d’eau ou d’une source d’humidité, telle qu’une baignoire, un lavabo, un évier de
cuisine, une piscine, dans un sous-sol humide ou tout autre emplacement humide.
6. Utilisez uniquement un chiffon sec pour le nettoyage comme indiqué par Bose Corporation. Débranchez ce produit de
la prise électrique murale avant de le nettoyer.
7. Ne bloquez jamais les orifices d’aération. Suivez les instructions du fabricant pour l’installation – Pour garantir un
fonctionnement fiable du produit et protéger celui-ci contre tout risque de surchauffe, installez-le à un emplacement et dans
une position permettant d’assurer une ventilation correcte.
8. N’installez pas cet appareil à proximité d’une quelconque source de chaleur, telle qu’un radiateur, une arrivée d’air
chaud, un four ou tout autre appareil (notamment les amplificateurs) produisant de la chaleur.
9. Utilisez uniquement les accessoires spécifiés par le fabricant.
10. Débranchez cet appareil pendant les orages ou au cours des longues périodes de non-utilisation afin d’éviter de
l’endommager.
11. Confiez toute réparation à du personnel qualifié. Une réparation est nécessaire lorsque l’appareil a été endommagé
de quelque façon que ce soit (endommagement du cordon d’alimentation ou de la fiche électrique, renversement
d’un liquide ou de tout objet sur l’appareil, exposition de l’appareil à la pluie ou à l’humidité, mauvais
fonctionnement, chute de l’appareil, etc.).

3
TABLE DES MATIÈRES
English FrançaisEspañol
INTRODUCTION 4
Réseau audio domestique sans fil Bose®link AL8 . . . . . . . . . . . . . . . . . . . . . . . . . . . . . . . . . . . . . . . . . . . . . . . . . . . . 4
Déballage . . . . . . . . . . . . . . . . . . . . . . . . . . . . . . . . . . . . . . . . . . . . . . . . . . . . . . . . . . . . . . . . . . . . . . . . . . . . . . . . . . . 4
Comment distinguer les deux appareils . . . . . . . . . . . . . . . . . . . . . . . . . . . . . . . . . . . . . . . . . . . . . . . . . . . . . . . 5
Choix de l’emplacement de chaque unité . . . . . . . . . . . . . . . . . . . . . . . . . . . . . . . . . . . . . . . . . . . . . . . . . . . . . . . . . . 5
INSTALLATION 6
Branchements . . . . . . . . . . . . . . . . . . . . . . . . . . . . . . . . . . . . . . . . . . . . . . . . . . . . . . . . . . . . . . . . . . . . . . . . . . . . . . . 6
Émetteur . . . . . . . . . . . . . . . . . . . . . . . . . . . . . . . . . . . . . . . . . . . . . . . . . . . . . . . . . . . . . . . . . . . . . . . . . . . . . . . 6
Récepteur . . . . . . . . . . . . . . . . . . . . . . . . . . . . . . . . . . . . . . . . . . . . . . . . . . . . . . . . . . . . . . . . . . . . . . . . . . . . . . 7
Instructions pour les anciens produits Bose et pour les produits ne provenant pas de Bose . . . . . . . . . . . . . 7
Vérification des indicateurs et des réglages . . . . . . . . . . . . . . . . . . . . . . . . . . . . . . . . . . . . . . . . . . . . . . . . . . . . . . . . 8
La diode d’état . . . . . . . . . . . . . . . . . . . . . . . . . . . . . . . . . . . . . . . . . . . . . . . . . . . . . . . . . . . . . . . . . . . . . . . . . . 8
Bouton de changement de canal de l’émetteur . . . . . . . . . . . . . . . . . . . . . . . . . . . . . . . . . . . . . . . . . . . . . . . . . 9
Télécommande de votre pièce d’extension Bose®link . . . . . . . . . . . . . . . . . . . . . . . . . . . . . . . . . . . . . . . . . . . 9
Appareil de votre pièce d’extension Bose®link . . . . . . . . . . . . . . . . . . . . . . . . . . . . . . . . . . . . . . . . . . . . . . . . . 9
Profitez bien de votre réseau audio sans fil . . . . . . . . . . . . . . . . . . . . . . . . . . . . . . . . . . . . . . . . . . . . . . . . . . . . . . . . . 9
RÉFÉRENCE 10
Accessoires . . . . . . . . . . . . . . . . . . . . . . . . . . . . . . . . . . . . . . . . . . . . . . . . . . . . . . . . . . . . . . . . . . . . . . . . . . . . . . . . . 10
Dépannage . . . . . . . . . . . . . . . . . . . . . . . . . . . . . . . . . . . . . . . . . . . . . . . . . . . . . . . . . . . . . . . . . . . . . . . . . . . . . . . . . . 10
Comment contacter le service client . . . . . . . . . . . . . . . . . . . . . . . . . . . . . . . . . . . . . . . . . . . . . . . . . . . . . . . . . 11
Garantie limitée . . . . . . . . . . . . . . . . . . . . . . . . . . . . . . . . . . . . . . . . . . . . . . . . . . . . . . . . . . . . . . . . . . . . . . . . . . . . . . 11
Informations techniques . . . . . . . . . . . . . . . . . . . . . . . . . . . . . . . . . . . . . . . . . . . . . . . . . . . . . . . . . . . . . . . . . . . . . . . . 11
Informations sur les produits générateurs de bruit électrique
U.S.A.
Ce matériel a fait l’objet de tests prouvant sa conformité aux limites imposées aux appareils numériques de classe B, conformément à
la partie 15 des réglementations de la FCC. Ces limites sont conçues pour offrir une protection raisonnable contre les interférences
nuisibles dans une installation résidentielle. Ce matériel génère, utilise et est susceptible d’émettre de l’énergie à fréquence radio.
À ce titre, s’il n’est pas installé ou utilisé conformément aux instructions, il est susceptible de perturber les communications radio.
Cependant, il n’est nullement garanti que de telles perturbations ne se produisent pas dans une installation donnée.
Si ce matériel perturbe effectivement la réception de la radio ou de la télévision (ce qui peut être vérifié en allumant et en éteignant le
matériel), vous êtes invité à tenter de remédier au problème en prenant une ou plusieurs des mesures ci-dessous :
• Réorientez ou déplacez l’antenne de réception.
• Augmentez la distance séparant le matériel du récepteur.
• Connectez le matériel à une prise située sur un circuit différent de celui auquel est connecté le récepteur.
• Consultez votre revendeur ou un technicien radio/TV expérimenté pour assistance.
Toute modification de cet appareil est susceptible d’annuler le droit de l’utilisateur à utiliser ce matériel.
Canada
Ce produit est conforme aux spécifications de la réglementation ICES-0003 Classe B du Canada.
Son utilisation est assujettie aux conditions suivantes : (1) cet appareil ne doit pas provoquer d’interférences et (2) cet appareil doit
tolérer les interférences externes, y compris celles qui peuvent provoquer un fonctionnement anormal de cet appareil.
Normes de sécurité relatives aux fréquences radio :
Cet appareil est conforme aux recommandations sur les fréquences radio FCC/OET 65 et au code 6 du ministère de la santé du Canad
relatif aux équipements mobiles. Il doit être installé à une distance d’au moins 20 cm des utilisateurs et autres personnes.
Renseignements à conserver
Les numéros de série figurent à la base de l’émetteur et du récepteur AL8.
Numéros de série : Émetteur __________________________________ Récepteur _________________________________________________
Revendeur : _____________________________________________________________________________________________________________
Téléphone du revendeur : Date d’achat : _______________________________________ ____________________________________________
Bose conseille de conserver votre facture ainsi qu’une copie de la carte d’enregistrement de votre produit avec cette notice.

4
EnglishFrançais Español
INTRODUCTION
Réseau audio domestique sans fil Boselink AL8
Merci d’avoir choisi Bose pour équiper votre domicile d’une solution d’expansion audio qui
vous évitera de tirer des câbles entre toutes les pièces.
Le réseau audio se compose d’un émetteur et de récepteurs. Les signaux audio de votre
système LIFESTYLE®18 ou 28 série II ou LIFESTYLE®38 ou 48 sont transmis à un autre
système ou à des enceintes dans une autre partie des locaux.
Un émetteur peut transmettre les signaux à 8 récepteurs, ce qui permet d’agrandir à tout
moment votre installation.
Remarque : Pour faciliter les possibilités d’extension futures, il est recommandé de conserver
ce guide comme référence.
Utilisé conjointement avec une télécommande Bose®link ou avec le PERSONAL®music
center II, le réseau audio domestique sans fil Bose link AL8 offre en effet d’innombrables
options d’extension.
Déballage
Déballez le système avec précaution et conservez tous les emballages pour une éventuelle
utilisation ultérieure. Ils permettront plus tard de transporter le produit en toute sécurité.
Assurez-vous que toutes les pièces illustrées sur la Figure 1 figurent dans le carton.
Si vous remarquez que l’un des éléments du système semble endommagé, n’essayez pas de
l’utiliser. Avertissez immédiatement Bose ou un revendeur Bose®agréé. Pour contacter Bose,
consultez la liste d’adresses incluse dans le carton d’emballage.
Figure 1
Contenu du carton
Ooooooooo
Émetteur
Récepteur
Notice
d’utilisation
Câble Bose®
link A
Alimentations
Remarque : Repérez les numéros de série indiqués sous l’émetteur et le récepteur Notez ces
numéros sur la carte d’enregistrement de votre produit et dans l'espace prévu à cet effet,
« Renseignements à conserver » page 3.

5
INTRODUCTION
English FrançaisEspañol
Comment distinguer les deux appareils
Le panneau de connexion de chaque unité identifie celle-ci par sa fonction : TRANSMITTER
(émetteur) ou RECEIVER (récepteur). Deux connecteurs Bose®link et un bouton marqué
Channel permettent aussi de distinguer l’émetteur.
Pour des raisons de compatibilité, ces deux unités possèdent le même code de
configuration, qui a été défini en usine avec les deux commutateurs en position haute
(Figure 2). Une diode s’illumine lorsque les deux unités sont branchées sur le secteur et
communiquent entre elles.
Figure 2
Panneaux de connexion
des deux unités Récepteur
Émetteur
Connecteurs
Bose®link
Connecteur
Bose®link
Commutateur de
canal Diode d’état
Remarque : Pour toutes informations sur la signification des différents états des diodes,
reportez-vous à la section « Vérification des indicateurs et des réglages » page 8.
Choix de l’emplacement de chaque unité
Placez l’émetteur dans la même pièce que le media center du système LIFESTYLE®.
Placez le récepteur dans la même pièce que votre périphérique d’extension Bose Link.
Remarque : L’utilisation du réseau audio avec des produits non compatibles Bose Link
nécessite un adaptateur. Pour plus d’informations, reportez-vous à la section « Instructions pour
les anciens produits Bose et pour les produits ne provenant pas de Bose » page 7.
Conseils de mise en place:
• Placez chaque unité à l’endroit, avec tous les pieds reposant sur une surface plane
(plancher, table ou étagère).
• Ne posez pas les unités sur le côté.
• Placez chaque unité à moins de 2 mètres du périphérique auquel elle est connectée
(à l’aide du câble Bose link A fourni).
• N’espacez pas les deux unités de plus de 24 mètres.
• N’oubliez pas que le signal est plus fort au-dessus et autour de l’émetteur, pas en dessous.

6
EnglishFrançais Español
INSTALLATION
Branchements
Il est possible de connecter un émetteur et jusqu’à 8 récepteurs pour chaque système
LIFESTYLE®.
L’émetteur et le récepteur founi utilisant chacun l’un des deux câbles Bose®link A fournis.
Ces câbles mesurent environ deux mètres. Chaque unité doit également être raccordée à une
prise électrique à l’aide de l’un des deux boîtiers d’alimentation fournis.
Remarque : En cas d’utilisation d’un récepteur ne provenant pas de Bose, les instructions
ci-dessous ne s’appliquent pas intégralement. Pour plus de détails, reportez-vous à la section
« Instructions pour les anciens produits Bose et pour les produits ne provenant pas de Bose »,
page 7.
Émetteur
1. Raccordez l’une des extrémités d’un câble Bose link A au jack marqué
« Bose®link INPUT » sur le panneau de connexion de l’émetteur
2. Raccordez l’autre extrémité de ce câble au jack « Bose link » (sous le jack Main Speaker)
du panneau de connexion du media center LIFESTYLE®(Figure 3).
Figure 3
Raccordement de
l’émetteur au media center
LIFESTYLE®
Connecteur Bose®link de l’enceinte
Émetteur
Alimentation
électrique
Connecteur Bose®link
INPUT
Media center LIFESTYLE®
Câble
Bose
link
A
Diode
d’état
Jack de l’enceinte principale
Remarque : Si un autre appareil est déjà connecté au jack Bose link Speaker du media center,
déconnectez-le. Vous pouvez utiliser le réseau audio sans fil pour remplacer cette connexion.
Si vous préférez continuer à utiliser cette connexion, reconnectez le câble au jack marqué
« Bose®link OUTPUT »sur le panneau de connexion de l’émetteur (Figure 4).
Figure 4
Raccordement de
l’émetteur et d’un
périphérique au media
center LIFESTYLE®
Émetteur Media center LIFESTYLE®
Connexion de l’émetteur
Connecteur
Bose®link
INPUT
Bose link
OUTPUT
Connexion de l’autre appareil Connecteur Bose®link de l’enceinte
3. Insérez le petit connecteur du câble du boîtier d’alimentation dans le jack « AC Power »
de l’émetteur, puis branchez .le boîtier d’alimentation à une prise électrique
La diode d’état s’illumine pour confirmer l’alimentation secteur.
Remarque : Pour toutes informations sur la signification des différents états des diodes,
reportez-vous à la section « Vérification des indicateurs et des réglages » page 8.

7
INSTALLATION
English FrançaisEspañol
Récepteur
1. Connectez une extrémité de l’un câble Bose®link A dans le connecteur marqué « Bose®
Link OUTPUT » sur le récepteur.
2. Connectez l’autre extrémité du câble au jack « Bose link Input » du système de la pièce
d’extension, à l’amplificateur ou à l’enceinte amplifiée (Figure 5).
Figure 5
Exemple de connexion à un
amplificateur Bose link
Connecteur Bose link
Input
Récepteur
Alimentation
électrique
Amplificateur LIFESTYLE®SA-3
Diode d’état
Connecteur Bose®link
OUTPUT Câble Bose
link A
Jack de sortie Bose link
3. Insérez le petit connecteur du câble du boîtier d’alimentation dans le jack « AC Power »
du récepteur, puis branchez le boîtier d’alimentation à une prise électrique.
La diode d’état s’illumine pour confirmer l’alimentation secteur.
Remarque : Pour toutes informations sur la signification des différents états des diodes,
reportez-vous à la section « Vérification des indicateurs et des réglages » page 8.
Instructions pour les anciens produits Bose et pour les produits ne
provenant pas de Bose
Le réseau audio domestique sans fil Bose Link AL8 permet également d’utiliser des appareils
non compatibles avec le système Bose link.
Il est possible d’utiliser des produits non Bose de l’une des manières indiquées ci-dessous :
• Un démodulateur/récepteur comme source audio, connecté à l’émetteur, ou situé dans une
pièce d’extension et connecté au récepteur
• Des enceintes amplifiées connectées au récepteur
Il est possible d’utiliser d’anciens produits Bose de l’une des manières indiquées ci-dessous :
• Des enceintes amplifiées, un récepteur radio ou un système doté de ses propres réglages
de volume et de mise sous/hors tension, avec des jacks de sortie ligne (de type RCA
femelle) connectés au récepteur
Les produits mentionnés ci-dessus nécessitent un câble d’adaptation RCA - DIN pour être
connectés à l’émetteur, au récepteur ou aux deux. Vous pouvez vous procurer auprès de
Bose un kit adaptateur composé de deux câbles de ce type.
Remarque : Pour commander cet adaptateur auprès de Bose®, indiquez la référence
285320-207. Pour savoir comment contacter Bose, consultez la liste des adresses figurant dans
le carton d'emballage.
Pour utiliser un câble adaptateur
Les connecteurs RCA correspondent à un codage couleur : le rouge est destiné au canal de
droite, le blanc au canal de gauche.
1. Insérez le connecteur DIN de l’adaptateur dans le jack Bose®link de l’émetteur (INPUT)
ou du récepteur (OUTPUT), selon le cas.
2. Insérez les connecteurs RCA de l’adaptateur dans les jacks Audio Out du panneau de
connexion de la source audio, ou dans les jacks Audio In de l’appareil situé dans la pièce
d’extension. Veillez à faire correspondre les connecteurs selon leur couleur.
Other manuals for Lifestyle 18 Series II
8
This manual suits for next models
19
Table of contents
Languages:
Other Bose Receiver manuals

Bose
Bose Link AR1 User manual

Bose
Bose Link AL8 User manual

Bose
Bose Lifestyle 18 Series II User manual

Bose
Bose Link AR1 User manual

Bose
Bose Link AL8 User manual

Bose
Bose Spatial Control User manual

Bose
Bose Link AL8 User manual

Bose
Bose Link AL8 User manual

Bose
Bose SL2 User manual

Bose
Bose Frames Soprano User manual