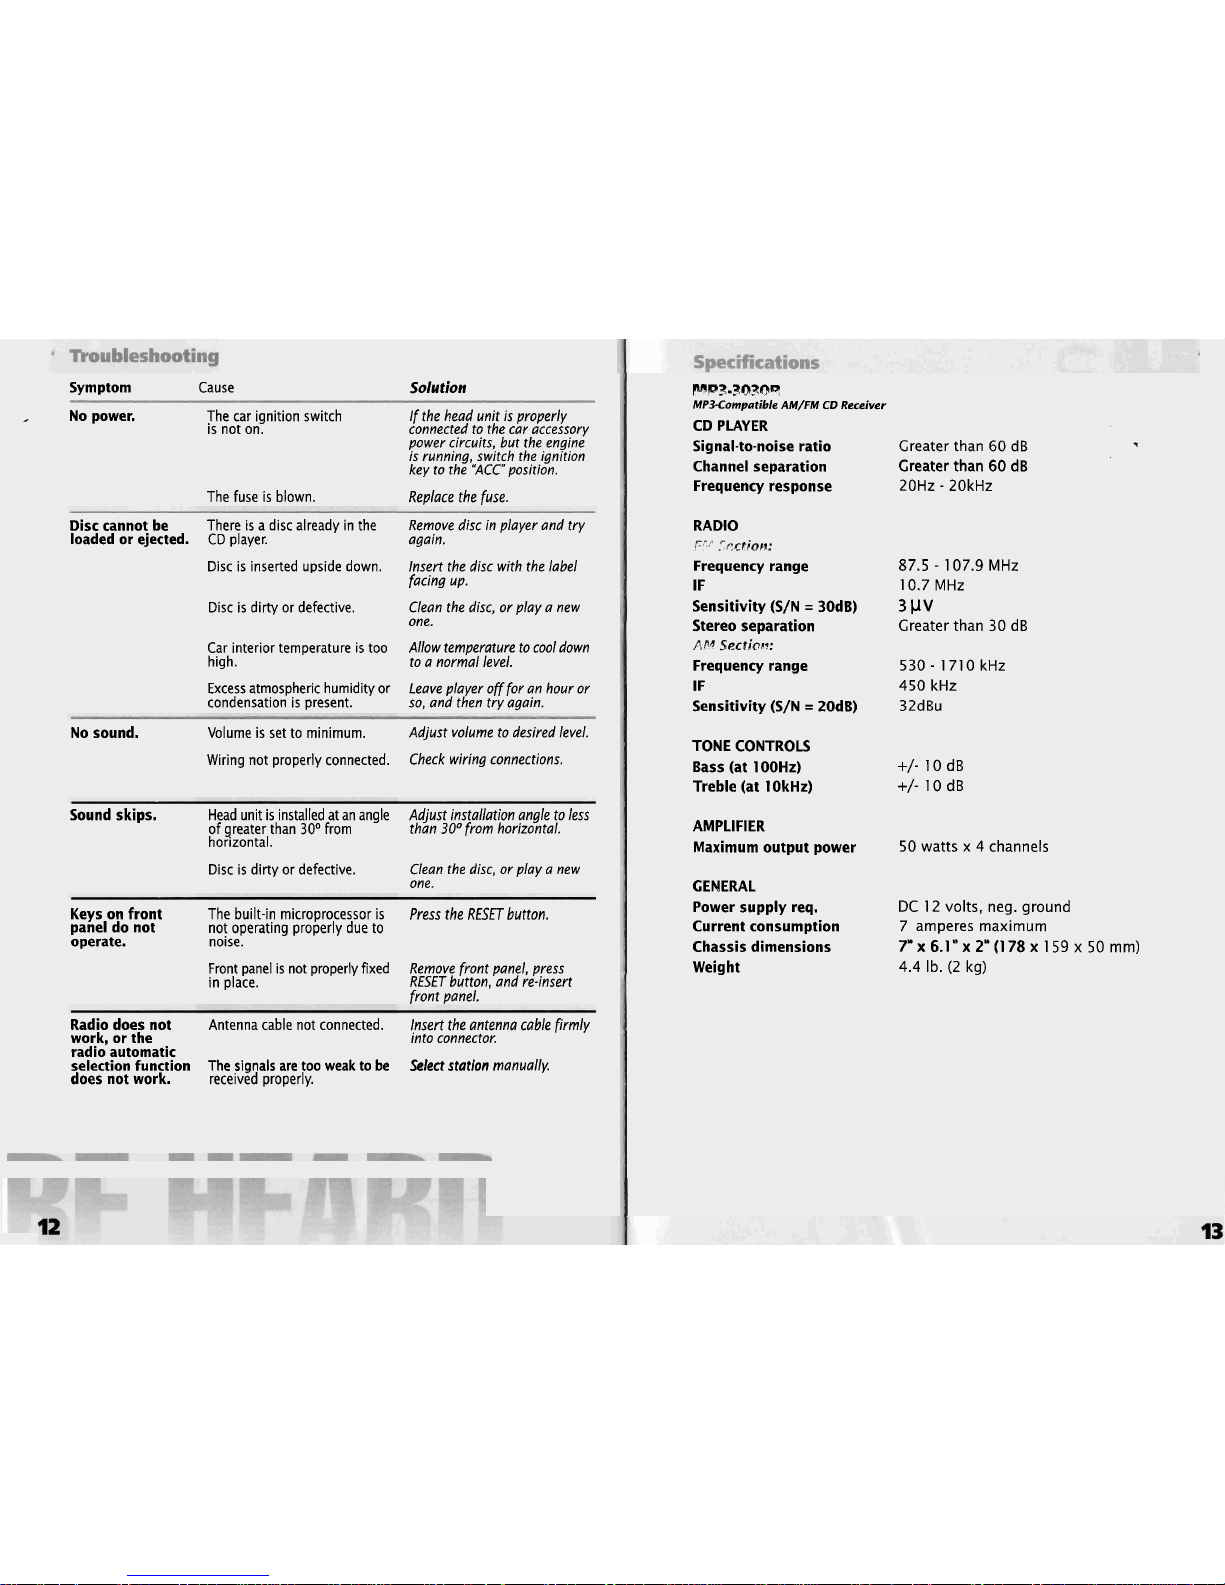
Boss Audio Systems CD-3030R User manual
Other Boss Audio Systems Car Receiver manuals

Boss Audio Systems
Boss Audio Systems 722CA User manual

Boss Audio Systems
Boss Audio Systems 775DI User guide

Boss Audio Systems
Boss Audio Systems 835UI User manual

Boss Audio Systems
Boss Audio Systems 622UA User guide

Boss Audio Systems
Boss Audio Systems 614C User manual

Boss Audio Systems
Boss Audio Systems CD-3020 User manual

Boss Audio Systems
Boss Audio Systems MP3-4100R User manual

Boss Audio Systems
Boss Audio Systems 506CA User manual

Boss Audio Systems
Boss Audio Systems 658UA User manual

Boss Audio Systems
Boss Audio Systems CD-3155R User manual

Boss Audio Systems
Boss Audio Systems BV9358B User manual

Boss Audio Systems
Boss Audio Systems MR1400S User manual

Boss Audio Systems
Boss Audio Systems 758DBI User manual

Boss Audio Systems
Boss Audio Systems MR1470UW User manual

Boss Audio Systems
Boss Audio Systems 758DBI User manual

Boss Audio Systems
Boss Audio Systems 560BRGB User manual

Boss Audio Systems
Boss Audio Systems MP3-3160R User manual

Boss Audio Systems
Boss Audio Systems BV7280 User manual

Boss Audio Systems
Boss Audio Systems BV9360B User manual

Boss Audio Systems
Boss Audio Systems 870DBI User manual