Bosston BSTNPP-2 User manual
BOSSTON
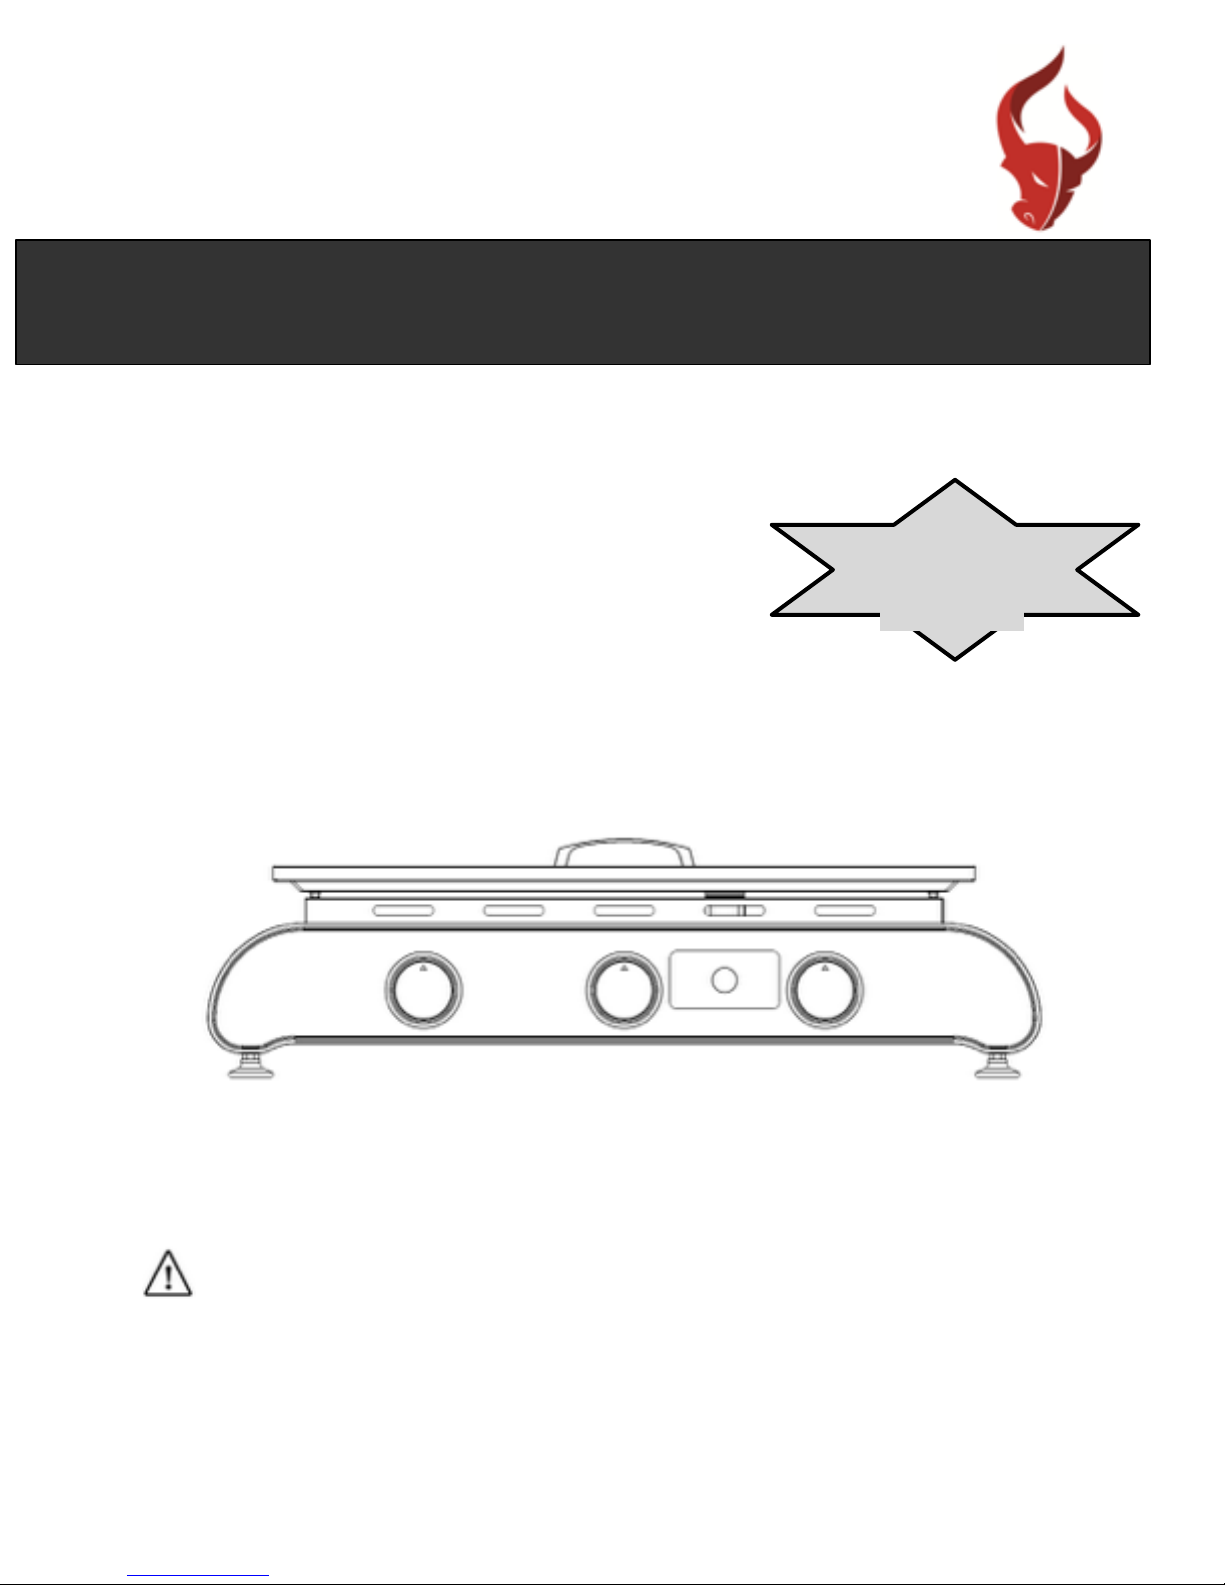
BSTNPP-2 and BSTNPP-3
2 AND 3 BURNER
PLANCHA GRILL
!WARNING!: This gas grill must be used only outdoors in a wellventilated
space and must not be used inside a building, garage, screened-in porch, gazebo
or any other enclosed area.
!1
Assembly & Operating Manual
DO NOT
DISCARD

SAFETY INSTRUCTIONS
DANGER!: IF YOU SMELL GAS
1. Shut off the gas supply at the gas cylinder.
2. Extinguish any flames.
3. Ventilate the area.
4. Check for leaks as detailed in this manual.
5. If the gas smell doesn’t disappear, keep your distance from the barbecue and contact your
dealer.
•Gas leakage can cause fire or explosions, which can lead to serious or fatal injuries or
damage of properties.
•An incorrect installation can be dangerous, that’s why all instructions in this manual must be
strictly followed.
•Not paying attention to the dangers, warnings and precautions in this user manual can lead
to serious or fatal injuries, or to fire or explosions causing damage to property.
•Changing the appliance can be extremely dangerous.
WARNING!:
•Never store or use gasoline or other flammable liquids near this or other barbecues.
•Check the barbecue first for leakages according to the instructions in this manual before
starting to use it.
•Do not try to ignite this barbecue without first having read chapter “barbecue ignition
instructions” in this manual.
•Keep this user manual for future reference.
•Follow the instructions for connecting the gas pressure regulator to your barbecue.
•Never store a backup gas cylinder or disconnected cylinder underneath or near this
barbecue.
•After a long period in which the BOSSTON barbecue has not been used, it must be checked
for gas leaks and obstructions of the burners. Refer to the instructions in this manual for the
correct procedure.
•Never check for gas leaks using a lighter.
•Never use your BOSSTON barbecue in case of gas leaks at the gas connections points.
•Keep inflammable materials at a minimum distance of 100 cm from the sides or rear of the
barbecue. Don’t store these inflammable materials in the storage space of the barbecue!
•Your BOSSTON barbecue may not be used by children. The accessible components of the
barbecue can become very hot. Keep young children away from the barbecue when using
your BOSSTON barbecue.
•Do not move the barbecue during use.
•Be careful when cleaning after use, the barbecue can still be hot.
•If one of the burners turns off while preparing a dish, close all gas valves. Wait five minutes
before you re-ignite the burners, following all ignition instructions when doing so.
•When cleaning the valves or burners, never enlarge the openings or connections.
•Keep your distance from ignition sources when replacing the gas cylinder.
•A dented or rusty gas cylinder can be dangerous. Have it checked by your gas supplier.
Never use a gas cylinder with a damaged valve
•Never disconnect the pressure regulator or any gas connection while using the barbecue.
•Always wear heat-resistant oven gloves when using the barbecue.
•The fat tray on the front could get hot. Please only take this tray out when it has cooled
down.
NOT SUITABLE FOR COMMERCIAL USE!
!2
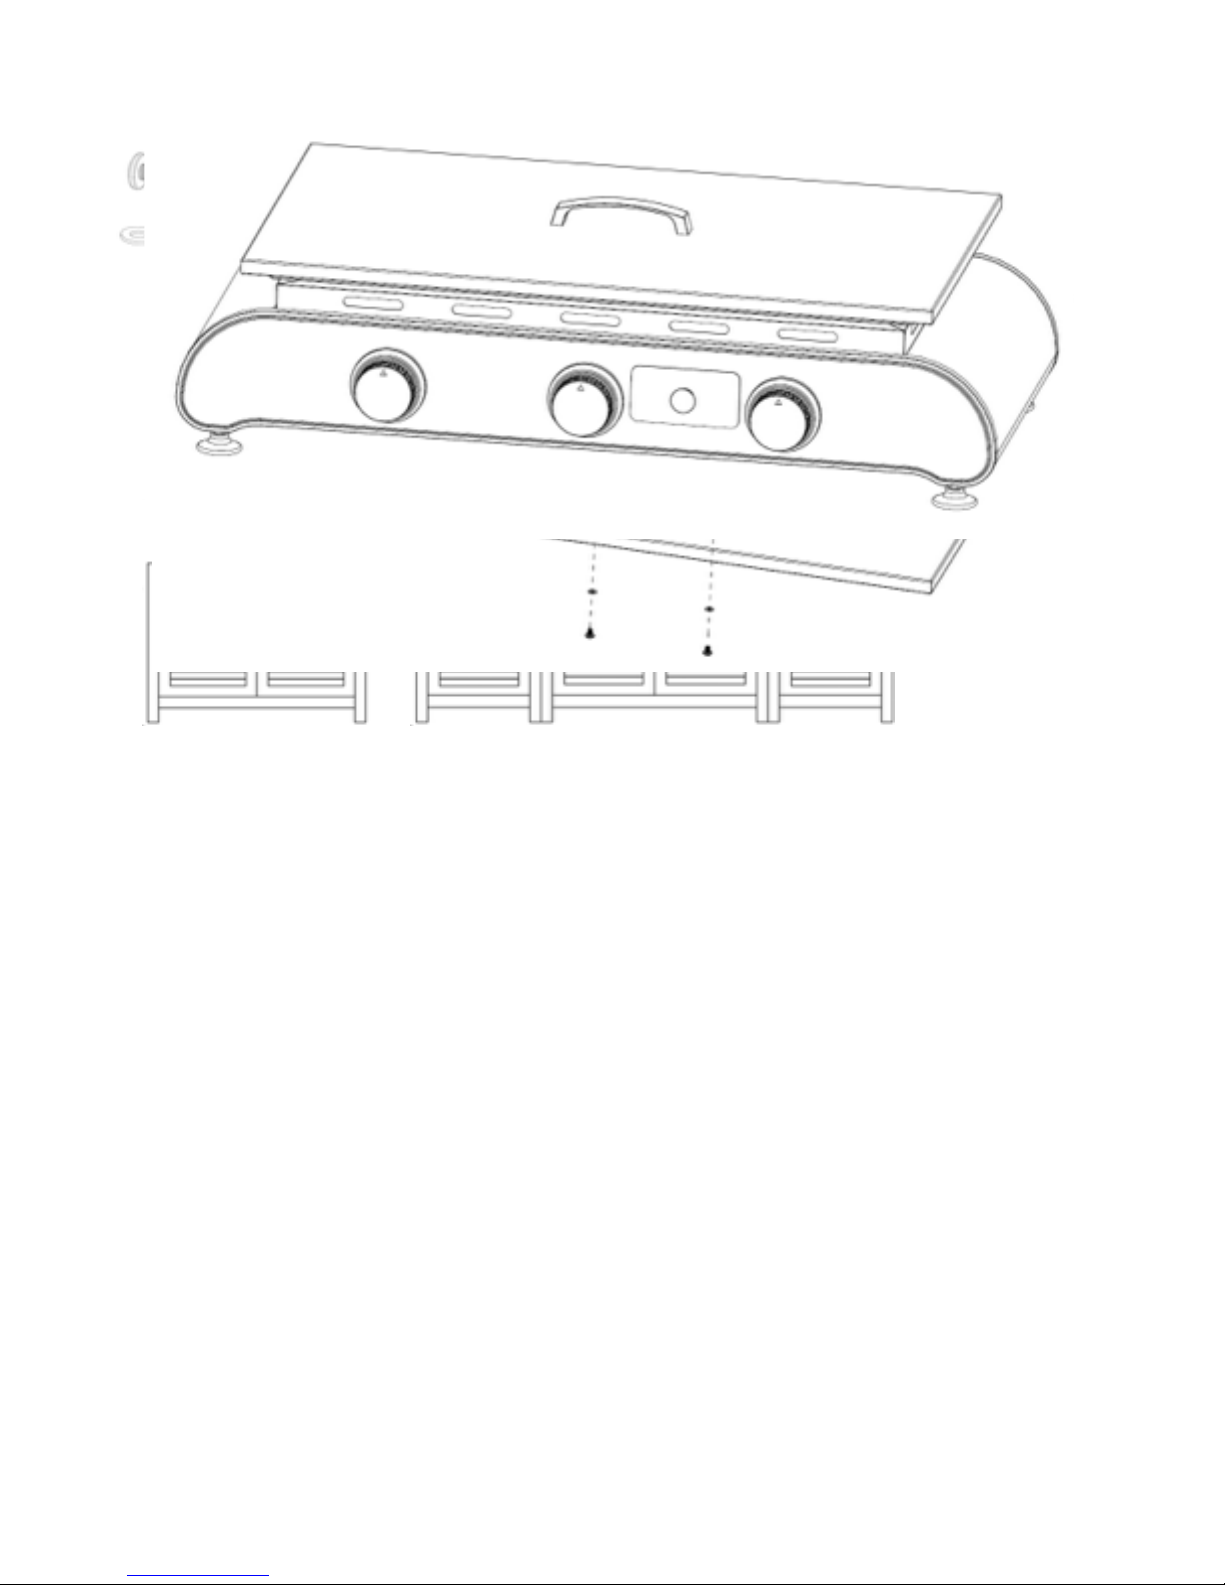
Please read all instructions thoroughly before use

3 Burner Model Shown. Same assembly for 2 burner model
ASSEMBLY
!
!3
INSTALLATION INSTRUCTIONS
•The appliance must be installed in accordance with these instructions, installation code AS/
NZS5601.1 and requirements of the local gas authority.
•Before installing the barbecue, consider the location of the gas supply and routing of the gas
line. Keep in mind that it should not be located under any burnable surface.
•The side and back should not be closer than 600mm from a combustible surface, while any
combustible surface above should be at least 1000mm away.
•For a correct functioning of this barbecue, it is important to place the barbecue on an even
surface.
•Not to be used in a built-in configuration.
! !
LOCATION
Locating Your Outdoor Gas Grill
It is important when selecting a location for your gas grill to ensure clearances to adjacent
combustibles are met. This appliance is intended for installation on an outdoor patio or in your
yard.
‘This appliance shall only be used in an above ground open-air situation with natural ventilation,
without stagnant areas, where gas leakage and products of combustion are rapidly dispersed by
wind and natural convection.’
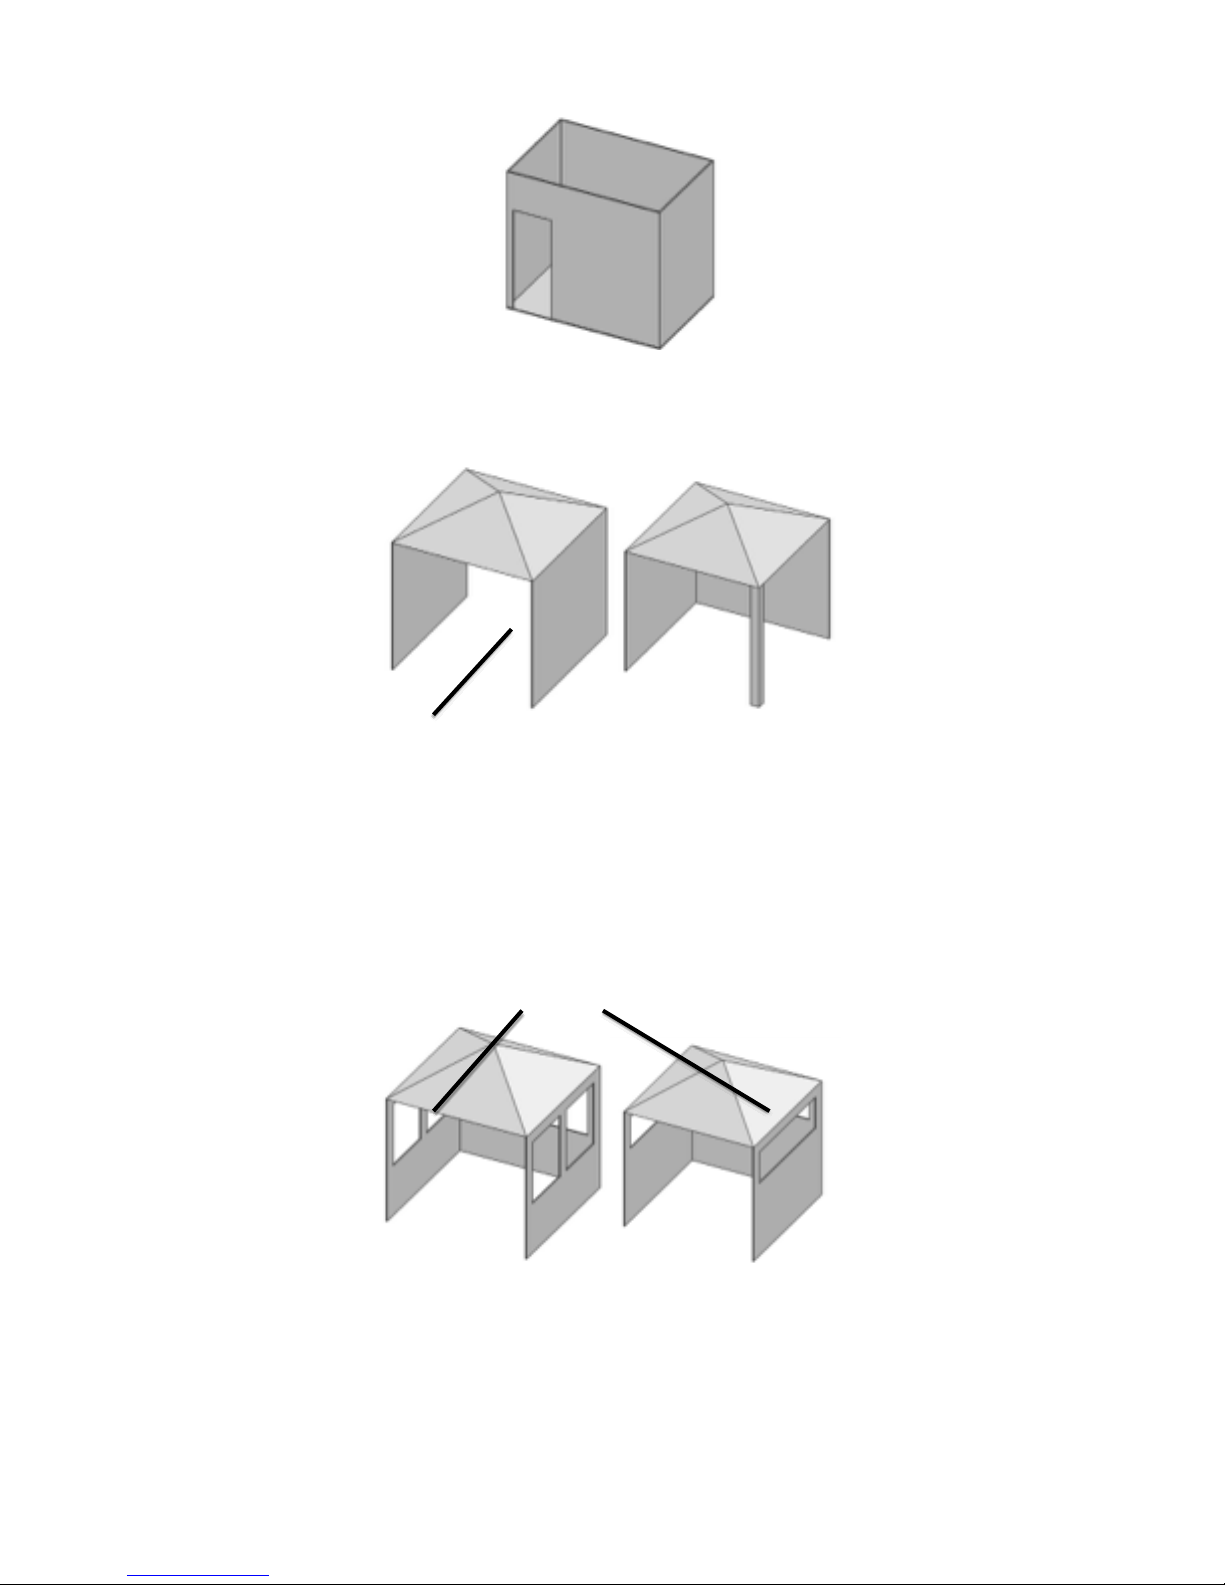
Any enclosure in which the appliance is used shall comply with one of the following:
An enclosure with walls on all sides, but at least one permanent opening at ground level and no
overhead cover.
!4
!
Within a partial enclosure that includes an overhead cover and no more than two sidewalls.
These sidewalls may be parallel, as in a breezeway, or at right angles to each other.
! !
Open Both Ends
Within a partial enclosure which includes an overhead cover and more than two walls, the
following shall apply:
a) at least 25% of the total wall area is completely open; and.
b) at least 30% of the remaining wall area is open and unrestricted. .
30% or more in total of the remaining wall
area is open and unrestricted
! !
Open side at least 25% of total wall area Open side at least 25% of total
wall area
In the case of balconies, at least 20% of the total of the side, back and front wall areas shall be
!5

and remain open and unrestricted.
UNIVERSAL LIQUIFIED PETROLEUM GAS CYLINDER
SPECIFICATIONS
!WARNING!If these instructions are not followed exactly, a fire causing death or
serious injury may occur.
This gas grill has been designed for use with an approved 4kg or 9 kg size Universal Liquefied
Petroleum Gas cylinder (not supplied). The Universal Liquefied Petroleum Gas cylinder must be
equipped with a POL tank valve connection. A dented or rusty cylinder may be hazardous and
should be checked by your Universal Liquefied Petroleum Gas supplier. Never use a cylinder
with a damaged valve. The cylinder supply system must be arranged for vapor withdrawal and
the cylinder shall include a dust cap to protect the cylinder valve. Do not store a spare Universal
Liquefied Petroleum Gas cylinder under or near this appliance. Never fill the cylinder beyond 80
percent full.
GAS CYNLINDER INSTALLATION
1. Check whether your barbecue is installed correctly.
2. Check whether the gas tap of the tank is completely closed (turn clockwise until the knob
stops).
3. Make sure that all burner knobs are set to OFFposition.
4. Remove the protective cover from the gas tap of the gas cylinder.
5. Inspect the connection between the gas tap and the pressure regulator. Look for damage
and dirt. Remove any debris. Check the hose for any damage.
6. Connect the regulator to the gas cylinder. Hand tighten counter-clockwise.
7. Take care not to over-tighten.
!WARNING!Use only the pressure regulator and hose assembly provided with this
barbecue.Replacement pressure regulator and hose assemblies should be sourced from
the place of purchase. The thread for the hose connection is 5/8”-18 UNF and connection
to the cylinder is through a Type 21 POL fitting. Always checkfor leaks after a cylinder is
connected.The regulator must be attached so that no part of the hose touches the
underside of the grill or oil pan. A fire will result if these directions are ignored.
Never operate your barbecue without a regulator.
CHECK FOR LEAKS
•Make sure all the knobs on the barbecue are on the OFF position.
•Turn the gas tap of the cylinder fully open (counter-clockwise).
•Check for leaks before igniting the grill by using a solution of 1:1 ratio of water and soap.
•Brush the soapy solution onto the hose and all joints. If bubbles appear you have a leak.
•Turn OFF the gas supply and rectify the problem before trying again.
•If leakage is detected and cannot be rectified, DO NOT use the barbecue and refer to the
place of purchase or your local gas dealer.
!6

WARNING!:
Under no circumstances should a naked flame be used to check for leaks.
VERY IMPORTANT: DISCONNECT THE GAS CYLINDER WHEN THE BARBECUE IS
NOT IN USE.
DISCONNECTING THE GAS CYLINDER
1. Turn OFF all knobs
2. Completely close the gas tap of the gas cylinder (turn clock-wise until the knob stops).
3. Remove the pressure regulator from cylinder by turning clockwise.
4. Replace the protective cover on the tap of the gas cylinder.
BARBECUE LIGHTING INSTRUCTIONS
WARNING!:BEFORE IGNITING
Check the gas supply hose before turning the gas “ON”. In case of visible damage or rips, the
hose must be replaced before use. The new gas supply hose must be according AS/NZS 1869.
VERY IMPORTANT!: ALWAYS INSPECT THE HOSE BEFORE EACH USE OF THIS
BARBECUE.
IGNITING THE MAIN BURNERS OF THE BARBECUE:
1. Read all instructions before igniting the burners.
2. Turn all knobs to OFFand open the gas tap of the gas cylinder.
3. Remove lid before lighting.
4. Press and turn the control knob counter-clockwise to the HI position. The built-in igniter
clicks and simultaneously ignites the jet flame and burner. If the burner does not ignite within
5 seconds, IMMEDIATELY turn the control knob to OFF, wait for 5 minutes until all gas has
disappeared and repeat the ignition procedure.
5. The LO position is obtained by turning the knob fully counter-clockwise.
6. Adjusting the control knob to your heat requirements can now control the flame.
WARNING!:
CHECK ALL GAS CONNECTIONS BEFORE EACH USE. DO NOT IGNITE THE
BARBECUE WHEN SMELLING ANY GAS.
!7
CHARACTERISTICS OF THE FLAME:
•Check whether the characteristics of the flame are in order. Each burner is preset prior to
shipment, but due to the many variations in local gas supplies, small adjustments might be
required.
•The flames of the burners must be blue and stable, without yellow tips, noise or sudden
increases.
•A yellow flame indicates insufficient presence of air. A noisy flame with sudden increases
from the burner means there is too much air present.
•NOTE: small yellow tips are OK.
MAINTENANCE/CLEANING INSTRUCTIONS
We recommend this gas grill be thoroughly inspected and serviced annually by a qualified
service person.
!WARNING!Do not cook with lid on. May cause overheating. Lid for storage
purpose only.
WARNING!To avoid the possibility of burns, maintenance should be done only
when the grill is cool. Avoid unprotected contact with hot surfaces. Ensure all burners
are turned off. Clean grill in an area where cleaning solutions will not harm decks, lawns,
or patios. Do not use oven cleaner to clean any part of this gas grill. Do not use a self-
cleaning oven to clean cooking grids or any other parts of the gas grill. Barbecue sauce
and salt can be corrosive and will cause rapid deterioration of the gas grill components
unless cleaned regularly.
Note: Stainless steel tends to oxidize or stain in the presence of chlorides and sulfides,
particularly in coastal areas and other harsh environments, such as the warm, highly humid
atmosphere around pools and hot tubs. These stains could be perceived as rust, but can be
easily removed or prevented. To provide stain prevention and removal, wash all stainless steel
surfaces every 3-4 weeks or as often as required with fresh water and/or stainless steel cleaner.
!WARNING!Turn off the gas at the source and disconnect the unit before servicing.
To avoid the possibility of burns, maintenance should be done only when the grill is cool.
A leak test must be performed annually and whenever any component of the gas train is
replaced or gas smell is present.
At all times keep the gas grill area free from combustible materials, gasoline and other
flammable vapors and liquids. Do not obstruct the flow of ventilation and combustion air.
This barbecue needs to be cleaned regularly. Make sure the barbecue is dry and clean to avoid
rust. Always store the barbecue after use. Don’t use abrasive cleaning agents and/ or anti-
corrosion products to clean the control panel with the wording and symbols. Such aggressive
cleaning materials can remove the pictures.
CLEANING THE ENAMELED GRILL SURFACE:
!8

The grill surface can be simply cleaned with a mild detergent, after that clean with hot water.
Food rests can be removed with a fiber brush.
CLEANING THE BURNERS:
•Make sure that the gas tap and knobs are set to the position OFF.
•Check whether the barbecue is cooled down.
•Remove the enameled plate.
•Clean the exterior of the burner with a soft brush. Clean any clogged ports with a pipe
cleaner or a wire brush.
•Inspect burners for any damages (cracks or holes). If damage is found, replace with a new
burner.
CLEANING THE FAT TRAY:
WARNING!: Make sure the barbecue has cooled down after use.
WARNING!Accumulated grease is a fire hazard.
The fat tray must be emptied and cleaned regularly.It should be washed with water and a mild
detergent.
•Store the barbecue outdoors on a dry and well-ventilated spot, out ofreach of children.
•ONLY store barbecue indoors after closing and removing the gas cylinder. The gas Cylinder
must be stored outside, out of reach of children.
WARNING!:
For safe use of the barbecue:
!9

1. Leave enough free space around the barbecue and keep inflammable materials out of
the way.
2. NEVER let children use the barbecue or play near the barbecue.
3. This is intended for outdoor use ONLY. NEVER use the barbecue in confined spaces or
underneath inflammable materials.
4. Do not obstruct the vents under the enameled plate of the barbecue, this could cause
over heating and damage the barbecue.
5. Place the barbecue at least 1000mm away from objects that could ignite the gas.
6. Regularly check the flames of the burners.
7. Shut down the gas supply when the barbecue is not in use.
8. Always shut OFF the gas cylinder completely and disconnect it from the barbecue
before moving or storing it.
9. NEVER cook with lid on. Lid for storage purpose only.
USING THE BARBECUE
Grilling requires a high temperature for the meat to nicely burn and brown. Most dishes
are constantly grilled on HI position. However, when grilling large pieces of meat or
chicken, it might be necessary to lower the temperature after the first browning. This
ensures the food to get well done, without burning the outside. For food requiring long
grill times or containing sugar marinade you might have to lower the temperature
nearing the end of the grilling time.
•Make sure the barbecue is checked for leaks and is properly placed.
•Remove all packing materials.
•
•Ignite the burners according to the instructions in this user manual.
•
•Turn the control knob to HI and preheat the barbecue for 15 minutes.
Put the food on the grill and grill it until it’s properly prepared.
TEMPERATURE SETTING
The control knobs can be set to any position between HI and LO.
NOTE: The hot grill will brown the outside of the meat, keeping the juices inside. The
longer the barbecue is preheated, the quicker the meat will brown
TROUBLE SHOOTING:
!10

Problem Possible Causes Solution
Low heat / Low flame when valve turned to high. For Universal Liquefied Petroleum Gas
- improper lighting procedure.
Improper preheating.
Ensure lighting procedure is followed carefully. All gas grill valves must be in the off
position when the tank valve is turned on. Turn tank on slowly to allow pressure to equalize.
See lighting instructions.
Preheat grill with both main burners on high for 10 to 15 minutes.
Uneven heat. Improper preheating.
Preheat grill with both main burners on high for 10 to 15 minutes.
Problem Possible Causes Solution
Burners burn with yellow flame, accompanied by the smell of gas. Possible spider web or
other debris, or improper air shutter adjustment. Thoroughly clean burner by removing.
See general maintenance instructions. Open air shutter slightly according to combustion air
adjustment instructions. (This must be done by a qualified gas installer.)
Main burner will not light with the igniter, but will light with a match. Jet-fire outlet is
dirty or clogged. Clean jet-fire outlet with a soft bristle brush.
Humming regulator. Normal occurrence on hot days. This is not a defect. It is caused
by internal vibrations in the regulator and does not affect the performance or safety of the
gas grill. Humming regulators will not be replaced.
Burners will not cross light each other. Dirty or corroded burners. Clean or replace
as required.
Burner output on “high” setting is too low. (Rumbling noise and fluttering blue flame at
burner surface.) Lack of gas.
Supply hose is pinched.
Dirty or clogged orifice.
Spider webs or other matter in venturi tube.
LPG regulator in “low flow” state. Check gas level in LPG Gas cylinder.
Reposition supply hose as necessary.
Clean burner orifice.
!11

CONDITIONS AND LIMITATIONS
CONTACT INFORMATION
Exim International (Australia) Pty Ltd-24 Harrington Street, Arundel, QLD 4215
Toll Free Number 1300 361 557
!12
"Exim warrants its products against manufacturing defects to the original purchaser only, provided that the purchase
was made through an authorizeddealer and is subject to the following conditions and limitations:"
This factory warranty is non-transferable and may not be extended what-so-ever by any of our representatives.
The gas grill must be installed by a licensed, authorized service technician or contractor. Installation must be done
inaccordance with theinstallation instructions Included with the product and all local and national building and fire
codes.
This limited warranty does not cover damages caused by misuse, lack of maintenance, grease fires, hostile
environments, accident, alterations, abuse or neglect and parts installed from other manufacturers will nullify this
warranty.
This limited warranty further does not cover any scratches, dents, painted finishes, corrosion or discoloring by heat,
abrasive and chemical cleaners, nor chipping on porcelain enamel parts, nor any components used in the installation
of the gas grill.
Should deterioration of parts occur to the degree of non-performance within the duration of the warranted coverage, a
replacement part will be provided.
In the first year only, this warranty extends to the replacement of warranted parts which are defective in material or
workmanship provided that the product has been operated in accordance with the operation instructions and under
normal conditions.
After the first year, with respect to this Limited Warranty Exim may, at its discretion, fully discharge all obligations
with respect to this warranty by refunding to the original warranted purchaser the wholesale price of any warranted
but defective part(s).
Exim will not be responsible for the installation, labour or any other costs or expenses related to the re-installation of a
warranted part, and such expenses are not covered by this warranty.
Notwithstanding any provision contained in this Limited Warranty Exim's responsibility under this warranty is
defined as above and it shall not in any event extend to any incidental, consequential, or indirect damages.
This warranty defines the obligation and liability of Exim with respect to the Bosston Kitchen, or other gas grills and
any other warranties expressed or implied with respect to this product, its components or accessories are excluded.
Exim neither assumes, nor authorizes any third party to assume, on its behalf, any other liabilities with respect to the
sale of this product. Exim will not be responsible for: over firing, blow outs caused by environmental conditions such
as strong winds, or inadequate ventilation.
Any damages to the gas grill due to weather damage, hail, rough handling, damaging chemicals or cleaners will not be
the responsibility of Exim. The bill of sale or copy will be required together with a serial number and a model number
when making any warranty claims from Exim.
Exim reserves the right to have its representative inspect any product or part prior to honouring any warranty claim.
Exim shall not be liable for any transportation charges, labour costs, or export duties.
This manual suits for next models
1
Table of contents


