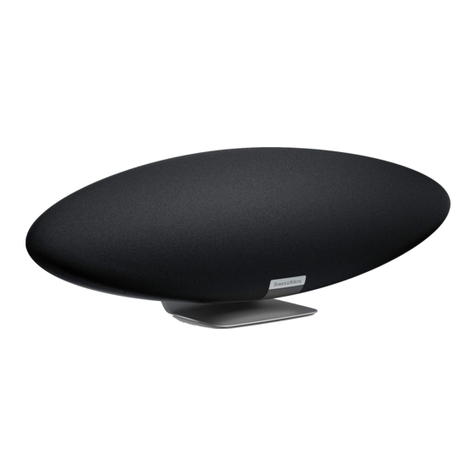
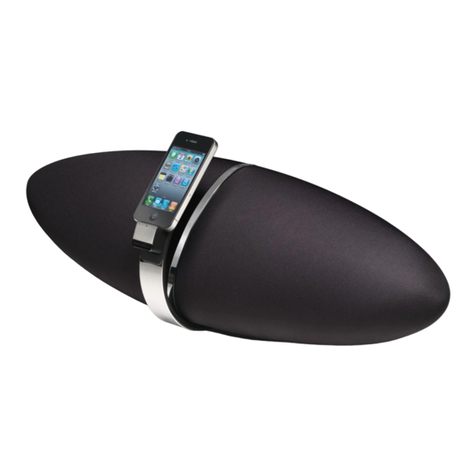
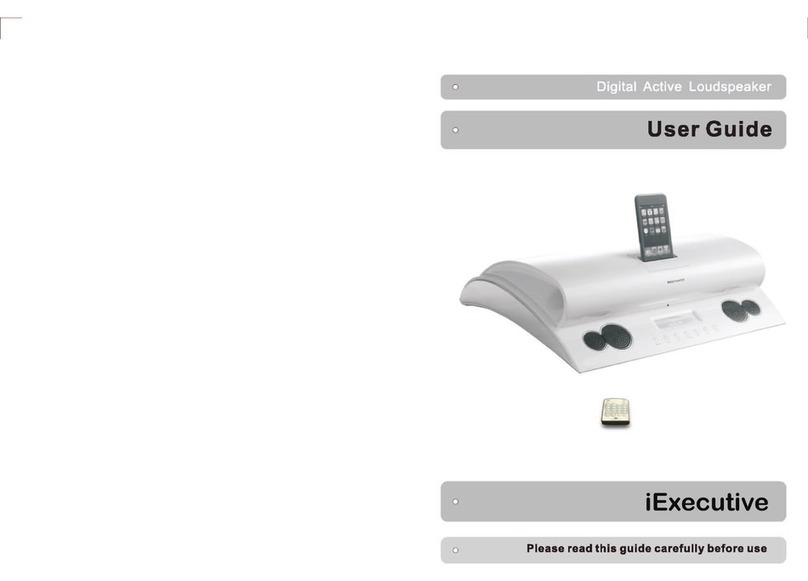
Bowers & Wilkins Zeppelin Mini User manual

Zeppelin Mini

2
www.bowers-wilkins.com
Welcome and thank you for choosing Bowers & Wilkins.
When John Bowers first established our company he did so in the belief that imaginative design,
innovative engineering and advanced technology were keys that could unlock the enjoyment of audio
in the home. His belief is one that we continue to share and it inspires every product we design.
Zeppelin Mini is more than just an iPod and iPhone dock and speaker system. As well as listening
to audio stored on your iPod or iPhone you can use it to:
Connect and listen to an external audio source.•
Play audio stored or streamed on your computer via USB.•
Sync your iPod or iPhone to iTunes via USB.•
Rotate the docked iPod or iPhone 90° to display album covers using Cover Flow or watch video•
in landscape format.*
* On appropriately equipped iPod and iPhone models.
This manual will tell you everything you need to know to get the most from your Zeppelin Mini. It begins
by describing the contents of the Zeppelin Mini carton.

3
www.bowers-wilkins.com
2. Connecting To Your Zeppelin Mini1. Zeppelin Mini Carton Contents.
Zeppelin Mini connection sockets are found on a panel
located on the back of the unit. The diagram above
illustrates the Zeppelin Mini connection panel.
Power Supply
Connect the Zeppelin Mini Power Supply to a mains
outlet socket using the supplied mains cable. Now
connect the Power Supply output cable to the Zeppelin
Mini power input socket. When rst connected to
mains power the Zeppelin Mini will automatically enter
standby mode with its indicator illuminating red.
Note: Section 4 describes all the Zeppelin Mini
indicator colours and their meanings.
USB Input
If you wish to listen to audio either stored or streamed
on your PC/Mac using the Zeppelin Mini USB input,
connect it using a USB cable from a spare PC/Mac
USB socket. The Zeppelin Mini USB input also enables
data held on your PC/Mac to be synchronised with the
data held on your iPod or iPhone. See the Section 5 for
more information.
Aux Input
If you wish to listen to an external analogue audio
source, TV audio or your PC/Mac analogue audio
output for example, connect it to the Zeppelin Mini
aux in socket using a cable terminated with a 3.5mm
mini-jack plug.
Zeppelin Mini•
iPod and iPhone cradles•
Remote Control Handset•
Power Supply•
Power Cable•
Document pack containing a Quick Start Guide,•
warranty information and statutory safety warnings.
Note: A USB cable is required if you wish to connect
your Zeppelin Mini to a PC/Mac. For reliable
operation the cable should not exceed 3m (10 ft) in
length. The Zeppelin Mini should also be connected
directly to the PC/Mac USB port and not via any
intermediate USB hardware.
Environmental Information
All Bowers & Wilkins products are
designed to comply with international
directives on the Restriction of Hazardous
Substances (RoHS) in electrical and electronic
equipment and the disposal of Waste Electrical
and Electronic Equipment (WEEE). These symbols
indicate compliance and that the products must be
appropriately recycled or processed in accordance
with these directives. Consult your local waste disposal
authority for guidance.
iPod and iPhone Model Compatibility and
Docking
Zeppelin Mini is compatible with the iPod and iPhone
models illustrated below.
With the majority of iPod models, docking to the
Zeppelin Mini is achieved simply by engaging the iPod
with the dock connector as illustrated above.
Zeppelin Mini
4
1
1
1

4
However, Zeppelin Mini incorporates a rotating dock
that allows iPod or iPhone models able to be used in
landscape mode to be rotated 90° in either direction.
This means that CoverFlow album artwork display
or landscape video can be used. iPod and iPhone
models that can display in landscape format must be
docked with the Zeppelin Mini using one of the cradles
supplied if they are to be rotated.
Warning! Not using a cradle when rotating
a docked iPod or iPhone may result in
damage to the iPod or iPhone.
The correct cradle for your iPod or iPhone can be
identied from the model number engraved on the
cradle. To use a cradle slide it on to the Zeppelin Mini
dock arm as illustrated above.
Note: For the latest information on cradles for iPod
and iPhone models visit www.bowers-wilkins.com/
zeppelinmini
Zeppelin Mini can be operated either from the controls
on its right hand side or from its remote control
handset. If the remote handset is to be used, its battery
insulating tab must rst be removed. This is illustrated
above.
3. Using Zeppelin Mini
Zeppelin Mini can be switched on from standby
(indicator: red) by the following actions:
• Pressing the right hand side standby button, see
illustration top.
• Pressing and holding the handset standby key.
• Docking an iPod or iPhone.
When Zeppelin Mini is switched on from standby the
last input used will be selected and the indicator will
change to blue, green or orange.
Note: The table in section 4 describes all the
Zeppelin Mini indictor colours and their meanings.
a
b c

5
With the Zeppelin Mini switched on from standby you
can:
• If an iPod or iPhone is docked, use the handset play/
pause key or the controls on the iPod or iPhone to
play or pause audio.
• If an iPod or iPhone is docked, use the handset next
and previous keys or the controls on the iPod or
iPhone to select the next or previous track.
• Use the handset volume keys or the Zeppelin Mini
right hand side volume buttons to control volume.
• Listen to audio via the Zeppelin Mini Aux Input.
• Listen to stored or streamed audio on your computer
via USB.
• Use the handset input key or right hand side standby
button to select the Zeppelin Mini USB, Dock and Aux
inputs sequentially. See the following section for more
on using the Zeppelin Mini USB input.
Note: There is a short delay when Zeppelin Mini
inputs are switched. This is a consequence
of the need to re-establish either USB or iPod
communication.
Note: ZeppelinMIni inputs are only available for
selection when input cables are connected.
• Press and hold the handset standby key or press
and hold the right hand side standby button to
return Zeppelin Mini to standby.
The Zeppelin Mini indicator illuminates in a range of
colours to indicate different operational conditions. The
table above describes the colours and their meanings.
4. Zeppelin Mini Indicator Lights
Indicator Colour Meaning Input Selected
Red Standby N/A
Yellow iPod/iPhone Synchronisation mode N/A
Blue On Dock
Fast ashing Blue Volume adjustment Dock
Green On USB
Fast ashing Green Volume adjustment USB
Orange On Aux
Fast ashing Orange Volume adjustment Aux
Fast ashing Red Volume at minimum or maximum Any
Continually ashing Red System fault N/A
White Firmware update underway N/A

6
The USB input enables you to connect your Zeppelin
Mini to a PC/Mac in order to play stored or streamed
audio, or to synchronise data held on your PC/Mac
with your iPod or iPhone.
Playing Audio via USB
When Zeppelin Mini is connected to a PC/Mac via
USB and its USB input is selected, the computer will
identify Zeppelin Mini as an output only audio device.
Specifying Zeppelin Mini in the PC/Mac audio control
panel will allow it to play audio data either stored
locally on the computer or streamed via a network or
the internet. The Zeppelin Mini indicator will illuminate
green when the USB input is selected.
Note: Section 4 describes all the Zeppelin Mini
indicator colours and their meanings.
Depending on the PC/Mac audio application in use,
the handset may be used to control playback, skip
tracks and adjust volume.
5. Using the Zeppelin Mini USB Input
Data Synchronisation via USB
When Zeppelin Mini is connected to a PC/Mac via USB
it can be used as an iTunes synchronisation dock to
synchronise data stored on the computer with data
stored on the iPod or iPhone.
To function as a synchronisation dock, the Zeppelin
Mini must rst be switched into standby by pressing
the right hand side standby button or the handset
standby key. Once in standby, pressing and holding
the right hand side standby button for two seconds
switches the Zeppelin Mini into synchronisation mode
(entry into synchronisation mode is not possible from
the remote handset). In synchronisation mode, a
docked iPod or iPhone will be linked directly to the
PC/Mac via USB so that iTunes can be used to
manage data synchronisation. The Zeppelin Mini
indicator will illuminate yellow in synchronisation mode.
Note: If no iPhone or iPod is docked or no PC/
Mac is connected, Zeppelin Mini will not enter
synchronisation mode.
When synchronisation is complete, synchronisation
mode can be cancelled either by un-docking the iPod
or iPhone or pressing and holding the Zeppelin Mini
right hand side standby button for two seconds.
It is good practice however always to “eject” iPod
and iPhone models from iTunes before physically
disconnecting the USB connection. The Zeppelin mini
will return to standby mode when synchronisation
mode is cancelled.
Note: Canceling synchronisation mode by any
means while synchronisation is underway may
result in data loss.

7
Updated Zeppelin Mini rmware may from time
to time be made available for download from the
Zeppelin Mini support section of the Bowers &
Wilkins web site. With the rmware le downloaded
to your PC/Mac, update your Zeppelin Mini by
following the steps below:
• Un-dock any docked iPod or iPhone and
disconnect Zeppelin Mini from its power supply.
• If it is not already connected, connect the Zeppelin
Mini to the PC/Mac via USB.
• While holding down the Zeppelin Mini power
switch, connect the Zeppelin Mini power cable.
The indicator will illuminate white to conrm that
the Zeppelin Mini is in rmware update mode and
connected to a PC/Mac.
• Launch the rmware updater on the PC/Mac and
follow the dialogue box instructions.
Note: On computers running Mac OS X, launching
the Zeppelin Mini firmware updater will install a
Zeppelin Mini Programmer application in the OS X
Applications folder. Launching the application by
double-clicking on its icon in the Applications folder
will begin the firmware update process.
6. Zeppelin Mini Firmware Update
Note: On computers running Microsoft Windows
(XP, Vista or 7), launching the Zeppelin Mini
firmware updater will install a Zeppelin Mini desktop
icon. Double-click on the icon to begin the update
process. If the process has not been run before,
a dialogue box will request that the location of the
USB Driver also installed by the updater is specified
(the default location is: C:\Program Files\Bowers
& Wilkins\Zeppelin MiniProgrammer). Once the
location of the USB driver has been specified, the
firmware update process will continue.
Once the rmware update is complete, the Zeppelin
Mini indicator will illuminate red and the unit will return
to normal operation.
Note: Updated Zeppelin Mini firmware may
incorporate new features. Download the most
recent owners manual for the latest information.

8
www.bowers-wilkins.com
Bienvenue dans le monde de Bowers et Wilkins et merci d’avoir choisi le Zeppelin Mini
Lorsque John Bowers a créé sa société, il savait déjà qu’un design imaginatif, une conception
innovante et une technologie avancée seraient les clés du plaisir de l'écoute de la musique chez soi.
C’est cette philosophie qui, aujourd’hui, continue de nous inspirer pour la conception de chaque
nouvel appareil.
Le Zeppelin Mini n’est pas qu’une station d’accueil/enceintes pour un iPod et iPhone. En plus de
pouvoir écouter toute la musique stockée dans votre iPod ou iPhone, il vous permet également :
Brancher et écouter une source audio externe.•
Lire les fichiers audio stockés sur votre ordinateur via une prise USB.•
Synchroniser votre iPod ou iPhone à iTunes via une prise USB.•
Faire pivoter de 90° l’iPod ou l’iPhone pour regarder les couvertures des disques (mode Cover•
Flow) ou une vidéo dans le format Paysage*.
* Uniquement sur les modèles d’iPod ou iPhone compatibles avec cette fonction.
Ce manuel vous indique tout ce que vous avez besoin de savoir concernant votre Zeppelin Mini.
Il commence par le contenu de l’emballage.

9
www.bowers-wilkins.com
2. Branchement de votre Zeppelin Mini1. Contenu de l’emballage du Zeppelin Mini
Les prises de branchements du Zeppelin Mini se
trouvent sur sa face arrière. Le schéma ci-dessus
montre les différentes connexions possibles.
Alimentation secteur
Branchez l’alimentation secteur du Zeppelin Mini sur
une prise murale, en utilisant le câble secteur fourni.
Branchez ensuite cette alimentation sur la prise
spéciale du Zeppelin Mini. Lorsqu’il est branché pour
la première fois sur le secteur, le Zeppelin Mini se met
automatiquement en mode de veille Standby, et son
indicateur s’allume en rouge.
Note : la section 4 décrit les différentes couleurs de
l’indicateur du Zeppelin Mini et leur signification.
Entrée USB
Si vous souhaitez écouter en ux direct (streaming) des
chiers audio stockés sur un ordinateur PC/Mac en
utilisant la prise d’entrée USB du Zeppelin Mini, reliez-
les en utilisant un câble USB branché sur une prise
USB libre de l’ordinateur. La prise USB du Zeppelin
Mini permet également de synchroniser les données
stockées sur votre PC/Mac avec celles contenues
dans l’iPod ou iPhone. Voir la section 5 de ce manuel
pour de plus amples informations à ce sujet.
Entrée Aux (iliaire)
Si vous souhaitez écouter une source audio analogique
externe, ou utiliser la sortie audio analogique de votre
PC/Mac, par exemple, reliez-les sur la prise d’entrée
aux in du Zeppelin Mini, via un câble terminé par une
prise mini-jack stéréo 3,5 mm.
Le Zeppelin Mini• Berceaux pour iPod et iPhone• Télécommande• Alimentation secteur• Câble d’alimentation secteur• Un ensemble de documents : guide d’utilisation• rapide Quick Start, information sur la garantie et
conseils concernant la sécurité pendant l’utilisation.
Note : un câble USB est nécessaire si vous
souhaitez brancher votre Zeppelin Mini sur un
PC/Mac. Pour un fonctionnement correct, ce
câble ne doit pas excéder une longueur de 3 m.
Le Zeppelin Minipeut être branché directement sur
le PC/Mac en USB, sans nécessité d’adaptateur
quelconque.
Information concernant l’environnement
Tous les produits Bowers & Wilkins
sont fabriqués avec le respect des
directives internationales concernant la
restriction sur l’utilisation de substances dangereuses
Restriction of Hazardous Substances (RoHS) dans les
équipements électriques et électroniques, et sur leur
mode de traitement Waste Electrical and Electronic
Equipment (WEEE). Ces symboles indiquent leur
compatibilité totale, et la possibilité de leur recyclage
ou traitement dans le respect de ces directives.
Consultez le service de récupération des déchets
dans votre zone géographique pour de plus amples
informations.
Compatibilité et installation des différents
modèles d’iPod et iPhone
Zeppelin Mini est compatible avec tous les modèles
d’iPod et iPhone représentés sur l’illustration ci-dessous.
La majorité des modèles d’iPod se branchent sur le
Zeppelin Mini en les enchant sur le connecteur de la
station d’accueil, comme illustré ci-dessous.
Zeppelin Mini
4
1
1
1

10
Cependant, Zeppelin Mini propose également un
système de rotation qui permet d’utiliser des modèles
d’iPod et iPhone en format Paysage, avec un
pivotement de 90° dans chaque direction. Cela permet
d’afcher correctement le mode Cover Flow (pochettes
des disques) ou les vidéos, lorsque disponible. Les
modèles d’iPod et iPhone correspondants doivent
alors être branchés sur le Zeppelin Mini en utilisant un
des berceaux fournis, an de permettre leur rotation.
Attention ! La non-utilisation d’un des
berceaux spéciaux fournis pour faire pivoter
un iPod ou iPhone peut les endommager.
Le berceau correct à utiliser en fonction de chaque
modèle d’iPod et iPhone est identié par les
inscriptions gravées directement sur le berceau
correspondant. La xation de ce berceau sur le bras du
Zeppelin Mini est illustrée ci-dessus.
Note : Pour connaître les dernières informations
concernant ces berceaux spéciaux pour tous les
modèles d’iPod et iPhone, visitez le site Internet
www.bowers-wilkins.com/zeppelinmini
Zeppelin Mini peut être piloté soit depuis ses
commandes en face avant, soit depuis sa
télécommande. Pour utiliser sa télécommande, l’isolant
de sa pile doit tout d’abord être retiré. Voir pour
l’illustration ci-dessus.
3. Utilisation de Zeppelin Mini
Pour allumer Zeppelin Mini en le sortant de son mode
de veille Standby, utilisez une des fonctions suivantes :
• Pressez la touche standby à droite de la façade, voir
l'illustration ci-dessus.
• Maintenez enfoncée la touche standby de la
télécommande.
• Branchez un iPod ou un iPhone.
Lorsque Zeppelin Mini est mis en marche depuis le
mode veille la dernière entrée utilisée sera sélectionnée
et l'indicateur lumineux passé au bleu, vert ou orange.
Note : le tableau de la section 4 décrit les différentes
couleurs de l’indicateur du Zeppelin Mini et leur
signification.
a
b c

11
Lorsque Zeppelin Mini est allumé en sortie de son
mode de veille Standby, vous pouvez :
• Si un iPod ou iPhone y est branché, utiliser la touche
de la télécommande ou de la façade play/pause
pour lire ou mettre en pause la musique.
• Si un iPod ou iPhone y est branché, utiliser les
touches de la télécommande ou de la façade next
ou previous pour choisir le morceau de musique
précédent ou suivant sur l’iPod ou l’iPhone.
• Utilisez les touches volume de la télécommande ou
les boutons de volume situés sur le coté droit de
Zeppelin Mini pour ajuster le niveau sonore.
• Écouter une source audio via l’entrée Aux du
Zeppelin Mini.
• Écouter une source audio stockée ou reçue en direct
depuis votre ordinateur et la prise USB.
• Utiliser la touche Input de la télécommande ou la
touche Standby (à droite) pour passer de l’entrée
USB du Zeppelin Mini à l’écoute de l’iPod ou iPhone
branché sur le dock. Voir la section suivante pour de
plus amples informations concernant l’utilisation de
l’entrée mini USB de Zeppelin Mini.
Note : le passage d’une entrée à l’autre du Zeppelin
Mini nécessite un court silence. Celui-ci est dû à la
nécessité de rétablir la communication avec la prise
USB ou l’iPod.
Note : les entrées de Zeppelin Mini ne sont
sélectionnables que lorsque des câbles y sont
connectés.
• Maintenez appuyée la touche standby de la
télécommande ou le bouton standy sur le coté droit
de Zeppelin Mini pour repasser en mode Veille.
L’indicateur lumineux du Zeppelin Mini peut
prendre différentes couleurs, suivant son mode de
fonctionnement en cours. Le tableau ci-dessus décrit
ces couleurs et leur signication.
4. Indicateur lumineux de Zeppelin Mini
Couleur Signication Entrée sélectionnée
Rouge Veille standby N/A
Jaune Mode Synchronisation en cours de l’iPod/iPhone N/A
Bleu Marche Dock
Bleu, clignotement rapide Réglage du volume Dock
Vert Marche USB
Vert, clignotement rapide Réglage du volume USB
Orange Marche Aux
Orange, clignotement rapide Réglage du volume Aux
Rouge, clignotement rapide Volume au minimum ou maximum N’importe laquelle
Rouge, clignotement continu Défaut système N/A
Blanc Mise à jour software en cours N/A

12
La prise d’entrée USB vous permet de relier votre
Zeppelin Mini à un ordinateur PC/Mac, an de lire des
chiers audio qui y sont stockés ou en cours de lecture
(streaming), ou pour synchroniser des données gérées
par le PC/Mac vers l’iPod ou l’iPhone.
Lecture audio via la prise USB
Lorsque Zeppelin Mini est relié à un PC/Mac via
un câble USB, l’ordinateur identie Zeppelin Mini
uniquement comme un appareil équipé d’une sortie
audio. En spéciant Zeppelin Mini dans le panneau
de contrôle audio de l'ordinateur, vous pourrez lire
des données audio soit stockées localement dans
l’ordinateur, soit récupérées en direct par celui-ci via
un réseau ou Internet. Zeppelin Mini doit être allumé, et
son entrée USB sélectionnée. L’indicateur de Zeppelin
Mini s’allume en vert lorsque son entrée USB est
sélectionnée.
Note : le tableau de la section 4 décrit les différentes
couleurs de l’indicateur du Zeppelin Mini et leur
signification.
Suivant l’application audio PC/Mac réellement utilisée,
la télécommande peut être utilisée pour contrôler la
lecture, passer d’un morceau à un autre et régler le
volume.
5. Utilisation de l’entrée USB du Zeppelin Mini
Synchronisation des données via USB
Lorsque le Zeppelin Mini est connecté à un PC /
Mac via USB il peut être utilisé comme dock de
synchronisation iTunes pour synchroniser les données
stockées sur l'ordinateur avec des données stockées
sur l'iPod ou iPhone.
Pour pouvoir fonctionner comme dock de
synchronisation, le Zeppelin Mini doit d'abord être
mis en veille en appuyant sur le bouton latéral droit
de veille de droite ou sur la touche « Standby » de
la télécommande. Une fois mis en veille, enfoncez
et maintenez pendant deux secondes la touche
« Standby » pour passer le Zeppelin Mini en mode
synchronisation (le passage en mode synchronisation
n'est pas possible à partir de la télécommande). En
mode de synchronisation, un iPod ou iPhone placés
sur le dock seront reliés directement au PC ou
au Mac via USB, an que iTunes puisse être utilisé
pour gérer la synchronisation des données. La diode
indicatrice du Zeppelin Mini s'allumera en jaune en
mode synchronisation.
Note : Si aucun iPhone ou l'iPod n’est placé sur
le dock ou si aucun PC / Mac n’est connecté,
le Zeppelin Mini n'entrera pas en mode de
synchronisation.
Lorsque la synchronisation est terminée, on peut sortir
du mode synchronisation soit en retirant l'iPod ou
l'iPhone du dock, soit en appuyant et en maintenant le
bouton "standby" à droite de Zeppelin Mini pendant
deux secondes. Prenez l'habitude de toujours
"éjecter" l'iPod ou l'iPhone d'iTunes avant de couper
physiquement la connexion USB. Le Zeppelin Mini
repassera seul en veille lorsqu'on sort du mode
synchronisation.
Note: L'annulation, par tout autre moyen, du mode
de synchronisation quand elle est en cours, peut
entraîner des pertes de données.

13
Des mises à jour du logiciel interne (software) de
fonctionnement de Zeppelin Mini sont disponibles
de temps en temps. Ce software mis à jour est alors
posté dans la section « support » Zeppelin Mini du site
Internet Bowers et Wilkins. Après avoir téléchargé sur
votre PC/Mac le nouveau software, la mise à jour de
Zeppelin Mini s’effectue de la manière suivante :
• Débranchez tout iPod ou iPhone branché sur
Zeppelin Mini, puis débranchez celui-ci de son
alimentation secteur.
• Si ce n’est déjà fait, reliez Zeppelin Mini au PC/Mac
via un câble USB.
• Lancez le chier de mise à jour software sur le PC/
Mac.
• Tout en pressant sur la touche d’allumage du
Zeppelin Mini, branchez son câble d’alimentation.
L’indicateur s’allume alors en blanc, conrmant que le
Zeppelin Mini est bien dans son mode de mise à jour
et qu’il est relié au PC/Mac.
• Lancez le programme de mise à jour sur le PC/Mac
et suivez les instructions apparaissant sur l’écran de
ce dernier.
Note : Sur les ordinateurs fonctionnant sous Mac
OS X, le lancement du programme de mise à jour
de Zeppelin Mini se traduit par l'installation d’une
application spécifique dans le dossier Applications
OS X. Un double clic sur l’icône de ce logiciel dans
le dossier Applications lance alors la mise à jour
effective.
6. Mise à jour du logiciel interne (software) de
Zeppelin Mini
Note : Sur les ordinateurs fonctionnant sous
Mircosoft Windoxs (XP, Vista ou 7), le lancement
du programme de mise à jour de Zeppelin Mini se
traduit par l’apparition d’une icône spécifique sur
le bureau de l’ordinateur. Un double clic sur cette
icône lance alors la mise à jour effective. S’il s’agit
de la première fois, une boîte de dialogue vous
demandera l’emplacement du driver USB installé
simultanément avec l’application (son emplacement
par faut est : C:\Program Files\Bowers & Wilkins\
Zeppelin MiniProgrammer). Une fois ce driver
localisé, la procédure de mise à jour se poursuit
automatiquement et normalement.
Une fois la procédure de mise à jour terminée,
l’indicateur lumineux de Zeppelin Mini devient
rouge, et l’appareil revient automatiquement à son
fonctionnement normal.
Note : Les nouveaux firmwares de Zeppelin
Mini peuvent intégrer de nouvelles fonctions.
Téléchargez régulièrement les derniers manuels
d’utilisation pour connaître toutes les informations
à ce sujet.

14
www.bowers-wilkins.de
Willkommen bei Bowers & Wilkins.
Der Firmengründer John Bowers war der Meinung, dass ein wunderschönes Design, eine innovative
Konstruktion und ausgeklügelte Technologien die Schlüssel zu Audio-Entertainment der Extraklasse
in Ihrem Zuhause sind. Wir teilen seine Meinung und jedes von uns entwickelte Produkt basiert
darauf.
Der Zeppelin Mini ist mehr als ein iPod- und iPhone-Dock und ein Lautsprechersystem. Sie
können sich die auf Ihrem iPod oder iPhone gespeicherten Audiosignale anhören und zusätzlich:
eine externe Audioquelle anschließen und hören.•
auf Ihrem Computer gespeicherte Audiodateien oder Streaming-Inhalte über USB wiedergeben.•
Ihren iPod bzw. Ihr iPhone über USB mit iTunes synchronisieren.•
den angedockten iPod oder das angedockte iPhone beidseitig um 90 Grad drehen, um•
die Playlist als “Cover Flow” darzustellen oder eine formatgerechte Videowiedergabe zu
ermöglichen*.
* Bei entsprechend ausgestatteten iPod- und iPhone-Modellen.
In dieser Bedienungsanleitung erfahren Sie, wie Sie Ihren Zeppelin Mini optimal nutzen können.
Wir beginnen mit dem Inhalt des Zeppelin Mini-Versandkartons.

15
www.bowers-wilkins.de
2. Anschlussmöglichkeiten Ihres Zeppelin Mini1. Inhalt des Zeppelin Mini-Versandkartons
Die Anschlussbuchsen Ihres Zeppelin Mini benden sich
an der Geräterückseite. In der Abbildung ganz oben ist das
Anschlussfeld dargestellt.
Netzteil
Verbinden Sie das Netzteil des Zeppelin Mini über
das beiliegende Netzkabel mit einer Netzsteckdose.
Schließen Sie nun das Ausgangskabel des Netzteils an die
Netzeingangsbuchse (POWER) des Zeppelin Mini an. Wird
der Zeppelin Mini das erste Mal ans Netz angeschlossen,
so schaltet er automatisch in den Standby-Modus. Die LED
leuchtet rot (s. Abbildung oben).
Hinweis: In Kapitel 4 werden die LED-Farben und deren
Bedeutung erläutert.
USB-Eingang
Möchten Sie sich auf Ihrem PC/Mac gespeicherte
Audiodateien oder Streaming-Inhalte anhören, nutzen
Sie den USB-Eingang des Zeppelin Mini und verbinden
ihn über ein USB-Kabel mit einer freien PC/Mac-USB-
Buchse. Über diesen Eingang können ferner auf Ihrem
PC/Mac gespeicherte Daten mit denen auf Ihrem iPod/
iPhone synchronisiert werden. Weitere Informationen hierzu
erhalten Sie in Kapitel 5.
Aux-Eingang
Möchten Sie sich beispielsweise eine externe analoge
Audioquelle, TV-Audio oder die analogen Audiosignale
Ihres PCs/Macs anhören, schließen Sie die jeweilige Quelle
über ein Kabel mit 3,5-mm-Ministecker an die AUX-
Eingangsbuchse des Zeppelin Mini an.
Zeppelin Mini• Aufnahmevorrichtungen für iPod und iPhone• Fernbedienung• Netzteil• Netzkabel• Unterlagen, einschließlich Kurzanleitung,• Garantieunterlagen und wichtiger Sicherheitshinweise.
Hinweis: Möchten Sie Ihren Zeppelin Mini an einen PC/
Mac anschließen, so benötigen Sie ein USB-Kabel.
Um einen zuverlässigen Betrieb zu gewährleisten, sollte
das Kabel nicht länger als 3 m sein. Ferner sollte der
Zeppelin Mini direkt an dem USB-Port des PCs/Macs
angeschlossen werden und nicht über eine dazwischen
liegende USB-Hardware.
Umweltinformation
Alle Bowers & Wilkins-Produkte entsprechen
den internationalen Richtlinien über die
Beschränkung der Verwendung bestimmter
gefährlicher Stoffe in Elektro- und Elektronikgeräten
(Restriction of Hazardous Substances (kurz RoHS genannt))
und über Elektro- und Elektronik-Altgeräte (Waste Electrical
and Electronic Equipment (WEEE)). Die durchgestrichene
Mülltonne steht für deren Einhaltung und besagt, dass die
Produkte ordnungsgemäß recycelt oder diesen Richtlinien
entsprechend entsorgt werden müssen.
Kompatibilität und Andocken der verschiedenen
iPod- und iPhone-Modelle
Der Zeppelin Mini ist zu den unten aufgeführten iPod- und
iPhone-Modellen kompatibel.
Bei den meisten iPod-Modellen erfolgt das Andocken,
wie ganz oben dargestellt, über den Universal-Dock-
Connector-Arm des Zeppelin Mini.
Zeppelin Mini
4
1
1
1
4. Generation
(Video)
5. Generation
(Videokamera)
6. Generation
3. Generation
2. Generation
4. Generation2. Generation
(Aluminium)
1. Generation
3. Generation
(Video)

16
Der Universal-Dock-Connector-Arm kann beidseitig um
90 Grad gedreht werden, so dass bei entsprechend
ausgestatteten iPod- und iPhone-Modellen die
Cover Flow-Bedienung und eine formatgerechte
Videowiedergabe möglich sind. iPod- und iPhone-Modelle
mit Querformat-Option müssen mit einer der beiliegenden
Aufnahmevorrichtungen an den Zeppelin Mini angedockt
werden, wenn sie gedreht werden sollen.
Warnung! Benutzen Sie keine Aufnahme-
vorrichtung, so kann der angedockte iPod
bzw. das angedockte iPhone beim Drehen
beschädigt werden.
Welche Aufnahmevorrichtung für Ihren iPod bzw.
Ihr iPhone die richtige ist, können Sie der auf der
Aufnahmevorrichtung angegebenen Modellnummer
entnehmen. Schieben Sie die jeweilige Aufnahme-
vorrichtung, wie oben dargestellt, auf den Universal-Dock-
Connector-Arm des Zeppelin Mini.
Hinweis: Die neuesten Informationen zu den
Aufnahmevorrichtungen für die iPod- und iPhone-Modelle
finden Sie unter www.bowers-wilkins.de/zeppelinmini.
Der Zeppelin Mini kann über die Bedienelemente an der
rechten Geräteseite oder über die Fernbedienung betrieben
werden. Möchten Sie die Fernbedienung benutzen, so
müssen Sie vor der ersten Inbetriebnahme das Isolierstück
für die Batterie entfernen (s. Abbildung oben).
3. Betrieb des Zeppelin Mini
Gehen Sie folgendermaßen vor, wenn Sie den Zeppelin
Mini vom Standby- (LED leuchtet rot) in den Betriebsmodus
schalten möchten:
• Drücken Sie die Standby-Taste an der rechten
Geräteseite (s. Abbildung ganz oben).
• Drücken Sie die Standby-Taste auf der Fernbedienung
und halten Sie diese gedrückt.
• Docken Sie einen iPod bzw. ein iPhone an.
Wird der Zeppelin Mini vom Standby- in den
Betriebsmodus geschaltet, so wird der zuletzt genutzte
Eingang aktiviert und die LED leuchtet blau, grün oder
orange.
Hinweis: In Kapitel 4 werden die LED-Farben und deren
Bedeutung erläutert.
a
b c

17
Ist der Zeppelin Mini vom Standby- in den Betriebsmodus
geschaltet worden, so können Sie:
• bei angedocktem iPod bzw. iPhone die Play/Pause-
Taste (>,) auf der Fernbedienung oder die Bedienele-
mente am iPod bzw. iPhone nutzen, um die Audiosignale
wiederzugeben oder um in den Pause-Modus zu
schalten.
• bei angedocktem iPod bzw. iPhone die Track-Tasten
({ }) auf der Fernbedienung oder die Bedienelemente
am iPod bzw. iPhone drücken, um den nächsten oder
den vorherigen Titel auszuwählen.
• die Lautstärke-Tasten (+ –) auf der Fernbedienung oder
die Lautstärke-Tasten an der rechten Seite des Zeppelin
Mini nutzen, um die Lautstärke einzustellen.
• die Audiosignale über den AUX-Eingang des Zeppelin
Mini hören.
• auf dem Computer gespeicherte Audiodateien und
Streaming-Inhalte über USB wiedergeben.
• die Eingangs-Taste ( ) auf der Fernbedienung oder
die Standby-Taste auf der rechten Seite nutzen, um
nacheinander auf die Zeppelin Mini-Eingänge USB, Dock
oder AUX zu schalten. Weitere Informationen zur Nutzung
des USB-Eingangs erhalten Sie weiter hinten in dieser
Bedienungsanleitung.
Hinweis: Beim Umschalten der Zeppelin Mini-Eingänge
ergibt sich eine kurze Verzögerungszeit. Diese ist darauf
zurückzuführen, dass entweder die USB- oder die iPod-
Verbindung wieder hergestellt werden muss.
Hinweis: Die Eingänge des Zeppelin Mini können nur
genutzt werden, wenn über die Eingangskabel eine
Verbindung hergestellt worden ist.
• die Standby-Taste ( ) auf der Fernbedienung oder die
Standby-Taste an der rechten Geräteseite drücken und
gedrückt halten, um den Zeppelin Mini in den Standby-
Modus zurückzuschalten.
Die Zeppelin Mini-LED leuchtet in verschiedenen Farben,
um unterschiedliche Betriebszustände anzuzeigen. Die
Tabelle oben erläutert, welche Bedeutung die jeweilige
Farbe hat.
4. LED-Anzeigen des Zeppelin Mini
LED-Farbe Bedeutung Gewählter Eingang
Rot Standby -
Gelb iPod-/iPhone-Synchronisationsmodus -
Blau Ein Dock
Blinkt schnell blau Lautstärkeeinstellung Dock
Grün Ein USB
Blinkt schnell grün Lautstärkeeinstellung USB
Orange Ein AUX
Blinkt schnell orange Lautstärkeeinstellung AUX
Blinkt schnell rot Lautstärke auf Minimum oder Maximum Beliebig
Blinkt kontinuierlich rot Systemfehler -
Weiß Firmware-Update läuft -

18
Über den USB-Eingang können Sie den Zeppelin Mini an
einen PC/Mac anschließen, um gespeicherte Audiodateien
oder Streaming-Inhalte wiederzugeben oder um die auf
Ihrem iPod bzw. iPhone gespeicherten Daten mit denen auf
Ihrem PC/Mac zu synchronisieren.
Audiowiedergabe über USB
Ist der Zeppelin Mini über den USB-Eingang an einen PC/
Mac angeschlossen, so identiziert der Computer den
Zeppelin Mini als nur zur Wiedergabe genutztes Audiogerät.
Wird der Zeppelin Mini über die Systemsteuerung/
Systemeinstellung des PCs/Macs speziziert, so können
entweder die lokal auf dem Computer gespeicherten
Audiodateien oder die über ein Netzwerk oder das Internet
gestreamten Audiodaten wiedergegeben werden. Bei
ausgewähltem USB-Eingang leuchtet die LED des Zeppelin
Mini grün.
Hinweis: In Kapitel 4 werden die LED-Farben und deren
Bedeutung erläutert.
Abhängig von der genutzten PC/Mac-Audioanwendung
kann die Fernbedienung zur Steuerung der Wiedergabe,
zum Überspringen von Titeln und zur Einstellung der
Lautstärke eingesetzt werden.
5. Nutzung des Zeppelin Mini-USB-Eingangs
Datensynchronisation über USB
Wird der Zeppelin Mini über die USB-Buchse an einen PC/
Mac angeschlossen, so kann er mit iTunes genutzt werden,
um die auf dem Computer gespeicherten Daten mit den
Daten auf dem iPod bzw. iPhone zu synchronisieren.
Um den Zeppelin Mini zur Synchronisation nutzen zu
können, muss er zunächst in den Standby-Modus
geschaltet werden. Drücken Sie dazu die Standby-
Taste an der rechten Geräteseite oder die Standby-
Taste auf der Fernbedienung. Bendet sich der
Zeppelin Mini im Standby-Modus, so können Sie ihn in
den Synchronisationsmodus schalten, indem Sie die
Standby-Taste an der rechten Geräteseite drücken und
für zwei Sekunden gedrückt halten (dies ist über die
Fernbedienung nicht möglich). Im Synchronisationsmodus
wird ein angedockter iPod bzw. ein angedocktes iPhone
über USB direkt mit dem PC/Mac verbunden, so dass
iTunes zur Datensynchronisation genutzt werden kann.
Im Synchronisationsmodus leuchtet die LED des Zeppelin
Mini gelb.
Hinweis: Ist kein iPod/iPhone angedockt bzw. kein PC/
Mac angeschlossen, so kann der Zeppelin Mini nicht in
den Synchronisationsmodus geschaltet werden.
Ist der Synchronisationsvorgang beendet, so können
Sie den Synchronisationsmodus deaktivieren, indem
Sie den iPod/das iPhone abnehmen oder indem Sie die
Standby-Taste an der rechten Seite des Zeppelin Mini
zwei Sekunden lang gedrückt halten. Sie sollten jedoch
die iPod-/iPhone-Modelle immer von iTunes trennen,
bevor Sie die USB-Verbindung physisch lösen. Der
Zeppelin Mini schaltet in den Standby-Modus, wenn der
Synchronisationsmodus deaktiviert ist.
Hinweis: Wird der Synchronisationsmodus während
des Synchronisierens deaktiviert, so kann dies zu
Datenverlusten führen.

19
Von Zeit zu Zeit kann ein Firmware-Update erforderlich
sein. Die aktuelle Version des Zeppelin Mini steht unter
Support auf der Bowers & Wilkins-Webseite zum Download
bereit. Nach dem Download des Firmware-Files auf Ihren
PC/Mac können Sie das Update an Ihrem Zeppelin Mini
folgendermaßen vornehmen:
• Nehmen Sie einen angedockten iPod bzw. ein
angedocktes iPhone ab und trennen Sie den Zeppelin
Mini von seinem Netzteil.
• Sollte dies nicht bereits der Fall sein, schließen Sie den
Zeppelin Mini über USB an Ihren PC/Mac an.
• Halten Sie den Netzschalter des Zeppelin Mini gedrückt
und schließen Sie das Zeppelin Mini-Netzkabel an. Die
LED leuchtet weiß und zeigt damit an, dass sich der
Zeppelin Mini im Firmware-Update-Modus bendet und
an einen PC/Mac angeschlossen ist.
• Öffnen Sie den Firmware-Updater auf dem PC/Mac und
folgen Sie den Anweisungen in den Dialogfenstern.
Hinweis: Auf Computern mit Mac OS X führt das
Öffnen des Zeppelin Mini-Firmware-Updaters im
OS X Anwendungsordner zur Installation einer
Programmanwendung des Zeppelin Mini. Öffnen Sie die
Anwendung durch einen Doppelklick auf das Icon im
Anwendungsordner und das Firmware-Update beginnt.
6. Firmware-Update des Zeppelin Mini
Hinweis: Auf Computern mit Microsoft Windows (XP,
Vista oder 7) führt das Öffnen des Zeppelin Mini-
Firmware-Updaters zur Installation eines Zeppelin
Mini-Desktop-Icons. Mit einem Doppelklick auf das Icon
beginnt das Update. Wird das Update zum ersten Mal
durchgeführt, teilt ein Dialogfenster mit, dass der Pfad
des ebenfalls vom Updater installierten USB-Treibers
spezifiziert ist (voreingestellt ist: C:\Program Files\
Bowers & Wilkins\Zeppelin MiniProgrammer). Ist der
Pfad des USB-Treibers erst einmal spezifiziert, wird das
Firmware-Update fortgesetzt.
Ist das Firmware-Update abgeschlossen, leuchtet die LED
des Zeppelin Mini rot. Das Gerät kehrt in den normalen
Betrieb zurück.
Hinweis: Das Firmware-Update des Zeppelin Mini kann
neue Features enthalten. Laden Sie sich die neueste
Version der Bedienungsanleitung mit den aktuellen
Informationen herunter.

20
www.bowers-wilkins.com
Bienvenido y gracias por elegir Bowers & Wilkins
Cuando John Bowers fundó nuestra compañía, lo hizo con la firme creencia de que el diseño
imaginativo, la ingeniería innovadora y la tecnología avanzada eran fundamentales a la hora de
hacer posible el pleno disfrute de la experiencia sonora en el hogar. Una creencia que seguimos
compartiendo y que inspira cada producto que diseñamos.
El Zeppelin Mini es mucho más que un sistema de altavoces con base de carga para iPod e
iPhone. Además de reproducir los contenidos de audio almacenados en su iPod o iPhone, usted
puede utilizarlo para:
Conectar y escuchar una fuente de audio externa.•
Reproducir señales de audio almacenadas o descargadas directamente en su ordenador vía•
USB.
Sincronizar su iPod o iPhone a iTunes vía USB.•
Girar 90º el iPod o iPhone cargado para visualizar portadas de álbumes discográficos utilizando•
el programa CoverFlow o visualizar contenidos de vídeo en formato panorámico (modo
“landscape”).*
* En modelos de iPod e iPhone debidamente equipados.
Este manual le explicará todo lo que usted necesita saber para explotar al máximo su Zeppelin Mini.
Comienza describiendo el contenido del embalaje del Zeppelin Mini.
Other manuals for Zeppelin Mini
2
Table of contents
Languages:
Other Bowers & Wilkins Docking Speakers manuals

Bowers & Wilkins
Bowers & Wilkins Zeppelin Air User manual

Bowers & Wilkins
Bowers & Wilkins Zeppelin Air User manual

Bowers & Wilkins
Bowers & Wilkins Zeppelin Air User manual

Bowers & Wilkins
Bowers & Wilkins Zeppelin Air User manual

Bowers & Wilkins
Bowers & Wilkins Zeppelin Air User manual

Bowers & Wilkins
Bowers & Wilkins Zeppelin Air User manual

Bowers & Wilkins
Bowers & Wilkins Zeppelin Air User manual

Bowers & Wilkins
Bowers & Wilkins Zeppelin Air User manual

Bowers & Wilkins
Bowers & Wilkins Zeppelin Air User manual

Bowers & Wilkins
Bowers & Wilkins Zeppelin Air User manual