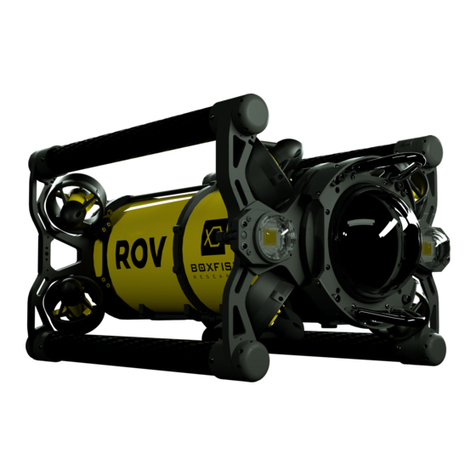
Boxfish Grabber User manual

Boxfish Grabber – Blueprint Lab
All rights reserved. Information and specifications may change at any time without notice. p0
Grabber Manual.
Blueprint Lab Grabber for Boxfish ROV

Boxfish Grabber – Blueprint Lab
p1 All rights reserved. Information and specifications may change at any time without notice.

Boxfish Grabber – Blueprint Lab
All rights reserved. Information and specifications may change at any time without notice. p2
Table of Contents
1 About this document ........................................................................................................3
1.1 Specifications..................................................................................................................3
2 Grabber components........................................................................................................4
2.1 Grabber accessory and cable.................................................................................4
2.2 Grabber mount on ROV ...........................................................................................4
2.3 How grabber and mount will arrive after shipping..........................................4
2.4 Other items required for grabber accessory.....................................................4
3 How to mount the grabber accessory onto the ROV.............................................6
4 How to control the grabber using the Control Station..........................................8
5 After a dive...........................................................................................................................9
6 Appendix: How to use the ROV without a grabber............................................... 10
6.1 How to remove grabber cable ............................................................................. 10
6.2 How to reattach the grabber cable..................................................................... 11

Boxfish Grabber – Blueprint Lab
p3 All rights reserved. Information and specifications may change at any time without notice.
1 About this document
This document contains instructions for mounting the Blueprint Lab high-
strength grabber to your Boxfish ROV, and how to open/close the grabber arms
using buttons on the Control Station.
If you wish to dive with the ROV without the grabber, you must unplug the
grabber cable from the ROV. Instructions for removing the cable are also
included in this document.
Boxfish ROV with Blueprint Lab grabber
1.1 Specifications
The grabber is depth-rated to 300m.

Boxfish Grabber – Blueprint Lab
All rights reserved. Information and specifications may change at any time without notice. p4
2 Grabber components
Grabber, cable and mounting components are shown below.
1. Grabber accessory. 2. Grabber cable. 3. Grabber mounting point on
underside of ROV. 4. Thumbscrews for holding grabber in place on mount.
2.1 Grabber accessory and cable
1. Grabber accessory has opening/closing arms on one end. On the other end,
note the four mounting lugs and central metal connector for attaching the
grabber cable.
2. Grabber cable for connecting the ROV to the grabber.
2.2 Grabber mount on ROV
3. Grabber mount on the ROV; located underneath the front dome. Picture
shows how it looks when the ROV is upside down.
4. 2x metal thumbscrews to hold the grabber attachment in place.
2.3 How grabber and mount will arrive after shipping
When you receive your ROV after shipping:
One end of the grabber cable will already be plugged into the penetrator
port marked ‘GRAB’ on the side of the ROV. The end that attaches to the
grabber will be covered by a red cap (IMPORTANT – note that this cap is
not watertight. If you wish to dive without the grabber attached you must
remove the entire cable from the ROV and insert a port plug in the GRAB
port)
The grabber and thumbscrews will be in the accessory box.
2.4 Other items required for grabber accessory
We also recommend the following items for your grabber:

Boxfish Grabber – Blueprint Lab
p5 All rights reserved. Information and specifications may change at any time without notice.
Silicone aerosol spray: For lubrication and water protection we recommend
obtaining some silicone spray to use before connecting the cable to the
metal connector, and again after disconnecting the grabber after a dive.
Silicone grease (supplied in your ROV accessory box): You will need this only
if you plan to use your ROV without the grabber attached. It is for
lubricating o-rings when removing/inserting penetrator plugs into the
‘GRAB’ cable port on the ROV. This port must remain watertight and the
silicone grease helps prolong the life of the o-rings in the plugs.

Boxfish Grabber – Blueprint Lab
All rights reserved. Information and specifications may change at any time without notice. p6
3 How to mount the grabber accessory onto the ROV
Note: When installing the grabber, you will find it easier to turn the ROV upside
down or onto its side for better access to the mounting point.
1. Find the grabber cable. If you are facing
the upside-down ROV, one end will be
plugged into a port on your left. The port
is labelled ‘GRAB’.
2. Thread the other end of the grabber cable
through the two holes in the grabber
mount so that there is about 10cm of
cable sticking out.
3. Remove the red cap from the end of the
cable.
4. Get your silicone spray, and lightly apply
some to:
a. the end of the cable
b. the connector on the grabber.
5. Orient the grabber accessory so that the
mounting bar is at the bottom.
6. Align the cable (there is a flat part on it) to
the connector and connect the cable.
Take care when attaching the cable so as
not to damage the pins inside the
connector.
7. Screw in the black collar to the grabber
connector to hold the grabber cable in
place.

Boxfish Grabber – Blueprint Lab
p7 All rights reserved. Information and specifications may change at any time without notice.
8. Thread the excess cable back through the
hole in the mounting point. Insert the
mounting lugs through and down into the
metal mounting plate so they are held in
place.
9. At this point, the holes on the sides of the
mounting point on the ROV should be
aligned with the holes on the grabber
attachment.
10. Use the thumbscrews to hold the grabber
mounting plate to the mounting point on
the ROV. (Note that the ROV is still
upside-down in this picture).

Boxfish Grabber – Blueprint Lab
All rights reserved. Information and specifications may change at any time without notice. p8
4 How to control the grabber using the Control Station
To use the grabber, power on the ROV and Control Station. You will use the five
areas on the Control Station shown below.
1. Sensor Power switch. Turn the Sensor Power switch (1) to the ON position
to send power to the grabber. Note: when testing the grabber out of the
water, minimise the time that the sensor switch is turned on, and turn it off
after use to avoid possible overheating of other equipment/sensors.
2. Grabber open control button. Press and hold the button to open the
grabber arms. While holding the button, the arms will move slowly apart until
the grabber is fully open. Release the button when you’d like the arms to
stop opening, or when the arms are fully open.
3. Grabber close control button. Press down and hold the button to start to
close the grabber arms. The arms will move slowly together until the grabber
is fully closed. Release the button to stop moving the arms towards the
closed position.
4. Grabber view. The grabber will be in view at point (4) on the screen showing
the wide-angle camera feed. Use this for guidance when positioning the
grabber and using the open/close controls.
5. Pitch/roll joystick*: Because the grabber does not sit flush with the bottom
of the ROV, you may need to pitch the ROV forward to pick up objects from
the bottom. Use the roll settings too if the object is at an angle.
* Note that this joystick is located in a different position (under the left joystick)
in newer ROVs.

Boxfish Grabber – Blueprint Lab
p9 All rights reserved. Information and specifications may change at any time without notice.
5 After a dive
While the grabber is attached, thoroughly rinse the ROV and grabber mounting
area with fresh water. Be sure to get behind the mechanism to direct water into
all the nooks and crannies, especially after use in salt water.
After disconnecting and drying the grabber, lightly use silicone spray on the
female end of the grabber cable AND the male pins on the grabber connector.
This will prevent water from sitting in the connections and possibly damaging
the connection points.
Replace the red cap onto the end of the grabber cable.

Boxfish Grabber – Blueprint Lab
All rights reserved. Information and specifications may change at any time without notice. p10
6 Appendix: How to use the ROV without a grabber
6.1 How to remove grabber cable
6.1.1 Items needed
Port plug (there will be a spare in your accessory box)
6.1.2 Before you start
Ensure ROV is powered off
6.1.3 Procedure
1. Remove vacuum from ROV. Unscrew the
collar from the vacuum port at the rear of
the ROV and then pull out the valve to
release the vacuum.
IMPORTANT!
If you wish to use the ROV without the grabber, you must remove its
cable as the end that connects to the grabber is not watertight.

Boxfish Grabber – Blueprint Lab
p11 All rights reserved. Information and specifications may change at any time without notice.
2. Locate the port labelled ‘GRAB’. Unscrew
the black knurled collar with your fingers
and pull out the plug. It is held in place
with two o-rings so you will need enough
strength to pull past these.
3. Remove the cable from the ROV and store
it safely in your accessories box. Note:
You may need to cut cable ties if present.
4. Put a port plug in the grabber port and
screw in the collar. Before you do this,
apply a thin coating of silicone grease to
the two o-rings on the plug.
5. Check that the ROV can hold a vacuum with this new port plug. Apply a
vacuum to the ROV (875mBar) and monitor the pressure on the Control
Station to ensure it is maintained for 10 minutes (for instructions, see the
Boxfish ROV Owner’s Manual).
6. Store the grabber, cable and thumbscrews carefully in your accessory
box.
6.2 How to reattach the grabber cable
To use the ROV with the grabber again, you must reattach the grabber cable.
6.2.1 Before you start
1. Ensure ROV is powered off
2. Release the vacuum from inside the ROV
3. Unscrew and pull out the port plug from the ‘GRAB’ port
4. Apply a thin coating of silicone grease to the O-rings on the grabber cable.

Boxfish Grabber – Blueprint Lab
All rights reserved. Information and specifications may change at any time without notice. p12
6.2.2 Procedure
1. Line up the grabber cable plug with
the port. The grabber cable plug
contains an 8-way pin. To ensure it is
oriented correctly, the pin has a
groove on the outside that must slot
over a ridge in the port.
2. Insert the grabber cable penetrator
into the ‘GRAB’ port and secure the
collar so it is fingertight. Take care
when inserting the plug. Don’t push
with excessive force or the connector
may be damaged and require the ROV
to be returned to our factory.
It can be useful to use a light to find the
location of the ridge so you can line the
plug up before inserting it.
3. Route the cable back through the grabber mounting plate. and then
through the grabber mount. The exact path for the cable is not
important, as long as the cable is not at risk of fouling the thruster.
4. Use cable ties to secure the cable if necessary.
5. Check that the ROV can hold a vacuum.

Boxfish Grabber – Blueprint Lab
p13 All rights reserved. Information and specifications may change at any time without notice.

Boxfish Grabber – Blueprint Lab
All rights reserved. Information and specifications may change at any time without notice. p14
Table of contents
Other Boxfish Marine Equipment manuals
