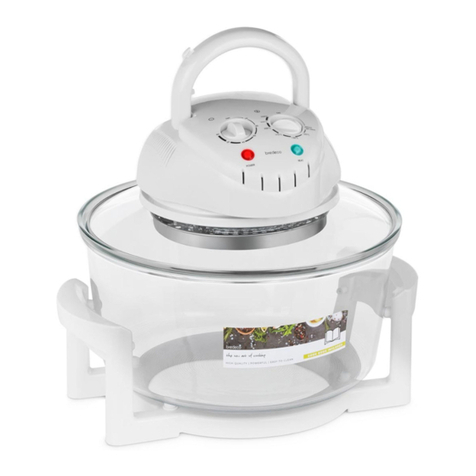
Brand Developers Limited Taste the Difference HD15 User manual

Air Roaster
1360
WATTS OF POWER
Model: HD15
INSTRUCTION MANUAL
BDV2
TTD - Air Roaster - Inspiration Guide and Manual - BDV2.indd 44 21/11/2016 5:59:02 PM

Congratulations on choosing your
TASTE THE DIFFERENCE™Air Roaster.
Please read this user manual carefully before first use.
FOR INDOOR USE ONLY
E1633
Taste the Difference™Air Roaster
Model: HD15
220-240V~, 50/60Hz. 1360W
Made in China
Exclusively Distributed
Throughout Australasia by:
Brand Developers Aust Pty Ltd
Unit 3, 2 Roussos Place,
Truganina, VIC 3029, AUSTRALIA
AUST Customer Care: 1800 890 840
Brand Developers Limited
Unit H, 686 Rosebank Road,
Avondale, 1026 Auckland, NEW ZEALAND
NZ Customer Care: 0800 002 999
TTD - Air Roaster - Inspiration Guide and Manual - BDV2.indd 43 21/11/2016 5:58:52 PM

1. “TruSurround”fan-forced convection cooking – the high-efficiency overhead fan
pushes heat from the halogen element deep into your food, while the second
element in the base cooks from below. This creates rapid heat circulation,
sealing in flavours and juices, cooking quickly and evenly, and reducing the
need for food turning.
2. 10 litre capacity holds a full family meal.
3. 1360 Watts of power plus a superfast halogen element equals unrivalled
cooking speeds – better food in less time!
4. No added oils needed – healthier, safer “air frying” for crispier outsides and
succulent insides.
5. ”Intelligent Menu System” – IMS pushbutton selection for Steak, Chicken, Fish,
Nuts,Cake,French Fries,Skewer,or full DIY for your own recipes and preferences.
6. Dual-height Grill Rack, Tumble Fryer Assembly, Grill Tray, Rotisserie Assembly,
Handling Tongs and Skewer Rack Assembly are all included.
7. “Auto Rotation” – a single click lets you rotisserie chickens and roasts, tumble fry
potatoes, roast coffee or nuts, or rotate racks of kebabs.
8. “SRT” – Built-in Smoke Reduction Technology dramatically cuts down cooking
smoke.
9. “Safe-T-Touch” double-layer construction - minimizes burn risk for peace-of-
mind benchtop cooking.
10. Animated LED display – timer from 0-99mins,temp from 80-240° C, built-in alarm.
11. “Auto-pause” lets you add ingredients or sauces during cooking.
12. Anti-slip rubber feet.
13. Lift-out non-stick inner dish – easy to use, and even easier to clean.
14. Overheating protection, Lid-lift auto-cutoff protection, Fuse protection, Micro-
switch safety lock protection.
The Features
Taste the Difference
™- Air Roaster
AIR ROASTER 42
TTD - Air Roaster - Inspiration Guide and Manual - BDV2.indd 42 21/11/2016 5:58:52 PM

Read and follow these instructions carefully before use:
1. Before switching on the Air Roaster, ensure that the voltage indicated on the
rating label is the same as that in your home.
2. This Air Roaster is intended for household use only, it is not intended for
commercial or industrial use.
3. Before using, please make sure all accessories and packing are removed.
4. Ensure the Air Roaster is placed on a flat, stable, dry, heat-resistant surface
when in operation.
5. Do not allow the power cord to come into contact with warm parts of the
appliance or any other hot surface.
6. We do not recommend the use of an extension power cord with this appliance.
7. To disconnect from the electricity supply, grip the plug and pull the plug from
the wall outlet socket. Never pull on the cord.
8. Do not place the Air Roaster on or near a heated cooktop, or a hot gas or
electric burner.
9. Do not operate the Air Roaster under a wall cupboard, shelves or other
overhanging objects or near flammable materials such as blinds, curtains or
wall hangings.
10. Do not operate the Air Roaster in the presence of explosive and/or flammable
fumes such as petrol or kerosene.
11. Only use manufacturer-recommended accessories or attachments with the
Air Roaster.
12. Do not leave the Air Roaster operating unsupervised.
13. This appliance can be used by children aged from 8 years and above and
persons with reduced physical, sensory or mental capabilities or lack of
experience and knowledge if they have been given supervision or instruction
concerning use of the appliance in a safe way and understand the hazards
involved. Children must not play with the appliance. Cleaning and user
maintenance must not be carried out by children unless they are 8 years or
older and supervised. Keep the appliance and its cord out of reach of children
Important Safeguards
2 AIR ROASTER
TTD - Air Roaster - Inspiration Guide and Manual - BDV2.indd 41 21/11/2016 5:58:52 PM

Important Safeguards Cont...
1. younger than 8 years.
2. This appliance is intended to be used in household and similar applications
such as:
Staff kitchen areas in shops, offices and other working environments
Farm houses
By clients in hotels, motels, bed & breakfasts, and other residential-style
environments.
3. When placing food in the Air Roaster, leave at least 2cm of space beneath the
lid to allow for efficient convection.
4. Avoid touching transparent cover and lid steam vents, to prevent being
scalded.
5. Do not allow cloth or other items to cover the vents around the top panel.
6. Do not position your face close to inner dish when opening the lid, during
cooking or after cooking, to prevent being scalded.
7. Allow inner dish handles to cool before lifting, or use gloves.
8. Only use the bottom handles when shifting the Air Roaster.
9. Allow accessories (skewer rack, rotisserie, tumble fryer, grill rack, etc.) to cool
before moving, or use handling tongs to prevent being scalded.
10. To protect against electric shock, DO NOT immerse the cable, plug or the Air
Roaster main body heater/control assembly in water or any other liquid.
11. Do not operate the Air Roaster if the power cord,plug or Air Roaster is damaged,
or if the Air Roaster has been dropped or has malfunctioned. If the main cord
is damaged it must only be replaced by the manufacturer or their service
representative.
12. To avoid risk of electric shock do not dismantle the Air Roaster control/
assembly.Any repairs must be carried out by the manufacturer or their service
representative.
13. The appliances are not intended to be operated by means of an external timer
or separate remote-control system.
14. Do not heat explosive materials directly or indirectly with the Air Roaster.
AIR ROASTER 3
TTD - Air Roaster - Inspiration Guide and Manual - BDV2.indd 40 21/11/2016 5:58:52 PM

1. Do not attempt to use Air Roaster if it refuses to start.
2. If Air Roaster refuses to stop, unplug from wall immediately, do not attempt to
restart.
3. If shell of body or lid deform or warp, or Air Roaster does not perform normally,
please contact service centre.
4. The temperature of accessible surfaces are liable to get hot during use. Take
care to avoid touching the accessible surfaces during and after operation.
Do not move the Air Roaster unit during operation or while hot. Allow the Air
Roaster to cool down before moving.
Important Safeguards Cont...
4 AIR ROASTER
TTD - Air Roaster - Inspiration Guide and Manual - BDV2.indd 39 21/11/2016 5:58:52 PM

1. Clean the inner dish and all accessories with a clean wet sponge before first
use.
2. Ensure all packaging materials are removed from the Air Roaster, including any
paper from beneath the non-stick inner dish.
3. When placing the inner dish into the base, make sure it is seated properly,
with its handles flush to the sides of the Air Roaster – there is a safety cut-off
switch inside the base that is only deactivated when the inner dish is properly
installed.
4. Close the lid before use - another safety cut-off prevents the Air Roaster turning
on when opened.
5. When you are ready to cook, please press “Power” button, the display will light
up and enter standby mode, waiting for your instructions; pressing “Power”
again will turn off the Air Roaster.
1. While cooking, if you open the lid, the cooking process will Auto Pause; when
you close the lid again, the process will continue. NOTE: you do not need to
reset cooking mode, temperature or time after opening and closing the lid.
2. When the Air Roaster reaches your preset temperature the infra-red light will
go out and will come on again when the Air Roaster drops below the preset
temperature.The infra-red light will cycle On and Off throughout the Air Roaster
process maintaining the preset temperature you have selected.
Before Use
Cooking with your Taste the Difference
®Air Roaster
AIR ROASTER 5
TTD - Air Roaster - Inspiration Guide and Manual - BDV2.indd 38 21/11/2016 5:58:52 PM

Structure and Assembly
Taste the Difference
™- Air Roaster
Glass Cover
Louvre
Inner Dish
Lid Handle
Lid
PC Cover
Power Cord
Bottom
Handle
Inner Dish
Handle
Vents Control
Panel
Base
Fan
Halogen
Tube
Rotisserie Rod
Drive Socket
Rotisserie
Rod Hole
Inner Cover
PTC Bottom
Element
Inner
Dish
Rotisserie
Rod Bracket
Handle
6 AIR ROASTER
TTD - Air Roaster - Inspiration Guide and Manual - BDV2.indd 37 21/11/2016 5:58:52 PM

Control Panel
Teperature
Setting Button
(-) Setting
Button
(+) Setting
Button
Functions
Button
Start/CancelDisplay
Screen
Power
On/Off
Time Setting
Button
Rotation
Indicator
Operating
Indicator
Power
Indicator
Functions
Indicator
Time
Indicator Temperature
Indicator
Rotation
Setting Button
AIR ROASTER 7
TTD - Air Roaster - Inspiration Guide and Manual - BDV2.indd 36 21/11/2016 5:58:52 PM

Accessories
Taste the Difference
®- Air Roaster
STANDARD ACCESSORIES
Grill Rack Grill Tray
Handling Tongs
ROTATING ACCESSORIES
Skewers and Skewer Rack
Rotisserie Chicken Forks & Rod
Rotisserie Tumble Fryer
Rotisserie Cage
8 AIR ROASTER
TTD - Air Roaster - Inspiration Guide and Manual - BDV2.indd 35 21/11/2016 5:58:52 PM

How to place the inner dish
Place the Air Roaster on a firm level heat-resistant surface and open the lid (Figure
1).When the Air Roaster is in the opening status (Figure 2), hold the handles (Figure
3) and place the Inner Dish in position (Figure 4). NOTE: make sure that the bracket
inside the Inner Dish is in front, and the hole is at the back.The dish handles should
sit flush with the body of the Air Roaster (Figure 5).You will hear a sound when the
Inner Dish locates properly. The Air Roaster can NEVER be used without the Inner
Dish in place.
AIR ROASTER 9
TTD - Air Roaster - Inspiration Guide and Manual - BDV2.indd 34 21/11/2016 5:58:48 PM

Assembling the Accessories
Using the Rotisserie Assembly
1. Slide one of the Rotisserie Forks onto the Rotisserie Rod and screw down tight.
2. Push the Rod through the chicken or meat you wish to cook until the Fork
engages with the food.
3. Slide the second Fork onto the other end of the Rod then push firmly into the
food – screw down to fix in position. NOTE – to keep your chicken or meat
compact, you may choose to truss your roast with twine.
4. Place the Rotisserie Assembly in position on the main body of the Air Roaster
making sure that the longer squared end of the Rod engages with the Drive
Socket at the back of the dish. Place the shorter grooved squared end of the
Rod on the Bracket at the front of the dish.
CAUTION:
Always check that there is sufficient space top and bottom for
the food to rotate freely without causing an obstruction.
10 AIR ROASTER
TTD - Air Roaster - Inspiration Guide and Manual - BDV2.indd 33 21/11/2016 5:58:48 PM

Assembling the Accessories Cont...
Using the Skewer Rack
Before assembling the Skewer Rack slide bite-sized food pieces onto Skewers – leave
2cm clear at the end of each Skewer.
1. Assemble Skewer Rack Discs onto Rotisserie Rod, and screw on tightly.
2. Mount Skewers onto Discs one at a time – slide a Skewer point into a hole on
Disc A, then clip its handle over the corresponding leaf on Disc B.
3. Continue until all required Skewers are mounted.
4. Place the Skewer Rack Assembly in position on the main body of the Air Roaster
making sure that the longer squared end of the Rod engages with the Drive
Socket at the back of the dish. Place the shorter grooved squared end of the
Rod on the Bracket at the front of the dish.
CAUTION:
Always check that there is sufficient space top and bottom for
the food to rotate freely without causing an obstruction.
1
4
2 3
AIR ROASTER 11
TTD - Air Roaster - Inspiration Guide and Manual - BDV2.indd 32 21/11/2016 5:58:47 PM

Using the Tumble Fryer Assembly
1. Slide the Tumble Fryer onto the Rotisserie Rod.
2. Screw the Rod down tight at each end.
3. Place the Tumble Fryer Assembly in position on the main body of the Air Roaster
making sure that the longer squared end of the Rod engages with the Drive
Socket at the back of the dish. Place the shorter grooved squared end of the
Rod on the Bracket at the front of the dish.
4. Open the Tumble Fryer door, place your food inside then close the door
securely.
CAUTION:
Always check that the Tumble Fryer door is closed securely.
Do not overfill the Basket.
Assembling the Accessories Cont...
12 AIR ROASTER
TTD - Air Roaster - Inspiration Guide and Manual - BDV2.indd 31 21/11/2016 5:58:29 PM

CAUTION:
Always check that the Rotisserie Cage lid is securely in place.
(Rotisserie Accessories & Grill Tray)
How to remove accessories
The Tongs ensure food can be removed from the Air Roaster without direct handling
of hot surfaces.
Using the Rotisserie Cage Assembly
1. Remove the Rotisserie Cage lid by squeezing the lid handles then insert food
into the Rotisserie Cage (food not shown).
2. Place the Rotisserie Cage lid back inside the cage, making sure it is at a height
that holds the food firmly in place.
3. Place the Rotisserie Cage Assembly in position on the main body of the Air
Roaster making sure that the longer squared end of the Rod engages with the
Drive Socket at the back of the dish. Place the shorter grooved squared end of
the Rod on the Bracket at the front of the dish.
Assembling the Accessories Cont...
1 2 3
AIR ROASTER 13
TTD - Air Roaster - Inspiration Guide and Manual - BDV2.indd 30 21/11/2016 5:58:29 PM

Operation Instructions
1. Place the Inner dish in the Air Roaster as previously described in this booklet.
2. Open the Lid of the Air Roaster and position the required accessory. Always
make sure to leave sufficient space between the food and the cover.
3. Close the Lid.
4. Connect the Air Roaster to the electricity mains supply socket.
5. Standby Mode
The buzzer sounds once, and the Mains light comes on (it will stay on until unit
is unplugged).The display screen stays off until you press POWER, then the Air
Roaster is in Standby Mode. All menus on the screen will flash. You can now
select a function for cooking.
6. Intelligent Menu System
In standby mode, press the MENU button in sequence to select the following
functions: “DIY”-“Nuts”-“Chicken”-“Cake”-“Skewer”-“Steak”-“French Fries”-“Fish”.
The temperature/time indicators show the presets for each function.
7. Temperature setting
Once a function is selected, pressing the TEMP button allows you to adjust
cooking temperature. Press once, and the temperature readout will flash. Press
+/- to increase or decrease the temperatures (range: 80°C – 240°C). Short
press adjusts temperature in 5-degree increments… Long press, 10-degree
increments.
8. Time setting
Once a function is selected, pressing the TIME button allows you to adjust
cooking duration. Press once, and the time readout will flash. Press +/- to
increase or decrease the duration (range: 1 – 99 minutes). Short press adjusts
time in 1-minute increments… Long press, 5-minute increments.
9. Rotation setting
Press ROTATION to stop or start rotation function at any time before or during
cooking process.The rotation indicator light will be on when it is rotating.
10. DIY
You can select the DIY function,and the display screen shows“00 000”.You can
now set the temperature/cooking time/rotation to suit your own preferences
and recipes.
11. Start/Cancel
Press START/CANCEL button,and the Air Roaster starts to work after selecting the
function; if you want cancel the operation, or the Air Roaster is not in standby
mode, pressing this button will immediately return you to standby mode.
14 AIR ROASTER
TTD - Air Roaster - Inspiration Guide and Manual - BDV2.indd 29 21/11/2016 5:58:16 PM

Technical Parameters
Cleaning methods
1. Disconnect the Air Roaster from the mains socket,and allow to cool completely
before attempting any cleaning or maintenance.
2. The outer surface of the Main Body/Control Panel can be cleaned by wiping
with a damp cloth, then drying thoroughly by wiping over with a soft dry cloth.
Do not wash or immerse the Main Body, Heater/Control Panel in water or any
other liquid.
3. The inner dish and all accessories may be washed in warm soapy water and
dried with a soft cloth in minutes.Do not use scourers or harsh cleaning agents
on any part of the main unit – simply wipe down, and wipe dry.
Voltage 220-240V
Frequency 50Hz
Power 1360W
Temperature adjustment range 80°C~240°C
Time setting range 1-99(MIN)
Air Roasters size(mm) 436 (W) X 335 (D) X 321 (H)
Giftbox size(mm) 431 (W) X 431 (D) X 378 (H)
Container capacity 10L
Net weight 6.5KG
AIR ROASTER 15
TTD - Air Roaster - Inspiration Guide and Manual - BDV2.indd 28 21/11/2016 5:58:16 PM

FOOD TIME(MIN) TEMPERATURE(°C)
Chicken (drums) 25 220-240
Chicken (pieces) 35 220-240
Chicken (wings) 15-18 200-220
Chicken (whole) 40-50 190-220
Steak 12-18 240
Fish 10-15 180-210
Lamb 15-25 220-240
Cake 20-30 150-165
Shrimp 10-12 190-210
Sausage 10-13 150-180
Tumble-roasted Nuts 10-15 135-165
Baked bread 8-10 180-200
Potatoes 20-30 220-240
Rice 20-35 220-240
Skewers/Kebabs 10-12 185-195
Shoestring fries 20-22 220-240
Recipes for Reference
16 AIR ROASTER
TTD - Air Roaster - Inspiration Guide and Manual - BDV2.indd 27 21/11/2016 5:58:16 PM

LIMITED REPLACEMENT WARRANTY STATEMENT
ONE (1) YEAR
If your product becomes defective due to faulty material or workmanship within a period of 1
year from the date of purchase, we warrant to do the following:
• For New Zealand Consumers: We will replace the product with a new product, free of
charge, or repair the product at our cost, at our discretion.
• For Australian Consumers: Our goods come with guarantees that cannot be excluded
under the Australian Consumer Law. You are entitled to a replacement or refund for
a major failure and for compensation for any other reasonably foreseeable loss or
damage.You are also entitled to have the goods repaired or replaced if the goods fail to
be of acceptable quality and the failure does not amount to a major failure.
Your warranty is subject to the following conditions:
• DO NOT operate the appliance with a damaged plug or cord, or if the unit has
been dropped, damaged or dropped in water. To avoid the risk of electric shock, do
not disassemble or attempt to repair the appliance on your own. If the supply cord is
damaged, it must be replaced by a qualified electrician in order to avoid a hazard.
Incorrect re-assembly or repair can cause a risk of electric shock or injury to persons
when the appliance is used.
• The item has not been misused, abused, neglected, altered, modified or repaired by
anyone.
• The item has been subjected to fair wear and tear
• The item has not been used for trade, professional or hire purposes.
• The item has not sustained damage through foreign objects, substances or accident.
Your warranty does not cover;
• Components that are subject to natural wear and tear caused by normal use in
accordance with operating instructions.
• Unauthorised/improper maintenance/handling or overload is excluded from this
warranty.
• For guarantee claims, you will need to submit a proof of purchase in the form of a valid
receipt that displays date and place of purchase.
This warranty does not replace but is in addition to your statutory rights.
This warranty does not apply to accessories supplied with the item.
This warranty applies only to the original purchaser and may not be transferred.
Replacement items will be covered by the limited warranty for the balance of the warranty
period from the date of the original purchase.
Please note:
Only the defective product or parts returned to place of purchase will be replaced under
this warranty.
Brand Developers Limited
Unit H, 686 Rosebank Road,
Avondale 1026,Auckland, New Zealand
Private Bag 93204, Parnell,Auckland 1151
FAX: +64 9 306 8203
NZ Customer Care: 0800 002 999
Brand Developers Aust Pty Ltd
Unit 3, 2 Roussos Place,
Truganina,VIC 3029,
AUSTRALIA
FAX: +61 3 9681 7825
AUST Customer Care: 1800 890 840
New Zealand Contact Australia Contact
AIR ROASTER 17
TTD - Air Roaster - Inspiration Guide and Manual - BDV2.indd 26 21/11/2016 5:58:16 PM
Table of contents
