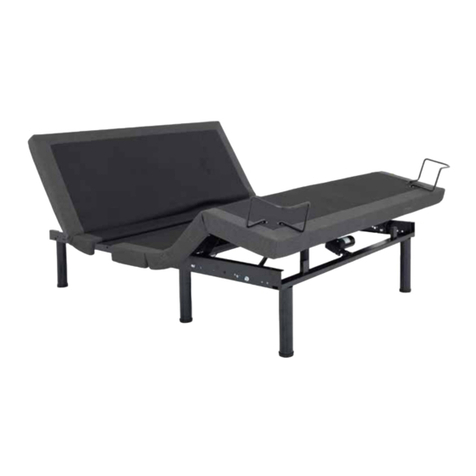
Brentwood HOME BASE User manual

BRENTWOOD BASE
OWNER’S MANUAL
Installation & Operation
Serial No.


Safety & Warranty Warnings 1
Parts List 4
Electronics Quick Reference Guide 5
Installaon Guide 7
Remote Control Instrucons 9
Seng Programmable Posions and Pairing Remote 11
Seng Preset Posions 13
Synchronizing Two Bases 14
To Operate The Beds Separately Again 16
Troubleshoong 17
CONTENTS

Safety & Warranty Warnings
Aenon: Read the following informaon before using this product . Failure to use a surge protecon device could compromise safety or
cause product malfuncon and could void the electrical poron of your warranty.
Electrical surges are by far the biggest cause of problems with electrical circuits.
In order to help protect your investment in case of a power surge or outage, use an electrical surge protecon device (not included).
WARRANTY WARNING!
Do not open or tamper with the transformer, control box, motors, or remote control (with the excepon of baery compartments). The
product warranty will be void if these components are tampered with.
SMALL CHILDREN AND PETS:
Immediately dispose of all packing materials as they can smother small children and pets. Do not allow any persons or pets under the base.
Children, convalescents and disabled person should not operate the base without adult supervision.
HOSPITAL OR CONVALESCENT USE DISCLAIMER:
Adjustable bases are designed and engineered for a lifestyle of in-home comfort and are not intended for hospital use or for a bed-ridden
paent on an extended recovery. Adjustable bases are not equipped with bars to help paents get safely in and out of bed and are not
intended to be used around tent type oxygen therapy or explosive gases.
-1-

PRODUCT RATINGS:
The base li motors are not designed for connuous use of more than 2 minutes in an 18 minutes period, or approximately 10% duty cycle.
Any aempt to circumvent or exceed this rang will shorten the life expectancy of the product and may void the warranty.
WEIGHT UNITS:
The limitaon for this adjustable base is 850 lbs. The base will structurally support these weights, provided weight is evenly distributed
across the head and foot secons. This product is not designed to support or li this amount in the head or foot secon alone. Exceeding
this weight restricon could damage the base and/or cause injury and void the warranty. Enter or exit the base in a flat posion and do not
sit on the head or foot secons while in the raised posion.
LIFTING AND LOWERING MECHANISMS AND MASSAGE UNITS:
It is normal for the raising and lowering feature on this base to emit a minimal humming sound during operaon. The massage feature
creates a vibrang hum during operaon and the resonance will increase accordingly with a higher intensity motor seng.
LOCATION ENVIRONMENT:
The level of sound experienced in a room is directly related to the environment within that locaon. In a room with hardwood floors and the
massage units turned on, a vibrang noise can be noceable. To reduce the resonance, place a piece of carpet or rubber casters cups under
the legs. The rubber caster cups also prevent the base sliding when located on smooth or hard surface flooring.
-2-

TO REDUCE THE RISK OF SHOCK, BURNS, FIRE OR INJURY:
Make sure the base is in a flat posion and the vibrang motors are turned off before unplugging the base from the power source. Always
unplug the base from the electrical outlet before cleaning or servicing the base . If the cord or plug is damaged, disconnue use of the base.
Contact customer service for examinaon and repair.
FCC COMPLIANCE:
This device complies with part 15 of the FCC Rules for residenal use. Operaon is subject to the following two condions: (1) This device
may not cause harmful interference, and (2) this device must accept any interference received, including interference that may cause
undesired operaon.
Radio Frequency: 2.4 GHz
For customer service under this limited warranty.
Toll Free Phone:1.855.430.8943
-3-

All electronics and components that need to be installed are located in boxes under the foundaon or
aached to the frame. Before discarding the packing materials, ensure that all the parts are accounted for.
Actual product appearance and
funconality may vary from photographs.
(2) 9-Volt Baeries
Socket and Crescent Wrench
Power Cord (1)
AAA Baeries (3)
A
Legs & Boom Caps (6)
King/CK Legs & Boom Caps (7)
B
Power Supply (1)
C
D
Remote Control (1)
E
Retainer Bar (2)
Aached to the frame
F
Parts List
-4-

Electronics Quick Reference Guide
-5-
Head Motor Control Box Foot Motor
USB Ports

-6-
Foot Motor
Head Motor
Power Cord
Pairing Buon
Power Supply
USB Ports

Two people are required to set up the base.
NOTE: To avoid damage to the base, always open the
carton in the flat posion.
1. Open the shipping box, cut the ribbon securing accessory
boxes & maress retainer bars, and put them aside.
Li the folded base frame unit out of the shipping carton
carefully, and then put it on a flat floor.
2. To install all six legs, thread the bolt of the leg to the nut on
the base frame, and ghten by hand. DO NOT OVERTIGHTEN.
3. Uncoil the input power cord (connected to the control box’s
power port) and plug it into the power supply.
4. Uncoil the power cord and connect it to the power supply.
Installation Guide
-7-

A
6. Ensure that baeries are correctly installed.
5. Carefully flip the base over onto its legs.
Important: Two people are required to move the base. Do not
drag across the floor. Do not rest frame on its side; excessive
pressure may damage the legs.
7. Insert the maress retainer bars into the grommets as shown.
-8-
Leg Posions
Head
Foot

Lis and Lowers Head Lis and Lowers Foot
Flash Light on/off
Flat Buon
Memory Posions
One touch ZG preset posion One touch An Snore posion
Remote Control Instructions
-9-

ONE TOUCH BUTTONS
Press and hold the buon, flash
light will be on.
ADJUST
-10-
Lis and Lowers Foot
Lis and Lowers Head
An Snore Preset Posion
Memory Posions
Flat Buon
Zero-G Preset Posion

STEP 3
Setting Programmable Positions and Pairing Remote
SETTING PROGRAMMABLE POSITIONS
To adjust the saved posion, repeat steps 1 and 2 and the new posion will be saved.
STEP 1
Adjust the head and foot to your desired posion.
STEP 2
Press and hold the flat buon first, then press and
hold memory buon for 5 seconds unl you hear 2
beeps sound.
The adjustable base has a programmable feature that allows you to save custom posions.
Please read all the instrucons below before seng your custom presets on the remote.
-11-

PAIRING REMOTE
STEP 1
Make sure the baeries work fine. Replace them when needed.
STEP 2
Plug the power cord to the power source.
The original remote that comes in the box is already paired to the base. No further acon is required.
In the event that the remote is not paired with the base, follow the steps below.
STEP 3
Press and hold head li and foot li simultaneously, then press and hold the buon on the cord of control
box for 3 seconds unl your hear 2 beeps sound, the remote is then paired.
Pairing Button
-12-

STEP 3
Setting Preset positions
SETTING PRESET POSITIONS
To adjust the saved posion, repeat steps 1 and 2 and the new posion will be saved.
STEP 4
If you want to restore to factory sengs, unplug the power supply for 5 seconds, then plug back in. The base will restore to factory
sengs.
STEP 1
Adjust the head and foot to your desired posion.
STEP 2
Press and hold the flat buon first, then press and
hold An Snore or Zero Gravity buon for 5 seconds unl
you hear 2 beeps sound.
The adjustable base has a programmable feature that allows you to modify preset posions.
Please read all the instrucons below before seng your preset posions on the remote.
-13-

Step 2:
1. Make sure Remote A was already paired to Base A and Remote B
was paired to Base B. If not, please pair them by following the
pairing remote instrucons on page 12.
2. On Remote A, press and hold Head Down and
Foot Up at the same me, within 5 seconds, the
Remote A backlit LEDs will blink.
(Named Crossover)
Synchronizing Two Bases
-14-
Remote A Remote B
Base B
Base A
(for Twin XL and Split sizes only)
Step 1:
Ensure both bases (A and B) are plugged into a power source.
3. Slide the side buon to "L" posion, then you can use Remote
A to control Base A only.
4. If you slide the side buon to "O" posion, then you can also
use Remote A to control Base A only.
5. Slide the side buon to " R" posion, then pair the Remote A
to Base B, you can use Remote A to control Base B only.
If you want to use Remote A to control two bases simultaeously,
slide the side buon to "O" posion.
Please note: If you want to control the bases through sliding the
side buon, only one remote can work. Another remote will not
be workable.
So now you can not use Remote B to control Base B, you need to
re-pair Remote B to Base B. Then if you want to use Remote B to
control two bases, only follow the above steps 2-5 on Remote B.

-15-
On Remote A, slide the side buon to "L" posion.
On Remote B, Press and Hold Head Down & Foot Down at the
same me, within 5 seconds, the flashlight on Remote B will be
on. Meanwhile press and hold Head Up & Foot Up on Remote
A, then the flashlight on Remote B will blink. Now Remote B has
learned Remote A successfully. Both remotes can control both
bases simultaneously now.
For example:
1. If you want to use Remote A to control two bases, slide the
side buon to "O" posion on Remote A.
2. If you want to use Remote A to control Base A only, slide the
side buon to "L" posion on Remote A.
3. If you want to use Remote A to control Base B only, slide the
side buon to " R" posion on Remote A.
The same steps for Remote B, if you want to use Remote B.
Two remotes control two bases simultaneously.
On Remote B, press and hold Head Down and Foot
Up at the same me, within 5 seconds, the Remote
B backlit LEDs will blink. (Named Crossover)
Remote A Remote B

-16-
Step 2:
Next, on Remote B, press and hold the Head Down and Foot Up buons simultaneously
unl the backlit LED lights blink.
Step 3:
On Remote B, press and hold the All Up and All Down buons unl the flashlight blinks.
Step 4:
Now, on Remote B, press and hold the Head Up and Foot Up buons and the blue
Pairing Buon (located on the power cord) simultaneously unl you hear a beep.
NOTE: Remote B now only controls Base B and the sync toggle no longer funcons.
Step 1:
On Remote A, press and hold the Head Down and Foot Up buons simultaneously unl the backlit LED lights blink. The Remote A now only
controls Base A and the sync toggle no longer funcons.
Remote A Remote B Remote B Remote B
To Operate The Beds Separately Again
Pairing Button

Troubleshooting
In the event that the base fails to operate, assess the symptoms and possible soluons provided in
the chart below.
SYMPTOMS SOLUTIONS
Remote control illuminates and appears to be
operable, but will not acvate base.
No features of the base will acvate.
Wireless remote will not illuminate.
Head or foot secon will elevate, but will not
return to the flat posion.
Verify that the power cord is plugged into a working, grounded electrical outlet. Test the
outlet by plugging in another working appliance.
Replace the baeries in the wireless remote.
Base mechanism may be obstructed. Elevate base and check for obstrucon. Remove
obstrucon.
Head secon may be too close to the wall.
Headboard may be too close to the edge of the maress. Verify that there is enough
distance between the headboard brackets and maress. Adjust if required.
Program the remote control (see the Seng Programmable Posions and Pairing Remote
secon of this manual for programming procedures).
Unplug the power cord, wait 30 seconds and plug back to reset electronic components.
The surge protecon device or the electrical outlet may be defecve. Test the outlet by
plugging in another working appliance.
Verify that the connector on the base is securely aached to the control box.
-17-
Table of contents
Other Brentwood Indoor Furnishing manuals