BRICK HOUSE IP28 iVu User manual

WHEN YOU NEED TO KNOW.
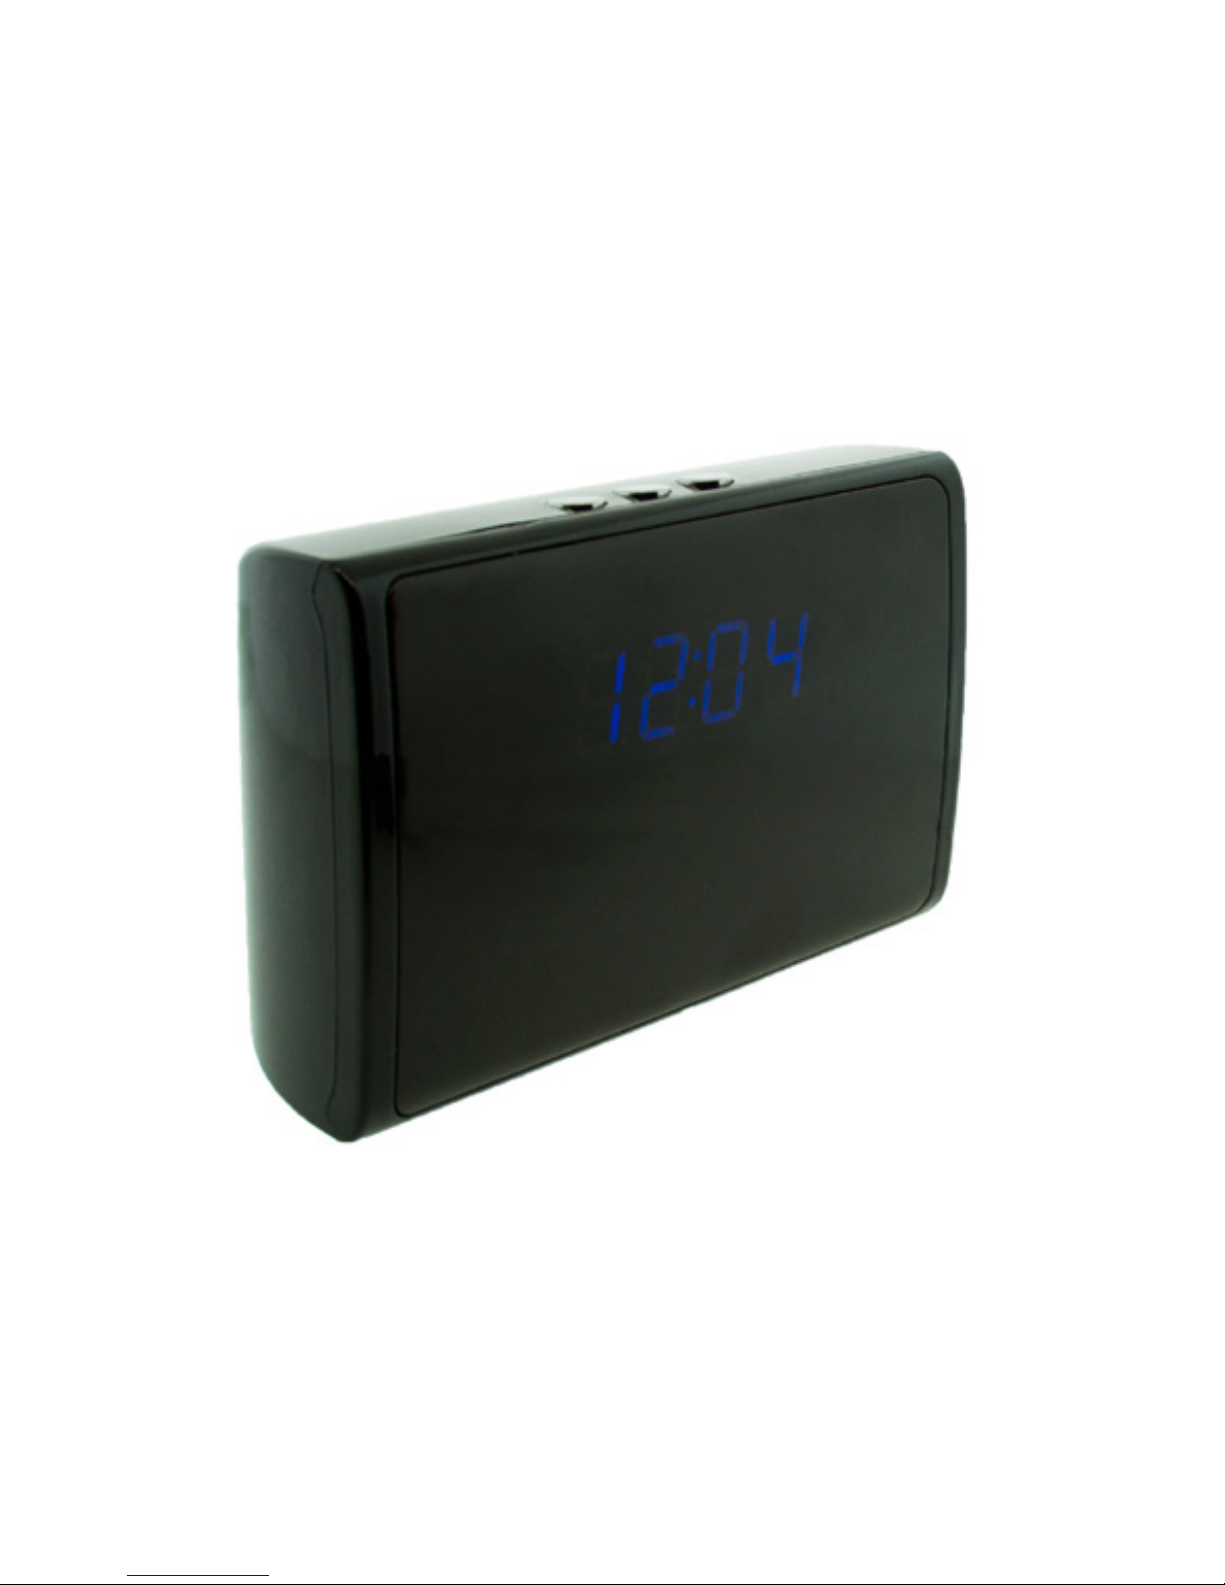
iVu WiFi Hidden Camera Clock
User’s Guide

iVu WiFi Hidden Camera Clock
The iVu WiFi Hidden Camera Clock a is a fully functional clock, displaying
time in an adjustable 12 or 24-hour format. This hidden cam records video
in high definition 1080p resolution at 25 frames per second. Select from
customizable recording mode settings; either continuous or motion activated
recording. View your video remotely view through the free Pro iCam mobile
application, supported on iOS or Android. Or, record video locally to a
microSD card (up to 32GB, not included). This covert camera can run up to
three hours on a single battery charge.
In the Box:
In the box you will find the iVu WiFi Hidden Camera Clock, USB Cable, AC
Power Adapter, a Rechargeable Battery, and this User’s Guide.
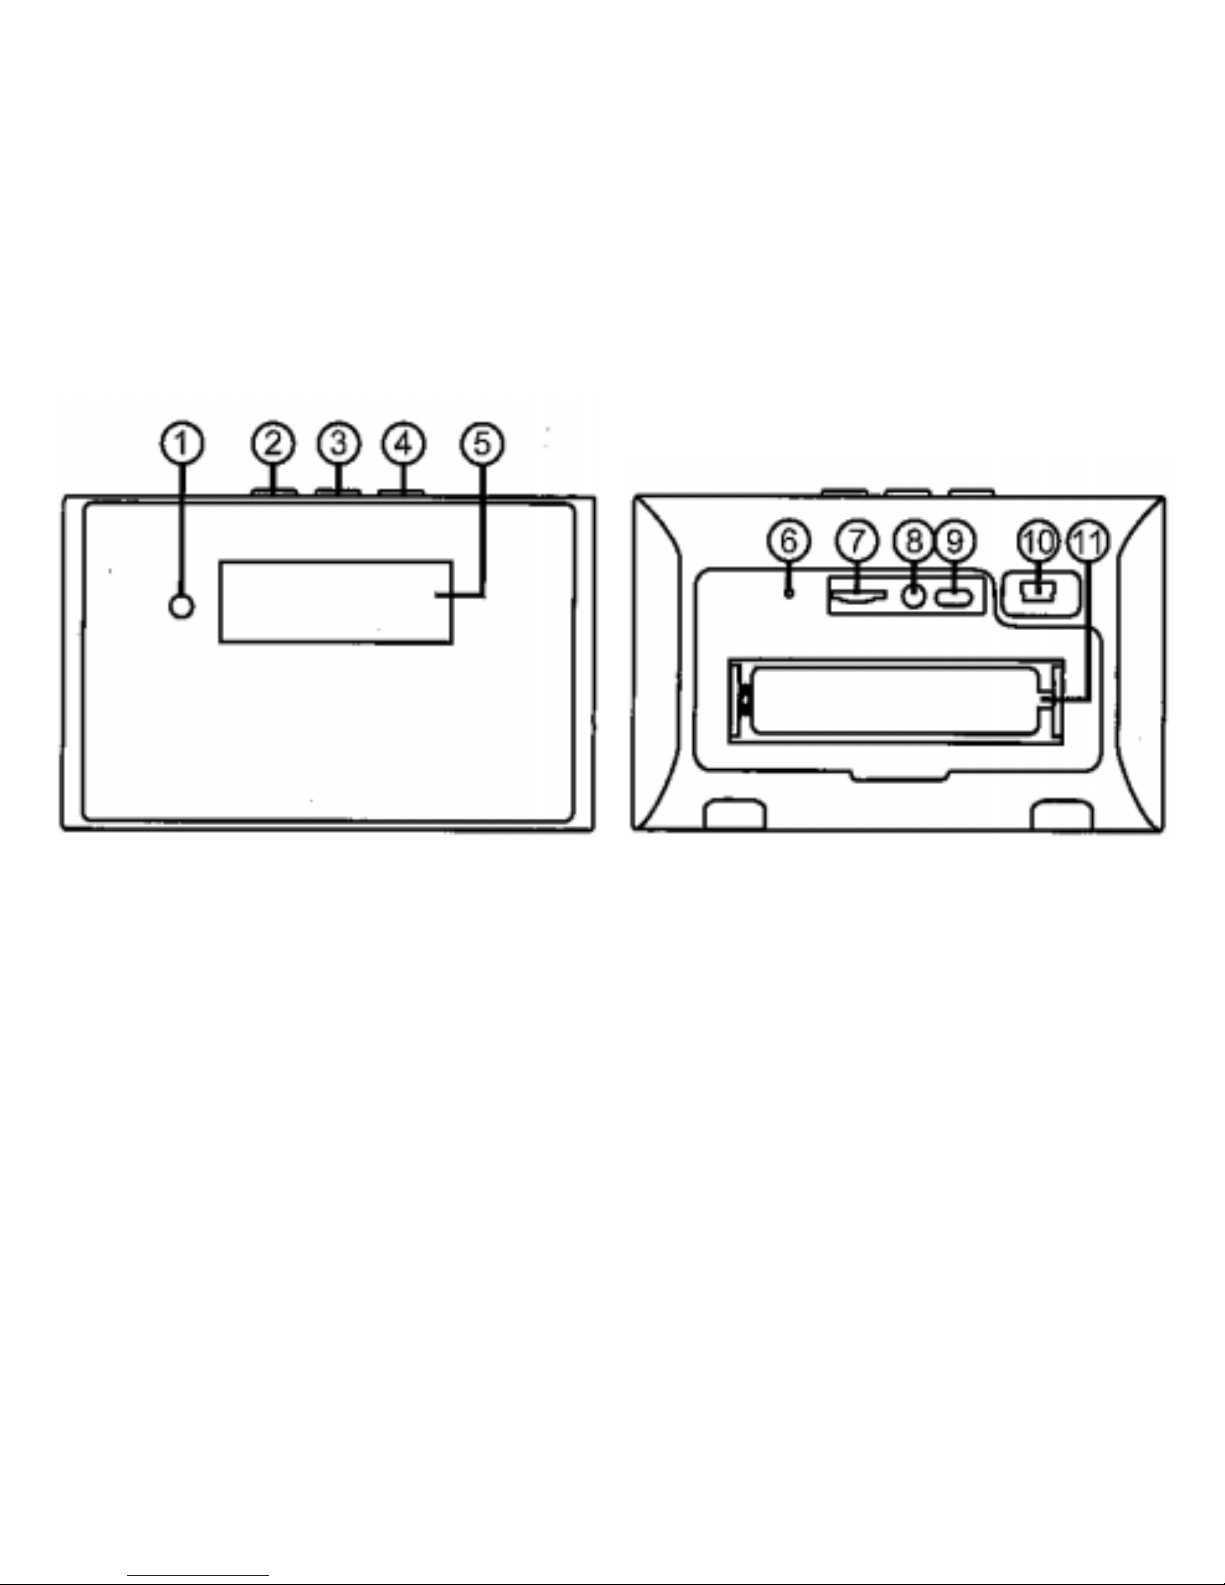
1. Blue Indicator Light 2. Set Button
3. Up Button 4. Down Button
5. Time Display 6. WiFi Indicator Light
7. Micro SD Card Slot 8. Reset Key
9. On/Off Switch 10. USB Port
11. Battery

Getting Started
The first step in using your clock cam is to take off the back cover of
the camera and remove the protective seal tabs from the battery. We
recommend charging the device for a full 5 hours before first use.
Next, go to the App or Google Play store and download the free “Pro iCam”
application.
At this point you can insert a microSD card into the slot located on the back
side of the camera. This camera will work without the presence of an SD
card; it is not recommended, however. If the network connection is lost, the
camera could miss capturing video without an SD card providing backup
storage. Next, turn device to the “On” position.

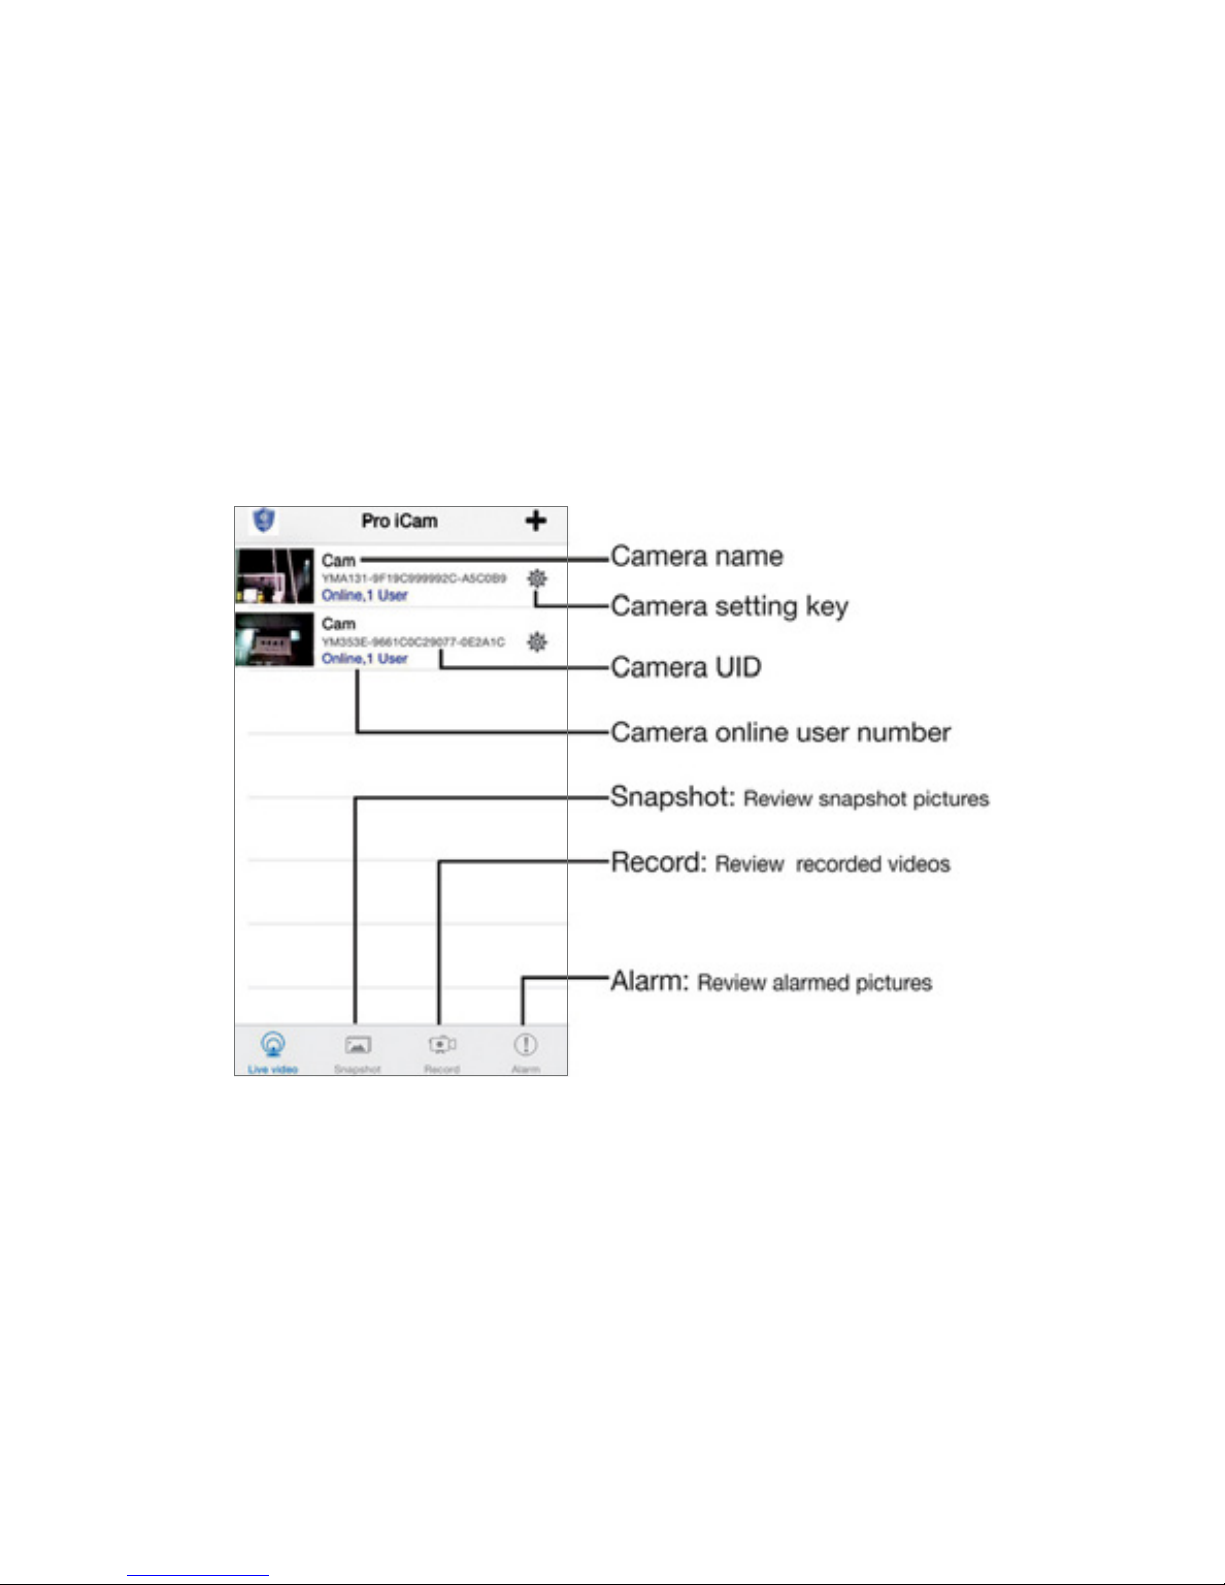
Getting to Know the Pro iCam App

Conguring A Local Wireless Network Connection
By connecting to your camera through its WiFi hotspot connection (known as
“Direct Connect”), you’re able to view your video locally within 100 feet of the
device.
To begin, switch the Power button to the On position. The Indicator light is
located on the back left side of the device next to the USB input; it will flash
red and blue as the clock camera is establishing its WiFi connection.
Note: It takes up to 5 minutes for the camera’s hotspot/WiFi to send out a
signal after the device is fully charged and powered on.
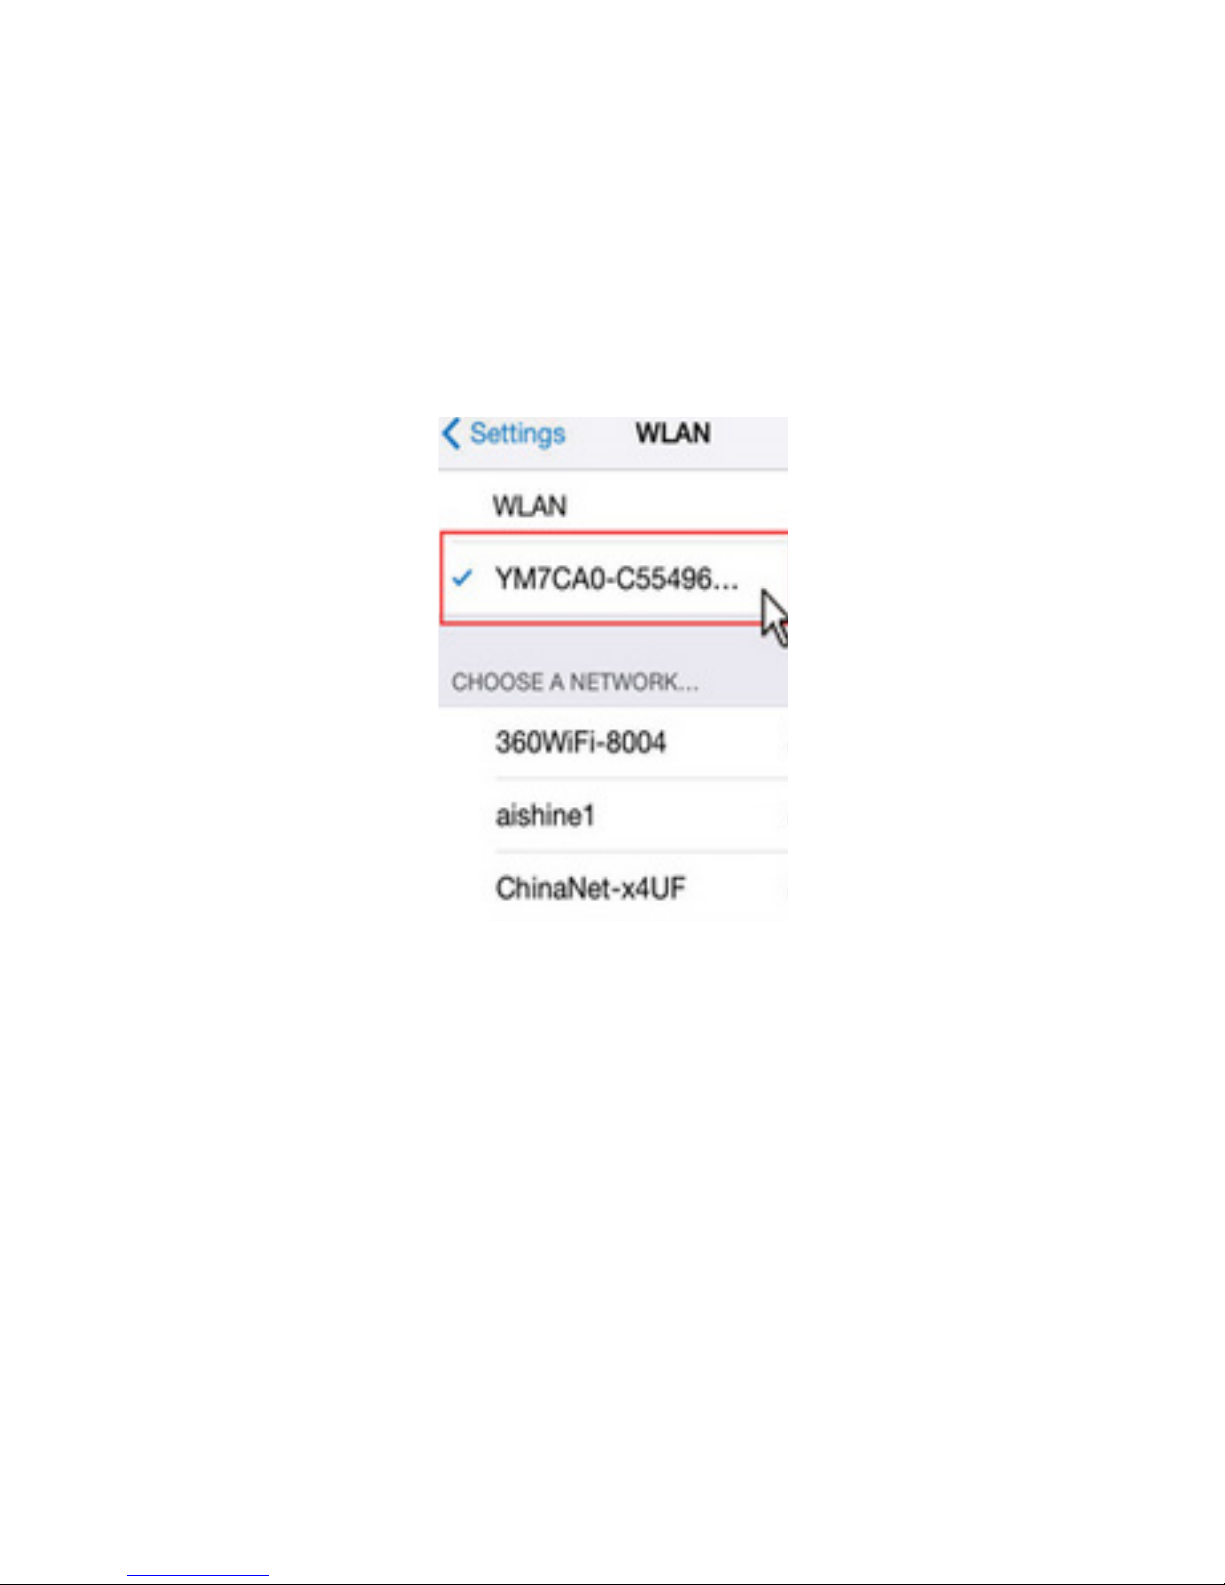
After 5 minutes, open the WiFi settings on your mobile device (smartphone
or tablet). From here you will locate the Camera’s WiFi device name:
“YMxxxxxxxxxxxxxx” (with the X’s representing a unique combination of
numbers and letters specific to your camera). Select this network and
connect. Once you connect successfully you will exit out of the WiFi menu.
You are now connected to the camera’s WiFi Wireless Hotspot Network.
Next, open the Pro iCam application from your mobile device. On the upper
right-hand corner select the + icon and select “Add new online camera”. The
default password will automatically populate in the Password field. Select
Search and your camera will appear.
Note: The camera’s default password is (8888).
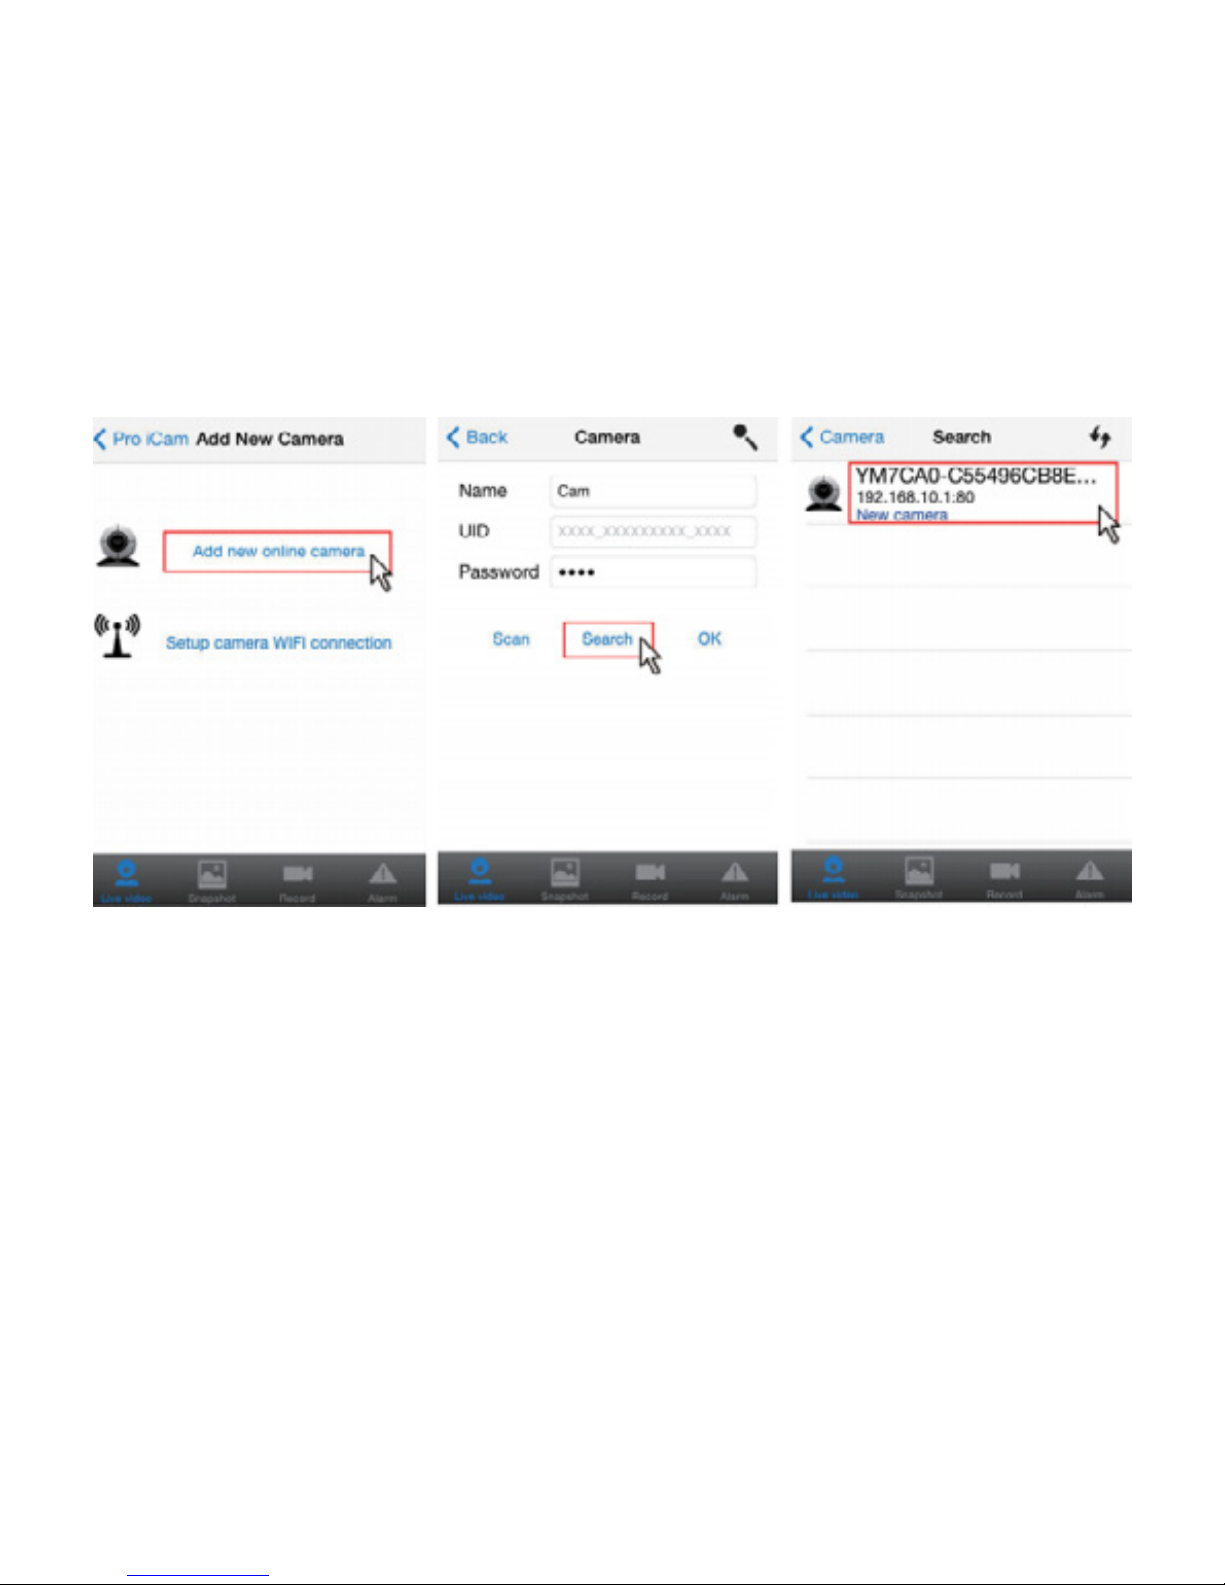
Select your camera and click OK. Your camera is now online; from here you
can customize your settings.
In the next section we’ll cover connecting your camera to your WiFi network
(known as a “P2P Connection”), enabling you to view video remotely.

Conguring A P2P Network Connection
By connecting your camera to your WiFi network, you’re able to view video
remotely through the Pro iCam app.
To establish this connection, first open the Pro iCam app, click the gear icon
located next to your camera to open and adjust network settings.
Select Advance Config; multiple options will appear. Select WiFi Config.

In WiFi Config, select your Home or Office WiFi SSID’s name and enter your
network Password.
Once you enter your network information, your camera will reboot; you
will have to exit out of the Pro iCam app while the settings apply. After 30
seconds, the camera’s red indicator light will come on and remain solid.
Your camera is now connected to your wireless network.
Conguring Other Advanced Settings
Within the Pro iCam app, clicking the gear icon located next to your camera
and selecting Advance Config will offer additional configuration options
besides connecting your camera to your WiFi network.

Alarm Conguration
Selecting the Alarm Config option allows you to customize recording trigger
settings.
Motion Detection Sensitivity: 1 is highest, 7 lowest for detecting activity. 4 is
recommended for normal activity
Email & FTP Video Upload: as well as Back to Preset functions are disabled
within the mobile app.
Alarm Interval: Choose between 30-300 seconds after motion is detected to
start recording again.
On-Screen Display: When motion is detected an event will display on your
screen.

SD Card Record Configuration
In the SD Card Record Config section you’re able to customize the settings
determining how and when your camera will record to an SD card.
Settings Include:
• Close: This option means you will activate the camera through the mobile
app to record or take a picture.
• On Alarm: This option means the camera is activated based on motion
• All Day: This option means continuous recording
• Resolution: Select 1080p, 720p, 480p resolutions. Lower resolution will
preserve storage space.
Format SD Card: This option formats the SD card inserted in the camera, if
needed.
Email Config: Not Supported.
FTP Config: Not Supported.
DDNS Config: Not Supported.

Change P2P Access Password: This option allows you to change your
camera’s default password from 8888 to a new password.
Camera Reboot: Choose this option to reset the device to factory default
settings.
Adjusting Camera Display: The HD Ovi Digital Clock WiFi Hidden Camera
features 3 buttons: Set, Up and Down. To adjust the clock’s time format, hold
the Set button for 3 seconds. Use the Up button to toggle between 12 and 24
hour format, and then press Set.
From here you will then press Set again to enter your Time. Using the Up and
Down buttons, enter hour and then Set, enter minute and then Set.

Troubleshooting
Problem: The backlight on my LCD Screen is extremely dim.
Solution: Your device is on low battery; charge it with the included cable.
Problem: The Device Hotspot/WiFi signal does not appear in my WiFi Menu.
Solution: Power down the device and remove the battery. Place the battery
back in the device and power it on using the included cable. Press and
hold the reset button for 5 seconds; the indicator light will flicker and then
disappear. The Red Indicator light will come back solid red. Wait 2 to 3
minutes for the device HotSpot/WiFi to transmit a signal, and then continue
the setup as instructed above.
Problem: I forgot my password
Solution: You will have to reset the device to factory settings; press the reset
key for 5 seconds, delete the camera in the Pro iCam app and re-add it.

Problem: My video is not loading; it shows that the camera is online but the
feed is buffering.
Solution: Depending on your internet speed it may take the device up to 30
seconds to load your live video feed. If you change the resolution to 480p your
video will load a lot quicker.
Problem: There is only one user logged in but it is showing two.
Solution: You will have to reset the device to factory settings; press the reset
key for 5 seconds, delete the camera in the Pro iCam app and re-add it.
Problem: The camera is not holding my WiFi settings and continues to show
that the camera is offline.
Solution: Make sure your camera’s SSID password was entered correctly.
Also, ensure that the camera is no further than 80 feet from your router. Range
is important in order to have a stable connection.

WHEN YOU NEED TO KNOW.
Table of contents
Other BRICK HOUSE Security Camera manuals


