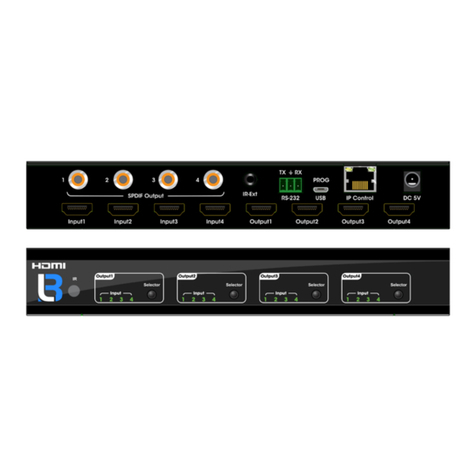
Brightlink P2000M Series User manual


User’s Guide
Page 2 of 54
Contents
PART ONE HARDWARE INSTALLATION GUIDE...............................................................................5
CHAPTER 1PRODUCT INSTRUCTION .........................................................................................................5
1.1 Introduction..................................................................................................................................5
1.2 Front Panel..................................................................................................................................5
1.3 Rear Panel......................................................................................................................................6
CHAPTER 2PREPARATIONS BEFORE INSTRUCTION....................................................................................7
2.1 Precautions..................................................................................................................................7
2.2 Check Installation Environment................................................................................................7
2.3 Installation Tools .........................................................................................................................7
CHAPTER 3INSTALLATION........................................................................................................................ 8
3.1 Install the Switch.........................................................................................................................8
3.2 Connect the power cord and grounded cord..........................................................................8
3.3 Test after Installation ..................................................................................................................9
CHAPTER 4TECHNICAL SPECIFICATIONS ..............................................................................................10
4.1 Hardware Features:..................................................................................................................10
4.2 Software Features:................................................................................................................... 10
PART TWO WEB CONFIGURATION GUIDE......................................................................................12
CHAPTER 1USER LOGIN.........................................................................................................................12
CHAPTER 2DEVICE STATUS....................................................................................................................13
2.1 System Status ...........................................................................................................................13
2.2 Port Statistics............................................................................................................................. 14
2.3 LACP Statistics..........................................................................................................................14
2.4 RSTP Statistics .........................................................................................................................15
2.5 IGMP Statistics..........................................................................................................................15
Picture 2.5.1 IGMP Statistics............................................................................................................15
Users can check the IGMP state statistics for current VLAN in this page.................................15
CHAPTER 3BASIC CONFIG......................................................................................................................15
3.1 System Config...........................................................................................................................16
3.2 Port Config.................................................................................................................................16
3.3 Flow Control ..............................................................................................................................17
CHAPTER 4ADVANCED CONFIG..............................................................................................................17
4.1 IGMP Config ..............................................................................................................................17
4.2 VLAN ..........................................................................................................................................18
4.3 ARP Config ................................................................................................................................22
4.4 Link Aggregation....................................................................................................................... 24
4.5 LACP Port Configuration .........................................................................................................25
4.6 LACP Port Configuration .........................................................................................................26
4.7 802.1X Configuration ...............................................................................................................27
4.8 Port Mirroring Configuration....................................................................................................27
4.9 Qos Configuration.....................................................................................................................28
4.10 Storm Control..........................................................................................................................28

User’s Guide
Page 3 of 54
4.11 PING.........................................................................................................................................29
CHAPTER 5SYSTEM CONFIGURATION.....................................................................................................29
5.1 Software Upgrade.....................................................................................................................29
5.2 Configuration Management.....................................................................................................30
5.3 System Warm Reset ................................................................................................................30
5.4 Factory Reset............................................................................................................................30
PART THREE CLI CONFIGURATION GUIDE...........................................................................31
CHAPTER 2CONSOLE PARAMETER CONFIGURATION..............................................................................35
CHAPTER 3PORT CONFIGURATION .........................................................................................................36
CHAPTER 4MAC CONFIGURATION.........................................................................................................37
CHAPTER 5VLAN CONFIGURATION....................................................................................................... 39
CHAPTER 6ARPCONFIGURATION ..........................................................................................................40
CHAPTER 7LINK AGGREGATION CONFIGURATION .................................................................................41
CHAPTER 8LACPCONFIGURATION........................................................................................................ 42
CHAPTER 9RSTPCONFIGURATION ........................................................................................................43
CHAPTER 10 USER GROUP CONFIGURATION...........................................................................................45
CHAPTER 11 QOSCONFIGURATION ........................................................................................................46
CHAPTER 12 PORT MIRROR CONFIGURATION .........................................................................................48
CHAPTER 13 IPADDRESS CONFIGURATION ............................................................................................49
CHAPTER 14 DOT1X CONFIGURATION ....................................................................................................51
CHAPTER 15 IGMPCONFIGURATION......................................................................................................52
APPENDIX TROUBLE SHOOTING....................................................................................................54

User’s Guide
Page 4 of 54
Packaging list:
Please open the product packaging box with care and check the following items:
L2 Managed Switch *1
Power Cord x1
DB9-RJ45 Cable
User Guide/CDx1
Installation accessories kit x1
If any of the above items are missing or damaged, please contact local reseller or
distributor for assistance.


User’s Guide
Page 6 of 54
1.3 Rear Panel
Picture 1.3.1 Rear Panel
Power Socket: Three-core power socket is adopted,please connect female head of
power cord to the socket, and connect the AC power supply with male head.

User’s Guide
Page 7 of 54
Chapter 2 Preparations before Instruction
2.1 Precautions
Please read the following precautions carefully before operation, to avoid damaging the
device or causing body injuries.
1). Please remove the power socket before cleaning the switch. Don’ wipe the switch
with wet cloth or wash the switch with liquid.
2). Don’t stock the device in damp environment or near water, to avoid water or moisture
penetrating into the inner device.
3). Don’t put the device on a unstable box or desk, the device will get damaged from
falling.
4). Please keep good ventilation indoor, and make sure the heat dissipation function of
switch works well.
5). The switch only works normally in suitable voltage. Please check the working voltage
first.
6). Please don’t open the switch enclosure randomly, especially when the switch is
powered on, there is risk of electric shock.
7). Please wear anti-static wrist strap when change the interface board,to avoid the
static electricity damage the board.
2.2 Check Installation Environment
The switch is for indoor use only, please pay attention to the following problems when
install the switch in a cabinet or put the device directly on the desktop.
1) The air vents of switch must have enough space to dissipate the heat inside
enclosure.
2) A good heat dissipation system in the cabinet or on the desktop.
3) The cabinet or desktop strong enough to support the weight of switch and
installation accessories.
4) Safe ground connection for the cabinet or desktop.
2.3 Installation Tools
1) Flathead screw driver
2) Cross screw driver
3) Anti-static wrist strap

User’s Guide
Page 8 of 54
Chapter 3 Installation
3.1 Install the Switch
3.1.1 Install the switch on a 19 inch standard cabinet
1) First fix the provided two L-shaped brackets on the two sides of switch.
2) Fix the switch on the rack with screws(screws are not provided).
Picture 3.1.1 Cabinet Installation
3.1.2 Install the switch on the desktop
When there is no 19 inch standard cabinet, the switch is usually put on clean
desktop. The operation is easier, please follow the below instructions:
1) Keep the desktop stable and safely grounded.
2) Set aside 10cm space around switch for heat dissipation.
3) Don’t put any heavy device on the switch.
3.2 Connect the power cord and grounded cord
3.2.1 Select of AC Power Socket
The neutral one-phase 3-wire power socket is advised to adopt, or the
multifunctional PC power socket. The neutral point of power supply must be well
grounded, please check the grounded power supply before operation.
Picture 3.2.1 one-phase 3-wire power socket
3.2.2 Connection of AC power cord
Step one: please connect one end of power cord to the power jack on the switch
rear panel,Connect the other end to the AC power socket.

User’s Guide
Page 9 of 54
Step two: check the power indicator(PWR) on the front panel, if the LED is on,
connection is
Successful.
3.3 Test after Installation
Make sure the working voltage is the same with the rated voltage of switch.
Check the connection of grounded cord.
Check the connection of configuration cable and power input cord.
If the interface cable is partly deployed outdoor, please check the connection of
anti-thunder
AC power strip and interface anti-thunder device.

User’s Guide
Page 10 of 54
Chapter 4 Technical Specifications
4.1 Hardware Features:
Service Ports
16*1000 Base-X SFP
8*10/100/1000 Base-T
Management Port
1* Console port
Switching Capacity
≥48Gbps
Packet Forwarding Capacity
36Mpps
Operation Temperature
-20~50°C
Storage Temperature
-40~70°C
Operation Humidity
10%~90%(non-condensing)
Storage Humidity
5%~95%(non-condensing)
Dimensions
440(L)×285(W)×44.5(H) mm
Weight
<4Kg
Input Voltage(AC)
AC:110~240V/50~60Hz
Power Consumption
<30W
4.2 Software Features:
Protocol
and Standards
IEEE 802.3ad, Static or Dynamic Link Aggregation;
IEEE 802.3u,100 BASE-TX;
IEEE 802.3ab,1000 BASE-T;
IEEE 802.3z,1000 BASE-X;
IEEE 802.3x,Full-Duplex Flow Control;
IEEE 802.1q,VLAN;
IEEE 802.1p,QoS/CoS;
IEEE 802.1d, Spanning Tree Protocol;
IEEE 802.1w,Rapid Spanning Tree Protocol;
MAC Address
16K MAC addresses;
Support auto-update, two-way learning;
VLAN
256 VLANs;
Port-based VLANs;
VLANs based on IEEE 802.1q;
Spanning Tree
STP Spanning Tree Protocol;
RSTP Rapid Spanning Tree Protocol;
Port
Aggregation
12 aggregation groups,each containing up to 12 ports;
Static aggregation and dynamic aggregation;
Port Mirroring
Many-to-one mirroring(that is, multiple mirroring ports, and one monitor port)
Ring Guard
Ring detection and avoidance
Traffic Control
Back-pressure traffic control under Half-Duplex mode
IEEE 802.3x traffic control under Full-Duplex mode
Flow Rate
Port-based ingress or egress rate limiting

User’s Guide
Page 11 of 54
Limitation
Multicast
IGMP Snooping
Storm
Suppression
Support the suppression of broadcast, multicast, DLF flooding and ICMP flooding
Security
Binding of the User port, IP addresses and MAC addresses;
802x1 port authentication;
QOS
SP(Strict Priority);
WFQ (Weighted Fair Queuing);
WRR (Weighted Round Robin);
802.1p (Port Queuing Priority);
DSCP Priority(Differentiated Service Code Point) ;
Configuration
and
Management
Uploading or downloading of the configuration data;
Uploading of upgrade patch;
WEB-based reset to factory defaults;
WEB-based interface management;
CLI interface management;
SNMP management;

User’s Guide
Page 12 of 54
Part Two WEB Configuration Guide
Chapter 1 User Login
switch adopt Web-based interface management, the default IP is 192.168.255.1. Please
check the IP address of PC, the PC IP address should in the same network segment with
switch IP address, or the PC can’t access to manage the switch. After the setting of IP
address, please input 192.168.255.1 in the browser to access the configuration interface of
switch.
The Web management interface consists of four modules, which are device information,
basic configuration, advanced configuration and system maintenance.
Picture 1.1.1 Login Page
Enter user password in the above login page, the default password is admin. The system only
support single user login, other logins will be refused until the user logs out.
If there isuser IP conflict, it suggests the last user didn’t log out successfully. Please
reboot the device or try to log in again180s later.
The user is advised to reset the IP address and password after first time login, and make
sure the switch is not configured in the same network segment with DHCP server or
Internet Gateway device.

User’s Guide
Page 13 of 54
Chapter 2 Device Status
2.1 System Status
Picture 2.1.1 System Status
Device status can be checked in the above page, which contains: Device Model, MAC
Address,Serial Number, Software Version,Hardware Version, IP Address, Netmask,Gatway
and Mgnt VLAN.

User’s Guide
Page 14 of 54
2.2 Port Statistics
Picture 2.2.1 Port Statistics
This page allows user to check the send bytes,send packets, recv bytes, recv packets. If
there are too many wrong packets, it suggests the port has very poor working performance,
the user need to examine the connection of network cable or the partner network card.
The current software version doesn’t support real-time statistics refresh, please click
“Refresh” button to get new statistics.
2.3 LACP Statistics
Picture 2.3.1 LACP Statistics
Users can check the LACP protocol running state of sing port in this page, the port state

User’s Guide
Page 15 of 54
can be easily defined by marked colours(showed in above picture). Detailed LACP protocol
information is showed in this page, including partner port and keywords.
2.4 RSTP Statistics
Picture 2.4.1 RSTPInformation Statistics
Users can find the RSTP bridge ID for every VLAN, and the basic RSTP information in
this page. In RSTP port status, the user can check VLAN ID, Path Cost,Edge Port,P2P Port,
Protocol and Port State.
2.5 IGMP Statistics
Picture 2.5.1 IGMP Statistics
Users can check the IGMP state statistics for current VLAN in this page.
Chapter 3 Basic Config

User’s Guide
Page 16 of 54
3.1 System Config
Picture 3.1.1 System Config
The user can check or modify IP address, netmask,gateway,mgnt VLAN, password and
SNMP configurations in this page.Click “Apply” to confirm the modification. Notice: Don’t
modify the netmask randomly, failed login may be caused by improper modification.
3.2 Port Config
Picture 3.2.1 Port Config
Port Status: The user can enable or disable a port in this page.Click “Enable” to open the port,
click “Disable” to close the port, the default setting is “Enable”.
Port Mode: 6 modes can be configured:Auto-negotiation,10 Half,10 Full,100 Half, 100 Full
and1000 Full. Default mode is Auto-negotiation, can be changed in pull-down list.
Flow Control: This function is defaulted closed, open it when needed.
Loop Detection:The function is defaulted closed, open it when needed.A port will be blocked
to cut the loop when loop is detected.( Notice: the port link indicator in front panel will be still

User’s Guide
Page 17 of 54
on when the port is blocked, for the physic connection is existed; while the link indicator on
the top of web management pages will be off.)
3.3 Flow Control
Picture 3.3.1 Flow Control
Users can define the bandwidth settings for specified egress and ingress interfaces in this
page. Flow control allows the user to limit maximum burst ingress flow, the port flow control
function works when the bandwidth limit is exceeded. There is no default bandwidth limit,
users can set the limit accordingly, limit shoud be in the range of 128kbps-3968kbps. Flow
shaping refers to the limit of maximum egress flow. Theflow shaping function works when the
limit is exceeded. The limit is not defaulted, please set the limit accordingly, the limit should
be in the range of 128kbps-3968kbps.
Chapter 4 Advanced Config
4.1 IGMP Config
Picture 4.1.1 IGMP Config

User’s Guide
Page 18 of 54
Showed in above is the IGMP multicast configuration page, the router port is static router port,
not aging. If a port is not configured as static router port, the switch define the port has a
connection with IGMP router(directly or indirectly)when it receives IGMP query messages
and the port will be recorded as dynamic router port .
The device snoops the IGMP messages by IGMP snooping, and build mapping relationship
between the device ports and multicast addresses.
The IGMP querying function refers to the IGMP router regularly send query messages to IP
multicast members, and the IP multicast members send back report messages to confirm the
multicast routing is effective. The query messages are divided into specified queries and
general queries. If the router is not working and can’t send out query messages, users can
configure the switch as an alternative of the router and send our query messages. Thus, the
IP forwarding path downstream the switch won’t get influenced and aged.
4.2 VLAN
The system provides two types of VLAN configuration: one is Quick Config for naive users to
do some simple VLAN distribution. The other is Advance Config for senior users who have
complex requirements on VLAN.
4.2.1 Quick Config
Picture 4.2.1 Vlan Rapid Configuration
“Public VLAN Protect” is an isolating function of VLAN. When the switch has public
ports( also named as public VLAN), users can effectively get VLAN data isolated by select
“Public” .Thus,the low-speed sources among the public ports won’t influence the visit speed
of other ports. And if only the normal VLAN function needed, please do not enable this
function(the default state is diable).The enable of public VLAN protect function will take effect
after rebooting device, please click reboot button to hot reboot the device and log in one

User’s Guide
Page 19 of 54
minute later.
VLAN Quick Config supports VLAN IDs range from 1 to 24, maximum supports 24 VLANs.
There are 24 ports showed in the top of page, and each port has a pull-down list to select
from No.2~24 VLAN or the “Public” VLAN. Users can add specified ports into different VLAN
and configure one or more ports as public VLAN.Usually the following ports will be configured
as public VLAN: general uplink port, server port, router port , printer port and other ports).
Click”Binding” button to confirm the configuration. After this configuration, PVID configuration
is not needed, the system will automatically configure PVID according to the VLAN IDs. In
normal configuration of public VLAN, the VLAN Label is “Not Take Effect”by default, no select
needed. ( Notice: When configure the VLAN, the switch port connects with this
administrative PC should be in the managment VLAN which is public VLAN in default
setting.)
Click “ delect” botton to clear all the configuration.
If more VLAN configuration functions are needed, please click “ Advanced config” button in
the bottom of this page. The quick config information will be cleared when entering into
advance config page.
4.2.2 Advance Config
Picture 4.2.2 VLAN Advance Config
The user can create or delete VLAN in advance config. Currently support a VLAN ID
range of 1~4094, support maximum 255 VLANs.
Click”Mgnt(management)” botton to enter into below page and VLAN members can be
added or deleted in this page.

User’s Guide
Page 20 of 54
Picture 4.2.3 VLAN Member Management
Click “ VLAN Virtue” botton to configure basic VLAN features.
Picture 4.2.4 VLAN Property Configuration
Beside VLAN distribution, users can also configure VLAN features. “VLAN Label Enable”
means port transmits tagged packets.”Ingress Filtering Enable” means when receiving a
mismatched VLAN packet,refusing to learn the address. “Packet Type” refers to what types of
packets can be received, tagged only or all. PVID means the default VLAN to get untag
packets, when a port is distributed to a specified VLAN, PVID need to be configured.
Case One. Public VLAN Mode
Table of contents
Other Brightlink Switch manuals
Popular Switch manuals by other brands

IDK
IDK FDX-32 user guide

Extron electronics
Extron electronics System 8 Plus installation instructions

Endress+Hauser
Endress+Hauser Soliphant M FTM50 operating instructions

Intellinet
Intellinet IPS-54GM06-10G-450W instructions

Cross Technologies
Cross Technologies 2582-122 instruction manual

Cisco
Cisco Catalyst 4500 Series Command reference guide

Xcellon
Xcellon SH10-7H3HC-2 quick start guide

GarrettCom
GarrettCom Magnum 6K8-Series Hardware installation and user's guide

Lenovo
Lenovo Flex System FC5022 Product guide

Wharfedale Pro
Wharfedale Pro WPL-26 Operating manual and user guide

Bticino
Bticino RW4027CM2 quick start guide

Belkin
Belkin Network USB Hub user manual