BRP Icon II 3.5" User manual

*362089*
ICON II 3.5” Gauge
Original Instructions
User’s Guide


1
TABLE OF CONTENTS
TABLE OF CONTENTS . . . . . . . . . . . . . . . . . . . . . . . . . . . . . . . . . . . . . . .1
SAFETY INFORMATION . . . . . . . . . . . . . . . . . . . . . . . . . . . . . . . . . . . . . .3
PRODUCT INFORMATION . . . . . . . . . . . . . . . . . . . . . . . . . . . . . . . . . . . .4
SYSTEM FUNCTIONS . . . . . . . . . . . . . . . . . . . . . . . . . . . . . . . . . . . . . . . .4
DISPLAY PARAMETERS . . . . . . . . . . . . . . . . . . . . . . . . . . . . . . . . . . . . .5
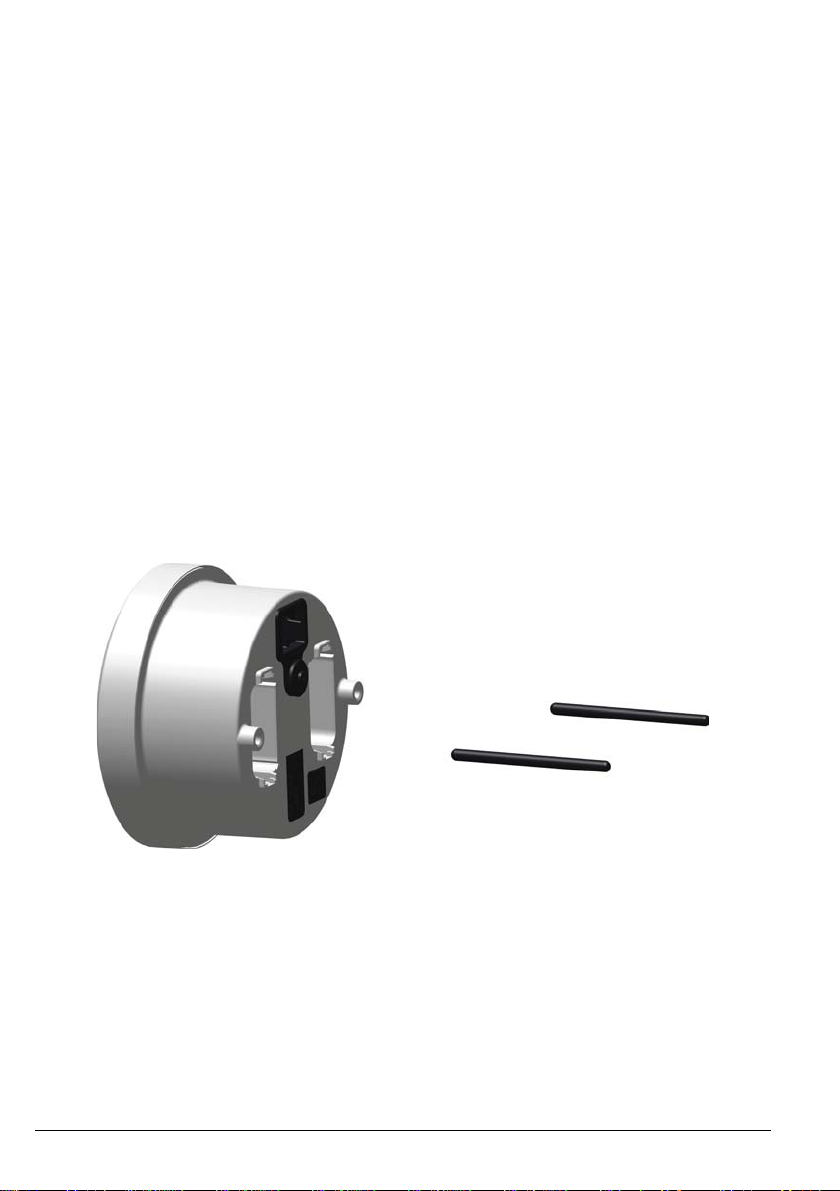
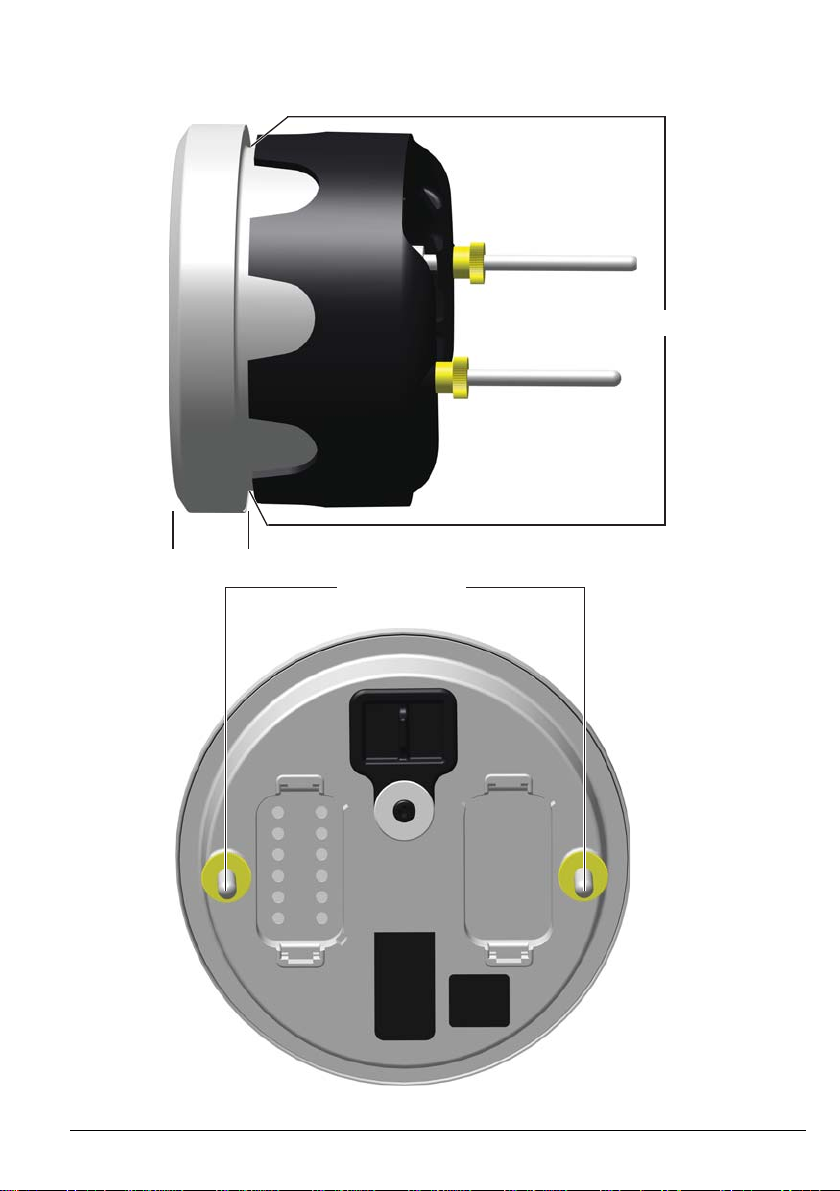
INSTALLATION . . . . . . . . . . . . . . . . . . . . . . . . . . . . . . . . . . . . . . . . . . . . .6
GAUGE DIMENSIONS . . . . . . . . . . . . . . . . . . . . . . . . . . . . . . . . . . . . . . . .7
INSTRUMENT PANEL CLEARANCES . . . . . . . . . . . . . . . . . . . . . . . . . . .8
GAUGE SPACING (CENTER TO CENTER) . . . . . . . . . . . . . . . . . . . . . . .8
INSTRUMENT PANEL THICKNESS . . . . . . . . . . . . . . . . . . . . . . . . . . . . .8
DRILLED HOLE SIZE . . . . . . . . . . . . . . . . . . . . . . . . . . . . . . . . . . . . . . . .8
FASTENING THE GAUGE . . . . . . . . . . . . . . . . . . . . . . . . . . . . . . . . . . . . .8
ELECTRICAL CONNECTIONS . . . . . . . . . . . . . . . . . . . . . . . . . . . . . . . . .8
TURNING THE DISPLAY ON . . . . . . . . . . . . . . . . . . . . . . . . . . . . . . . . . . .8
SETTING UP YOUR GAUGE . . . . . . . . . . . . . . . . . . . . . . . . . . . . . . . . . . .9
SETTINGS . . . . . . . . . . . . . . . . . . . . . . . . . . . . . . . . . . . . . . . . . . . . . . . . .9
CALIBRATION . . . . . . . . . . . . . . . . . . . . . . . . . . . . . . . . . . . . . . . . . . . . .15
TRIP LOG . . . . . . . . . . . . . . . . . . . . . . . . . . . . . . . . . . . . . . . . . . . . . . . . .21
RESTORE DEFAULTS . . . . . . . . . . . . . . . . . . . . . . . . . . . . . . . . . . . . . .22
FIRMWARE INFORMATION . . . . . . . . . . . . . . . . . . . . . . . . . . . . . . . . . .22
MODE SELECTION . . . . . . . . . . . . . . . . . . . . . . . . . . . . . . . . . . . . . . . . .23
THROTTLE SOURCE . . . . . . . . . . . . . . . . . . . . . . . . . . . . . . . . . . . . . . .23
TRIM ASSIST . . . . . . . . . . . . . . . . . . . . . . . . . . . . . . . . . . . . . . . . . . . . . .24
WINTERIZATION . . . . . . . . . . . . . . . . . . . . . . . . . . . . . . . . . . . . . . . . . . .24
POWER STEERING ASSIST . . . . . . . . . . . . . . . . . . . . . . . . . . . . . . . . . .25
INSTRUMENT SELECTED BACKLIGHTING . . . . . . . . . . . . . . . . . . . . .25
USING THE DISPLAY . . . . . . . . . . . . . . . . . . . . . . . . . . . . . . . . . . . . . . .26
DISPLAY SCREENS . . . . . . . . . . . . . . . . . . . . . . . . . . . . . . . . . . . . . . . .27
HOME 1 . . . . . . . . . . . . . . . . . . . . . . . . . . . . . . . . . . . . . . . . . . . . . . . . . .27
HOME 2 . . . . . . . . . . . . . . . . . . . . . . . . . . . . . . . . . . . . . . . . . . . . . . . . . .28
HOME 3 . . . . . . . . . . . . . . . . . . . . . . . . . . . . . . . . . . . . . . . . . . . . . . . . . .29
BOAT 1 . . . . . . . . . . . . . . . . . . . . . . . . . . . . . . . . . . . . . . . . . . . . . . . . . . .30
BOAT 2 . . . . . . . . . . . . . . . . . . . . . . . . . . . . . . . . . . . . . . . . . . . . . . . . . . .31
BOAT 3 . . . . . . . . . . . . . . . . . . . . . . . . . . . . . . . . . . . . . . . . . . . . . . . . . . .32
ENGINE 1 . . . . . . . . . . . . . . . . . . . . . . . . . . . . . . . . . . . . . . . . . . . . . . . . .33
ENGINE 2 . . . . . . . . . . . . . . . . . . . . . . . . . . . . . . . . . . . . . . . . . . . . . . . . .34
SYSTEM INFORMATION . . . . . . . . . . . . . . . . . . . . . . . . . . . . . . . . . . . . .34
SYSTEM FAULTS . . . . . . . . . . . . . . . . . . . . . . . . . . . . . . . . . . . . . . . . . .34

3
SAFETY INFORMATION
This user’s guide may contain the following safety messages:
This user’s guide contains information to prevent personal injury and damage to equipment.
Use this guide in combination with the boat and outboard operator’s guides. Always follow
safety and operation information.
DANGER
Indicates a hazardous situation which, if not avoided, will result in death or serious
injury.
WARNING
Indicates a hazardous situation which, if not avoided, could result in death or serious
injury
CAUTION
Indicates a hazardous situation which, if not avoided, could result in minor or moder-
ate personal injury.
NOTICE
Indicates an instruction which, if not followed, could severely damage engine compo-
nents or other property.

4
PRODUCT INFORMATION
The Icon II 3.5” Color gauge is designed for use with Evinrude E-TEC®G2 outboards. The
display communicates with the outboard, remote control(s), and other network connected
devices, by means of a NMEA 2000®compliant network.
The gauge handles standard NMEA 2000 messages and proprietary messages. The display
controls a number of helm functions and options. Some options and/or modes of operation are
not possible to access without this display present in the system. Select outboard sensor cal-
ibrations and functions are also accessible through the display.
SYSTEM FUNCTIONS
The display provides a number of user selectable modes and configuration menus. Select
modes affect unit selection and screen appearance. Other modes interact with and affect
remote control and outboard operation and functionality.
This display interacts with system components including one Evinrude E-TEC G2 outboard,
up to two remote controls, and devices on a NMEA 2000 network.
FEATURES
Supports single and twin outboard applications. Twin engine applications require 2 gauges
(one for each outboard)
Viewable with polarized sunglasses
Bright illumination - 750 Nit (750 cd/m2)
Firmware update capability via USB interface
Integrates with Evinrude ICON II remote controls and Evinrude E-TEC G2 outboards
NMEA 2000 network interface
Pre-configured user selectable screens
Descriptive text for fault codes and procedures
Multi-language support

5
Display Parameters
The display supports the following data:
Number of engines supported
• 2 (one gauge for each engine) Operating Hours
Engine Instance
• 0-1 Low Oil Warning
System Faults Fuel Economy
Fuel Flow Mode Selection
• Trim Assist
• Power Steering Assist
Water Pressure Winterization
Battery Voltage Hand/Foot Throttle Command Source
Cooling Water Temperature
Settings
• Trim Sender Calibration
• Tilt Limit Calibration
• Fluid Level Configuration and Calibra-
tion
Trim Position Back Light Control
• Display Selected
• Remote Control Selected
Oil Level
• From outboard mounted oil tank
• From vessel mounted oil tank Audible Alarms
Fluid Levels
• Four Inputs
• Sourced from remote control inputs or
NMEA 2000 devices
Unit Selection
•US
• Metric
• Imperial
• Nautical
Speed Over Ground (with use of a GPS antenna/source only)

6
INSTALLATION
Verify that each of the following components are in the kits:
Kit With GPS P/N 769968
• Sealing Plug, P/N 514690
• 2-pin connector, P/N 514696
• Single Tee, P/N 764151
• GPSAntenna, P/N 767487
• Wire Harness, P/N 767749
• GaugeAssembly, P/N 5010797
• User’s Guide, P/N 362089
Kit Without GPS P/N 769969
• Sealing Plug, P/N 514690
• 2-pin connector, P/N 514696
• Single Tee, P/N 764151
• Wire Harness, P/N 767749
• GaugeAssembly, P/N 5010797
• User’s Guide, P/N 362089
Install the threaded studs into the back of the gauge and tighten.
362089-41

7
GAUGE DIMENSIONS
362089-43
2.95 in (7.49 cm)
3.34 in (8.48 cm)
0.64 in (1.62 cm)

8
INSTRUMENT PANEL CLEARANCES
Gauge Spacing (center to center)
• Minimum center distance - 4” (10.16 cm)
Instrument Panel Thickness
• Maximum panel thickness - 1” (2.54 cm)
Drilled Hole Size
IMPORTANT: Check space behind panel for adequate instrument clearance.
• 3 3/8 in. (86 mm)
FASTENING THE GAUGE
Insert instrument into panel hole. Install back clamp. Tighten nuts finger tight.
Electrical Connections
Connect the following:
• 2-pin deutsch connector to the warning horn (optional)
• 2-pin deutsch connector to the accessory power Y-connector
• the public network connector to the public network tee
For gauge connector identification, refer to CONNECTOR IDENTIFICATION.
TURNING THE DISPLAY ON
Turn the key switch to the On position or start the outboard to turn the display on.
NOTE: There is no power button on this gauge.

9
SETTING UP YOUR GAUGE
Settings
Press and hold the backlight button (far right) to access the Settings screen.
Use the Settings screen to set Configuration options, Calibration options, reset the trip log,
restore the display to factory default settings, and view Firmware Information.
Use the up and down arrows to highlight the desired selection.
Press the right facing arrow to enter the desired selection screen.
362089-20

10
Configuration
Use the up and down arrows to highlight the Configuration option from the Settings screen.
Press the right facing arrow button to access the Configuration screen. Use the Configuration
screen to set Units, Key Beep, Language and Engine.
362089-20
362089-22

11
Units
Unit Selection
NOTE: If Nautical is selected, certain units of measure will change. Refer to the table below
for specifics.
U.S. Metric Imperial Nautical
Degrees Fahrenheit Degrees Celsius Degrees Celsius Specific unit of measure is
determined by primary
measurement system
selection (sub-units)
Gallons per Hour Liters per hour Imperial gallons
per hour Specific unit of measure is
determined by primary
measurement system
selection (sub-units)
Miles per Gallon Liters per 100
Kilometers Milesperimperial
gallon Nautical miles per specific
unit of measure is
determined by primary
measurement system
selection (sub-units)
Miles per Hour Kilometers per
Hour Miles per hour Knots
percent percent percent percent
Pounds per Square
Inch kilospascals Pounds per
square inch Specific unit of measure is
determined by primary
measurement system
selection (sub-units)
Revolutions per
Minute Revolutions per
minute Revolutions per minute
Volts Volts Volts Volts
Miles Kilometers Miles Nautical miles

12
Use the up and down arrows to highlight the Units selection in the list. Press the right facing
arrow to enter the Units screen. Use the up and down arrows to select units in U.S. (default
selection), Metric, or Imperial or Nautical.
362089-22
362089-39

13
Key Beep
Use the up and down arrows to highlight Key Beep.
Press the right facing arrow button to turn the Key Beep On or Off.
Language
Use the up and down arrows to highlight Language.
Press the right facing arrow to access the language screen.
362089-15
362089-42

14
Use the up and down arrows to highlight the language selection (English (default), French,
Spanish, Italian, or German). Press the right facing arrow to confirm the language selection.
Engine
Use the up and down arrows to highlight Engine.
Press the right facing arrow button to change the selections.
For single engine applications, use the Single/Port setting.
For twin engine applications, two gauges are required (one for each engine).
Use the Single/Port setting for the port engine and the Starboard setting for the starboard
engine.
362089-21
362089-37

15
Calibration
Press the up and down arrow buttons to highlight Calibration.
Press the right facing arrow button to enter the Calibration screen.
Use the Calibrations screen to set calibration options for Fluid Tanks, Trim and Tilt.
Fluid Tanks
Press the up and down arrow buttons to select the Fluid Tanks option.
Press the right facing arrow button to set calibration levels (2, 3, or 5 point) and tank volumes.
The fluid tank input source(s) are sourced from the control head (if applicable) or via the
NMEA 2000 network.
362089-27
362089-16

16
Press the right facing arrow button to access the Fluid Calibration screen for the selected fuel
tank.
Press the up and down arrow buttons to select the following:
Fluid Type
Fluid Type is not configurable.
362089-31
362089-32

17
Tank Volume
Press the up and down arrows to highlight Tank Volume.
Once tank volume is highlighted, press the right facing arrow.
The text will turn red.
Press the up and down arrows to select the appropriate tank volume.
Press the check mark button to confirm the selection.
Press the left facing arrow to return the previous screens.
362089-33
362089-34

18
Calibration Points
Press the up and down arrow buttons to highlight Calibration Points.
Once Calibration Points is highlighted, press the right facing arrow button.
Press the + and - buttons to select the appropriate number of calibration points (2, 3 or 5).
Press the left facing arrow to return the previous screens.
362089-35
Table of contents
Other BRP Measuring Instrument manuals