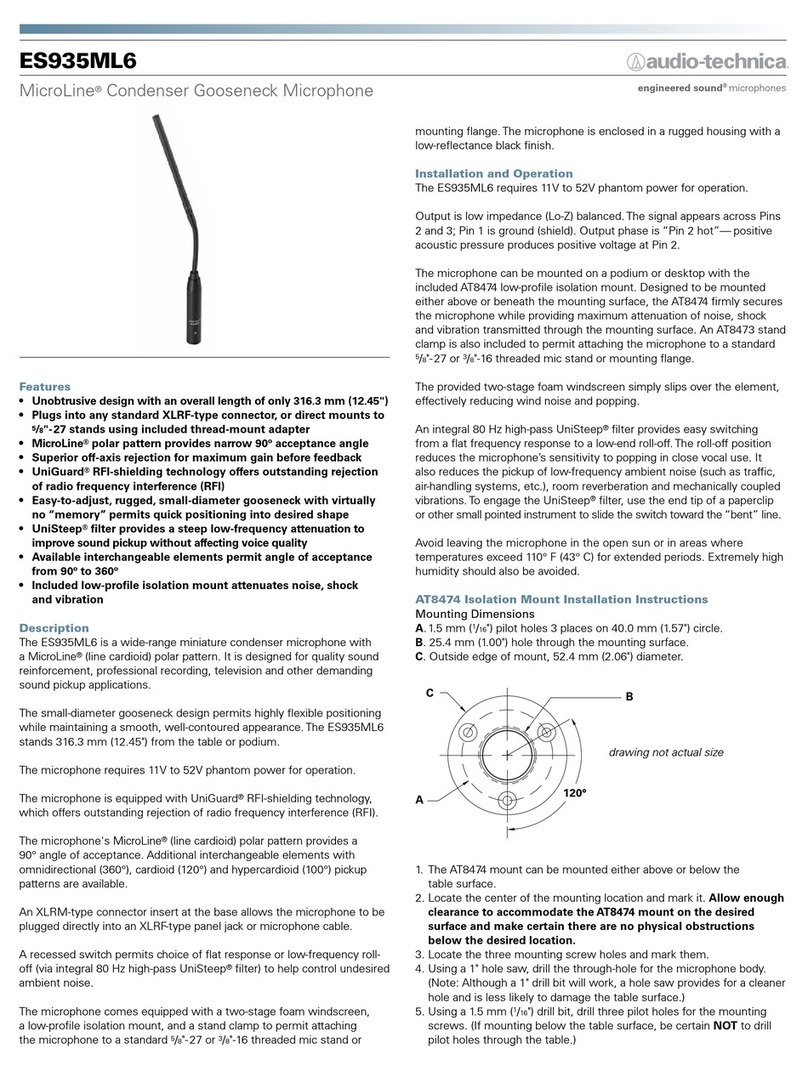
BST HTX-28C User manual

WIRELESS CHAIRMAN / DELEGATE MICROPHONE
for UHF CONFERENCE SYSTEM WITH USB RECORDER
MICROPHONE PRESIDENT / DELEGUE SANS FIL
pour SYSTEME DE CONFERENCE UHF AVEC ENREGISTREUR USB
INSTRUCTION MANUAL • EN • p. 2
MANUEL D‘UTILISATION • FR • p. 17
HTX-28C / D
CODE: 95-3036 / 95-3037

SAFETY RECOMMENDATIONS
Accordance with the requirements of UK standards
The product is for indoor use only
• This device is only allowed to be operated with an alternating current of max. 110-240V~ 50/60Hz and was
designed for indoor use only.
• This is a wireless communication system, use UHF band carrier frequency. We recommend that users
consult local radio management committee to choose the appropriate and legally available frequency, in
order to avoid RF interference
• Refer servicing to qualied servicing personnel.
• The unit should only be used in moderate climates
• This unit should be cleaned only with a dry cloth. Avoid solvents or other cleaning detergents
Usage restrictions
The product uses a UHF transmission system, that is exclusively reserved for professional use. An ofcial
user license or authorization from local authorities may be required in some countries. Consult the competent
authorities for its use, which remains the sole responsibility of its user (UK – BE – PT – D – NL – LU – GR –
SP – RO).
CAUTION on handling of the microphones
• Do not grasp the microphone to lift or pull on the microphone unit: pick up the unit by its base
• Slowly bend and straighten the exible part of the microphone. Do not bend it with excessive force
• Do not drop the unit
• If you do not use the unit for long periods of time, remove the battery
• The dedicated lithium-ion battery should be used
• Do not place any obstructions around the microphone units
• When the microphone units are too close together, high sound volume may cause acoustic feedback, In
this case, increase the space between the conference units or turn down the volume
• After the battery has been removed and replaced, conrm that the power LED turns off
• The battery life is usually approximately 300 charge cycles.
• If battery capacity display in microphone LCD is ash ,it means that battery capacity is low, user should
turn off that mic and charge the battery.
• Take out the battery if the microphone will not use for a long time.
Features of wireless delegate microphone HTX-28D
• Electret condenser microphone tted with windshield cover
• LCD display microphone ID, battery level, microphone state,
control channel, etc.
• Equipped with microphone on/off key and indicator.
• Equipped with 3 function keys to set microphone id, control
channel, volume level and battery status.
• Microphone will shut off the power or in standby if receiver
powered off.
2• HTX-28C / D

Features of wireless chairman microphone HTX-28C
Including the functions of the delegate unit, chairman unit has
other following functions:
• Chairman microphone can turn on any time.
• If the system support video camera auto-track function,
chairman microphone ID number should be 1
• Priority function: chairman can turn off delegate micro-
phones by clear key any time
• Chairman only mode: Delegate microphone can not be
turned on again after chairman microphone press priority
button. The chairman need quit this mode rst, and then
delegate microphone can be turned on again
SCHEMATIC DIAGRAM OF THE MICROPHONES
1. Unidirectional electret MIC
2. Annular red indicator lamp to show the microphone state.
3. Mute/Set key
4. Mic volume +/ up key
5. Mic volume up -/down key
6. MIC ON/OFF key
7. Chairman Priority
8. LCD
9. Microphone power switch
INSTALLATION OF WIRELESS MICROPHONE
Mounting the battery
Remove battery cover Install the battery pack Close battery cover
Installation of the battery pack: Remove the battery cover on the bottom of the microphone; insert the battery
in the direction of the arrow to fasten it, and then close the battery cover. Listen for the click sound and make
sure the battery cover is securely xed.
HTX-28C / D • 3

Mounting and dismounting the microphone
Mounting microphone: Insert the microphone into the microphone moun-
ting socket in a straight line, and then rotate the microphone clockwise
to fasten it securely.
Unmounting microphone: Rotate the microphone counterclockwise, then
pull the microphone upward to dismounting
* Please contact us if you need more detailed information during your installation.
MICROPHONE SETTING & OPERATION
a. Microphone function key description:
• POWER: Press this key to power on or power off the microphone
• ON/OFF: Microphone will on/off in correct communication mode. If the microphone data channel is diffe-
rent from receiver data channel, the user can not turn on the microphone.
• PRIOR: Chairman microphone priority key that can turn off all delegate microphones.
• VOL-: Decrease the volume level of microphone
• VOL+: Increase the volume level of microphone
• MUTE: Prevention of unwanted noise such as cough
b. Microphone project setting
Press MUTE key and turn on the microphone with POWER key at the same time, microphone will enter project
setting. There are four setting in this part.
• Microphone data (room) channel setting (Default channel is «ROOM 0»), there are 16 data (room) channel
for option (0-1-2-3-4-5-6-7-8-9-A-B-C-D-E-F), user can select the channel by VOL - and VOL + key, and
press MUTE to save the setting, Microphone will switch to next setting part automatically. User can see
receiver data channel setting for reference.
• Microphone ID setting: Chairman microphone ID number can be set from 0-9, A-F total 16 ID for option,
delegate microphone ID number can be set from 0-255, total 156 ID for option. User can select the ID by
VOL - and VOL + key, and press MUTE to save the setting, Microphone will switch to next setting part
automatically.
Please note: All microphone ID in one system should be different, if any units have the same ID number, the system will not work properly. If system
connect video processor to support video camera auto-track function, chairman microphone ID should be 1.
• Chime of chairman microphone: When chairman microphone turned on, system will give a chime indicative
sound. User can press VOL - to close this function and press VOL + to open this function.
• Microphone working mode: Default mode is LINK. User can press VOL - switch to FREE mode and press
VOL + switch to LINK mode. In Free mode, microphone can be turned on/off any time with communicate
with receiver unit, and user can set the microphone audio channel (when microphone is off, press MUTE
key, audio channel number will ash, user can press VOL - and VOL + key to select the audio channel),
FREE mode just used for testing. In LINK mode, microphone must work and communicate with receiver
unit, or microphone can not turn on, microphone audio channel was distributed by receiver unit.
• Exit microphone project setting: Press microphone on or POWER key to exit, if there is no action of the
microphone microphone will exit the setting in 9 secs.
SPECIFICATIONS OF THE MICROPHONES
Frequency range.................................................UHF; Audio: 610-665MHz – Data: 422.4 – 438.4MHz
Power supply..........................................................................................Lipo batteries 3.7V𝌃1950mAh
Consumption......................................................................................Standby: 360mW; Active: 630mW
4• HTX-28C / D

Dimensions..................................................................................................................... 170 x 58 x 120mm
Weight.................................................................................................................................................. 0.7kg
This marking indicates that this product should not be disposed with other household wastes throughout the EU. To prevent possible harm to the
environment or human health from uncontrolled waste disposal, recycle it responsibly to promote the sustainable reuse of material resources. To
return your used device, please use the return and collection systems or contact the retailer where the product was purchased. They can take
this product for environmental safe recycling.
MANUEL D’UTILISATION
En conformité avec les exigences de la norme CE
Utilisation uniquement à l’intérieur
• Ceci est un système de communication sans l, utilise la fréquence porteuse de la bande UHF. Nous re-
commandons aux utilisateurs de consulter le comité local de gestion de la radio pour choisir la fréquence
appropriée et légalement disponible, an d’éviter les interférences RF
• Si les appareils présentent des problèmes, tels qu’un son anormal, de la fumée, de la chaleur ou des
dommages aux câbles d’alimentation, débranchez la che d’alimentation de la prise et contactez votre
revendeur.
• L’appareil est conçu pour une utilisation dans des climats modérés.
Restrictions d’usage
Le produit intègre un système de transmission UHF, son usage est exclusivement réservé à un usage pro-
fessionnel. Une licence ofcielle d’utilisation ou autorisation des autorités locales peut être requise dans
certains pays. Consulter les autorités compétentes pour son usage qui demeure sous la seule responsabilité
de son utilisateur (UK– BE – PT – D – NL – LU – GR – SP – RO).
PRECAUTIONS lors de la manipulation des microphones
• Ne soulevez pas le bloc en tirant sur le microphone : saisissez le bloc par sa base
• Pliez et dépliez lentement la partie exible du microphone. Ne le pliez pas avec une force excessive
• Ne laissez pas tomber l’appareil
• Si vous n’utilisez pas l’appareil pendant de longues périodes, retirez la batterie
• Utilisez uniquement le pack de batteries lithium-ion fourni
• Ne placez aucun obstacle autour des microphones
• Lorsque les microphone sont trop proches les uns des autres, un volume sonore élevé peut provoquer un
retour acoustique. Dans ce cas, augmentez la distance entre les microphone ou baissez le volume
• Une fois la batterie retirée et remplacée, vériez que le voyant d’alimentation s’éteint
Caractéristiques du micro Délégué sans fil HTX-28D
• Microphone électret à condensateur avec bonnette
• Afchage sur écran LCD de l’ID du micro, du niveau de bat-
terie, du mode du micro, canal, etc.
• Interrupteur M/A et voyant
• 3 touches de fonction permettent de régler l’ID, le canal, le
volume et le mode.
• Le micro s’éteint ou commute en veille lorsque le récepteur
est éteint.
HTX-28C / D • 5

Caractéristiques du micro Président sans fil HTX-28C
En plus des fonctions d’un micro Délégué, le micro Président
possède les fonctions supplémentaires suivantes:
• Il est activable à tout moment.
• Si le système est relié à un système vidéo de tracking auto-
matique, l’ID du micro Président doit être réglé sur 1.
• Fonction de Priorité: Le Président peut éteindre les micros
Délégués à tout moment
• Mode Président Uniquement: Le micro Délégué ne peut pas
être allumé si le Président a appuyé sur la touche Priority.
Le Président doit d’abord quitter ce mode avant de pouvoir
remettre en service les micros Délégué.
SCHEMA DES MICROPHONES
1. Micro unidirectionnel électret
2. Voyant circulaire rouge indiquant le mode du micro.
3. Touche Muet/Réglage
4. Touche de volume Micro +/ vers le haut
5. Touche de volume Micro -/ vers le bas
6. Micro activé/désactivé
7. Priorité Président
8. Ecran LCD
9. Interrupteur M/A
INSTALLATION D'UN MICROPHONE SANS FIL
Mise en place de la Batterie
Retirez le couvercle Installez la batterie Fermez le couvercle
Installation du pack de batteries: Retirez le capot du compartiment à batterie en dessous du microphone.
Insérez la batterie dans le sens de la èche pour l'enclencher. Fermez le compartiment à batteries. Lorsque
le couvercle s'enclenche, vous entendez un clic.
6• HTX-28C / D

Montage et démontage d'un microphone
Montage du microphone: Insérez le microphone dans la
prise en ligne droite, puis faites pivoter le microphone dans
le sens des aiguilles d'une montre pour le xer solidement.
Démontage du microphone: Tournez le microphone dans le
sens antihoraire, puis tirez le microphone vers le haut pour
le démonter
* Veuillez nous contacter si vous avez besoin d'informations plus détaillées lors de
l'installation.
CONFIGURATION
CONFIGURATION & FONCTIONNEMENT DU MICROPHONE
Le microphone (y compris le micro Président) comporte 3 touches de fonction:
POWER, ON/OFF, PRIOR, VOL-, VOL +, MUTE
a. Description des touches sur le microphone:
• POWER : appuyez sur cette touche pour allumer ou éteindre le microphone
• ON/OFF : Le microphone ne s'allumera/s'éteindra que s'il est dans le bon mode de communication. Si le
canal de data du microphone est différent du canal data du récepteur, l'utilisateur ne peut pas allumer le
microphone.
• PRIOR : touche de priorité du microphone Président qui peut désactiver tous les microphones des délé-
gués.
• VOL- : Diminuer le niveau de volume du microphone
• VOL+ : Augmenter le niveau de volume du microphone
• MUTE : Empêche des bruits indésirables telle que la toux de l'orateur
b. Configuration du Microphone
Appuyez sur la touche MUTE et allumez en même temps le microphone avec la touche POWER. Le micro-
phone s'allume en mode conguration qui contient quatre réglages.
• Réglage du canal data (salle) du micro (le canal par défaut est «ROOM 0»). Il y a 16 canaux data (salle) au
choix (0-1-2-3-4-5-6-7-8-9-A-B-C-D-E-F). L'utilisateur peut sélectionner le canal à l'aide des touches VOL
- et VOL +, et appuyer sur MUTE pour enregistrer le réglage. Le microphone passera automatiquement au
réglage suivant. L'utilisateur peut voir le réglage du canal de data du récepteur pour référence.
• Réglage de l'ID du Microphone: Le numéro d'identication du microphone du président peut être déni de
0 à 9 ou de A-F. Il y a un total de 16 ID possibles. Le numéro d'identication du microphone délégué peut
être déni de 0 à 255, donc un total de 156 ID au choix. L'utilisateur peut sélectionner l'ID par les touches
VOL - et VOL +, et appuyer sur MUTE pour enregistrer le réglage. Le microphone passera automatiquement
au réglage suivant.
Veuillez noter : Tous les ID des microphones dans un système doivent être différents. Si plusieurs microphones ont le même numéro d'identification, le
système ne fonctionnera pas correctement. Si le système est connecté à un processeur vidéo pour le tracking automatique de la caméra vidéo, l'ID du
microphone du président doit être 1.
• Carillon du microphone du président : lorsque le microphone du président est activé, le système émet un
signal sonore. L'utilisateur peut appuyer sur VOL - pour désactiver ce signal ou appuyer sur VOL + pour
l'activer.
• Modes de fonctionnement du microphone : le mode par défaut est LINK. L'utilisateur peut appuyer sur
VOL - pour passer en mode FREE. Appuyez sur VOL + pour revenir en mode LINK.
Le mode FREE n'est utilisé que pour les tests. En mode FREE, le microphone peut être activé/désactivé
HTX-28C / D • 7

à tout moment sans communiquer avec le récepteur. L'utilisateur peut dénir manuellement le canal au-
dio du microphone (lorsque le microphone est éteint, appuyez sur la touche MUTE, le numéro du canal
audio clignote, l'utilisateur peut appuyer sur les touches VOL - et VOL + pour modier le canal audio).
En mode LINK, le microphone doit fonctionner et communiquer avec le récepteur, sinon le microphone
ne peut pas être activé. Le canal audio du microphone est attribué par le récepteur.
• Quitter le mode de conguration du micro: Appuyez sur la touche POWER ou ON du micro pour quitter. En
l'absence de toute action sur le micro, il quittera le réglage après 9 secondes.
• La durée de vie de la batterie est généralement d'environ 300 cycles de charge.
• Si l'afchage de la capacité de la batterie sur l'écran LCD du microphone clignote, cela signie que la
capacité de la batterie est faible, l'utilisateur doit éteindre ce micro et charger la batterie.
• Retirez la batterie si le microphone ne sera pas utilisé pendant une longue période.
CARACTERISTIQUES TECHIQUES DES MICROPHONES
Bande de fréquence...........................................UHF; Audio: 610-665MHz – Data: 422.4 – 438.4MHz
Alimentation........................................................................................... Batteries Lipo 3.7V𝌃1950mAh
Consommation...........................................................................................Veille: 360mW; Actif: 630mW
Dimensions..................................................................................................................... 170 x 58 x 120mm
Poids..................................................................................................................................................... 0.7kg
Ce symbole signifie que cet appareil ne doit être mis aux déchets ménagers dans aucun pays de la Communauté européenne afin d’éviter de nuire
à l’environnement et à la santé humaine. Il convient d’en disposer d’une manière responsable afin de promouvoir la réutilisation des matériaux.
Pour retourner votre appareil usagé, merci d’utiliser les systèmes de retours et de ramassage mis en place ou de contacter votre revendeur chez
qui vous avez acheté l’appareil. Ils peuvent reprendre cet appareil pour un recyclage écologique.
© 2022 COPYRIGHT LOTRONIC SA
8• HTX-28C / D
This manual suits for next models
3
Table of contents
Languages:
Other BST Microphone manuals
