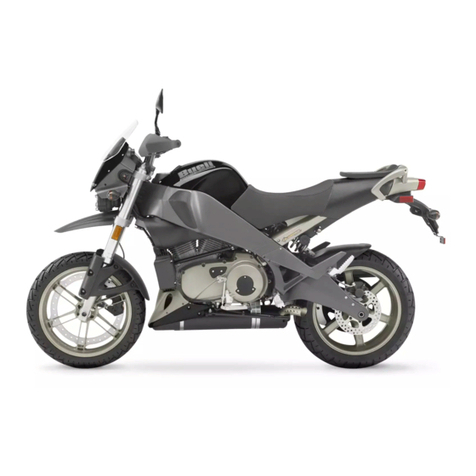
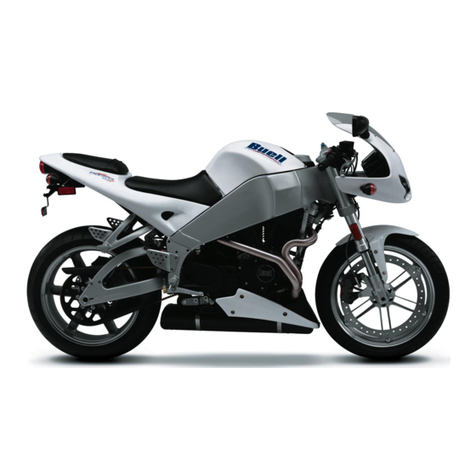
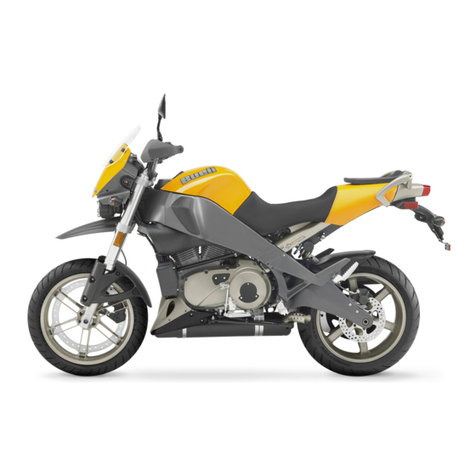
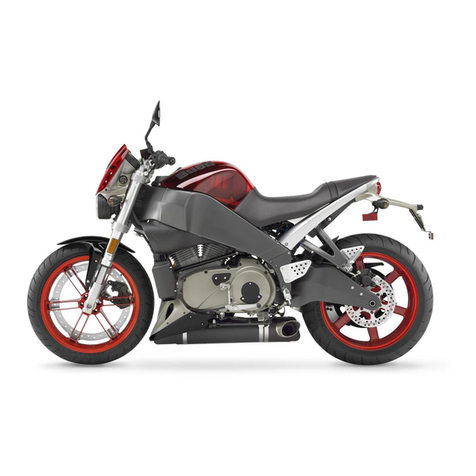
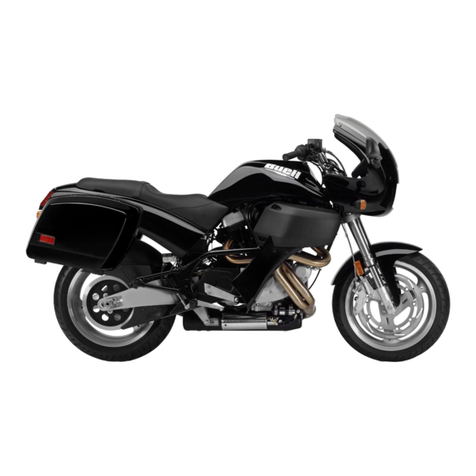
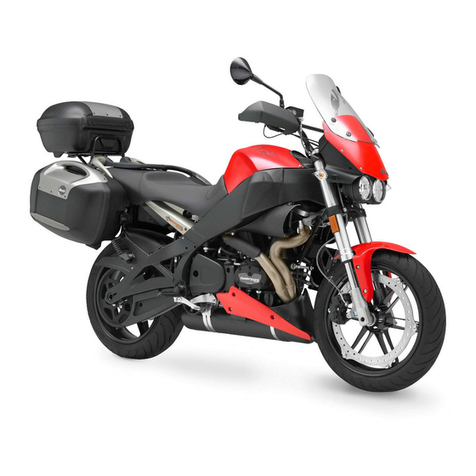
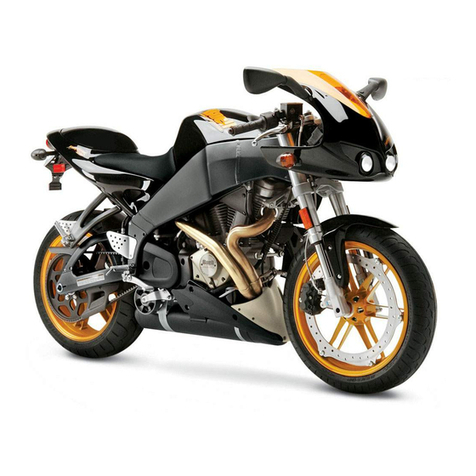
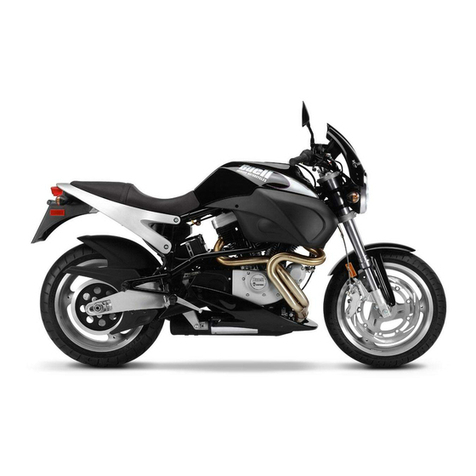
Buell 2008 XB SERIES User manual

2008 Buell XB Models Electrical Diagnostics Manual
99493-08Y
©2007 Buell Motorcycle Company

Buell motorcycles conform to all applicable U.S.A. Federal Motor Vehicle Safety Standards and U.S.A.
Environmental Protection Agency regulations effective on the date of manufacture.
To maintain the safety, dependability, and emission and noise control performance, it is essential that
the procedures, specifications and service instructions in this manual are followed.
Any substitution, alteration or adjustment of emission system and noise control components outside of
factory specifications may be prohibited by law.
IMPORTANT NOTICE
Buell Motorcycle Company

2008 Buell XB Models
Electrical Diagnostics Manual
©2007 Buell Motorcycle Company
ALL RIGHTS RESERVED
99493-08Y
Printed in the U.S.A.
VISITTHE BUELLWEB SITE
http://www.buell.com

Blank Text Here

Blank Text Here
READER COMMENTS
Please comment on the completeness, accuracy, organization, usability, and readability of this manual.
Please list the page, item, and part number(s) of any errors you find in this manual.
Please tell us how we can improve this manual.
Occupation:
Name: Dealership:
Street: Department:
City: State: Zip:
Please clip out and mail to:
Service Communications Department
Buell Motorcycle Company
P.O. Box 653
Milwaukee, WI USA 53201
The Buell Motorcycle Company maintains a continuous effort to improve the quality and usefulness of its
publications. To do this effectively, we need user feedback - your critical evaluation of this manual.
2008 Buell XB Models Electrical Diagnostics Manual (99493-08Y)

NOTES

ABOUTTHIS MANUAL
GENERAL
This electrical diagnostic service manual has been prepared
with two purposes in mind. First, it will acquaint the user with
the construction of the Buell product and assist in the perform-
ance of repair. Secondly, it will introduce to the professional
Buell Technician the latest field-tested and factory-approved
diagnostic methods.We sincerely believe that this manual will
make your association with Buell products more pleasant and
profitable.
HOWTO USEYOUR SERVICE MANUAL
Refer to the table below for the content layout of this manual.
CHAPTERNO.
Starting / Charging1
Engine Management2
Appendix A Connector RepairA
Appendix B Wiring DiagramsB
Appendix C ConversionsC
Appendix D GlossaryD
Use the TABLE OF CONTENTS (which follows this FORE-
WORD) and the INDEX (at the back of this manual) to quickly
locate subjects. Sections and topics in this manual are
sequentially numbered for easy navigation.
For example, a cross-reference shown as 2.1 SPECIFICA-
TIONS refers to chapter 2 CHASSIS, heading 2.1 SPECIFIC-
ATIONS.
For quick and easy reference, all pages contain a section
number followed by a page number. For example, page 3-5
refers to page 5 in section 3.
A number of acronyms and abbreviations are used in this
document. See the D.1 GLOSSARY for a list of acronyms,
abbreviations and definitions.
PREPARATION FOR SERVICE
Stop the engine when refueling or servicing the fuel
system. Do not smoke or allow open flame or sparks near
gasoline. Gasoline is extremely flammable and highly
explosive, which could result in death or serious injury.
(00002a)
Good preparation is very important for efficient service work.
A clean work area at the start of each job will allow you to
perform the repair as easily and quickly as possible, and will
reducetheincidence of misplaced toolsandparts.Amotorcycle
that is excessively dirty should be cleaned before work starts.
Cleaning will occasionally uncover sources of trouble. Tools,
instruments and any parts needed for the job should be
gathered before work is started. Interrupting a job to locate
tools or parts is a distraction and causes needless delay.
NOTES
•To avoid unnecessary disassembly, carefully read all rel-
ative service information before repair work is started.
•In figure legends, the number which follows the name of
a part indicates the quantity necessary for one complete
assembly.
SERVICE BULLETINS
In addition to the information presented in this manual, Buell
Motor Company will periodically issue Service Bulletins to Buell
dealers. Service Bulletins cover interim engineering changes
and supplementary information. Consult the Service Bulletins
to keep your product knowledge current and complete.
USE GENUINE REPLACEMENT PARTS
Do not use aftermarket parts and custom made front forks
which can adversely affect performance and handling.
Removing or altering factory installed parts can adversely
affect performance and could result in death or serious
injury. (00001a)
To ensure satisfactory and lasting repairs, carefully follow the
manual instructions and use only genuine Buell replacement
parts.This is your assurance that the parts you are using will
fit right, operate properly and last longer.
WARNINGS AND CAUTIONS
Statements in this manual preceded by the following words
are of special significance.
WARNING indicates a potentially hazardous situation
which, if not avoided, could result in death or serious
injury. (00119a)
CAUTION indicates a potentially hazardous situation
which, if not avoided, may result in minor or moderate
injury. (00139a)
CAUTION used without the safety alert symbol indicates
a potentially hazardous situation which, if not avoided,
may result in property damage. (00140a)
NOTE
Refers to important information, and is placed in italic type. It
is recommended that you take special notice of these items.
Proper service and repair is important for the safe, reliable
operation of all mechanical products.The service procedures
recommended and described in this manual are effective
methods for performing service operations.
I
FOREWORD

Always wear proper eye protection when using hammers,
arbor or hydraulic presses, gear pullers, spring com-
pressors, slide hammers and similar tools. Flying parts
could result in death or serious injury. (00496b)
Some of these service operations require the use of tools
specially designed for the purpose.These special tools should
be used when and as recommended. It is important to note
thatsomewarnings againstthe use of specificservice methods,
which could damage the motorcycle or render it unsafe, are
stated in this manual. However, please remember that these
warnings are not all-inclusive. Inadequate safety precautions
could result in death or serious injury.
Since Buell Motorcycle Company could not possibly know,
evaluate or advise the service trade of all possible ways in
which service might be performed, or of the possible hazardous
consequences of each method, we have not undertaken any
such broad evaluation.Accordingly, anyone who uses a service
procedure or tool which is not recommended by Buell Motor-
cycle Company must first thoroughly satisfy himself that neither
his nor the operator's safety will be jeopardized as a result.
Failure to do so could result in death or serious injury.
PRODUCT REFERENCES
Read and follow warnings and directions on all products.
Failure to follow warnings and directions can result in
death or serious injury. (00470b)
When reference is made in this manual to a specific brand
name product, tool or instrument, an equivalent product, tool
or instrument may be substituted.
Kent-Moore Products
All tools mentioned in this manual with an "HD", "J" or "B"
preface mustbe ordered throughSPX Kent-Moore.For ordering
information or product returns, warranty or otherwise, visit
www.spx.com.
Loctite Sealing andThreadlocking Products
Some procedures in this manual call for the use of Loctite
products. If you have any questions regarding Loctite product
usage or retailer/wholesaler locations, please contact Loctite
Corp. at www.loctite.com.
PRODUCT REGISTERED MARKS
Allen, Amp Multilock, Bluetooth, Brembo, Delphi, Deutsch,
Dunlop, Dynojet, Fluke, G.E. Versilube, Gunk, Hydroseal,
Hylomar, Kevlar, Lexan, Loctite, Lubriplate, Keps, K&N, Mag-
naflux, MarsonThread-SetterTool Kit, MAXI fuse, Molex, MPZ,
Mulitilock, Novus, Packard, Pirelli, Permatex, Philips, PJ1,
Pozidriv, Robinair, S100, Sems, Snap-on,Teflon, Threadlocker,
Torca, Torco, TORX, Tufoil, Tyco, Ultratorch, Velcro, X-Acto,
and XM Satellite Radio are among the trademarks of their
respective owners.
H-D MICHIGAN, INC.TRADEMARK
INFORMATION
Blast, Firebolt, Glaze, Gloss, Harley, Harley-Davidson, Light-
ning,Sunwash, Supersmart,Tender,TripleTail,Thunderstorm,
Ulysses, Uniplanar and ZTL are among the trademarks of H-
D Michigan, Inc.
CONTENTS
All photographs, illustrations and procedures in this manual
may not necessarily depict the most current model or com-
ponent, but are based on the latest production information
available at the time of publication.
Since product improvement is our continual goal, Buell Motor-
cycle Company reserves the right to change specifications,
equipment or designs at any time without notice and without
incurring obligation.
II FOREWORD

STARTING / CHARGING
1.1 SPECIFICATIONS
General...............................................................................1-1
1.2 ELECTRIC STARTER SYSTEM
General...............................................................................1-2
Wiring Diagrams..........................................................1-2
Start Relay..................................................................1-2
Starter Interlock...........................................................1-2
Operation............................................................................1-2
1.3 STARTING SYSTEM DIAGNOSIS
Diagnostics.........................................................................1-4
Diagnostic Notes.........................................................1-4
Job/Time Code Values................................................1-4
1.4 STARTER ACTIVATION CIRCUITS
Starter Activation Circuits.................................................1-14
1.5 DIAGNOSTICS/TROUBLESHOOTING
General.............................................................................1-15
Voltage Drops...................................................................1-15
1.6 STARTERTROUBLESHOOTING
Starter Troubleshooting....................................................1-16
1.7TESTING STARTER ON MOTORCYCLE
Start Relay Test................................................................1-18
Starter Current Draw Test.................................................1-20
1.8TESTING STARTER ON BENCH
Free Running Current Draw Test......................................1-22
Starter Solenoid................................................................1-22
Solenoid Pull-In Test.........................................................1-22
Solenoid Hold-In Test........................................................1-23
Solenoid Return Test........................................................1-23
Post Test...........................................................................1-24
1.9 CHARGING SYSTEM
General.............................................................................1-25
Alternator...................................................................1-25
Voltage Regulator......................................................1-25
Troubleshooting................................................................1-25
Battery.......................................................................1-25
Wiring........................................................................1-25
Job/Time Code Values..............................................1-25
Testing..............................................................................1-30
Milliampere Draw Test...............................................1-30
Total Current Draw Test.............................................1-30
Current andVoltage Output Test:Using HD-48053....1-30
Current and Voltage Output Test: Using Load
Tester.........................................................................1-31
Stator Check..............................................................1-31
AC Output Check......................................................1-32
1.10 BATTERYTESTING
General.............................................................................1-33
Voltmeter Test...................................................................1-33
Installation........................................................................1-33
Load Test..........................................................................1-33
ENGINE MANAGEMENT
2.1 SPECIFICATIONS
Specifications.....................................................................2-1
2.2 DYNAMIC DIGITAL FUEL INJECTION
(DDFI)
Introduction.........................................................................2-2
General...............................................................................2-2
For More Information..........................................................2-2
Troubleshooting...........................................................2-2
2.3 DIAGNOSTIC INTRODUCTION
System Problems...............................................................2-5
No Start.......................................................................2-5
Poor Performance.......................................................2-5
Check Engine Lamp....................................................2-5
Resolving Problems............................................................2-5
2.4 CHECKING FORTROUBLE CODES
Check Engine Lamp...........................................................2-6
Code Types.........................................................................2-7
Current........................................................................2-7
Historic........................................................................2-7
Retrieving Trouble Codes...................................................2-7
Multiple Trouble Codes.......................................................2-7
Check Engine Lamp Flashes..............................................2-7
2.5 CHECK ENGINE LAMP DIAGNOSTICS
Retrieving Trouble Codes...................................................2-9
Clearing Codes.................................................................2-10
2.6 BREAKOUT BOX
General.............................................................................2-11
Installation........................................................................2-11
Removal...........................................................................2-11
2.7WIGGLETEST
General.............................................................................2-13
Procedure.........................................................................2-13
2.8 INITIAL DIAGNOSTIC CHECK
General.............................................................................2-14
Diagnostic Notes.......................................................2-14
Circuit Diagram/Wire Harness Connector Cable.......2-14
Job/Time Code Values..............................................2-14
Initial Diagnostics.............................................................2-14
General Information...................................................2-14
Diagnostic Notes.......................................................2-14
2.9 INTAKE LEAKTEST
General.............................................................................2-21
Leak Tester.......................................................................2-21
Parts List...................................................................2-21
Tester Assembly........................................................2-21
Intake Leak Testing...........................................................2-21
2.10 CHECK ENGINE LAMP NOT
ILLUMINATED AT KEY ON
General.............................................................................2-23
Diagnostics.......................................................................2-23
Diagnostic Tips..........................................................2-23
Diagnostic Notes.......................................................2-23
III
TABLE OF CONTENTS

2.11 CHECK ENGINE LAMP ON
CONTINUOUSLY
General.............................................................................2-27
Diagnostics.......................................................................2-27
Diagnostic Notes.......................................................2-27
2.12 ENGINE CRANKS BUTWILL NOT
START
General.............................................................................2-31
Diagnostics.......................................................................2-31
Diagnostic Notes.......................................................2-31
2.13 NO ECM POWER
General.............................................................................2-36
Diagnostics.......................................................................2-36
Diagnostic Notes.......................................................2-36
2.14 STARTS,THEN STALLS
General.............................................................................2-39
2.15 FUEL PRESSURETEST
Inspection.........................................................................2-42
Diagnostics.......................................................................2-44
Diagnostic Notes.......................................................2-44
2.16 MISFIRE
General.............................................................................2-50
Misfire at Idle or Under Load.....................................2-50
Diagnostics.......................................................................2-50
Diagnostic Notes.......................................................2-50
2.17 DTC P0112 (15), P0113 (15)
General.............................................................................2-54
Intake Air Temperature (IAT) Sensor.........................2-54
Diagnostics.......................................................................2-54
Diagnostic Tips........................................................2-119
Diagnostic Notes.......................................................2-54
2.18 DTC P0117 (14), P0118 (14)
General.............................................................................2-58
Engine Temperature (ET) Sensor..............................2-58
Diagnostics.......................................................................2-58
Diagnostic Tips..........................................................2-58
Diagnostic Notes.......................................................2-58
2.19 DTC P0122 (11), P0123 (11)
General.............................................................................2-62
Throttle Position Sensor (TPS)..................................2-62
Diagnostics.......................................................................2-62
Diagnostic Tips..........................................................2-62
Diagnostic Notes.......................................................2-62
2.20 DTC P0151 (13), P0152 (11), P0154 (13)
General.............................................................................2-66
Oxygen (O2) Sensor.................................................2-66
Diagnostics.......................................................................2-66
Diagnostic Tips..........................................................2-66
Diagnostic Notes.......................................................2-67
2.21 DTC P0261 (23),P0262 (23),P0264 (32),
P0265 (32)
General.............................................................................2-70
Front and Rear Fuel Injectors....................................2-70
Diagnostics.......................................................................2-70
Diagnostic Notes.......................................................2-70
2.22 DTC P0339 (56)
General.............................................................................2-74
Crankshaft Position (CKP) Sensor............................2-74
Diagnostics.......................................................................2-74
Diagnostic Tips..........................................................2-74
Diagnostic Notes.......................................................2-74
2.23 DTC P0502 (43), P0503 (43), P0608 (37)
General.............................................................................2-77
Vehicle Speed Sensor...............................................2-77
Diagnostics.......................................................................2-77
Diagnostic Notes.......................................................2-77
2.24 DTC P0506 (34), P0507 (34), P0511 (34)
General.............................................................................2-84
IAC Operation............................................................2-84
Diagnostics.......................................................................2-85
Diagnostic Tips..........................................................2-85
Diagnostic Notes.......................................................2-85
2.25 DTC P0562 (16), P0563 (16)
General.............................................................................2-88
Battery Voltage..........................................................2-88
Diagnostics.......................................................................2-88
Diagnostic Notes.......................................................2-88
2.26 DTC P0603 (54),P0604 (52),P0605 (53),
P0607 (55)
General.............................................................................2-93
ECM Failure..............................................................2-93
2.27 DTC P0617 (46)
General.............................................................................2-94
Start Relay................................................................2-94
Diagnostics.......................................................................2-95
2.28 DTC P0628 (33), P0629 (33)
General.............................................................................2-99
Fuel Pump.................................................................2-99
Diagnostics.......................................................................2-99
Diagnostic Notes.......................................................2-99
2.29 DTC P0691 (36), P0692 (36)
General...........................................................................2-104
Cooling Fan High Voltage........................................2-104
Cooling Fan Low Voltage.........................................2-104
Diagnostics.....................................................................2-104
Diagnostic Notes.....................................................2-104
2.30 DTC P1110 (22), P1111 (22), P1112 (22)
(JAPANESE MODELS ONLY)
General...........................................................................2-109
IV TABLE OF CONTENTS
TABLE OF CONTENTS

Active Intake System (Japanese Models Only).......2-109
Diagnostics.....................................................................2-109
Diagnostic Notes.....................................................2-109
Verify Settings.................................................................2-109
Removal.........................................................................2-109
Installation......................................................................2-110
2.31 DTC P1151 (44), P1152 (44)
General...........................................................................2-115
Bank Angle Sensor.................................................2-115
Diagnostics.....................................................................2-116
Diagnostic Notes.....................................................2-116
2.32 DTC P1154 (26), P1155 (27)
General...........................................................................2-119
Clutch Switch and Neutral Switch...........................2-119
Diagnostics.....................................................................2-119
Diagnostic Notes.....................................................2-119
2.33 DTC P1470 (21),P1471 (21),P1477 (21),
P1478 (21)
Interactive Muffler Control Actuator................................2-124
Diagnostics.....................................................................2-125
Diagnostic Notes.....................................................2-125
2.34 DTC P1501 (45), P1502 (45), P1503 (45)
General...........................................................................2-130
Side Stand Sensor..................................................2-130
Diagnostics.....................................................................2-130
Diagnostic Notes.....................................................2-130
2.35 DTC P1601 (47)
General...........................................................................2-135
Auxiliary Power Outlets...........................................2-135
Diagnostics.....................................................................2-135
Diagnostic Tips........................................................2-135
Diagnostic Notes.....................................................2-135
2.36 DTC P1653 (35), P1654 (35)
General...........................................................................2-139
Tachometer..............................................................2-139
Diagnostics.....................................................................2-139
Diagnostic Notes.....................................................2-139
2.37 DTC P2300 (24),P2301 (24),P2303 (25),
P2304 (25)
General...........................................................................2-143
Front (Code 24) and Rear (Code 25) Ignition Coils .2-143
Diagnostics.....................................................................2-143
Diagnostic Notes.....................................................2-143
2.38 HEATED HANDLEBAR GRIPS
General...........................................................................2-146
Diagnostics.....................................................................2-146
Diagnostic Tips........................................................2-146
Diagnostic Notes.....................................................2-146
APPENDIX A CONNECTOR REPAIR
A.1 AMP MULTILOCK CONNECTORS
AMP Multilock Connector Repair.......................................A-1
General.......................................................................A-1
Separating Pin and Socket Housings.........................A-1
Mating Pin and Socket Housings................................A-1
Removing Terminals from Housing.............................A-1
Inserting Terminals into Housing.................................A-2
Preparing Wire Leads for Crimping.............................A-2
Crimping Terminals to Leads......................................A-3
Inspecting Crimped Terminals.....................................A-4
A.2 DELPHI CONNECTORS
Delphi Connector Repair....................................................A-5
General.......................................................................A-5
Separating Pin and Socket Housings.........................A-5
Mating Pin and Socket Housings................................A-5
Removing Socket Terminals........................................A-5
Installing Socket Terminals..........................................A-5
A.3DEUTSCHELECTRICALCONNECTORS
Deutsch Connector Repair.................................................A-7
General.......................................................................A-7
Separating Pin and Socket Housings.........................A-7
Mating Pin and Socket Housings................................A-7
Removing Socket Terminals........................................A-7
Installing Socket Terminals..........................................A-7
Removing Pin Terminals.............................................A-9
Installing Pin Terminals...............................................A-9
Crimping Terminals...................................................A-10
A.4 DEUTSCH STANDARDTERMINALS
Deutsch Standard Terminal Crimps.................................A-11
Preparing Wire Leads for Crimping...........................A-11
Crimping Terminal to Lead........................................A-11
Inspecting Crimps.....................................................A-11
A.5 METRI-PACKTERMINALS
Metri-Pack Terminal Crimps.............................................A-12
Matching Terminal To Crimper..................................A-12
Preparing Wire Lead.................................................A-12
Crimping Wire Core..................................................A-12
Crimping Insulation/Seal...........................................A-12
Inspecting Crimps.....................................................A-13
A.6 150 METRI-PACK CONNECTORS
150 Metri-Pack Connector Repair....................................A-14
General.....................................................................A-14
Separating Pin and Socket Housings.......................A-14
Mating Pin and Socket Housings..............................A-14
Removing Socket Terminal.......................................A-14
Inserting Socket Terminal..........................................A-14
A.7 280 METRI-PACK CONNECTORS
280 Metri-Pack Connector Repair....................................A-16
General.....................................................................A-16
Separating Pin and Socket Housings.......................A-16
Mating Pin and Socket Housings..............................A-16
Removing Socket Terminals......................................A-16
TABLE OF CONTENTS V
TABLE OF CONTENTS

Installing Socket Terminals........................................A-16
Crimping Terminals...................................................A-16
A.8 480 METRI-PACK CONNECTORS
480 Metri-Pack Connector Repair....................................A-18
General.....................................................................A-18
Separating Pin and Socket Housings.......................A-18
Mating Pin and Socket Housings..............................A-18
Removing Socket Terminals......................................A-18
Installing Socket Terminals........................................A-18
A.9 630 METRI-PACK CONNECTORS
630 Metri-Pack Connector Repair....................................A-19
General.....................................................................A-19
Separating Pin and Socket Housings.......................A-19
Mating Pin and Socket Housings..............................A-19
Removing Socket Terminal.......................................A-19
Installing Socket Terminal.........................................A-19
A.10 SEALED SPLICE CONNECTORS
Sealed Splice Connector Repair......................................A-20
General.....................................................................A-20
Preparing Wire Leads...............................................A-20
Splicing Wire Leads..................................................A-20
Inspecting Seals.......................................................A-20
APPENDIX BWIRING DIAGRAMS
B.1 CONNECTORS
Connector Locations..........................................................B-1
B.2WIRING DIAGRAMS
Wiring Diagram Information...............................................B-3
Wire Color Codes........................................................B-3
Wiring Diagram Symbols............................................B-3
2008 Buell Wiring Diagrams...............................................B-4
Wire Routing....................................................................B-27
APPENDIX C CONVERSIONS
C.1 METRIC CONVERSION
Conversion Table................................................................C-1
C.2 FLUID CONVERSIONS
United States System........................................................C-2
Metric System....................................................................C-2
British Imperial System......................................................C-2
C.3TORQUE CONVERSIONS
United States System........................................................C-3
Metric System....................................................................C-3
APPENDIX D GLOSSARY
D.1 GLOSSARY
Acronyms and Abbreviations.............................................D-1
REFERENCE MATERIAL
TOOLS...........................................................I
TORQUE VALUES........................................V
INDEX.........................................................VII
VI TABLE OF CONTENTS
TABLE OF CONTENTS

SUBJECT............................................................................................................................PAGE NO.
1.1 SPECIFICATIONS.....................................................................................................................1-1
1.2 ELECTRIC STARTER SYSTEM................................................................................................1-2
1.3 STARTING SYSTEM DIAGNOSIS............................................................................................1-4
1.4 STARTER ACTIVATION CIRCUITS.........................................................................................1-14
1.5 DIAGNOSTICS/TROUBLESHOOTING...................................................................................1-15
1.6 STARTER TROUBLESHOOTING............................................................................................1-16
1.7 TESTING STARTER ON MOTORCYCLE...............................................................................1-18
1.8 TESTING STARTER ON BENCH............................................................................................1-22
1.9 CHARGING SYSTEM.............................................................................................................1-25
1.10 BATTERY TESTING..............................................................................................................1-33
STARTING / CHARGING

NOTES

1.1SPECIFICATIONS
GENERAL
The specifications contained in the following tables are for the
following Buell models: Ulysses, Lightning, and Firebolt.
Table 1-1. Starter Specifications
STARTER
3000 RPM (min) @ 11.5 VFree speed 90 Amp (max) @ 11.5 VFree current 400 Amp (max) @ 2.4 VStall current 8.1 ft-lbs (11 Nm) (min) @ 2.4 VStall torque
Table 1-2. Service Wear Specifications
MMIN.SERVICEWEAR LIMITS
11.00.433Brush length (minimum) 28.9811.141Commutator diameter (min-
imum)
Table 1-3.TorqueValues
TORQUEITEM
8-11 Nm72-96 in-lbsBattery terminal fasteners 7-10 Nm60-85 in-lbsStarter battery positive cable nut 18-27 Nm13-20 ft-lbsStarter mounting bolts
2008 Buell XB Diagnostics: Starting / Charging 1-1

1.2ELECTRIC STARTER SYSTEM
GENERAL
The starter is made up of an armature, field winding assembly,
solenoid, drive assembly, idler gear and drive housing. The
starter motor torque is increased through gear reduction.The
gear reduction consists of the drive pinion on the armature, an
idler gear and a clutch gear in the drive housing.The idler gear
is supported by rollers.The clutch gear is part of the overrun-
ning clutch/drive assembly.The overrunning clutch is the part
which engages and drives the clutch ring gear.It also prevents
the starter from overrunning.The field windings are connected
in series with the armature through brushes and commutator
segments.
Wiring Diagrams
For additional information concerning the starting systemcircuit,
see the wiring diagrams in this section and Section 2, Engine
Management.
Start Relay
The start relay is not repairable.Replace the unit if it fails.
Starter Interlock
See Section 2, Engine Management, for operation and
troubleshooting information.
OPERATION
See Figure 1-1.When the starter switch is pushed, the starter
relay is activated and battery current flows into the pull-in
winding (10) and the hold-in winding (11), to ground. The
magnetic forces of the pull-in and hold-in windings in the
solenoid push the plunger (7) causing it to shift to the left.This
action engages the pinion gear (1) with the clutch ring gear
(13). At the same time, the main solenoid contacts (8) are
closed, so battery current flows directly through the field wind-
ings (3) to the armature (4) and to ground.Simultaneously, the
pull-in winding (10) is shorted. The current continues flowing
through the hold-in winding (11) keeping the main solenoid
contacts (8) closed. At this point, the starter begins to crank
the engine. After the engine has started, the pinion gear (1)
turns freely on the pinion shaft through the action of the over-
running clutch (12).The overrunning clutch prevents the clutch
ring gear (13) (which is now rotating under power from the
engine) from turning the armature (4) too fast.When the starter
switch is released, the current of the hold-in winding (11) is fed
through the main solenoid contacts (8) and the direction of the
current in the pull-in winding (10) is reversed. The solenoid
plunger (7) is returned to its original position by the return
spring, which causes the pinion gear (1) to disengage from the
clutch ring gear (13).
1-2 2008 Buell XB Diagnostics: Starting / Charging

567
8
9
4
3
15
14
13 12 10
16
11
567
8
9
4
3
15
14
13
16
11
12 10
1
2
3
ed01524
13.7.1. Hold-in windingBrushStarter at moment starter
switch is closed 14.8. Overrunning clutchBall bearing
2. 9.Starter during cranking 15.Solenoid plunger Clutch ring gear
16.10.3. Starting circuit (see wiring
diagram)
Main solenoid contactsPinion gear
4. 11.Idler gear Battery
12.5. Pull-in windingField winding
6. Armature
Figure 1-1. Starter Operation
2008 Buell XB Diagnostics: Starting / Charging 1-3

1.3STARTING SYSTEM DIAGNOSIS
DIAGNOSTICS
TOOL NAMEPART NUMBER
BREAKOUT BOXB-48115
HARNESS CONNECTOR TEST KITHD-41404-B
Diagnostic Notes
Each reference number below correlates to a circled number
on the flow chart(s).
1. See Figure 1-2. Perform test for 1.5 DIA-
GNOSTICS/TROUBLESHOOTING, Voltage Drops.
2. Remove starter motor.Connect jumper wires as described
in Free Running Current Draw Test under 1.8 TESTING
STARTER ON BENCH.
3. Connect BREAKOUT BOX (Part No. B-48115) to Elec-
tronic Control Module (ECM).
4. Use HARNESS CONNECTOR TEST KIT (Part No. HD-
41404-B) gray terminal socket probe and patch cord.
5. See Starter Current Draw Test under 1.7 TESTING
STARTER ON MOTORCYCLE.
6. See Free Running Current DrawTest under 1.8TESTING
STARTER ON BENCH.
Job/Time CodeValues
Dealership technicians filing warranty claims should use the
job/time code values printed in bold text underneath the
appropriate repair.
12
3
ed01523
1. Motor terminal
2. Battery terminal
3. Solenoid terminal
Figure 1-2. StarterTerminals
1-4 2008 Buell XB Diagnostics: Starting / Charging

Ignition RelayKey Switch Relay Start Relay
Right
Handlebar
Switch
7
8
2
7
8
2
Start relay
Neutral switch
Clutch switch
1 2 3 4 1 1
[22A]
[128B]
[128A]
Starter
Solenoid
Battery
43
44
27
37
38
29 23
21
41 35
Fuse Block And
Relay Assembly
Brake/Horn/EVA 10 Amp
Key Switch 15 Amp
Battery 30 Amp
Lights 15 Amp
Ignition 15 Amp
1
10
5
87
87A
30
85
86
4
7
15
6
9
14
2
19
11
87
87A
30
85
86
87
87A
30
85
86
Clutch
Switch
[95B]
1
2
Fuse Block
And Relay
Assembly 1 1
Neutral
Switch
[131B] [131A]
GY
R
R
BK/R
W/BK
R/BK
R/BK
BK
BK
BK
GN
R/Y
TN/Y TN/Y
RR
R
R/BK
R/BK
GY/O
R/BK
BE
R/Y R
TN/LGN
TN/LGN
BK
BK
GY
BE
GN
BK
W/BK
GY/O
GN/O
GN/O
TN/Y
R/BK
R/BK
BK/R
R
J1
[11A]
(GY)
ECM [11B][11A]
[10B]
[62B]
[10A]
J2
[10A]
(BK)
GND 2
R/GY
Ignition
Switch
134
1234
R
R
R/BK
[33B]
[33A]
LOCK
IGN
em00076
Figure 1-3. Starting Circuit (Ulysses, Lightning)
Table 1-4.Wire Harness Connectors
LOCATIONTYPEDESCRIPTIONNO.
Under seat34-place Amp (Tyco)ECM (BK)[10] Under seat34-place Amp (Tyco)ECM (GY)[11] Behind windscreen4-place MultilockRight handlebar switch[22] Underside of clutch lever assembly2-place MultilockClutch switch[95] Top of starterSpade terminalStarter solenoid[128] Under sprocket cover1-place bulletNeutral switch[131]
2008 Buell XB Diagnostics: Starting / Charging 1-5

Right
Handlebar
Switch
1 2 3 4
[22A]
23
24
11
17
18
9 3
5
Brake/Horn/EVA 10 Amp
Key Switch 15 Amp
Lights 15 Amp
Ignition 15 Amp
1
10
5
87
87A
30
85
86
4
7
15
6
9
14
2
19
11
87
87A
30
85
86
87
87A
30
85
86
Relay Block
1 1
Neutral
Switch
[131B] [131A]
BK/R
W/BK
W/BK
R/BK
BK
GN
1 1
[128B]
[128A]
Starter
Solenoid
GND 2
Battery
BK
BK
TN/Y TN/Y
RR
R
R/BK
R/BK
GY/O
R/BK
BE
TN/LGN
BK
GY
GY
BE
GN
BK
W/BK
W/BK
GY/O
GN/O
GN/O
TN/Y
R/BK
R/BK
BK/R
R
R/Y
[5B]
[5A]
21
21
J-Fuse
R
Ignition RelayKey Switch Relay Start Relay
[11B][11A]
[10B][10A][62B]
7
8
2
7
8
2
Start relay
88Switched ignition
Neutral switch
Clutch switch
J1
[11A]
(GY)
ECM
J2
[10A]
(BK)
Clutch
Switch
[95B]
1
2
TN/LGN
BK
R/GY
Ignition
Switch
134
1234
R
R
R/BK
R
R
R/BK
[33B]
[33A]
LOCK
IGN
em00152
Figure 1-4. Starting Circuit (Firebolt)
Table 1-5.Wire Harness Connectors
LOCATIONTYPEDESCRIPTIONNO.
Under seatSpade terminalsJ-Fuse[5] In fairing34-place Amp (Tyco)ECM (BK)[10] In fairing34-place Amp (Tyco)ECM (GY)[11] Behind windscreen4-place MultilockRight handlebar switch[22] Underside of clutch lever assembly2-place MultilockClutch switch[95] Top of starterSpade terminalStarter solenoid[128] Under sprocket cover1-place bulletNeutral switch[131]
1-6 2008 Buell XB Diagnostics: Starting / Charging
Table of contents
Other Buell Motorcycle manuals

Buell
Buell 2002 S3T User manual

Buell
Buell 2003XB9S User manual

Buell
Buell 2007 FIREBOLT User manual

Buell
Buell 2009 XB Series User manual

Buell
Buell 2002 X1 User manual

Buell
Buell Ulysses 2006 User manual

Buell
Buell S1 Lightning 1996 User manual

Buell
Buell 2002 X1 User manual

Buell
Buell 2002 P3 User manual

Buell
Buell 1125 2009 Series User manual

Buell
Buell S1 Lightning Instruction manual

Buell
Buell XB9R 2003 User manual

Buell
Buell P3 User manual

Buell
Buell 2005 FIREBOLT User manual

Buell
Buell 2007 LIGHTNING User manual

Buell
Buell Blast 2014 User manual

Buell
Buell XB9R 2003 User manual

Buell
Buell 1125 2009 Series User manual

Buell
Buell S3T Thunderbolt 2002 User manual

Buell
Buell 2005 P3 User manual