Burley R1510A User manual

Plastic Welding Machine
Model
No:R1510

1
A. Handle
B. Thermostat knob
C. Power indicator
D. Heating element
E. Stand
F. Heating sockets
G. Wrench
H. Scissors
I. Screw
FECHNICAC SPEIFIC ATIONS
Model Number: R1510A/B
Voltage:
Power:
Temperature:
Heating sockets:
Screw:
220-240V/110-120V ~ 50/60Hz
850W/1500W
M8X1, M10X1
01
A
B
C
D
E
F
GH
I

02
5
3 4
2

SAFETY
> To operate this device safely, the user must have read and understood these
instructions for use before using the device for the first time.
> Observe all safety instructions! Failure to do so may cause harm to you and others.
> Retain all instructions for use, and safety instructions for future reference.
> If you sell or pass the device on, you must also hand over these operating instructions.
> The device must only be used when it functions properly. If the product or part of the
product is defective, it must be taken out of operation and disposed of correctly.
> Never use the device in a room where there is a danger of explosion or in the vicinity
of flammable liquids or gases.
> Always ensure that a device which has been switched off cannot be restarted
unintentionally.
> Do not use devices with an on/off switch that does not function correctly.
> Keep children away from the device! Keep the device out of the way of children and
other unauthorised persons.
> Do not overload the device. Do not use the device for purposes for which it is not
intended.
> Make sure to always wear the required personal protective equipment.
> Exercise caution and only work when in good condition: If you are tired, ill, if you have
ingested alcohol, medication or illegal drugs, do not use the device, as you are not in
a condition to use it safely.
> This product is not intended to be used by persons (including children) or who are
limited in their physical, sensory or mental capacities or who lack experience and/or
knowledge of the product unless they are supervised, or have been instructed on how
to use the product, by a person responsible for their safety.
> Ensure that children are not able to play with the device.
> Always comply with all applicable domestic and international safety, health, and
working regulations.
1. General safety instructions
2. Electrical safety
> The device may only be connected to a socket that is correctly installed and grounded.
> The fuse must be a residual current circuit-breaker with a measured residual current
of no more than 30 mA.
03
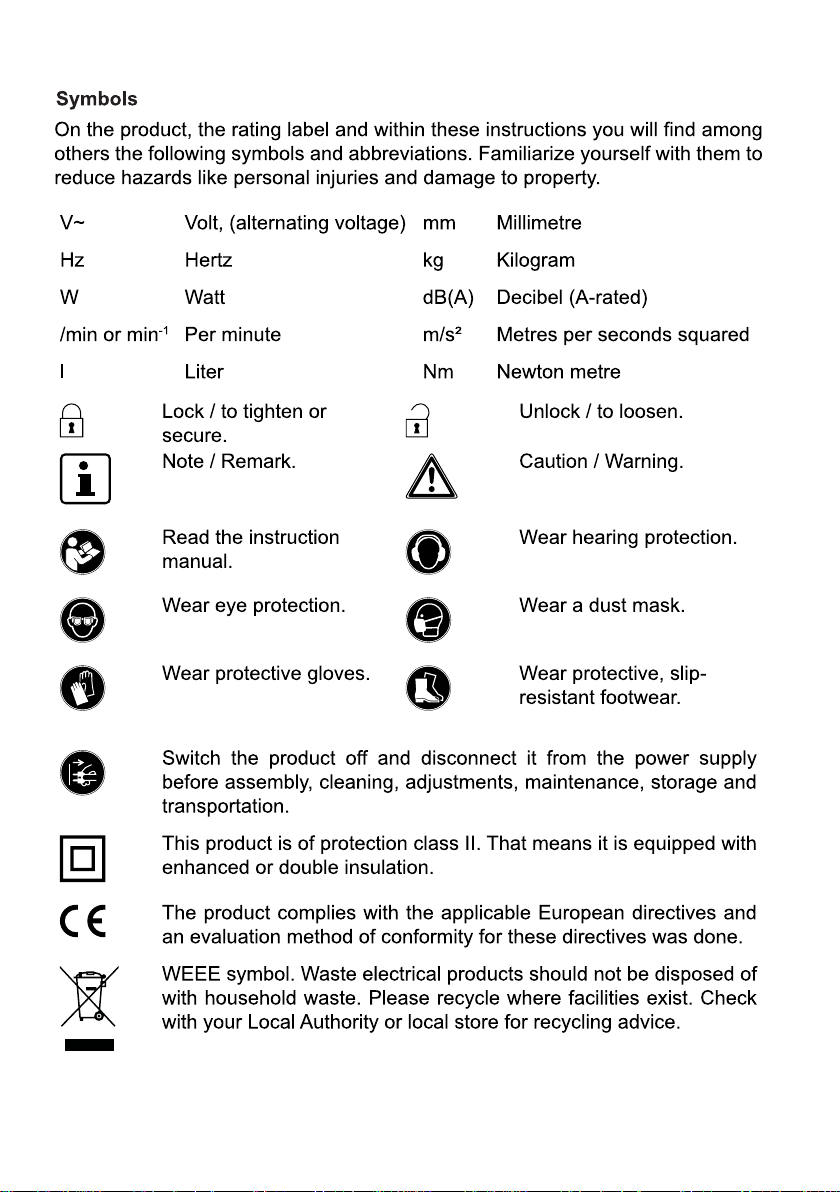
Read and observe the instructions for use before using for the first time.

04
> Make sure that the power supply corresponds with the connection specifications of
the device before it is connected.
> The tool may only be used within the specified limitations for voltage and power (see
type plate).
> Do not touch the mains plug with wet hands! Always pull out the mains plug at the
plug and not by the cable.
> Do not bend, crush, pull or drive over the power cable, protect from sharp edges,oil
and heat.
> Do not lift the device using the cable or use the cable for purposes other than intended.
> Check the plug and cable before each use.
> If the power cable is damaged immediately disconnect the plug. Never use the device
if the power cable is damaged.
> If the device is not in use make sure the plug is pulled out.
> Make sure that the device is switched off before plugging in the mains cable.
> Make sure that the device is switched off before unplugging it.
> Disconnect the power supply before transporting the device.
3.Device-specific safety instructions
> Make sure the workplace is adequately ventilated. Residual gases and vapours can
be harmful to health.
> Do not operate the product in moist environments or allow it to become moist.
> Careless handling of the product increases the risk of fire and explosion.
> Flammable and toxic gases can develop when working with synthetics, paints,
varnishes and similar materials. Do not work in the proximity of highly flammable
gases or materials.
> Heat can reach flammable parts that are not visible.
> Do not use the product in the same position for a long time.
> Risk of burns! Do not touch the hot nozzle. Wear protective gloves.
> Never point the hot air current at persons or animals.
> Never use the product as a hair dryer or for drying clothing.
> Do not move the heating element too close to the part to be treated. The resultant
build up of air can cause the product to overheat.
> Do not block the air inlet openings.
> Let the product completely cool before storing. The heating element can cause
damage and fires.
> Symbols affixed to your tools may not be removed or covered. Information on the
device that is no longer legible must be replaced immediately.

05
Operation
WARNING!
Heating sockets are available in different diameters! Always use the
correct heating socket according to
the intended use! Observe the
technical re
quirements of this product (see section "Technical
specifications") when purchasing and using heating sockets!
NOTICE!
Socket becomes hot during use! Wear protective gloves during using in
order to avoid injuries like burns!
Heating sockets
Installation
②
- Put the machine on stand(E).
- Align heating socket(F) on both sides of heating element(D). Screw the heating
socket(F) clockwise on the heating element(D).
- Fix the heating socket(F) with screw(I), tighten it by clockwise.
Removing/Placing
②
- Loosen the screw(I) with the wrench(G), remove the heating socket(F), if change to
another pair of heating socket(F), repeat the mentioned above steps.
Thermostat knob
③
WARNING!
Make sure the thermostat knob(B) is in its "0" position and disconnect it from
power supply before making any adjustments.
>
Turn the thermostat knob
(B) anticlockwise (as seen from operators position) to
increase the maximum temperature.
> Turn the thermostat knob (B) clockwise (as seen from operators position) to
decrease the maximum temperature.
Indicator
③
> Turn the thermostat knob (B) clockwise (as seen from operators position)
to decrease the maximum temperature.
> After reached to required temperature, the red indicator turned off.

06
Welding
> Put the assembled machine on flat mesa.
> Turn the thermostat knob(B) to required temperature.
> When red indicator turn off, push the pipe and connector into corresponding
matrixes and keeping some time(refer to below table).
> Pull the pipe and connector out and insert to each other in seconds until it
cool down.
> Turn the thermostat knob(B) to its "0" position. Let the heating socket(F) cool
down before lifting it from heating element(D).
Cleaning and maintenance
WARNING!
Risk of injury!Switch off the product and disconnect the mains plug before all
cleaning and maintenance work. Wait until all moving parts have come to a
complete stop and the product has cooled down.
Cleaning the product
Careful handling and regular cleaning ensure that the product remains functional and
efficient for a long time.
- Wipe down the product with a slightly damp cloth.
- Never spray the product with water or expose it to water.
- Never use detergents or solvents for cleaning. This can cause irreparable damage to
the product. The plastic parts can be eaten away by the chemicals.
- Keep the air inlet openings and socket clear of impurities and blockages.

08
This manual suits for next models
1
Table of contents