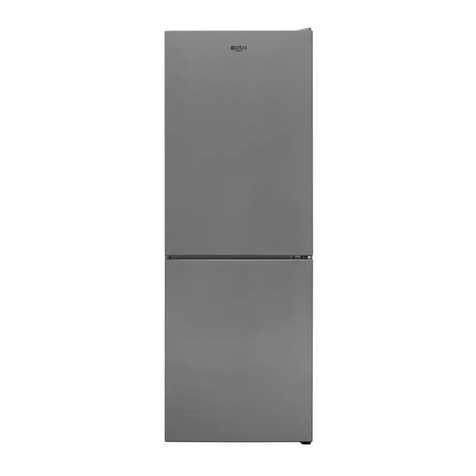
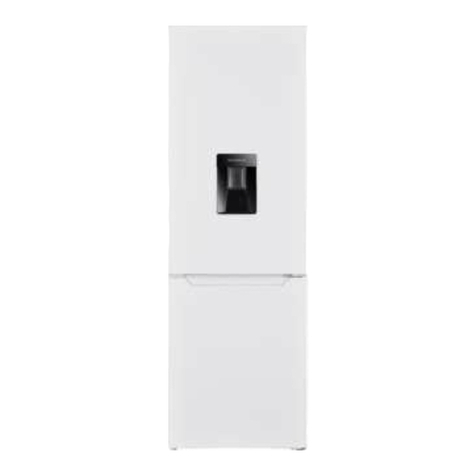
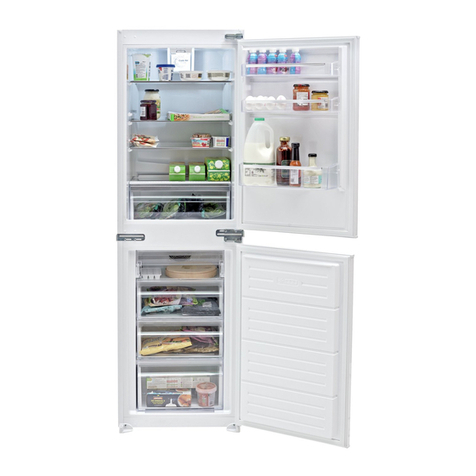
Bush ME60170TFW User manual

技术要求
1.颜色要求:封面:黑白印刷
内页:黑白印刷;
批量时要求统一,不能有明显色差,
2.版面内容:封二印内容,
6-10页大写字高需大于3mm
图案与文字应印刷清晰、
规范,不能有印刷缺陷;
3.页面印刷:双面印刷;
4.成型方式:骑马钉;
5.成品尺寸:A5(140X210)
尺寸公差按GB/T 1804-c;
6.批量生产前须送样确认。
B
C
D
E
F
B
C
D
1234
1234
借(通)用件登记
出图审查
日 期
标志 处数 更改文件号 签 名 日 期
设计
制图
审核
工艺
黄英婷
会签
标准化
批准
日期
重 量 比 例
广东奥马冰箱有限公司
视角符号
重 要 度 [B]
2021-6-9
共 1 张 第 1 张
A A
封面:80g双胶
内页:80g双胶
说明书
陈家怡
刘金利
李梅方 CKBSH-D02-M

ME60170TFW

You'll soon be enjoying your new refrigerator.
It all begins here,with your instructions.Don't worry,
there's nothing too technical coming up.Just simple,
step-by-step guidance to get you up and running
quickly.Sound good?Then let's get started
2 Help and Guidance
Help and Guidance
We're here to help you get the most from your refrigerator.Should you require
any guidance,a simple solution can often be found online at.
www.bush-support.com
If you
still require further
assistance,call one of our experts on 0345 257 7271.
Issue1 01/04/2021
Troubleshooting

Contents 3
Contents
1 Safety i nformation
S afety in formation 6
Getting to know 2
your refrigerator
Ready?Let's begin... 13
14
Parts
Installing your3
refrigerator
Transportation 17
Installation 17
Door Reverse 18
Electrical Connection 19
4Using your
refrigerator
Before f irst u se 22
U sing y our a ppliance 22
U seful i nformation 22
Care and Maintenance 5
Genera l 26
Power failure 26
Moving your appliance 26
Technica l Specifications 27
6Product support
Trouble Shooting 30
Help and 31assistance
Guarantee 32
0345 257 7271.

Troubleshooting

Safety information 1

Safety information
Important-Please read these instructions fully
before installing or operating
6 Safety information
Before use
0345 257 7271.

Safety information 7
Safety information
Important-Please read these instructions fully
before installing or operating
Troubleshooting

8 Safety information
Safety information
Important-Please read these instructions fully
before installing or operating
0345 257 7271.

Safety information 9
Safety information
Important-Please read these instructions fully
before installing or operating
Troubleshooting

10 Safety information
Safety information
Important-Please read these instructions fully
before installing or operating
similar
and with yellow or orange
color.
0345 257 7271.
The refrigerating
appliance is not
intended to be used as
a built-inappliance,
unless specifically
shown as such into its
instructionmanual.
The drawers, baskets
and shelves should be
kept in their current
position unless
otherwise specified in
th
is document.
z
z


Getting to know
your refrigerator 2

Getting to know your refrigerator
You'll be up and running in no time
Ready?Let's begin...
Please read these instructions carefully.They contain
important information which will help you get the best
from your refrigerator and ensure safe and
correct installation and operation
If you require any further assistance,our technical
experts are happy to help.For full details,refer to
the product support section at the end of these
instructions.
Getting to know your refrigerator 13
Troubleshooting

14 Getting to know your refrigerator
Getting to know your refrigerator
You'll be up and running in no time
Accessories included
Parts
1.Thermostat
2.Drawers
3.Leveling feet
4.Door
3
2 4
1
Instructions x 1 Hinge cover
0345 257 7271.


Installing your refrigerator 3

Installing your refrigerator 17
Installing your refrigerator
Bringing it all together
Troubleshooting
.Do not place the appliance near a heat source or
in direct sunlight.
.Do not put any heavy objects on top of the
appliance. It will damage the appliance.
ot install the appliance in a moist and
Transportation
Caution: 2 people are required to unpack .Do n
and handle the appliance, it is wet place.
t
e
ied
.Refer to section Care and Maintenance to
prepare your appliance for use .
recommended that gloves are worn.
.The appliance should be transported only in an
upright position. Do not tilt the appliance greater
than 45 degrees . The packaging as supplied must
be intact during transportation.
.After transporting the appliance, leave it for at
least 4 hours before switching on to allow the
cooling system to settle. Failure to comply could .Adjust the feet at front to level the appliance. I
result in damage to the appliance. should be installed on a smooth surface to avoid
.Do not move the appliance by pulling the door or excessive vibration and noise.
h
ca
on
vd
el
re
ia
ngs
sit
em
tc.ay damage your flooring and wall .E
r
a
a
c
ti
h
n
a
g
p
p
p
l
l
a
i
t
a
e
n
)
ce
w
h
h
a
er
s
e
a
i
t
c
i
li
n
m
di
a
c
te
at
c
e
l
s
a
t
ss
h
(
e
s
t
h
e
ow
mp
n
e
o
ra
n
t
t
u
h
re
range of the appliance operation in place. The
appliance may not work properly if it is left for a
long period at a temperature outside the specif
range:
extended temperate: ‘this refrigerating appliance is
intended to be used at ambient temperatures
ranging from 10 °C to 32 °C (from 50°F to 90°F )’;
temperate: ‘this refrigerating appliance is intended
to be used at ambient temperatures ranging from
16 °C to 32 °C(from 61°F to 90°F )’;
subtropical: ‘this refrigerating appliance is intended
to be used at ambient temperatures ranging from
16 °C to 38 °C (from 61°F to 100°F )’;
tropical: ‘this refrigerating appliance is intended to
.Empty any water in the drain tray before moving .
.Make sure that the defrost water pipe at the back
of the product is fixed to the plastic evaporating
pan on the top of the compressor to avoid deforst
water spillage on the floor .
.Ensure the supply cable is not caught under the
appliance
during
and
after
moving.
.Carefully remove all packaging materials
including
the
foam
base,
dispose
of
correctly
Installation
.Ensure sufficient spacing is provided for the
appliance to be installed. Leave space on both
sides (5cm), back (5cm) and above the
appliance
5cm) to ensure proper ventilation. be used at ambient temperatures ranging from
16 °C to 43 °C(from 61°F to 110°F )’

18 Installing your refrigerator
Warning:
Please make sure the unit to
be tilted more than 45 degree to access
the bottom hinge. It is advised to leave the unit for
4 hours to allow the cooling to settle before
switch on.
Levelling the appliance
1.Rotate feet clockwise to heighten.
2.Rotate feet anti clock wise to lower.
Installing your refrigerator
Bringing it all together
Door Reverse
Warning:
Remove the main plug before
reversing the door. 2 people may be
required to reverse the door .
1.R
emove the screws
from the hinge cover
put the hinge cover on the soft pad for future use
2.O
pen the door and remove the screw
on the
top hinge plate
from the front side . Then
remove the hinge plate
carefully . Take out
the door from the cabinet and place it on the
ground protected with soft pad to avoid any
damage .
3.R
emove plastic cover
and screws at the
top left side
and fix it to the right side .
4.P
ut the plastic soft pad on the floor and Lie down
the whole product to the rear side to the pad
carefully . Remove the two front adjustable feet
. Take out the bottom hinge from the
bottom of right side Record down all the position
of the screws on the bottom hinge . Then
remove all the screws from the bottom hinge .
Turn the hinge over to ensure the protruded area
is pointing to the right side . Put the bottom
hinge to the bottom of left side and fix all the
screws back to the hinge according to the
previous record . Then add the two adjustable
level feet back to the bottom side .
5.R
emove the screw from the right side of top
hinge plate to left side . Move the unit stand
upright . Put the door to the left side . Ensure the
hole on the lower side has fully entered to thepin
on the bottom hinge plate . Put the top hinge
plate , Use the alternative cover
(with hole)
provided and fit to the side . And fix to the door .
Fix the screw to the top hinge plate to the cabinet
Turn the door to ensure the door can be open and
closed without any problem .
6. Refit the top hinge cover by fixing the screw
.
Figure.1
Door opening from left side
Figure.2
Door opening from right side
0345 257 7271.

Installing your refrigerator 19
Installing your refrigerator
Bringing it all together
Electrical connection
Any electrical work that is required to
install this appliance MUST be carried out
by a qualified electrician.
Warning: THIS APPLIANCE MUST BE
EARTHED
Before making any electrical connections,
ensure that:
.Electrical safety is only guaranteed when the earth
system of your house is in accordance with the
related local regulations.
.Do not damage the refrigerant circuit.
.Do not bend, stretch or pull the supply cable to
avoid electric shock.
.Do not use electrical appliances inside the food
storage compartments of the appliance, unless
they are of the type recommended by the
manufacturer.
.Ensure the power socket is suitable for the
maximum power of the machine (fuses in the
power circuit must be 13 amp).
.The supply voltage should be the same as that
indicated in the technical specifications and the
appliance rating plate.
.The appliance should be earthed and in
compliance with the applicable law.
.When installed, the power socket must be within
easy reach.
.If the socket outlets in your home are not suitable
for the plug supplied with this unit check with a
qualified electrician for replacement.
.The use of adapters, multiple connectors or
extension cables are not recommended.
.The appliance must be connected to a 220-240
volt 50Hz AC supply by means of a three pin
socket, suitably earthed and protected by a 13
amp fuse.
.Should the fuse need to be replaced, a 13 amp
fuse approved to BS1362 must be used.
.The plug contains a removable fuse cover that
must be refitted when the fuse is replaced. If the
fuse cover is lost or damaged, the plug must not
be used until a replacement cover has been fitted
or the plug is replaced.
.A damaged plug should be cut off as close to the
plug body as possible, the fuse should be removed
and the plug disposed of safely.
Plug replacement (UK & Ireland only)
Should you need to replace the plug; the wires
in the power cable are coloured in the
following way:
Blue Neutral 'N'
Brown Live 'L'
Green & Yellow Earth 'E'
As the colours of the wires in the power cable
may not correspond with the coloured
markings identifying the terminals in your
plug, and proceed as follows:
The green & yellow wire must be connected to
the terminal in the plug that is marked with the
letter E or by the earth symbol.
The blue wire must be connected to the
terminal that is marked with the letter N.
The brown wire must be connected to the
terminal that is marked with the letter L.
If the power supply cord is damaged, it must be
replaced by the manufacturer or its service
agent or a similar qualified person in order
to avoid a hazard.
Troubleshooting
Table of contents
Other Bush Refrigerator manuals

Bush
Bush BEUCFR6082 User manual

Bush
Bush BFFWX60185B User manual

Bush
Bush ME60170TLW User manual

Bush
Bush BIE7030FF User manual

Bush
Bush MSBSWTDB20 User manual

Bush
Bush BSFF60B Assembly Instructions

Bush
Bush BIEF7030FF User manual

Bush
Bush BUCL6082 Assembly Instructions

Bush
Bush BIFFC55177 User manual

Bush
Bush BFFX54152W User manual

Bush
Bush M50152FFW User manual

Bush
Bush BUCR5085W User manual

Bush
Bush BEUCFR6082 User manual

Bush
Bush MEBI55177 User manual

Bush
Bush ME5585UCL User manual
Bush
Bush BIE5050FF User manual

Bush
Bush MSBSB20 User manual

Bush
Bush AB320 Assembly Instructions

Bush
Bush BUCL6082 User manual

Bush
Bush BFFF48144W Assembly Instructions