Bushnell LPX650 User manual

TWO-WAY RADIO MODEL
LPX650
Instruction Manual
Part No. UM-LPX650202209
V1
English
MADE, UNDER THIS WARRANTY OR AS A TORT CLAIM (INCLUDING NEGLIGENCE OR STRICT
PRODUCT LIABILITY), A CONTRACT CLAIM, OR ANY OTHER CLAIM. THIS LIMITATION
CANNOT BE WAIVED OR AMENDED BY ANY PERSON. THIS LIMITATION OF LIABILITY WILL
BE EFFECTIVE EVEN IF SHINE FLEX OR AN AUTHORIZED REPRESENTATIVE OF SHINE FLEX
HAS BEEN ADVISED BY YOU OF THE POSSIBILITY OF ANY SUCH DAMAGES.
Some states and countries do not allow limitations on how long an implied warranty lasts
and do not allow the exclusion or limitation of incidental or consequential damages, so the
above limitations may not apply to you. This warranty gives you specific legal rights, and you
may also have other rights which vary from state to state and country to country.
Provided that the product was purchased from Shine Flex itself or through its authorized
reseller or agent and utilized in the U.S.A., Shine Flex will, without charge, repair or replace,
at its option, defective products, products or component parts upon delivery to the
authorized Shine Flex Authorized Service Center, accompanied by proof of the date of first
customer purchase, such as a duplicated copy of a sales receipt.
You must pay any initial shipping charges required to ship the product for warranty service,
but the return charges, to an address in the U.S.A, will be at Shine Flex’s expense, if the
product is under warranty.
For Products Purchased Outside the U.S.A.
Please contact your authorized local reseller or agent for warranty information.
Trademark Acknowledgment
Bushnell is a trademark of Vista Outdoor Operations LLC and its affiliates, used under
license.
© 2022 Bushnell
U.S. & Canada Only
Product Manufactured by:
Shine Flex US LLC, Illinois, USA.
For product, service or warranty information and manuals in other languages contact us at:
www.shineflexglobal.com (855) 224-5127
For other information, visit:
www.bushnell.com

Definitions: Safety Alert Symbols and Words
This instruction manual uses the following safety alert symbols and words to alert
you to hazardous situations and your risk of personal injury or property damage.
DANGER: Indicates an imminently hazardous situation which,
if not avoided, will result in death or serious injury.
WARNING: Indicates a potentially hazardous situation which,
if not avoided, could result in death or serious injury.
CAUTION: Indicates a potentially hazardous situation which,
if not avoided, may result in minor or moderate injury.
(Used without word) Indicates a safety related message.
NOTICE: Indicates a practice not related to personal injury which,
if not avoided, may result in property damage.
Important Safety Instructions
WARNING: To reduce risk of injury:
Before any use, be sure everyone using this unit reads and understands
all safety instructions and other information contained in this manual.
Save these instructions and review frequently.
1. Only accessories included in this package or specified by the manufacturer should
be used with the radio. The 5V USB-C charging input is compatible
with USB chargers that fully conform to the USB standards.
2. Do not use cleaners or solvents to clean the exterior of the radio. Use only a damp or
dry cloth.
3. Do not expose this product to splashing or dripping water.
4. Do not attempt to service the receiver yourself. Removing the cover will void the
warranty. Changes or modifications not expressly approved by BUSHNELL may void
the user’s authority granted by the FCC to operate this device and should not be
made.
5. Do not plug the wall adaptor into the power outlet if the outlet is wet.
6. Do not use any portable radio that has a damaged antenna. If a damaged antenna
comes into contact with your skin, a minor burn can result.
Important Safety Instructions for Battery
WARNING: Read all safety warnings and all instructions:
Failure to follow the warnings and instructions may result in fire and/or serious injury
• Do not incinerate the battery even if it is severely damaged or is completely worn
out.
• Do not discard battery in a fire. The battery pack can explode in a fire.
• Do not replace battery in any area labeled “Hazardous Atmosphere”. Any sparks
created in a potentially explosive atmosphere can cause an explosion or fire.
• Do not disassemble, crush, puncture, shred, or otherwise attempt to change the
form of your battery.
• Do not dry a wet or damp battery with an appliance or heat source, such as a
hair dryer or microwave oven.
• A small leakage of liquid from the battery cells may occur under extreme usage
or temperature conditions. This does not indicate a failure. Do not open, deform
or mutilate the battery as there may be corrosive materials which can cause
damage to eyes or skin and may be toxic if swallowed.
However, if the outer seal is broken and this leakage gets on your skin:
a. Wash quickly with soap and water.
b. Neutralize with a mild acid such as lemon juice or vinegar.
c. If battery liquid gets into your eyes, flush them with clean water for a minimum
of 10 minutes and seek immediate medical attention.
This product uses Ni-MH batteries. Do not transport package if damaged, a fire
hazard could exist.
For more information, please call our customer support line at (855) 224-5127, or
email us at cs@shineflexglobal.com.
Recycle Battery
Local, state or federal laws may prohibit disposal of batteries in ordinary trash.
Consult your local waste authority for information regarding available recycling
and/or disposal options.
A-1 A-2

CAUTION:
Exposure to high volume sound levels may cause temporary or permanent
damage to your hearing. Although there is no single volume setting that is
appropriate for everyone, you should always use your radio with the volume set
at low level and avoid prolonged exposure to high volume sound levels.
1. Set the volume control in a low position and use as low a volume as
possible.
2. Avoid turning up the volume to block out noisy surroundings.
Whenever possble, use your radio in a quiet environment with low
background noise.
3. Limit the amount of time you use headsets or earpiece at high volume
levels.
4. When using the radio without a headset or earpiece, do not place the
radio’s speaker directly against your ear.
5. Observe all signs and instructions that require an electrical device or
RF radio product to be switched off in designated areas, such as
gas/refueling stations, hospitals, blasting areas, potentially explosive
atmospheres, or aircraft.
Your radio will give you years of trouble-free service if cared for properly.
Handle the radio gently. Keep the radio away from dust. Never put the radio
in water or in a damp place. Avoid exposure to extreme temperatures.
Customer Assistance -
Product Service & Support
For any questions about operating this new BUSHNELL branded product,
PLEASE CONTACT US FIRST… do not return this product to the retail store. The
contact information for support will vary depending on the country in which you
purchased and utilize the product.
To obtain warranty service or other information for products purchased from
Shine Flex itself or through its authorized reseller or agent and utilized in the
U.S.A., please email us at cs@shineflexglobal.com. You will receive
instructions on how to ship the products at your expense to an our Authorized
Service Center. To obtain service, you must include: (a) a copy of your receipt,
bill of sale or other comparable proof of purchase; (b) a written description of
the problem; and, most importantly; (c) your address and telephone number.
For further information needed on its features, please visit
www.shineflexglobal.com for frequently asked questions
and the electronic manual.
© 2022 Shine Flex US LLC, Illinois, USA
Introduction - Getting Started
1
• Handheld Radios
• Rechargeable Batteries
• USB-C Single Charging Cable
• Belt Clips
• Charging Dock
Pack Contents
6. If you experience a skin irritation after using this product, discontinue
use and seek medical attention.
7. If the product or charger: overheats; has a damaged cord or plug; has
been dropped or damaged; has been dropped into water, disconnect
any charger from its power supply, discontinue use of the product.
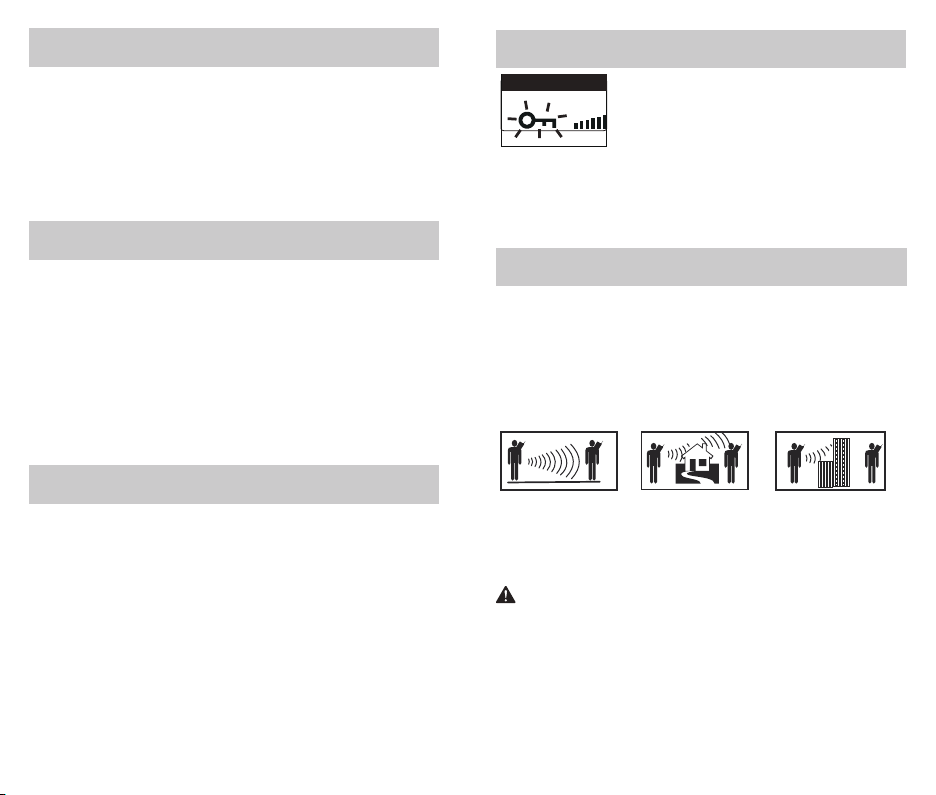
Electromagnetic Interference
Nearly every electronic device is susceptible to electromagnetic interference
(EMI) if inadequately shielded, designed, or otherwise configured for
electromagnetic compatibility. Turn off your radio in any facility where posted
notices instruct you to do so. These facilities may include hospitals or health
care facilities that may be using equipment that is sensitive to external RF
energy.
• When instructed to do so, turn off your radios when on board an aircraft. Any
use of a RF device must be in accordance with applicable laws, regulations
and airline crew instructions.
• Some radios may interfere with some hearing aids. In the event of such
interference, you may want to consult your hearing aid manufacturer or
physician to discuss alternatives.
• If you use any other personal medical device, consult the manufacturer of
your deivce to determine if it is adequately shielded from RF energy. Your
doctor or physician may be able to assist you in obtaining this information.
A-3
NOTE: Standard accessories may vary by model.

2 3
Product Overview
1
9
8
6
5
2
3
4
7
10
1. Microphone/Earphone/Charge Jack
2. PUSH-TO-TALK (PTT) Button
• Press and hold to transmit your voice
3. Power Button
• Press and hold to turn the unit On or Off
4. - Button
• Press to decrease volume
• Press and hold to set Hi or Lo Transmit Power Level
5. LED/S.O.S Flashlight Button
• Press to use the LED ashlight /
turn off the ashlight or S.O.S. Flashlight function
• Press and hold to activate S.O.S. Flashlight function
6. MIC (Microphone)
7. Speaker
8. Antenna
9. Backlit LCD Display
10. Menu/Weather Button
• Press to display the menu
• Press and hold to listen to or exit NOAA All Hazards Radio channels
11. Call/Lock Button
• Press to send Ringtone to other radios
• Press and hold to activate or deactivate Key Lock feature
12. + Button
• Press to increase volume
• Press and hold to use or stop Monitor feature on the selected channel
13. Battery Compartment Cover
14. Belt Clip
15. Battery Door Screw (Behind the clip)
16. Battery Door Screw
17. Water Detection sensors
18. Charging contacts (for charging dock)
19. LED Flashlight
MENU
CALL 11
12
13
14
15
16
17
18
19

5
4
Backlit LCD Display
1. Transmit/Receive Icon
2. Weather Icon
3. VOX Icon
4. DCS/CTCSS Privacy Code Numbers
5. Dual Watch Icon
6. Scan Icon
7. Weather Alert Icon
8. Key Tone Icon
9. DCS/CTCSS Icon
10. Roger Beep Icon
11. Hi/Low Power Icon
12. Power Saver Icon
13. Battery Level Indicator
14. Vibration Alert
15. Channel Numbers
16. Lock Icon
17. Speaker Volume Indicator
Product Features
• 70 Channels
• Weather Alert
• LED/S.O.S Flashlight
• Button Lock
• Charge Jack
• 121 Privacy Codes
(
38 CTCSS codes/83 DCS codes)
• Battery/Power Saver
• Battery Level Indicator
• Auto Squelch
• Belt Clip
• Hands-Free Operation
(VOX)
• Scan
(Channels, privacy codes)
165
234
7
9
10
11
12
13 14 15 16 17
• 10 Channel Weather Radio
• Float on the water
• IP67 Waterproof and Dustproof
• Vibration Alert
•Backlit LCD Display
• Call Alert
(15 selectable tones)
• Speaker/Microphone
• Roger Beep
(Selectable On/Off)
• Keystroke Tones
(Selectable On/Off)
• Low Battery Audible Alert
• Maximum Range Extender
Staying in touch is convenient and easy when using your
radio. Some of the many uses you will discover include:
Communicating with others while hiking, biking, and working; keeping track of
family and friends at a crowded public event; checking with travel companions;
connecting with neighbors; arranging meeting spots
with others while shopping at the mall, talking with
your colleagues in store or warehouse.
Secure your radio while on the go.
Carrying your radio with you is easy when using the
belt clip.
The belt clip easily attaches to your belt, purse, or
backpack.
Belt clip
8
Making Life Easier and Safer

NOTE:
• You can use Alkaline batteries if required, however YOU MUST NOT
CHARGE THE RADIOS WITH ALKALINE BATTERIES INSERTED as this will
damage the radio.
• NEVER mix old and new batteries.
• Do Not mix alkaline, standard (carbon-zinc), or rechargeable (Ni-Cd,
Ni-MH, etc.) batteries.
• Remove the batteries from the instrument if it is not required for extended
periods of time in order to avoid demage to the radio resulting from a
leaking battery.
Waterproof
This radio is waterproof to IP67 standards. It is dust / splashproof from any
direction. The radio is resistant to water and rain splashes only when the
battery compartment cover, ear/mic/charge jack cover are sealed. Open the
battery compartment cover or ear/mic/charge jack cover only when the
radio is dry. Use of a headset accessory should be in dry environments only.
The USB cable and charging dock is not waterproof. Do not expose the
charging dock to rain or snow. Charge the radios only in a dry location. The
battery compartment cover must be tightly closed with the screw to
maintain the weatherproof seal of the radio.
6 7
Removing the Belt Clip
Pull the Belt Clip latch forward (away from the unit) While pulling the Belt
Clip latch, push up the Belt Clip.
Installing Batteries
Caution:
Observe the proper battery polarity orientation when
installing batteries. Incorrect positioning can damage both the batteries
and the unit.
1. Remove the belt clip. Remove the two screws securing the battery
compartment cover. Open the battery compartment cover.
2. Install the rechargeable batteries (supplied) by following the
orientation.
3. Replace the Battery Compartment Cover. Tighten the screws.
- -
-
+
+ +
AA
AA
AA
Installing the Belt Clip
Slide the Belt clip into the slot.
A “click” indicates the Belt clip is locked into position.
1
2

Operation - Charge
To charge batteries in radio
1. Check to see that the batteries have been inserted properly.
2. Insert the USB-C cable into the charge jack located at the top of the
radio.
3. Plug the cable into USB-compatible power port.
NOTE:
• Use only the supplied rechargeable batteries for
recharging your Bushnell radio.
• Bushnell recommends your radio is turned off while being
charged.
• The batteries can take more than 12-14 hours to fully charge.
• Always use the supplied charging cable for optimal charging
performance.
8 9
NOTE:
• Use only the supplied rechargeable batteries for
recharging your Bushnell radio.
• Bushnell recommends your radio is turned off while
being charged.
• The batteries can take more than 12-14 hours to
fully charge.
• Always use the supplied charging cable for optimal
charging performance.
LPX650 Charging dock
Input: 5V DC 1000mA
Output: 2 x (5V DC 400mA)
1. Press and hold the Power button to turn on your radio.
2. Press the Menu button once, the current channel number flashes on
the LCD Screen.
3. Press the +or – button to select a channel.
NOTE: Both radios must be tuned to the same channel/privacy code
to communicate.
4. Press the Talk button to confirm the channel setting.
5. Press and hold the Talk button while speak into the microphone.
6. When finished talking, release the Talk button and listen for a
response.
Operation - Quick Start
To charge radio(s) in charging dock
1. Insert radio(s) into charging dock as shown.
2. Insert the USB-C cable into jack on back of charging dock.
3. Plug the cable into USB compatible power port. For pluggable
equipment, the socket-outlet shall be installed near the equipment
and shall be easily accessible. If charging light is not on, check
position of radio. Radio should be upright. The charge indicator light
will stay on (Red) as long as the radio is in the charging well, and the
light will go off when the charging is complete.
Floating Radio
The radio is designed to float when in water, the LED light will flash to
assist you in locating the radio when in water.
Do not leave the radio floating in water permanently. This could cause
premature corrosion of the battery contacts and other damage.
NOTE: This radio floats with included NiMH batteries. It may not float with
some other AA batteries.
Mic/spk jack
Charge jack

10 11
LCD Screen Back Light
Every time the Power/+/-/MENU button is activated (except Talk and
Call button), the LCD Screen back light will illuminate for 6 seconds.
Microphone/Earphone/Charge Jack
Your radio is equipped with an auxilliary microphone, earphone and charge
jack located at the opposite top side of the radio.
Turning the Unit ON/OFF
To Turn ON: Press & hold Power button for 3 seconds until the LCD
screen turns ON and displays the current channel.
To switch OFF: Press and hold Power button for 3 seconds until the
LCD screen turns blank.
Battery life
Your radio has a built-in power saver to make the batteries last longer. But
when you are not using the units, turn them OFF to conserve battery power.
Operation - Using Your Radio
Communicating with Another Person
Listening for a Response
Release the Talk button to receive incoming transmissions. Your radio is
always in Standby mode while the Talk or Call buttons are not pressed.
To Adjust Volume
In Standby mode, press the +or -button.
A triple beep sound is used to indicate the minimum and maximum volume
levels (1 through 8).
NOTE:
• Do not hold the radio close to your ear. If the volume is set to an
uncomfortable level, it could hurt your ear.
• Keeps your headphone audio at a comfortable level to avoid damage your
ear.
Auto Battery Save
Battery Low
Battery Save Mode
Two Inches
from Mouth
Listening
1. Press and hold the Talk button.
2. With the microphone about 2 inches (5 cm)
from your mouth,speak in a normal voice.
3. Release the Talk button when you are
finished talking and listen for a response.
NOTE:
• You cannot receive incoming calls while pressing
the Talk button.
• Both radios must be tuned to the same channel/
privacy code to communicate.
Battery Low
If there are no transmissions within 10 seconds, the
radio will automatically switch to Battery Save mode
and the Power Saver icon will flash in the display.
This will not affect the radio’s ability to receive
incoming transmissions.
When battery power is low, the Battery Low icon will
blink and an audible tone will sound twice before the
radio shuts off. Your batteries need to be recharged.
The radio will display flashing battery icon while

Transmitting range
The talk range depends on the environment and terrain. In general the radio
can reach further in wide open spaces, without obstructions such as hills or
buildings. It will be affected by concrete structures, heavy foliage and by
operating radios indoors or in vehicles. Don’t try to use two radio units
which are less than 5 m (16 feet) apart. Otherwise, you may experience
interference.
IMPORTANT SAFETY
WARNING:
To reduce radio frequency exposure when you are using your hand-held,
hold the unit at least 5 cm (2 inches) away from your face.
Optimal Range
Outdoors Flat,
open areas
Medium Range
Outdoors Buildings or
trees Also near
residential buildings
Minimal Range Outdoors
Dense foliage or
mountains. Also inside
some buildings
Call Button
Press and release the Call button to alert others that you are calling.
The other person will hear a 3 seconds call tone.
This tone is used only to establish voice communications.
NOTE: See page 20 on how to select between 15 call tone settings.
LED/S.O.S. Flashlight
Press and release the LED/S.O.S Flashlight button below the Talk
button to use the LED flashlight located at the bottom of the radio.
To activate S.O.S. Flashlight function, press and hold the LED/S.O.S
Flashlight button to turn on. Press and release to turn off the flashlight or
S.O.S. function.
NOTE: In order to prevent misoperation and save power, the flashlight will
automatically turn off after 5 minutes
Auto Squelch/Maximum Range
Your radio will automatically shut off weak transmissions and unwanted
noise due to terrain, conditions or if you’ve reached your Maximum Range
limit.
You can turn off auto squelch (or turn on maximum range extender),
allowing all signals to be received and extending the maximum range of
your radio.
To turn maximum range extender on (Turn off auto squelch), press and hold
the +button for at least 3 seconds to turn on the maximum range extender.
To turn maximum range extender off (Turn on auto squelch), press and hold
the +button to turn off the maximum range extender.
Key Lock
To turn the lock on or off: Press and hold the Lock Button for 3 seconds.
A double beep sound is used to confirm your lock on or off request. When in
Lock mode, the Lock icon will be displayed.
Key Lock Icon
12 13
The Lock function locks the Menu button and the
press-and-hold function of + or - buttons to prevent
accidental operation.

14 15
Set High / Low (Hi-Low) Transmit Power
Level
Your radio can transmit selectivity at 0.5 or 2 watts of power. Use the low
power setting for short-range communications and use the high power
setting for long-range communications.
Scrolling Through the Menu Function
By scrolling through the Menu function, you will be able to select or turn on
preferred features of your radio. When scrolling through the Menu function,
your radio features will be displaced in the same predetermined order:
• Channel Selection
• Set CTCSS Privacy Codes
• Set DCS Privacy Codes
• Set Vox On/Off
• Set Vox Sensitivity
• Set Dual Watch
• Set Channel Scan
• Set Call Tones 1-15
• Set Vibration alert On/Off
• Set Roger Beep On/Off
• Set Key Tones On/Off
Channel Selection
The radio has 70 channels, Channel 1~22 are compatible with other brands
of Two-Way radios.
To toggle between Hi-Low Power Modes
NOTE: Channel 8-14, 34-37, 53-56 only operate on Low power setting.
Hi/Low Icon Press and hold the - button until Hi or Low icon
toggles.
1. Briefly press and release Menu button, the
channel number flashes.
2. Press +or -button to select a channel. (You
can hold the +or -button for fast advance)
3. When the desired channel is displayed, choose one of the following.
a. Press the Menu button to enter the new setting and proceed to
other functions.
b. Press the Talk or Call button to enter the new setting and return to
Standby mode.
c. Do not press any buttons for 6 seconds to enter the new setting and
return to Standby mode.
NOTE:
• Both radios must be tuned to the same channel to communicate.
• See page 24 for frequency allocation charts.
• The privacy codes of CH23-70 are fixed, so there are no CTCSS or
DCS setting on these channels.
Privacy Codes
Your radio incorporates two advanced coded squelch system that can help
to reduce interference from other users on any given channel. CTCSS
(Continuous Tone Coded Squelch System) provides 38 privacy codes and
DCS (Digital Coded Squelch) provides 83 privacy codes. This provides a total
of 121 Privacy Codes. Either system can be used on channels
(CH1-CH22), but both systems cannot be used on the same channel at the
same time.
NOTE:
• To successfully communicate using a privacy code, both the sending and
receiving radios must be tuned to the same channel and to the same
privacy code system (CTCSS or DCS) and privacy code number. Each
channel will remember the last privacy code system and number you
select.
• The privacy code 00 is not a privacy code, but allows all signals to be
heard on a channel that is set to 00 on both the CTCSS and DCS systems.
Channel Number

CTCSS Privacy Code
16 17
Set CTCSS Privacy Codes
To Select a CTCSS privacy code:
a. Press the Menu button to enter the new setting and proceed to other
functions.
b. Press the Talk or Call button to enter the new setting and return to
Standby mode.
c. Do not press any buttons for 6 seconds to enter the new setting and
return to Standby mode.
Set DCS Privacy Codes
a. Press the Menu button to enter the new setting and proceed to other
functions.
b. Press the Talk or Call button to enter the new setting and return to
Standby mode.
c. Do not press any buttons for 6 seconds to enter the new setting and
return to Standby mode.
Voice Activated Transmit (VOX)
In VOX mode, your radio can be used "hands-free", automatically
transmitting when you speak. You can set the VOX sensitivity level to fit
the volume of your voice and avoid transmissions triggered by background
noise.
To turn VOX mode on or off:
1. After selecting a channel (only be available on
channel 1~22), press the Menu button until
the CTCSS icon appears and the small
numbers next to the channel number flash on
the display. (00 through 38)
NOTE: If DCS is turned on at the channel selected, the display will
flash the CTCSS icon and "OFF". To switch from DCS to CTCSS,
press the +or -button while the display is flashing "OFF". The display
will then show the small numbers flashing and you will then be able to
proceed to step 2.
2. Press using the +or -button to select a privacy code. You can hold
the +or -button for fast advance.
3. When your desired CTCSS privacy code is displayed, choose one of
the following:
1.
2. Press using the +or -button to select a DCS code. You can hold the
+ or -button for fast advance.
3. When your desired DCS privacy code is displayed, choose one of the
following:
DCS Privacy Code
VOX Icon 1. Press the Menu button until the VOX icon
flashes on the display. The current On or Off
setting is displayed.
2. Press the +or -button to turn VOX On or Off.
3. Choose one of the following:
a. Press the Menu button to enter the new setting and proceed to
other functions.
b. Press the Talk or Call button to enter the new setting and return
to Standby mode.
c. Do not press any buttons for 6 seconds to enter the new setting and
return to Standby mode.
1. After selecting a channel (only be available on
channel 1~22), press the Menu button until
the DCS icon appears and the small numbers
next to the channel number flash on the
display (00 through 83).
NOTE: If CTCSS is turned on at the channel selected, the display will flash
the DCS icon and "OFF". To switch from CTCSS to DCS, press the +or -
button while the display is flashing "OFF". The display will then show the
small numbers flashing and you will then be able to proceed to step 2.

18 19
4. Press the Talk button to confirm your setting.
NOTE: The privacy codes of CH23-70 are fixed, so there are no CTCSS or
DCS setting on these channels.
Set Channel Scan
Your radio can automatically scan channels.
To scan channels:
3. Choose one of the following:
a. While the current setting is on, press Talk or Call button to begin
scanning channels.
b. While the current setting is on, do not press any button for 6 seconds
to begin scanning channels.
c. While the current setting is off, press Menu button to proceed to
other functions.
d. While the current setting is off, press Talk or Call button to return
to Standby mode.
e. While the current setting is off, do not press any buttons for 6
seconds to return to Standby mode.
NOTE: The radio will check privacy codes while scanning channels.
The Scan icon will continue to be displayed when scan is on. Your radio
will continue to scan all channels and stop if an incoming transmission is
detected. Your radio will remain on that channel for 8 seconds after the last
incoming transmission.
To set VOX sensitivity:
Set Dual Watch
Your radio is capable of monitoring two channels, the current and another
(dual watch) channel. If the unit detects a signal on either channel, it will
stop and receive the signal.
Dual watch channel:
1.
1. Press the Menu button repeatedly until the
Scan icon and the current off setting are
flashing
2. Press the +or -button to select Channel Scan
on or off.
VOX Sensitivity Level
Dual Watch setting
Channel Scan setting
Scan Channels
1. Press the Menu button until the VOX icon
flashes and the current sensitivity level is
displayed.
NOTE: The current VOX sensitivity level is
displayed with letters "L" and a Number 01
through 05, with Number 05 being the most
sensitive level and Number 01 being the least
sensitive level.
2. Press the +or -button to change the setting.
3. Choose one of the following:
a. Press the Menu button to enter the new setting and proceed to other
functions.
b. Press the Talk or Call button to enter the new setting and return to
Standby mode.
c. Do not press any buttons for 6 seconds to enter the new setting and
return to Standby mode.
NOTE: Every time turn on the radio, Vox will be turned off.
3. Dual watch CTCSS channel: Continue pressing the MENU
button to change the CTCSS code. Press the +or -button to select the
desired CTCSS code (00-38).
Dual watch DCS channel: Continue pressing the MENU
button to change the DCS code. Press the +or -button to select the
desired DCS code (00-83).
1. Press the MENU button until the screen shows
DW icon, “DW” icon will be displayed while
“OFF ” flashes on the LCD Screen.
2. Press the +or -button to select the Dual Watch
channel (1-70, except the current channel).

3. Choose one of the following:
a. Press the Menu button to enter the new setting and proceed to
other functions.
b. Press the Talk or Call button to enter the new setting and return to
Standby mode.
c. Do not press any buttons for 6 seconds to enter the new setting and
return to Standby mode.
NOTE: Vibration function will be suspended during charging.
Set Roger Beep On/Off
Your listener will hear an audible tone when you release the Talk button.
This alerts the other party that you are finished talking and it is OK for them
to speak.
To turn roger beep on or off:
3. Choose one of the following:
a. Press the Menu button to enter the new setting and proceed to other
functions.
b. Press the Talk or Call button to enter the new setting and return to
Standby mode.
c. Do not press any buttons for 6 seconds to enter the new setting and
return to Standby mode.
4. Press the Talk button to confirm your setting.
NOTE: The privacy codes of CH23-70 are fixed, so there are no CTCSS or
DCS setting on these channels.
Set Channel Scan
Your radio can automatically scan channels.
To scan channels:
3. Choose one of the following:
a. While the current setting is on, press Talk or Call button to begin
scanning channels.
b. While the current setting is on, do not press any button for 6 seconds
to begin scanning channels.
c. While the current setting is off, press Menu button to proceed to
other functions.
d. While the current setting is off, press Talk or Call button to return
to Standby mode.
e. While the current setting is off, do not press any buttons for 6
seconds to return to Standby mode.
NOTE: The radio will check privacy codes while scanning channels.
The Scan icon will continue to be displayed when scan is on. Your radio
will continue to scan all channels and stop if an incoming transmission is
detected. Your radio will remain on that channel for 8 seconds after the last
incoming transmission.
20 21
1. Press the Menu button until the letter "C"
and the current call tone number (01 through
15) is displayed. The current call tone will
sound for 3 seconds.
2. Press the +or -button to hear the other call
tone settings.
1. Press the Menu button until the Vibration
Alert icon flashes. The current on or off
setting is displayed.
2. Press the +or -button to change the Vibration
Alert on or off.
1. Press the Menu button until the Roger
Beep icon flashes. The current on or off
setting is displayed.
2. Press the +or -button to select roger beep on
or off.
During scanning (while receiving an incoming
transmission), you can choose from the following:
a. Press and hold the Talk button to communicate on that channel. Your
radio will remain on that channel and return to Standby mode.
b. Press the +or -button to resume scanning channels.
c. Press the Talk or Call button to return to Standby mode.
Set Call Tones 1-15
You can choose between 15 different Call Tone Settings to transmit a
call alert.
To change a call tone setting:
3. Choose one of the following:
a. Press the Menu button to enter the new setting and proceed to other
functions.
b. Press the Talk or Call button to enter the new setting and return to
Standby mode.
c. Do not press any buttons for 6 seconds to enter the new setting and
return to Standby mode.
Set Vibration Alert On/Off
Your radio can alert you to incoming signals by sounding an audible call
tone only or both with vibrating.
To change call settings: (continue on next page)
Call Tone Setting
Roger Beep Icon
Vibration Off
Vibration On

Weather (WX) Alert Mode
Turning On the Weather Alert function will allow your radio to automatically
receive NOAA weather signals and warnings from designated weather
broadcast stations. If the radio is turned ON, it will alert to Weather and
other emergency alerts broadcast by NOAA.
NOTE:
• This feature is set to OFF by default.
• Make sure the strongest Weather channel is selected for your area using
the channel selection in the previous menu.
To turn Weather Alert On or Off
Factory Reset
If the radio's display locks up or stops functioning properly, you might need
to reset your radio.
Caution:
This procedure clears all the information you have stored
Before you reset your radio, try turning it off and on again. If your radio is
still not functioning correctly you may need to reset the radio. To reset, To
reset, press and hold +button and power on button. The radio willl reset
to Channel 1.
22 23
Set Key Tones On/Off
When Key Tone is On, an audible tone will sound each time a button is
pressed.
To turn key tone on or off:
3. Choose one of the following:
a. Press the Menu button to enter the new setting and proceed to other
functions.
b. Press the Talk or Call button to enter the new setting and return to
Standby mode.
c. Do not press any buttons for 6 seconds to enter the new setting and
return to Standby mode.
NOAA All Hazards Radio Channels
You can use your radio to listen to NOAA All Hazards Radio channels
transmitting in your area.
To listen to All Hazards Radio channels:
NOTE: NOAA - National Oceanographic and Atmospheric Administration.
1. Press the Menu button until the Key Tone
icon flashes. The current on or off setting is
displayed.
2. Press the +or –button to select key tone on
or off.
1. Press and hold the Weather button until the
All Hazards Radio icon displayed. Press
the Menu button and the currently selected
All Hazards Radio channel flashes on the
display.
2. Use the +or -button to change All Hazards
Radio channels.
3. The All Hazards Radio icon will continue
to be displayed when All Hazards Radio is on.
4. To exit All Hazards Radio, press and hold the
Weather button.
1. When All Hazards Radio is on, press the
Menu button until the Weather Alert icon
flashes on display. The current Weather Alert
On or Off setting is displayed.
2. Press +or -button to turn Weather Alert On or
Off.
3. Press the Menu button again to save the new
setting and exit the Weather Alert Mode.
The Weather Alert icon show on the
display when it turned on.
During scanning (while receiving an incoming
transmission), you can choose from the following:
a. Press and hold the Talk button to communicate on that channel. Your
radio will remain on that channel and return to Standby mode.
b. Press the +or -button to resume scanning channels.
c. Press the Talk or Call button to return to Standby mode.
Set Call Tones 1-15
You can choose between 15 different Call Tone Settings to transmit a
call alert.
To change a call tone setting:
3. Choose one of the following:
a. Press the Menu button to enter the new setting and proceed to other
functions.
b. Press the Talk or Call button to enter the new setting and return to
Standby mode.
c. Do not press any buttons for 6 seconds to enter the new setting and
return to Standby mode.
Set Vibration Alert On/Off
Your radio can alert you to incoming signals by sounding an audible call
tone only or both with vibrating.
To change call settings: (continue on next page)
Weather Alert Icon
Key Tone Icon
Hazards Radio
Channel
in your radio.

24 25
However, there is no guarantee that interference will not occur in a particular installation. If this
equipment does cause harmful interference to radio or television reception, which can be
determined by turning the equipment off and on, the user is encouraged to try to correct the
interference by one or more of the following measures:
• Reorient or relocate the receiving antenna.
• Increase the separation between the equipment and receiver.
• Connect the equipment into an outlet on a circuit different from that to which the receiver is
connected.
• Consult the dealer or an experienced radio/TV technician for help.
Safety Information for Radios
Your wireless handheld portable transceiver contains a low power transmitter. When the talk button
is pushed, it sends out radio frequency (RF) signals. The device is authorized to operate at a duty
factor not to exceed 50%. In August 1996, the Federal Communications Commissions (FCC) adopted
RF exposure guidelines with safety levels for handheld wireless devices
Important
FCC RF Exposure Requirements: For body-worn operation, this radio has been tested and meets the
FCC RF exposure guidelines when used with Bushnell accessories supplied or designated for this
product. Use of other accessories may not ensure compliance with FCC RF exposure guidelines. Use
only the supplied antenna. Unauthorized antennas, modifications or attachments could damage the
transmitter and may violate FCC regulations.
Normal Position
Hold the transmitter approximately 1 inch (25mm) from your face and speak in a normal voice, with
the antenna pointed up and away.
FCC Part 15.21 Warning Statement-
NOTE: THE GRANTEE IS NOT RESPONSIBLE FOR ANY CHANGES OR MODIFICATIONS NOT
EXPRESSLY APPROVED BY THE PARTY RESPONSIBLE FOR COMPLIANCE. SUCH MODIFICATIONS
COULD VOID THE USER’S AUTHORITY TO OPERATE THE EQUIPMENT.
ISEDC Warning
This device complies with Innovation, Science, and Economic Development Canada licence-exempt
RSS standard(s). Operation is subject to the following two conditions:
(1) this device may not cause interference, and
(2) this device must accept any interference, including interference that may cause undesired
operation of the device.
ISEDC Radiation Exposure Statement
For body worn operation, this model device has been tested and meets the ISED RF exposure
guidelines when used with an accessory designated for this product or when used with an accessory
that Contains no metal and that positions of the face up minimum distance is 25 mm.
Any Changes or modifications not expressly approved by the party responsible for compliance could
void the user’s authority to operate the equipment.
Your wireless handheld portable transceiver contains a low power transmitter. When the talk button
is pushed, it sends out radio frequency (RF) signals. The device is authorized to
operate at a duty factor not to exceed 50%.
Model LPX650:
This device complies with part 15 of the FCC Rules. Operation is subject to the following two
conditions: 1) This device may not cause harmful interference, and 2) this device must accept any
interference received,including interference that may cause undesired operation.
FCC Warnings: Replacement or substitution of transistors, regular diodes or other parts of a unique
nature, with parts other than those recommended by Bushnell may cause a violation of the technical
regulations of part 95 of the FCC rules, or violation of type acceptance requirements of part 2 of the
rules.
Helpful Tip - Accessories
Recommended accessories for use with your radios are available from your
local dealer or authorized service center.
If you need assistance regarding accessories,
please visit www.shineflexglobal.com
IMPORTANT NOTICE:
This equipment has been tested and found to comply with the limits for a Class B digital device,
pursuant to Part 15 of the FCC Rules. These limits are designed to provide reasonable protection
against harmful interference in a residential installation. This equipment generates, uses and can
radiate radio frequency energy and, if not installed and used in accordance with the instructions,
may cause harmful interference to radio communications.
The NOAA NWR Frequency Table
Channel No. NWR Frequency
1 162.5500
2 162.4000
3 162.4750
4 162.4250
5 162.4500
Channel No. NWR Frequency
6 162.5000
7 162.5250
8 161.6500
9 161.7750
10 163.2750
Operation - General Specifications
Frequency Allocation and Compatibility
A = Channel No. for 70 Channel Models
B = Frequency in MHz
C = Power Output
D = Code System / Code No.
A B C D
1 462.5625 High ANY
2 462.5875 High ANY
3 462.6125 High ANY
4 462.6375 High ANY
5 462.6625 High ANY
6 462.6875 High ANY
7 462.7125 High ANY
8 467.5625 Low ANY
9 467.5875 Low ANY
10 467.6125 Low ANY
11 467.6375 Low ANY
12 467.6625 Low ANY
13 467.6875 Low ANY
14 467.7125 Low ANY
15 462.5500 High ANY
16 462.5750 High ANY
17 462.6000 High ANY
18 462.6250 High ANY
19 462.6500 High ANY
20 462.6750 High ANY
21 462.7000 High ANY
22 462.7250 High ANY
23 462.5625 High CTCSS / 38
24 462.6125 High CTCSS / 35
25 462.6625 High CTCSS / 32
26 462.7125 High CTCSS / 29
27 462.5500 High CTCSS / 26
28 462.6000 High CTCSS / 23
29 462.6500 High CTCSS / 20
30 462.7000 High CTCSS / 17
A B C D
31 462.5875 High DCS / 1
32 462.6375 High DCS / 4
33 462.6875 High DCS / 7
34 467.5625 Low DCS / 10
35 467.6125 Low DCS / 13
36 467.6625 Low DCS / 16
37 467.7125 Low DCS / 19
38 462.5750 High DCS / 22
39 462.6250 High DCS / 25
40 462.6750 High DCS / 28
41 462.7250 High DCS / 31
42 462.5625 High CTCSS / 14
43 462.6125 High CTCSS / 11
44 462.6625 High CTCSS / 8
45 462.7125 High CTCSS / 5
46 462.5500 High CTCSS / 2
47 462.6000 High CTCSS / 37
48 462.6500 High CTCSS / 34
49 462.7000 High CTCSS / 31
50 462.5875 High DCS / 2
51 462.6375 High DCS / 5
52 462.6875 High DCS / 8
53 467.5625 Low DCS / 11
54 467.6125 Low DCS / 14
55 467.6625 Low DCS / 17
56 467.7125 Low DCS / 20
57 462.5750 High DCS / 23
58 462.6250 High DCS / 26
59 462.6750 High DCS / 29
60. 462.7250 High DCS / 32
66 462.6000 High CTCSS / 13
67 462.6500 High CTCSS / 10
68 462.7000 High CTCSS / 7
69 462.5875 High DCS / 3
70 462.6375 High DCS / 6
A B C D A B C D
61 462.5625 High CTCSS / 28
62 462.6125 High CTCSS / 25
63 462.6625 High CTCSS / 22
64 462.7125 High CTCSS / 19
65 462.5500 High CTCSS / 16

26 27
IMPORTANT NOTICE:
Changes or modifications to this unit not expressly approved by the party responsible for compliance
could void the user’s authority to operate the equipment.
This device complies with Part 15 of the FCC Rules. Operation is subject to the following two
conditions: 1) This device may not cause harmful interference, and 2) this device must accept any
interference received,including interference that may cause undesired operation.
This equipment has been tested and found to comply with the limits for a Class B digital device,
pursuant to Part 15 of the FCC Rules. These limits are designed to provide reasonable protection
against harmful interference in a residential installation. This equipment generates, uses and can
radiate radio frequency energy and, if not installed and used in accordance with the instructions,
may cause harmful interference to radio communications.
However, there is no guarantee that interference will not occur in a particular installation. If this
equipment does cause harmful interference to radio or television reception, which can be
determined by turning the equipment off and on, the user is encouraged to try to correct the
interference by one or more of the following measures:
• Reorient or relocate the receiving antenna.
• Increase the separation between the equipment and receiver.
• Connect the equipment into an outlet on a circuit different from that to which the receiver is
connected.
• Consult the dealer or an experienced radio/TV technician for help.
Safety Information for Radios
Your wireless handheld portable transceiver contains a low power transmitter. When the talk button
is pushed, it sends out radio frequency (RF) signals. The device is authorized to operate at a duty
factor not to exceed 50%. In August 1996, the Federal Communications Commissions (FCC) adopted
RF exposure guidelines with safety levels for handheld wireless devices
Important
FCC RF Exposure Requirements: For body-worn operation, this radio has been tested and meets the
FCC RF exposure guidelines when used with Bushnell accessories supplied or designated for this
product. Use of other accessories may not ensure compliance with FCC RF exposure guidelines. Use
only the supplied antenna. Unauthorized antennas, modifications or attachments could damage the
transmitter and may violate FCC regulations.
Normal Position
Hold the transmitter approximately 1 inch (25mm) from your face and speak in a normal voice, with
the antenna pointed up and away.
FCC Part 15.21 Warning Statement-
NOTE: THE GRANTEE IS NOT RESPONSIBLE FOR ANY CHANGES OR MODIFICATIONS NOT
EXPRESSLY APPROVED BY THE PARTY RESPONSIBLE FOR COMPLIANCE. SUCH MODIFICATIONS
COULD VOID THE USER’S AUTHORITY TO OPERATE THE EQUIPMENT.
ISEDC Warning
This device complies with Innovation, Science, and Economic Development Canada licence-exempt
RSS standard(s). Operation is subject to the following two conditions:
(1) this device may not cause interference, and
(2) this device must accept any interference, including interference that may cause undesired
operation of the device.
ISEDC Radiation Exposure Statement
For body worn operation, this model device has been tested and meets the ISED RF exposure
guidelines when used with an accessory designated for this product or when used with an accessory
that Contains no metal and that positions of the face up minimum distance is 25 mm.
Any Changes or modifications not expressly approved by the party responsible for compliance could
void the user’s authority to operate the equipment.
Your wireless handheld portable transceiver contains a low power transmitter. When the talk button
is pushed, it sends out radio frequency (RF) signals. The device is authorized to
operate at a duty factor not to exceed 50%.
Model LPX650:
This device complies with part 15 of the FCC Rules. Operation is subject to the following two
conditions: 1) This device may not cause harmful interference, and 2) this device must accept any
interference received,including interference that may cause undesired operation.
FCC Warnings: Replacement or substitution of transistors, regular diodes or other parts of a unique
nature, with parts other than those recommended by Bushnell may cause a violation of the technical
regulations of part 95 of the FCC rules, or violation of type acceptance requirements of part 2 of the
rules.
Warranty & Trademark Acknowledgment
Limited Lifetime Warranty on Radio
Shine Flex warrants to the original consumer purchaser only that this product and the
component parts thereof, will be free from defects in workmanship and materials. During
this period, Shine Flex will, repair or replace, at its sole option and discretion, this product or
any defective parts. Shine Flex’s liability hereunder shall be limited to repair or replacement
of the defective part or parts, and such correction shall constitute a fulfillment of all of Shine
Flex’s warranties hereunder.
This limited warranty does not apply to accessories and consumables and is only valid for
the original consumer purchaser in limited jurisdictions and is not transferrable. This limited
warranty will automatically terminate prior to expiration if this product is sold or otherwise
transferred to another party. The product must be purchased from Shine Flex or an
authorized dealer or the warranty is void. This limited warranty is valid only for products
purchased and utilized in specific jurisdictions. Please visit our website at
www.shineflexglobal.com for a list of jurisdictions wherein this limited warranty is valid.
This limited warranty does not cover damage due to misuse, abuse, negligence, acts of God,
accident, commercial use or modification of, or to any part of this product. This warranty
does not cover damage due to improper operation, maintenance or installation; ordinary
wear and tear; or attempted alterations or repairs by anyone other than Shine Flex or
someone authorized by Shine Flex to do warranty work. Any unauthorized alterations or
repairs will void this warranty. This limited warranty does not cover product sold AS IS or
WITH ALL FAULTS. This limited warranty is invalid if the factory applied serial number or
date stamp has been altered, defaced or removed from this product. This limited warranty
does not cover product purchased or utilized in a jurisdiction not covered.
The procedure for obtaining service and support, and the applicability of this warranty, will
vary depending on the country or jurisdiction in which you purchase and utilize the product.
For details on obtaining product service, support and other warranty information please visit
www.shineflexglobal.com.
This warranty gives you specific legal rights, and you may also have other rights which vary
from state to state and country to country.
EXCEPT AS EXPRESSLY SET FORTH IN THIS WARRANTY, SHINE FLEX MAKES NO OTHER
WARRANTIES, EXPRESSED OR IMPLIED, INCLUDING ANY IMPLIED WARRANTIES OF
MERCHANTABILITY AND FITNESS FOR A PARTICULAR PURPOSE. SHINE FLEX EXPRESSLY
DISCLAIMS ALL WARRANTIES NOT STATED IN THIS LIMITED WARRANTY. ANY IMPLIED
WARRANTIES THAT MAY BE IMPOSED BY LAW ARE LIMITED TO THE TERMS OF THIS
EXPRESSED WARRANTY.
LIMITATION OF REMEDIES AND DAMAGES. REPAIR OR REPLACEMENT AS PROVIDED UNDER
THIS WARRANTY IS THE EXCLUSIVE REMEDY OF THE CONSUMER. SHINE FLEX SHALL NOT
BE LIABLE FOR ANY INCIDENTAL OR CONSEQUENTIAL DAMAGES, INCLUDING BUT NOT
LIMITED TO ATTORNEYS’ FEES AND/OR COSTS OF LITIGATION, FOR BREACH OF ANY
EXPRESS OR IMPLIED WARRANTY ON THIS PRODUCT. SHINE FLEX IS NOT LIABLE FOR ANY
DAMAGES CAUSED BY THE PRODUCT OR BY THE PRODUCT TO PERFORM, INCLUDING ANY
LOST PROFITS, LOST SAVINGS, INCIDENTAL DAMAGES, OR CONSEQUENTIAL DAMAGES.
SHINE FLEX IS NOT LIABLE FOR ANY CLAIM MADE BY A THIRD PARTY OR MADE BY YOU FOR
A THIRD PARTY. THIS LIMITATION APPLIES WHETHER DAMAGES ARE SOUGHT, OR A CLAIM
Table of contents