soldered to the solar collectors. It is easiest to do this before the collector is brought to the roof,
or at least before you tie down the solar collector. Adapters that screw on should also be
installed before the collector is tied down. The following pictures illustrate the collector
adapters
used with Butler Sun 1 flat plate collectors.
Figure 1. Butler Sun Flat Plate Adapter Kit Usage
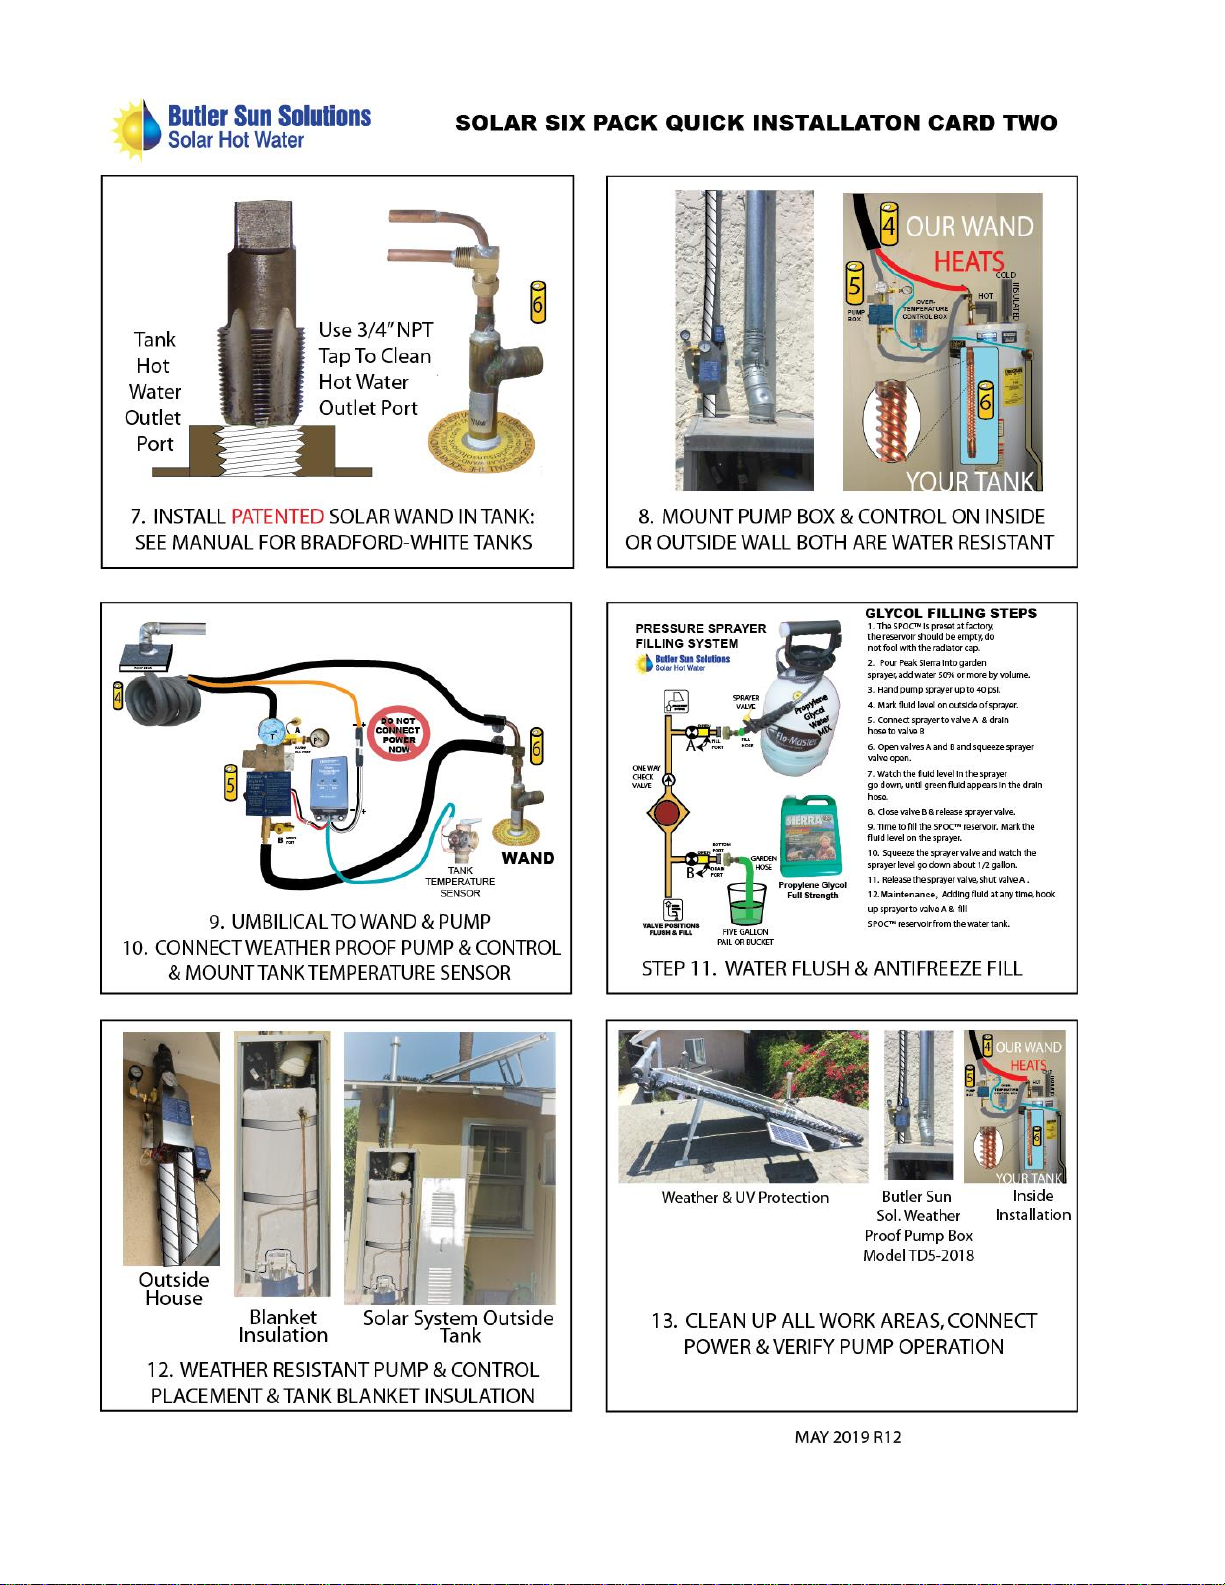
STEP 3. SPOCTM MOUNTING
Step 3A: After the collector is mounted, with the adapters in place, it is time to put the SPOCTM
in place. The SPOC™is mounted parallel and even with the top of the collector by placing lifting
brackets screwed into the collector side wall, self-
tapping screws through the straps that hold the
SPOC™onto the lifting brackets, See Figure 3. The radiator cap
must be at the top, and the
radiator section should slope slightly downward towards the collector
connection.
Step 3B: Use the short length of black hose provided to connect the SPOCTM to the collector
outlet Tee-fitting. Be sure to put the hose on the port that is labeled SPOC™and not where the
collector outlet hose gets connected.
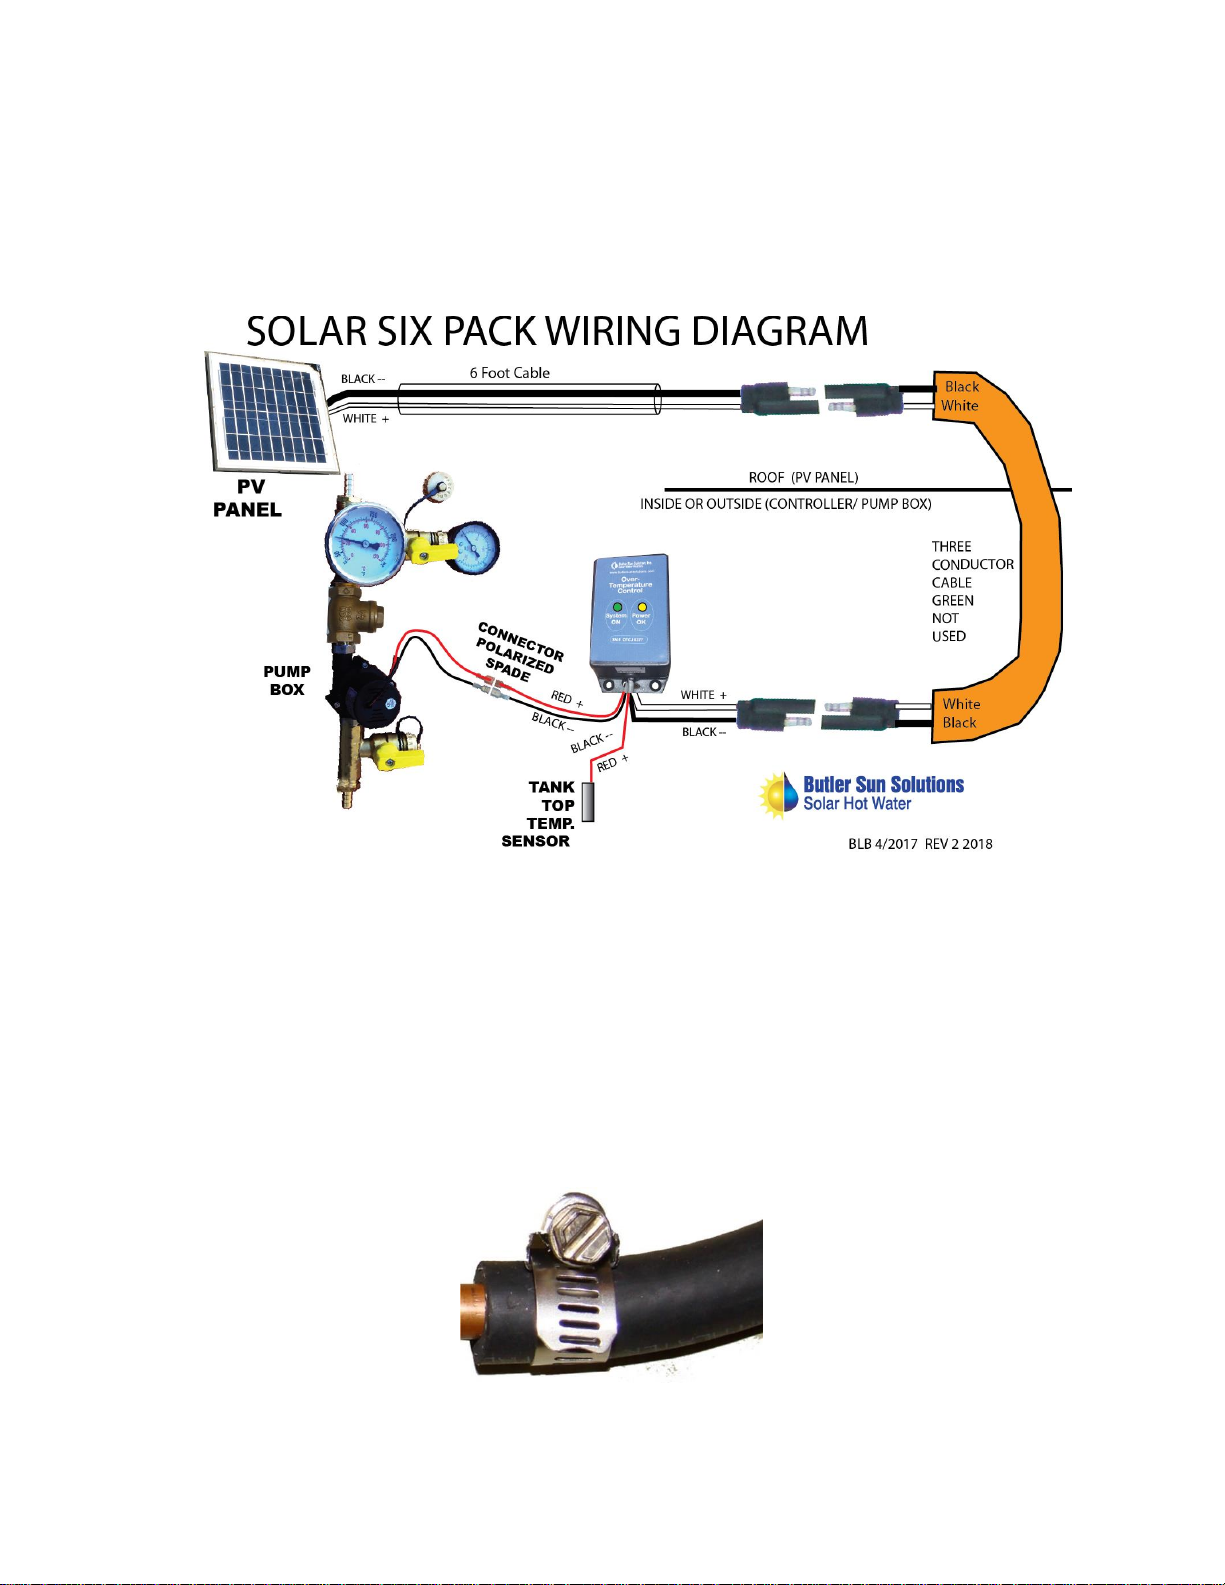
STEP4. ROUTING THE UMBILICAL TO OR THROUGH THE ROOF
Step 4A: Plan the route of the umbilical from the collectors to the water tank. This may mean
going through an attic or crawl space. Typically, the umbilical penetrates through the roof below
the bottom of the solar collector. In some cases, it is possible to avoid a roof penetration by
routing it around the eaves. Doing this properly will save time and money.
Step 4B: If you must make a roof penetration, use flashing found at your local building supply
store, which will meet local roofing codes. Commercial “Roof Jack” flashing is designed to
prevent rain water from entering the house and vermin from using the penetration as a pathway.
Make sure that the flashing is fitted and sealed to the roof properly with roof tar or proper
sealants that meet local code, See Figures 4 & 8.
STEP 5. MAKING UMBILICAL CONNECTIONS ON THE ROOF
Step 5A: First, make all of the fluid connections. Connect the outlet hose to the fluid outlet near
the highest point on the solar collector. Before installing the hoses put tape on one hose and


 Operation and maintenance instructions")