C.R. Laurence LD324 Manual

Visit us at &")&$%#for international toll free information 1
© COPYRIGHT C.R. LAURENCE CO., INC. 2012
Subject to printing errors and design changes over which we have no contro . In the event of prob ems p ease contact our Customer Service Department.
AVDB3063_08/12
AC.R. LAURENCE Co., INC.
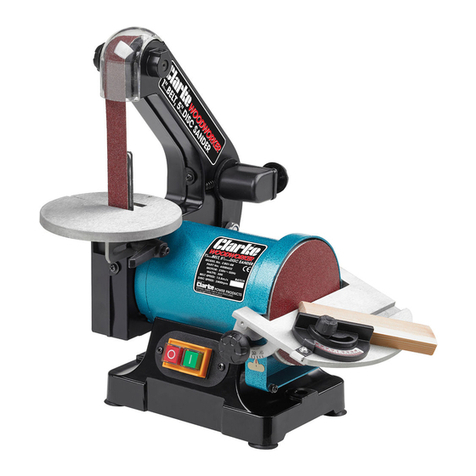
3" x 24" Belt Sander
$'(&)( %$$)"
!&3)"
Read this aterial before using this product.
Failure to do so can result in serious injury.
SAVE THIS MANUAL
Care for the environ ent!
Tool ust not be discarded with household waste!
This product contains electrical or electronic co ponents that should be
recycled. Leave the product for recycling at the designated station e.g.
the local authority's recycling station.

Visit us at &")&$%#for international toll free information 2
A
!%"
$*&)&11.37869(8.437&.196*84+4114:&11.37869(8.4371.78*)'*14:2&;
6*7918 .3 *1*(86.( 7-4(0 +.6* &3)46 7*6.497 .3/96; !-* 8*62 54:*6 8441 .3 &11 4+
8-* :&63.3,7 1.78*) '*14: 6*+*67 84 ;496 (46)*) 54:*6 8441 46 '&88*6; 45*6&8*)
(46)1*7754:*68441
#! !"!
$
a) Keep work area clean and well lit. Cluttered and dark areas increase the risk of accidents.
b) Do not operate power tools in explosive atmospheres, such as in the presence of flammable
liquids, gases or dust. Power tools create s arks which may ignite the dust or fumes.
c) Keep children and bystanders away while operating a power tool.
Distractions can cause you to lose control.
! !%
a) Power tool plugs must match the outlet. Never modify the plug in any way.
Do not use any adapter plugs with earthed (grounded) power tools.
Unmodified lugs and matching outlets will reduce risk of electric shock.
b) Avoid body contact with earthed or grounded surfaces such as pipes, radiators, ranges, and
refrigerators. There is an increased risk of electric shock if your body is earthed or grounded.
c) Do not expose power tools to rain or wet conditions. Water entering a ower tool will
increase the risk of electric shock.
d) Do not abuse the cord. Never use the cord for carrying, pulling or unplugging the power tool.
Kee cord away from heat, oil, shar edges or moving arts. Damaged or entangled cords
increase the risk of electric shock.
e) When operating a power tool outdoors use an extension cord suitable for outdoor use.
Use of a cord suitable for outdoor use reduces the risk of electric shock.
f) Inspect tool cords periodically and, if damaged, have them repaired by an authorized service
facility. Inspect extension cords periodically and replace if damaged.
!%
a) Stay alert, watch what you are doing and use common sense when operating a power tool.
Do not use a power tool while you are tired or under the influence of drugs, alcohol, or
medication. A moment of inattention while o erating ower tools may result in serious
ersonal injury.
b) Use safety equipment. Always wear eye protection. Safety equi ment such as dust masks,
non-skid safety shoes, hard hats, or hearing rotection used for a ro riate conditions will
reduce the risk of ersonal injuries.
c) Avoid accidental starting. Ensure the switch is in the OFF position before plugging in the tool.
Carrying ower tools with your finger on the switch or lugging in ower tools that have
the switch ON increases the risk of accidents.
d) emove any adjusting key or wrench before turning the power tool ON. A wrench or a key
left attached to a rotating art of the ower tool increases the risk of ersonal injury.

Visit us at &")&$%#for international toll free information 3
A
!%"
e) Do not overreach. Keep proper footing and balance at all times. This enables better control
of the ower tool in unex ected situations.
f) Dress properly. Do not wear loose clothing or jewelry. Keep your hair, clothing, and gloves
away from moving parts. Loose clothes, jewelry or long hair can be caught in moving arts.
g) If devices are provided for the connection of dust extraction and collection facilities, ensure
these are connected and properly used. Use of these devices can reduce dust related hazards.
$!"
a) Do not force the power tool. Use the correct power tool for your application. The correct
ower tool will do the job better and safer at the rate for which it was designed.
b) Do not use the power tool if the switch does not turn ON and OFF. Any ower tool that cannot
be controlled with the switch is dangerous and must be re aired.
c) Disconnect the plug from the power source before making any adjustments, changing
accessories, or storing power tools. Such reventive safety measures reduce the risk
of starting the ower tool accidently.
d) Store idle power tools out of the reach of children. Do not allow persons unfamiliar with
the power tool or these instructions to operate the power tool. Power tools are dangerous
in the hands of children.
e) Properly maintain power tools. Check for misalignment or binding of moving parts, breakage
of parts and any other condition that may affect the power tool's operation. If damaged, have the
power tool repaired before use. Many accidents are caused by oorly maintained ower tools.
f) Keep cutting tools sharp and clean. Pro erly maintained cutting tools with shar cutting
edges are less likely to bind and are easier to control.
g) Use the power tool, accessories and tool bits etc., in accordance with these instructions and
in the manner intended for the particular type of power tool, taking into account the working
conditions and the work to be performed. Use of the ower tool for o erations different
than intended could result in a hazardous situation.
#
a) Have your power tool serviced by a qualified repair person using only identical replacement
parts. This will ensure that the safety of the ower tool is maintained.
" !
#! !!Make sure the switch is in the "OFF" position before
plugging in.
$% $!$!Wait for the sanding belt to come to a complete stop
before any type of adjustment or maintenance.
$%#!
$% $" ! !The mask filter should be
replaced regularly.
! should be done in the work area to prevent
ingesting glass particles.

!!$!Keep tool clean for safest and best performance. Follow
instructions for operation and changing accessories.
$If any parts are missing, do not operate your belt sander until missing parts are
replaced. Failure to do so could result in serious personal injury.
$Do not use this tool as a component of other tools. Also, do not use
attachments or accessories not recommended for use with this product. Any such use could
result in possible serious injury.
! !
Belt Size……………………………..…3" x 24"
Belt Speed…………………………350M/MIN
Voltage………………………………...…120V
Amperage…………………………………10A
Cycle/Phase………………….60Hz, 1 Phase
!!!$%"!
Visit us at &")&$%#for international toll free information 4
A
!%"
)'(
& &$
%!%$
)((%$
&%$&)'
%*&
$ $"(
&! $$%
$ $"(
)&
$ $"(
$' %$*&
! ! "
Belt Size……………………………..…76 x 610 mm
Belt Speed…………………………..........350M/MIN
Voltage………………………………...…..........240V
Amperage………………………………….....1200W
Cycle/Phase…………………...........50Hz, 1 Phase

Visit us at &")&$%#for international toll free information 5
A
!!
!"%"!
Warning! Always hold the belt sander firmly with both
hands while sanding. To start the belt sander, press
the On/Off Switch (A) Fig. 2. To stop the belt sander,
release the On/Off Switch. For continuous operation
press and hold the On/Off Switch (A) and then press
the Lock-On Button (B). You can now release the
On/Off Switch and the belt sander will continue to
operate without holding the switch. To stop the belt
sander, press and release the On/Off Switch.
! !
To change the sanding belt, pull Lever (A) Fig. 3
which will release the belt tension. Pull the sanding
belt off the two rollers (B). Also make sure the rear
roller is free of all debris before installing belt. Place
the new sanding belt in place around the two rollers.
The belt should be centered between the front and
the rear rollers. Push the Lever (A) towards the rear
to increase the tension on the sanding belt.
" ! !!
To adjust the sanding belt tracking, turn the sander
upside down. Hold the sander firmly with one hand,
start the motor and release the On/Off Switch
immediately after observing the belt tracking. If the
sanding belt runs outward, turn the Tracking Knob
(A) Fig. 4 clockwise and counterclockwise if the
sanding belt runs inward. Make this adjustment until
the outer edge of the belt is even with the outer edge
of both rollers (B).
" !!
Warning! Before installing dust bag, unplug the belt
sander from its source of power. When using your
belt sander, dust and grit are produced, therefore it
is important to use a dust bag (A) Fig. 5. To connect
the dust bag to the dust collection port on the belt
sander, place the right edge collection port as shown
on Fig. 5. Press the dust bag spring at the top of the
dust bag (B) together, this will widen opening. Slide
the dust bag over dust collection port and release.
)&
)&
)&
)&

Visit us at &")&$%#for international toll free information 6
A
!!
Caution! Do not allow the dust bag to get too full. Empty the dust bag regularly to improve the dust
collection. Do not dispose of the dust particulate in an open fire. You should always empty the dust bag
each time before you store the tool away.
Caution! When working on etal surfaces, do not use dust bag or a vacuu cleaner because sparks
are generated. Wear safety glasses and a dust mask. Due to the danger of fire, do not use your belt sander
to sand magnesium surfaces. Do not use for wet sanding.
!!
Always start your belt sander before it is in contact with the workpiece. When possible, clamp your
workpiece to a work bench. Use the correct grit sanding belt for your application.
!
1) Never apply excessive force on your belt sander. This may cause overloading and motor damage.
2) Keep your machine clean at all times. Always keep the air cooling vents clear of debris using a clean
dry paint brush. Compressed air is not recommended because of the airborne particulates it creates.
3) emove the electrical plug from the socket before carrying out any work on the device.
4) Never use caustic agents to clean the plastic parts.
5) Check the carbon brushes regularly (dirty or worn carbon brushes may result in excessive sparking).
6) This electric appliance is built in accordance with the relevant safety rules. epair of electric appliance
must only be carried out by experts, otherwise it may cause considerable danger for the user.
This manual suits for next models
1
Table of contents
