1
www.cablematters.com
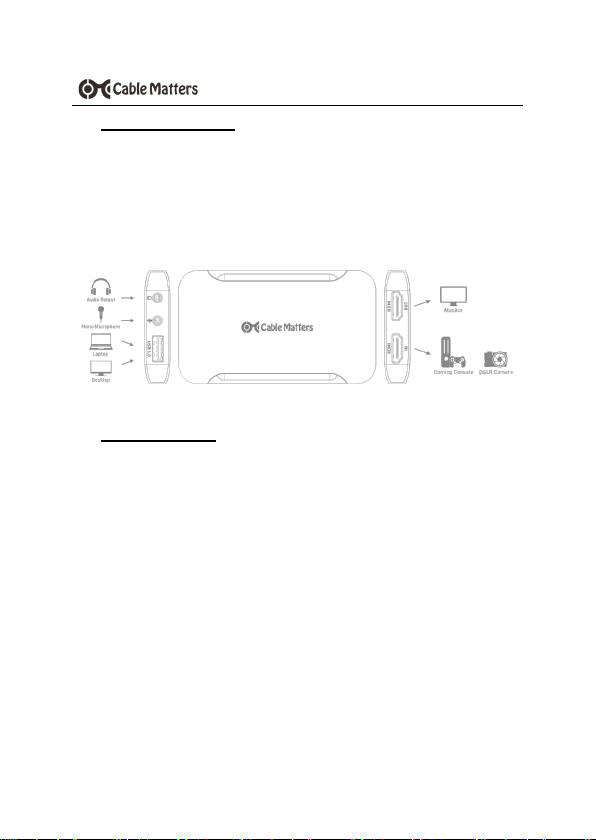
USB 3.0 HD Video Capture Device
www.cablematters.com
1. Introduction
1.1 Introduction
Thank you for your purchase from Cable Matters® Inc., the ‘Reliable Connectivi-
ty’ company. This User Manual provides an overview of the features and installa-
tion of your new
USB 3.0 HD Video Capture Device
Please read these instructions carefully before connecting, operating or configur-
ing this product. Please keep this manual for future reference.
1.2 Copyright and Trademarks
Cable Matters® is a registered trademark or trademark of Cable Matters Inc. All
rights reserved. All other trademarks are the property of their respective owners.
The terms HDMI®, HDMI® High-Definition Multimedia Interface, and the HDMI®
Logo are trademarks or registered trademarks of HDMI® Licensing Administra-
tor, Inc. USB Type-C® and USB-C® are registered trademarks of USB Imple-
menters Forum. macOS® is a trademark of Apple Inc., registered in the U.S. and
other countries. Windows® is a registered trademark of Microsoft Corporation in
the U.S. and other countries.
1.3 FCC Compliance Statement
This device complies with Part 15 of the FCC Rules. Operation is subject to the
following two conditions: 1) This device must not cause harmful interference, and
2) this device must accept any interference received, including interference that
may cause undesired operation.
2. PRODUCT OVERVIEW
2.1 Package Contents
Please check that the following items are contained in the box:
• USB 3.0 HD Video Capture Device
• USB-A 3.0 Male to Male Cable with USB-A to USB-C® Adapter
• User Manual