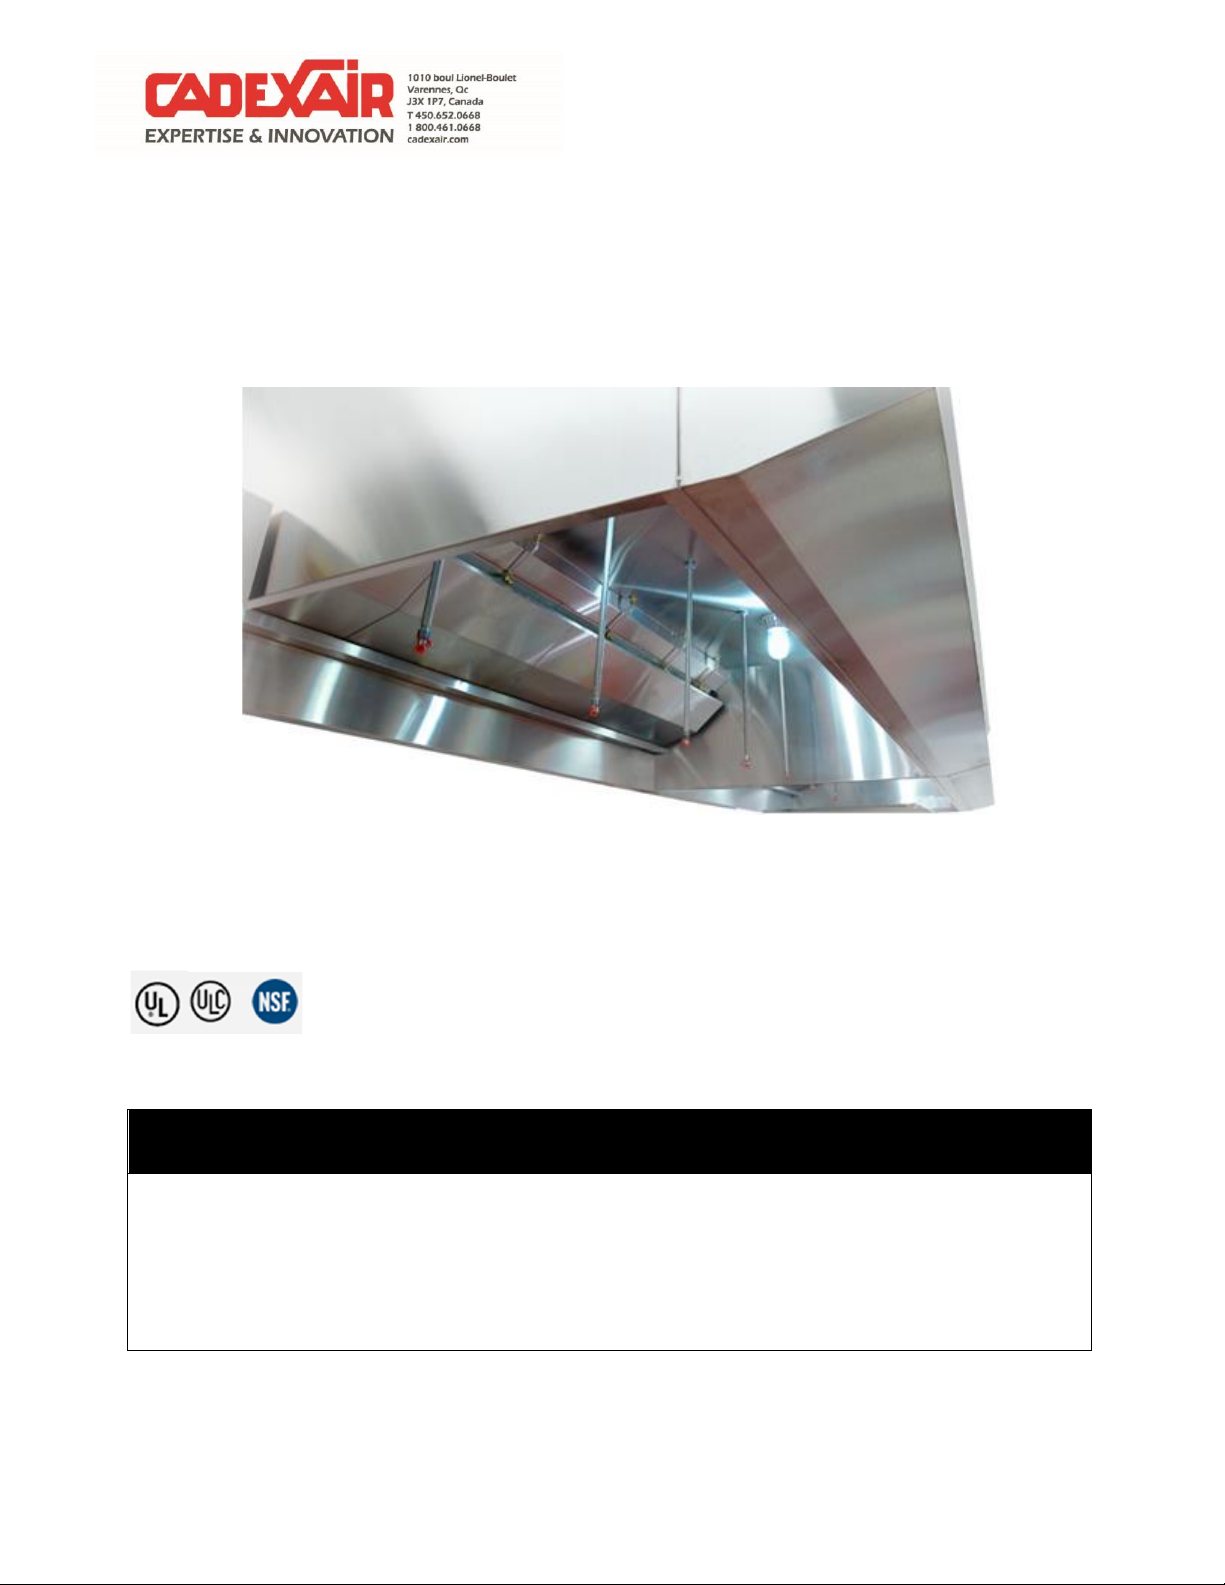
CADEXAIR CA Series Manual

User Manual CA Series
Version : V1.0

Doc150313-01
Installation and maintenance manual
www.cadexair.com 1 1010, Boulevard Lionel Boulet
1-800-461-0668 Varennes, Québec, Canada J3X 1P7
Installation and maintenance manual
for commercial kitchen hoods
IMPORTANT / ATTENTION / DANGER
A commercial kitchen hood must always be installed by professionals according to the local
construction codes in force.
A commercial kitchen hood ventilation system can have many different power sources such
as electric, gas and mechanical involving the hood system and other systems. Make sure to
have the necessary qualifications before proceeding to installations, repairs or

Doc150313-01
Installation and maintenance manual
www.cadexair.com 2 1010, Boulevard Lionel Boulet
1-800-461-0668 Varennes, Québec, Canada J3X 1P7
maintenance. The lack of knowledge of this type of system can cause material damage,
injuries and death.
Table of content
Delivery, handling, reception and storage ...........................................................................................................4
Installation............................................................................................................................................................4
Material clearance .........................................................................................................................................4
Kitchen exhaust hood positioning................................................................................................................4
Weight validation............................................................................................................................................5
Lifting, suspension and levelling..................................................................................................................5
Connection of the kitchen exhaust hood collar.........................................................................................5
Exhaust hood collar joint and air supply collar joint on PE series..........................................................6
Self-cleaning hood CA1M series plumbing fitting.....................................................................................6
Electrical wiring..............................................................................................................................................6
Access on top of exhaust hoods .................................................................................................................6
Exhaust hood skirting....................................................................................................................................6
Silicone usage................................................................................................................................................6
Seismic performance.....................................................................................................................................6
Fire suppression system...............................................................................................................................6
Filters installation and Geo-Vary grease extractor adjustment...............................................................7
Air flow balancing.................................................................................................................................................7
Exhaust hood with baffle filters CAS series...............................................................................................7
Exhaust hood with Geo-Vary grease extractors CAM series..................................................................7
Air flow adjustment........................................................................................................................................8
Maintenance.........................................................................................................................................................8
Stainless Steel................................................................................................................................................8
Daily maintenance.........................................................................................................................................9
Weekly maintenance..................................................................................................................................... 9
Monthly maintenance....................................................................................................................................9
Geo-Vary grease extractor maintenance...................................................................................................9

Doc150313-01
Installation and maintenance manual
www.cadexair.com 3 1010, Boulevard Lionel Boulet
1-800-461-0668 Varennes, Québec, Canada J3X 1P7
Inspection and cleaning of the commercial kitchen exhaust system.....................................................9
Inspection and maintenance of the exhaust hood fire suppression system.........................................9
Tips and tricks..............................................................................................................................................10
Problems and solutions ......................................................................................................................................11
ANNEX 1: Exhaust hood weight evaluation table...............................................................................................14
ANNEX 2 : Assembly diagram of an exhaust hood with mecanical joints (CA-W series) ...................................15
ANNEX 3: Installation, adjustment and cleaning of Geo-Vary grease extractor................................................16
ANNEX 4: Exhaust system NFPA96 inspection schedule....................................................................................17

Doc150313-01
Installation and maintenance manual
www.cadexair.com 4 1010, Boulevard Lionel Boulet
1-800-461-0668 Varennes, Québec, Canada J3X 1P7
Delivery, handling, reception and storage
Delivery
Kitchen hoods are bulky units; it is the buyer’s
responsibility to coordinate adequately the delivery on
site in order to have the best mode of transport such
as flat bed, small truck for narrow access or tailgates.
Handling
The buyer must provide necessary equipment on site
to unload the truck. When using a forklift for any item
over 6 foot (1.8 meter), the forklift must be equipped
with long forks.
Reception
Upon reception, inspect the material to make sure it is
in good condition before signing the bill of lading or any
approval document provided by the carrier. If there is
damage, write it clearly on the bill of lading or any
approval document provided by the carrier. As soon
as possible, advise Cadexair and provide pictures of
the damaged equipment.
Verify the packing slip attached to the bill of lading to
make sure all the items listed on the packing slip are
received. It is possible that some items are note sent
in the same shipment. Refer to the packing list
included with the bill of lading for verification.
Claims on missing items must be sent within 72 hours
following the reception of material. If claims are done
after this delay, Cadexair reserves the right to refuse
the claim.
Storage
Do not store the exhaust kitchen hood outside; avoid
exposing the exhaust kitchen hood to the sun and to a
temperature above 35° Celsius. These conditions can
affect the adherence of the protective film glue
protecting the exhaust kitchen hood and may damage
the stainless steel when removing the protective film.
Installation
IMPORTANT
Cadexair does not take responsibility for
the installation of the exhaust kitchen
hood on site unless it is clearly stated in
the sales contract.
A commercial exhaust kitchen hood must
always be installed according to the
applicable NPFA 96 edition and local
standards.
Cadexair does not recommend walking
or standing on top of the exhaust kitchen
hoods. These actions may damage and
deform the exhaust kitchen hood which
will void the guaranty. If an access is
mandatory, installed boards to distribute
the weight evenly on the exhaust kitchen
hood joints and not to the center of the
stainless steel sheets. If needed,
additional supports must be used to
support the boards.
Material clearance
Make sure to respect the clearance standards from
combustible and semi-combustible material. The
exhaust kitchen hood must be installed 3 inches
(75mm) from semi-combustible classified material and
18 inches (460mm) from combustible material. This
clearance standard is applicable to walls, ceiling and
structural components of the building. Verify with the
fabrication plans if clearance reduction methods have
been applied.
Kitchen exhaust hood positioning
Make sure to respect the kitchen exhaust hood
homologation when installing. The hood must be
installed to 78 inches (1980mm) from the finished floor
in the front. The exhaust kitchen hood must have an
overhang of 6 inches (150mm) on each side and an

Doc150313-01
Installation and maintenance manual
www.cadexair.com 5 1010, Boulevard Lionel Boulet
1-800-461-0668 Varennes, Québec, Canada J3X 1P7
overhang of 12 inches (305mm) in front of the cooking
equipment or according to the homologation stickers
affixed on the kitchen exhaust hood.
Validate with the kitchen exhaust hood shop drawings
for dimensions to install the kitchen exhaust hood at
the right place (hood orientation, hood position in
cooking island, etc.).
When the kitchen exhaust hood is on the floor, place a
protection material under the hood to avoid damages
to the stainless steel.
Weight validation
Perform validation of the weight of each kitchen
exhaust hood according to the hoods weight table to
make sure your anchorage and methodology are
appropriate to the weight of the component.
Lifting, suspension and levelling
Fix the anchor points to the building’s structure
according to the position of the kitchen exhaust hood
mounting brackets and install 7/16 inches (11mm)
threaded rods in the anchor points according to the
positions of the brackets. See below for the typical
positioning of exhaust hood mounting brackets
without spacer for the combustible material
clearance.
Adjust the length of threaded rods to respect the
kitchen exhaust hood height installation.
Lift the kitchen exhaust hood and fix the hood with the
threaded rods. All of the kitchen exhaust hood
mounting brackets must be held by a threaded rod.
Adjust the height of the hood via the threaded rods
bolts installed in the mounting brackets to level the
kitchen exhaust hood.
When lifting an island exhaust hood with assembly
joints, we suggest proceeding to the assembly of the
sections on the ground and then lifting the whole
assembly of the exhaust kitchen hoods. Refer to
annex 2 for assembly.
IMPORTANT
Maintain the kitchen exhaust hood
relatively levelled when lifting to avoid
flexion and torsion of the hood. We
highly recommend to use a lifting device
such as Genie Lift.
During installation of multiple kitchen
exhaust hood, we highly recommend to
use a laser level device. Each mounting
bracket must be used for the suspension
of the kitchen exhaust hood.
Connection of the kitchen exhaust hood collar
IMPORTANT
According to the NFPA96 code, the duct
must be at minimum made from 16
gauge steel or 18 caliber stainless steel.
The duct must be welded entirely and
waterproof.
Sometimes there are openings made in
factory on the kitchen exhaust hood.
Always make sure that these openings
are not obstructed for future installation
of components on site.
The connection of the exhaust collar must be made
with a full and continuous welding. While welding,
protect the stainless steel surfaces to avoid
contamination.

Doc150313-01
Installation and maintenance manual
www.cadexair.com 6 1010, Boulevard Lionel Boulet
1-800-461-0668 Varennes, Québec, Canada J3X 1P7
It is possible to connect the kitchen exhaust hood collar
according to the following figure from NFPA96.
Exhaust hood collar joint and air supply collar joint
on PE series
Type 2, C3 series exhaust hood are note regulated by
NFPA 96 standards. A welded duct is not mandatory.
The junction can be soldered by point to intervals from
1 to 2 inch (25 to 50 mm) or with metal screws every 3
to 6 inch (75 to 150 mm).
Self-cleaning hood CA1M series plumbing fitting
Self-cleaning hood series are equipped with a NPT
type 3/8 brass fitting for each hood section. CA-W
exhaust hood series are equipped with 2 connections.
Single and double hoods will be provided with a
connection for a 2 inch male NPT drain.
Electrical wiring
Hoods are frequently equipped with lighting.
Depending on the product, the lighting is pre-wired by
hood section to a junction box. Certain model
requires that each fixture to be connected. Refer to
the schematic of this control provided on the
manufacturing plans to ensure that the wiring is done
properly.
Access on top of exhaust hoods
Provide an access on top of the hood to perform
maintenance, electrical wiring and access control
components, plumbing fittings, and fire suppression
system components even after the installation and
construction is completed.
Exhaust hood skirting
It is possible to install a hood skirting provided by
Cadexair or not above the hood. The installation
method may vary according to the exhaust hood
model. The hood skirting can be installed with a “Z”
component installed on the back panel of the hood
skirting. Depending on the height of the hood skirting,
tracks or any other methods might be necessary to
support the hood skirting. An assembly with screws
allow keeping corners together.
IMPORTANT
Never pierce the hood for installation of
hood skirting, suspended ceilings or
other. This will void the exhaust hood
homologation
Silicone usage
Once the exhaust hood is in place, it is recommended
to apply a silicone joint between different hood
sections or between the exhaust hood and walls.
Recommended silicone: Kason RubbaSeal, aluminum
color
Seismic performance
It is the buyer’s responsibility to perform a seismic
installation according to plans provided by a seismic
specialized engineer.
Fire suppression system
According to NFPA 96, a fire suppression system is
mandatory with this type of hood above cooking
equipment for the exhaust ducts and cooking
equipment. This system is activated by fusible links or
thermal detectors integrated to the exhaust hood. In
case of fire, the air exhaust is maintained and the air
supply is stopped. Filters housing, exhaust collar and
cooking surface are sprayed with a chemical product.
Energy sources like gas and electricity are interrupted
for the cooking equipment and hood lightings and an
alarm system sounds.

Doc150313-01
Installation and maintenance manual
www.cadexair.com 7 1010, Boulevard Lionel Boulet
1-800-461-0668 Varennes, Québec, Canada J3X 1P7
Filters installation and Geo-Vary grease extractor
adjustment
Before starting the exhaust hood, install filters starting
with inserting the top of the filter first in the top slot then
lay down the base of the filters in the bottom slot where
grease will be collected.
Geo-Vary grease extractor has a pre-determined
setting as well as an adjustment level. The Geo-Vary
identification must always be in front. Perform the
adjustment according to the label in each exhaust
hood. Refer to Annex 3.
Air flow balancing
Exhaust hood with baffle filters CAS series
Start the exhaust fan and validate the rotation direction
before starting the air balancing and make sure all
filters are installed in the exhaust hood. Have in hand
the specified air flow requirement for the good
functioning of the exhaust hood.
Cadexair recommends the following method with
measurements read with a propeller anemometer with
a 2.75 inch wheel (70 mm).
Perform 5 speed readings in the filters slot according
to the image below. Readings must be performed
perpendicularly to the filters at an approximate
distance of 2 inch (50 mm). Evaluate the average
speed by filters adding the 5 speed values then divided
by 5.
Then, multiply the average speed value by an effective
area factor according to the filters size (refer to table
below).
Size
Effective Area
H x W (in)
SQ.FT
SQ M
16 x 16
1,36
0,126
16 x 20
1,75
0,163
16 x 25
2,24
0,208
20 x 16
1,75
0,163
20 x 20
2,25
0,209
20 x 25
2,88
0,268
For Imperial calculations, use air flow speed units in
feet per minute and use the effective area in square
foots (SQ.FT) to get an air flow in cubic foot per minute
(CFM).
For Metric calculations, use air slow speed units in
meters per hour and use the effective area in square
meters (SQ.M) to get an air flow in cubic meter per
hour. To convert a cubic meter per hour air flow into
liters per seconds, multiply the value by 0.278.
Exhaust hood with Geo-Vary grease extractors
CAM series
Before proceeding to balancing, make sure that the
filters are installed in the exhaust hood and adjusted
as indicated on the label inside the exhaust hood
(Refer to Annex 3).
Start the exhaust fan and validate the rotation direction
before starting the air balancing. Have in hand the
specified air flow requirement for the good functioning
of the exhaust hood.
Cadexair recommends the following method with
measurements read with a propeller anemometer with
a 2.75 inch wheel (70 mm).
Perform 3 speed readings in the filters slot according
to the image below. Readings must be performed
perpendicularly to the filters top opening at an
approximate distance of 2 inch (50 mm). Evaluate the

Doc150313-01
Installation and maintenance manual
www.cadexair.com 8 1010, Boulevard Lionel Boulet
1-800-461-0668 Varennes, Québec, Canada J3X 1P7
average speed by filters adding the 3 speed values
then divided by 3.
Then, multiply the average speed value by an effective
area factor according to the filters size (refer to table
below).
Size
Effective Area
H x W (in)
SQ.FT
SQ M
16 x 16
0,431
0,040
16 x 20
0,542
0,050
16 x 25
0,569
0,053
20 x 16
0,431
0,040
20 x 20
0,542
0,050
20 x 25
0,569
0,053
For Imperial calculations, use air flow speed units in
feet per minute and use the effective area in square
foots (SQ.FT) to get an air flow in cubic foot per minute
(CFM).
For Metric calculations, use air slow speed units in
meters per hour and use the effective area in square
meters (SQ.M) to get an air flow in cubic meter per
hour. To convert a cubic meter per hour air flow into
liters per seconds, multiply the value by 0.278.
Air flow adjustment
If an exhaust hood air flow is too high or too low, adjust
the amount of rotation per minute of the wheel on the
exhaust fan.
•Pulleys and belt adjustment;
•Manual dimmer adjustment with provided
screw ;
•Adjustment via inverter (variable frequency
drive) of the maximum frequency operation.
Some exhaust hood model may be equipped with a
manual damper located under the exhaust hood collar.
The air flow will adjust according the opening. The
manual damper is used to facilitate balancing of many
exhaust hoods on the same exhaust fan.
The Geo-Vary grease extractor can be used the same
way to facilitate the balancing of many exhaust hoods
on the same exhaust fan. The air flow will adjust
according to the opening of the Geo-Vary grease
extractor. If modifications are to be made to the
adjustment of the Geo-Vary filters according to new
balancing requirements, contact Cadexair to receive
new labels according the required adjustment.
Maintenance
Stainless Steel
Stainless steel is very resistant to corrosion but it is not
foolproof. It is necessary to clean frequently in order
to preserve the surface integrity. It is recommended to
clean the metal when it is dirty and to not wait until a
deep cleaning is necessary to keep the original
appearance.
A regular cleaning with a soap or soft detergent
followed by a hot water rinse usually provides good
results. Si the water used contain a high percentage
of minerals, it is recommended to dry the surface with
a soft cloth.
Commercial products with the mention “suitable for
stainless steel” can and should be used. Some
commercial cleaning products containing phosphates,
synthetic detergents and alkali can be used to clean
severely stained or tarnished stainless steel. These
products ensure a cleaning without danger to the
surface and are effective. It is recommended to read
carefully the manufacturer’s instructions before using
a product.
IMPORTANT
Never use a chlorine based cleaning
product or by-product such as
hydrochloric acid (bleach, Lysol, etc.)
How to apply cleaning products
Cleaning products are applied directly on the surface
to clean or using a soft cloth or sponge. In both cases,
carefully rinse with clear hot water and wipe with a dry
and soft cloth or let the surface dry.
Always rub with the grain.

Doc150313-01
Installation and maintenance manual
www.cadexair.com 9 1010, Boulevard Lionel Boulet
1-800-461-0668 Varennes, Québec, Canada J3X 1P7
To get rid of water stains, rinse with clear hot water.
You can also avoid water stains by wiping the surface
with a soft and dry cloth. A non-abrasive cream
product or a cleaning product can be used for light
superficial stains. Products specifically designed for
stainless steel cleaning and containing citric acid can
be used. Nylons scouring pads are recommended to
remove the majority of food premises. If a more severe
treatment is required to get rid of stripes and surface
scratches, it is recommended to use a very thin
abrasive to avoid damaging the surface. If stainless
steel has a direction or a special pattern, repairs must
be aligned with the direction of the original finish to
obtain a more esthetic result. If a metallic brush is
used, it should be made of stainless steel from the
same steel gauge then the exhaust hood material. It
is important to verify that the abrasive used are exempt
of all contamination like chloride and iron. If you need
to clean the surface with a chemical product or an
abrasive, we recommend making a test first on a non-
showing surface to verify the results.
If the above advice does not provide a satisfying result,
remember that stainless steel can be polished on site
by specialists, manually or mechanically. Stainless
steel is solid and not plated; therefore, it doesn’t lose
its corrosion resistance properties following a
polishing.
Daily maintenance
•Wipe the visible inner and outer parts of the
exhaust hood.
•Verify the control panel display to ensure good
functioning of the system.
•Wipe the visible parts of the Geo-Vary grease
extractor.
Weekly maintenance
•Remove baffle filters and clean or soak with a hot
water and degreaser solution.
•Empty all grease cups located under modular
extraction baffles.
Monthly maintenance
•Remove and clean all filters.
•Clean the grease gutter.
•Verify the exhaust fan motor belt.
•Verity the filters from you air supply system.
Geo-Vary grease extractor maintenance
When necessary:
•Remove the Geo-Vary grease extractor from the
exhaust hood filter cage. Remove the guillotine
from the extractor by removing the wing nut
located inside the extractor, in the back.
•Put the guillotine and extractor upside down in a
dishwasher or simply wipe the inside surfaces
with detergent and hot water.
•Put back the guillotine in the extractor according
to hit initial setting and screw back the wing nut.
•Install the Geo-Vary grease extractor according to
indications of Annex 3.
Inspection and cleaning of the commercial kitchen
exhaust system
Inspection of the commercial kitchen exhaust system
is mandatory.
Owner of commercial kitchen are obligated to regularly
have their exhaust system inspected in order to ensure
the security of their employees and the public in
general. The system includes: exhaust hoods,
filtration units, exhaust ducts and exhaust fans.
Make an inquiry to your insurance provider about the
required inspection by local standards for your type of
establishment. Refer to annex 4 for more information
about the required inspection schedule according to
the NPFA96 standards.
IMPORTANT
Inspection and cleaning of commercial
kitchen exhaust system is mandatory
according to the law and some insurance
firms.
Inspection and maintenance of the exhaust hood
fire suppression system
Fire suppression components require a regular
maintenance to ensure they are in conformity with local
fire standards and regulations. NFPA96 standards
require two (2) annual inspections including
replacement of components intended in the standard.

Doc150313-01
Installation and maintenance manual
www.cadexair.com 10 1010, Boulevard Lionel Boulet
1-800-461-0668 Varennes, Québec, Canada J3X 1P7
Tips and tricks
A commercial kitchen operates usually out of standard
working hours (evenings and week-end). It is
recommended to have in inventory replacements
exhaust and air supply fan motor belts. Furthermore,
for critical components with motor, a replacement
motor should be kept in inventory. Most of the
components are hard to find during the week-end;
having them on hand facilitate maintenance.

Doc150313-01
Installation and maintenance manual
www.cadexair.com 11 1010, Boulevard Lionel Boulet
1-800-461-0668 Varennes, Québec, Canada J3X 1P7
Problems and solutions
** Important –For your own and your staff safety, you may need to contact a qualified technician or
electrician according to the type of problem you encounter **
Problem
Causes
Possible solutions
Ventilation is not
working
Exhaust fan problem
- Verify that the disconnect is in open position
- Verify that the exhaust fan motor belts are in good
conditions and replace them if necessary
Electrical supply
problem to the exhaust
fan and components
- With a multi-meter, verify if there is electrical power
reaching the disconnect of the exhaust fan
- If not, verify if there is electrical power reaching the
magnetic starter or inverter (variable frequency drive)
- Test the motor with an ohmmeter (need an electrician
or qualified technician) and change the motor if
necessary
Problem with magnetic
starter
- Verify if the magnetic started is powered on the
primary side; if not, verify the power system of the
disconnect and the fuse on the distribution panel
(contact an electrician if needed)
- If the magnetic started has a “Manual/Off/Auto” type
selector, put the selector in manual mode; if the
ventilation start, the problem is related to the start-up
control selector; verify electrical wiring (contact an
electrician if required)
- Verify if the overload protection is snapped in; if yes,
press on reset; adjust the overload protection to 1.15
times la motor FLA value (refer to the motor safety
plate)
- Contact a qualified technician
Problem with inverter
(variable frequency
drive)
- Verify if the inverter has power on the primary side or
if there is text on the screen; if not, verify the power
system of the disconnect and the fuse on the
distribution panel (contact an electrician if needed)
- Verify if the inverter shows an error code; verify with
the inverter owner’s manual for the error code and
proposed solutions
- If the inverter has power, cut the power and put it
back on; some overload faults from the electrical
network requires a reboot
- Contact a qualified technician

Doc150313-01
Installation and maintenance manual
www.cadexair.com 12 1010, Boulevard Lionel Boulet
1-800-461-0668 Varennes, Québec, Canada J3X 1P7
A lot of noise
from exhaust
hood
Exhaust fan problem
- Motor belts are damaged; change the motor belts
- The exhaust fan wheel is unbalanced or there is a
bearing problem; contact a qualified technician
- Verify and adjust Geo-Vary grease extractor according
to the manufacturers indications and refer to Annex 3
Exhaust hood is
working but does
not suck air as
usual
Duct problem
- Duct access door open in the exhaust duct or
obstruction in the exhaust duct
Exhaust fan problem
- Verify and adjust or change the exhaust fan motor
belts
Geo-Vary adjustment
- Verify and adjust
- Verify and adjust Geo-Vary grease extractor according
to the manufacturers indications and refer to Annex 3
Fire suppression
triggering
Fire or accidental trigger
ONCE THE DANGER IS ELIMINATED AND ALARMS ARE
NEUTRALIZED
- Clean as fast as possible the suppression liquid
- Call the company in charge of you fire suppression
system maintenance to put the system back in
operation
- If the system is equipped with a rearming relay or
Cadexair control panel, press on the reset button to
power the cooking equipment back on
Exhaust hood
lights not
working
- If the system is equipped with a Cadexair control
panel, press on the reset button inside the control
panel
- Verify if the light bulbs are in good condition
- Verify the electrical power to the lights (contact an
electrician if needed)
Cooking
equipment not
working
- If the system is equipped with a Cadexair control
panel, press on the reset button inside the control
panel
Auto-cleaning
system
Auto-cleaning system
not working
Verify that the water supply valve is open inside the
Cadexair control panel
- Activate the selector in test mode on the control panel
to verify it’s operation; if the test works, adjust the BIO
option ON in the menu Set Param of the Bio automate
then contact Cadexair
- If the test does not work; verify the water supply to
the control panel and verify the good functioning of the

Doc150313-01
Installation and maintenance manual
www.cadexair.com 13 1010, Boulevard Lionel Boulet
1-800-461-0668 Varennes, Québec, Canada J3X 1P7
water valves and change them if necessary then contact
Cadexair

Doc150313-01
Installation and maintenance manual
www.cadexair.com 14 1010, Boulevard Lionel Boulet
1-800-461-0668 Varennes, Québec, Canada J3X 1P7
ANNEX 1: Exhaust hood weight evaluation table
Exhaust hood weight table: weight units in pounds per feet of hood length and in (kilogram per meter of hood length)
Exhaust hood
model
Exhaust hood width in feet (in meter)
3
(0,9)
3,5 (1,05)
4 (1,2)
4,5 (1,35)
5
(1,5)
5,5
(1,7)
6
(1,85)
6,5
(2)
7
(2,15)
7,5
(2,3)
8
(2,45)
8,5
(2,6)
9
(2,75)
9,5
(2,9)
10 (3,05)
Width
CA-S
27 (12)
30 (14)
33
(15)
36 (16)
39
(18)
42 (19)
45 (20)
48 (22)
Weight
CA-S-PE
50 (23)
55 (25)
60
(27)
65 (29)
70
(32)
75 (34)
80 (36)
85 (39)
CA-S-M
33 (15)
37 (17)
41
(19)
45 (20)
49
(22)
53 (24)
57 (26)
61 (28)
CA-S-M-PE
67 (30)
71 (32)
75
(34)
79 (36)
83
(38)
87 (39)
91 (41)
95 (43)
CA-W
50 (23)
55 (25)
60 (27)
65 (29)
70 (32)
75 (34)
80 (36)
85 (39)
CA-W-PE
95 (43)
100
(45)
105 (48)
110
(50)
115 (52)
120
(54)
125 (57)
130 (59)
CA-W-M
80 (36)
85 (39)
90 (41)
95 (43)
100 (45)
105
(48)
110 (50)
115 (52)
CA-W-M-PE
125
(57)
130
(59)
135 (61)
140
(64)
145 (66)
150
(68)
155 (70)
160 (73)
C3
21 (10)
24 (11)
27
(12)
30 (14)
33
(15)
36 (16)
39 (18)
42 (19)

Doc150313-01
Installation and maintenance manual
www.cadexair.com 15 1010, Boulevard Lionel Boulet
1-800-461-0668 Varennes, Québec, Canada J3X 1P7
ANNEX 2 : Assembly diagram of an exhaust hood with mecanical joints (CA-W
series)
NOTE: Verify carefully the installation direction of the exhaust hood according to plans

Doc150313-01
Installation and maintenance manual
www.cadexair.com 16 1010, Boulevard Lionel Boulet
1-800-461-0668 Varennes, Québec, Canada J3X 1P7
ANNEX 3: Installation, adjustment and cleaning of Geo-Vary grease extractor
Position and adjust the opening of the Geo-Vary grease extractor according to the plan:
1. Unscrew the wing nut;
2. Move the guillotine to the required adjustment;
3. Screw back on the wing nut.
A bad adjustment may cause performance issues.
Cleaning of the Geo-Vary grease extractor
When necessary, remove the Geo-Vary from theexhaust hood filter cage carefully noting the guillotine
adjustment and position for each Geo-Vary.
•Remove the Geo-Vary grease extractor from the exhaust hood filter cage. Remove the guillotine
from the extractor by removing the wing nut located inside the extractor, in the back.
•Put the guillotine and extractor upside down in a dishwasher or simply wipe the inside surfaces
with detergent and hot water.
•Put back the guillotine in the extractor according to hit initial setting and screw back the wing nut.

Doc150313-01
Installation and maintenance manual
www.cadexair.com 17 1010, Boulevard Lionel Boulet
1-800-461-0668 Varennes, Québec, Canada J3X 1P7
ANNEX 4: Exhaust system NFPA96 inspection schedule
According to the cooking type
Frequency
Systems serving solid fuel cooking
operations
Monthly
Systems serving high-volume cooking
operations, such as 24-hour cooking,
charbroiling or wok cooking
Quaterly
Systems serving moderate-volume cooking
operations
Semi-annually
Systems serving low-volume cooking
operations, such as churches, day camps,
seasonal businesses, or senior centers
Annually
This manual suits for next models
9
Table of contents
Other CADEXAIR Ventilation Hood manuals
Popular Ventilation Hood manuals by other brands

Best
Best CP57E series installation instructions

Thor Kitchen
Thor Kitchen HRH3001U Installation guide and user's manual

XtremeAIR
XtremeAIR Special Series Installation guide & user manual

JUNO
JUNO JDK5535-EF operating instructions

Broan
Broan BDF SERIES installation guide

ELICA
ELICA EAS430SS Use, care and installation guide