Calimar GOBLIN CMARSSMRC-4Y User manual

CALIMAR® GOBLIN (CMARSSMRC-4Y) ROBOTIC POOL CLEANER
OPERATION MANUAL

CaliMar® Technical Service before using at (888)
635-0330 or visit our website at www.calimarpool.com.

Congratulations on your purchase of the most technologically advanced automatic pool vacuum
available today. Your CaliMar® cleaner is easy to use and will make maintaining your pool
affordable and effortless. Following these simple directions will insure that the cleaner will
quickly and efficiently clean your pool today and for many years to come.

4
FIGURE E1
FIGURE S6A
HOLD
FIGURE S6B
FIGURE E3
FIGURE E2
6) Confirm that the all connections to the swivel are tightened properly prior to placing
the cleaner into the pool.
Installing an Extension Cord
NOTE: This section is only necessary for pools with depths greater than 8’.
NOTE: Ensure the gasket inside the swivel is still secured in place after the plug is removed
from the swivel.
IMPORTANT: DO NOT use any tools for the following steps. All connections should be
hand tightened.
IMPORTANT: Check all connections are firmly in place prior to using the cleaner. The
cleaner is now ready to use as per the normal operation instructions.
1) Remove the entire cleaner from the pool.
2) Dry all connections and the Floating Swivel.
3) Disconnect the short cable from the swivel by loosening the black collar and gently
pulling on the plug (Figure E1).
5) Secure the connection by rotating the black collar in a clockwise direction until it is
hand tight.
6) Insert the Extension Cord Union on the end of the Extension Cord and secure it by
hand tightening the black collar on the end of the cable (Figure E3).
NOTE: The Extension Cord Union has two distinctly different sockets to prevent an incorrect
connection.
7) Insert the blue plug on the 8’ cable into the other end of the union and hand tighten
the black collar, ensuring the gasket is in place prior to making the connection
(Figure E3).
4) Insert the blue plug of the Extension Cord into the open end of the swivel ensuring
that the gasket is firmly in place prior to making the connection (Figure E2).
EXTENSION
CORD
EXTENSION CORDEXTENSION CORD UNION8’CABLE
HOLD

5
• 3 HOUR WALL CLIMBING OPERATION:
Press the 3 hour (Complete-Clean) Mode switch on the power supply as shown in Figs PS1. The Robot will automatically begin its cleaning program and a red LED will light on
the power supply. NOTE: The unit will climb the walls during this cleaning cycle. The robot will automatically turn off after 3 hours. To end the cleaning cycle early, press the middle (off
switch) - Figure PS1.
• If a second cleaning is required or the unit is accidentally shut off, make sure the unit is manually switched off, and wait 30 seconds before switching the unit on again.
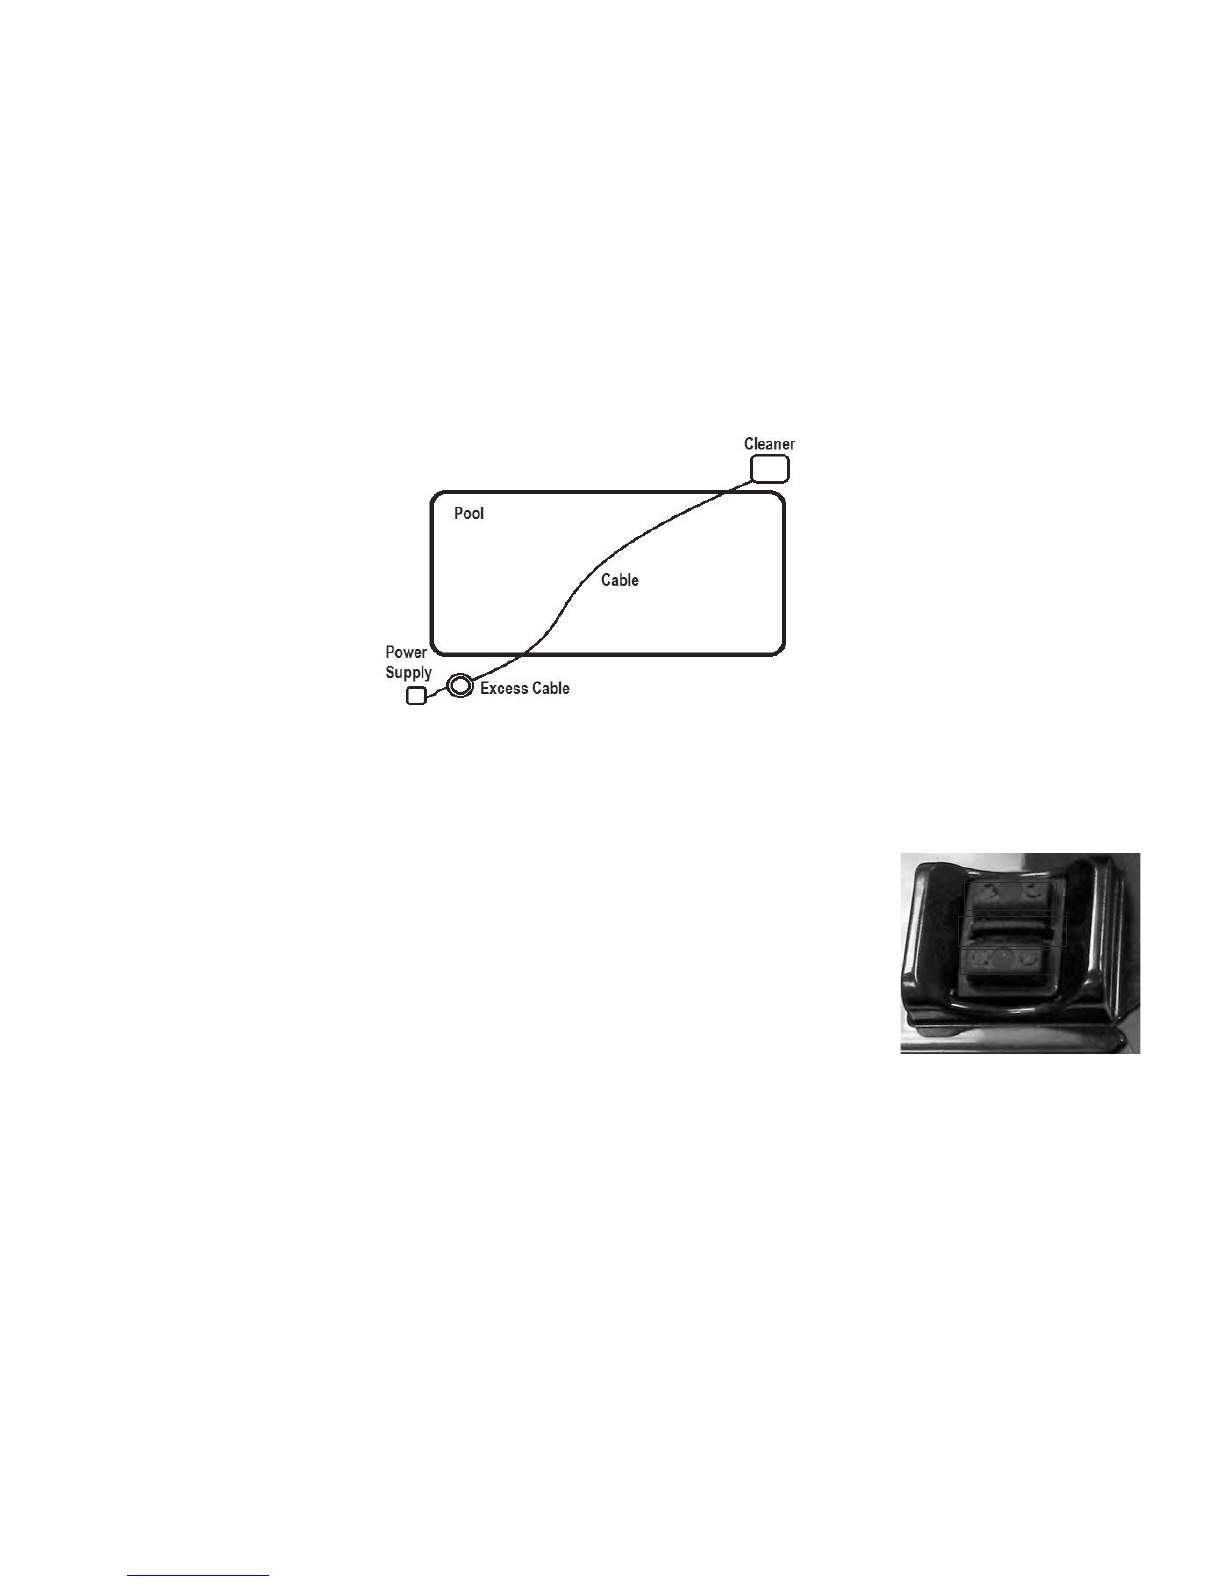
INSTALLATION
• Walk the cleaner to the furthest point of the pool.
• Add 6’/2m of cord to the pool for additional coverage.
• Coil up the remaining cable and secure it so that excess cable will not be pulled into the pool (the Velcro strap originally attached to the cable can be used).
• Be sure to only plug the power supply into a GFCI (ground fault current interrupter) or ELI (earth leak interrupter) protected electrical outlet.
• Look at the power supply and check that the power supply switch is in the off position (middle switch position).
• Plug the power supply into the GFCI or ELI protected outlet.
• Plug in the connector from the cleaner into the socket. The connector is keyed so that it will only plug into the socket one way. Make sure
that the plug is pushed all the way onto the socket. Slide the connector lock (strain relief) onto the connector and turn the connector lock clockwise
until it is snug.
DO NOT RUN THE CLEANER OUT OF THE WATER.
OPERATING THE CLEANER OUT OF THE WATER WILL DAMAGE THE MOTORS AND OID THE WARRANTY
IMPORTANT NOTE: During normal operation, the cleaner will appear to shut off for a few seconds. This is normal and part of the pool cleaning program. The
unit has multiple ways of cleaning the walls. It may climb to the top, scrub, then make a turn and drive back down the wall to the bottom of the pool. It may also
climb to the top, shut down for a few seconds, remove itself from the wall, turn its pump motor on again, pushing itself down to the bottom of the pool away
from the wall. It could also climb the wall, scrub the waterline, turn its pump motor off, and float away from the wall down to the bottom. All of these
variations have been programmed into the cleaner and are designed to quickly and efficiently clean your entire pool. This unit has been designed to clean all areas
of your pool. It will climb the walls, and occasionally break the surface. In the process of climbing the wall it may stay on the surface and continue to operate from
several seconds to a few minutes. This is normal and the cleaner will eventually make its way to the bottom to continue its cleaning. Since most of the dirt is
concentrated on the floor of the pool, the cleaner will spend the majority of its time on the floor.
• Place the cleaner into the pool and if needed rock the cleaner side to side to release any trapped air. The cleaner will sink to the bottom
of the pool.
• ONE HOUR FAST-TRACK OPERATION: Press the One Hour FAST-TRACK switch as shown in Figure PS1. The robot will automatically
begin its cleaning program and a
yellow LED will light on the power supply. NOTE: When in the FAST-TRACK Mode, the robot will not
climb the walls, but rather
will concentrate its cleaning efforts on the floor where the majority of debris is located. The unit operates in
a slow but steady coverage pattern, and will automatically shut off after 60 minutes. To end the cleaning cycle manually, press the
middle button (off switch) - Figure PS1.
FIGURE. PS1
3-Hour Cleaning
1-Hour Cleaning
OFF
FIGURE. C1

6
REMO ING THE CLEANER FROM THE POOL
GENERAL MAINTENANCE
• Slowly pull the floating cord to get the cleaner to the pool surface and near
the edge of the pool. DO NOT PULL THE CLEANER OUT OF THE POOL BY
THE CORD OR THE SWIVEL.
• Reach down and grasp the handle of the cleaner and remove it from the
pool as shown in Figures 1 and 2 .
Please follow the below procedures to ensure maximum cleaner performance and overall
component condition.
Water Chemistry
The following ranges are the recommended water levels to maintain a
properly balanced pool.
PH Level: 7.2 – 7.8
Total Alkalinity: 80 – 150ppm
Calcium Hardness: 150 – 300ppm
NOTE: Properly balanced water is a guideline for preserving warranty coverage.
FIGURE 1: Grasping Handle FIGURE 2: Lift from Pool by Handle
CLEANING THE FILTER BAG (Filter Bag Should Be Cleaned After Every Use.)
• Turn cleaner upside down and place on ground so the bottom lid is exposed.
• Press the red tabs inward towards the center of the cleaner as shown in figure 3.
Lift the bottom lid with the filter bag up and out of the cleaner.
FIGURE 3
• Grasp the bottom lid firmly, with one hand and use your other hand to grab the filter bag
material and pull it away and up from the bottom lid (see Figure 4).
FIGURE 4
• Turn filter bag inside out and hose off all debris as shown in Figure 5. If very dirty it may
be washed in your washing machine, inside out, with cold water, mild detergent, and by
itself. Do NOT put in the dryer.
FIGURE 5
• Hose all debris off the bottom lid being sure to get all dirt out of the fine filters on the
intake doors as shown in Figure 6.
FIGURE 6

7
The unit should be stored in an area that will afford some protection from the elements to
insure that it retains its finish
. DO NOT STORE NEAR OPEN CHEMICALS
• To reapply the filter bag, first turn it right side out. Next place the filter bag frame onto
the bottom lid being sure that the bag frame seats fully into the channel. Press down
on all corners to ensure fit. Check the seat of the filter onto the bottom lid (see Figure 7)
FIGURE 7
FIGURE 8
FIGURE 9
FIGURE 10
• Pick up the bottom lid and turn it over so the bag hangs below it (see Figure 8). Place
the bottom lid back into the cleaner being careful to feed the filter bag into the body of
t he cleaner. MAKE SURE ALL FILTER MATERIAL IS INSIDE THE CLEANER
OTHERWISE THE LID WILL NOT CLOSE AND LATCH PROPERLY.
• Once the bottom lid is seated press it firmly into the cleaner. Gently pull on the bottom
lid to insure that it is properly locked in. The lid is now installed.
CABLE MAINTENANCE
UNCOILING THE CABLE
STORING THE CABLE
• Loosely loop the cable as shown in Figure 10.
• Unplug the cable from the power
supply.
• Hold the cord close to the cleaner.
• Make a roughly two foot loop with
the cord as shown.
• When making loop, roll the cable
slightly in a counter clockwise
manner to maintain form.
DO NOT WRAP THE CORD
TIGHTLY AROUND OBJECTS.
STORAGE
WINTER
SUMMER
If temperatures will regularly be below 45 degrees Fahrenheit or 5 degrees Celsius, the
cleaner and power supply should be stored indoors.
In the event that the cable does coil on itself, it can easily be straightened by following the below
instructions.
• Turn the power supply to the off position
• Remove the cleaner from the pool and place it on the far end of the pool deck/yard
(away from the power supply)
• Unscrew the blue cable from the power supply
• Hold the black collar at the plug end and gently lift the cable off the ground (FIGURE 9)
• Gently pull on the cable to straighten
• The swivel will rotate as tension is applied, eliminating the coils in the cable
• Return to normal cleaner use

Impeller Cover - Black
Handle - Black
Top Shell - Silver
NC7409B
NC7415SI
NC7410B

CaliMar® Technical Service at (888) 635-0330.

THERE ARE NO OTHER WARRANTIES OR REPRESENTATIONS, EITHER EXPRESSED OR IMPLIED,
WHETHER OF MERCHANTABILITY, FITNESS FOR A PARTICULAR PURPOSE, OR OTHER, MADE BY
CALIMAR® OTHER THAN THOSE SPECIFICALLY SET FORTH IN THIS WARRANTY. NO PERSON,
FIRM, OR CORPORATION IS AUTHORIZED TO MAKE ANY REPRESENTATIONS OR INCUR ANY
OBLIGATIONS IN THE NAME F OR ON BEHALF OF CALIMAR® EXCEPT AS STATED HEREIN. THE
REMEDIES SET FORTH IN THIS WARRANTY ARE EXPRESSLY UNDERSTOOD TO BE THE EXCLUSIVE
REMEDIES
REMEDIES AVAILABLE TO THE PURCHASER, AND THIS WARRANTY CONTAINS THE FULL AND
COMPLETE AGREEMENT BETWEEN CALIMAR® AND THE PURCHASER. THIS WARRANTY SETS
FORTH THE ONLY OBLIGATIONS OF CALIMAR® WITH REGARDS TO THIS PRODUCT, AND THERE ARE
NO WARRANTIES WHICH EXTEND BEYOND THE DESCRIPTION ON THE FACE HEREOF.
To obtain warranty service, call CaliMar® Customer Support Specialist at (888) 635-0330 or email
sales@calimarpool.com.
CaliMar® is not responsible for, nor does this
The warranty obligations of CaliMar® shall be limited to repair or replacement of the product or any defective
component, at the discretion of CaliMar®. The repair or replacement may include the use of refurbished
components and/or units. CaliMar® will not be liable or responsible under any circumstances or in any amount
for any consequential or incidental damages, for any injury or damages to persons or property using or used in
connection with this product, or for loss of profits or other costs or expenses of any kind or character.
CaliMar® 4-Year Limited Warranty:
CaliMar® will cover freight back to the customers within the continental US for approved warranty
Table of contents