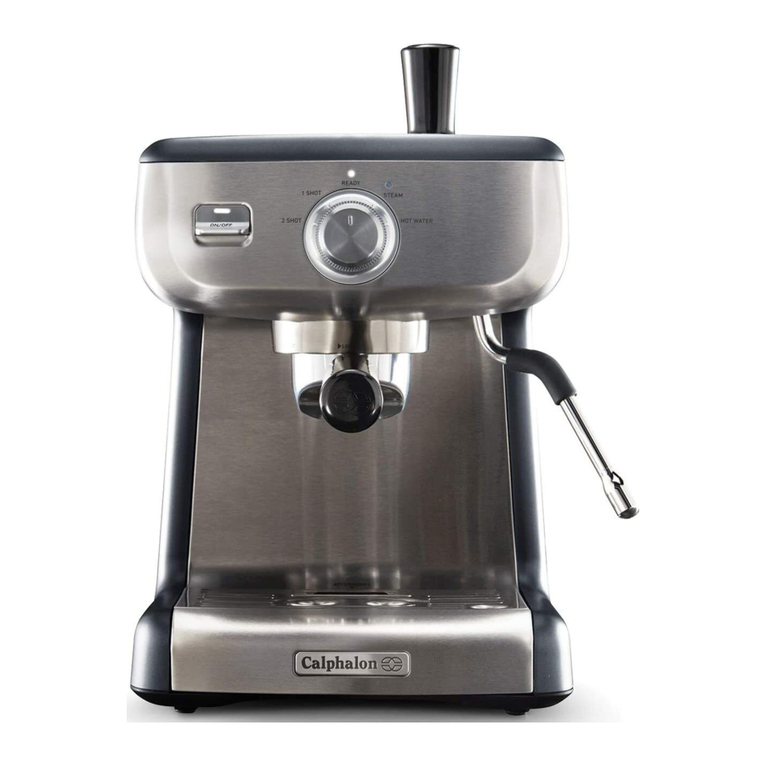
Calphalon BVCLECM-PMPMN-SS User manual

Compact Manual Espresso Machine
User Guide
BVCLECM-PMPMN-SS
BVCLECM-PMPMN-SS23EM1(US).pdf12023/6/614:54

IMPORTANT SAFEGUARDS
Contents
Important Safeguards 2 - 3
Features 4 - 6
Before First Use 7
Espresso Making Guide 8 - 12
Tips for Making the Perfect Cup 12 - 14
Tips for Milk Frothing 15 - 16
Espresso Styles to Try 17 - 18
Shot Volume Programming 19 - 20
Care and Cleaning
21 - 22
ECO Mode 20
Descaling: Group Head and Steam Wand
23
Troubleshooting Guide 24 - 25
Warranty 26
32
11. Always attach plug to appliance first, then
plug cord into the wall outlet (for appliances
with detachable cords). To disconnect, turn
any control to the off position, then remove
plug from wall outlet.
12. Do not use appliance for other than intended
use. Misuse can cause injuries.
13. WARNING: To avoid the risk of injury, never
open or disengage the brew chamber
(portafilter) during the brew cycle. Always
properly engage the filter holder to the
locking mechanism. Failure to so do may
disengage the filter holder during the brew
cycle and cause injuries.
14. Models intended to be used with
sealed capsules: Only use capsules
intended for this appliance. If the
capsule does not fit, do not force the
capsule into the appliance.
15. Models with coffee grinders: Check
hopper for presence of foreign objects
before using.
For appliances with service panels:
16. WARNING: TO REDUCE THE RISK OF
FIRE OR ELECTRIC SHOCK. DO NOT
REMOVE THIS COVER. NO
USER-SERVICEABLE PARTS INSIDE.
REPAIRE SHOULD BE DONE BY
AUTHORIZED PERSONNEL ONLY.
SAVE THESE INSTRUCTIONS
HOUSEHOLD USE ONLY
North American models with grounded plugs:
POWER CORD INSTRUCTIONS:
PRODUCT NOTICES
A short power-supply cord (or detachable power-supply cord) may be provided to reduce risks
resulting from becoming entangled in or tripping over a longer cord. Longer detachable power-
supply cords or extension cords are available and may be used if care is exercised in their use.
If a long detachable power-supply cord or extension cord is used:
Do not pull, twist or otherwise abuse the power cord.
a. The marked electrical rating of the detachable power-supply cord or extension cord should
be at least as great as the electrical rating of the appliance;
b. If the appliance is of the grounded type, the extension cord shouldbe a grounding type
3-wire cord; and
c. The longer cord shouldbe arranged so that it will not drape over the counter top or table
top where it can be pulled on by children or tripped over unintentionally.
1. Place the appliance on a hard, flat, level surface to avoid interruption of airflow underneath
the espresso maker.
2. Do not operate the appliance with an empty water tank.
3. Keep the area above the appliance clear during use, as hot steam will escape the appliance.
IMPORTANT SAFEGUARDS
When using electrical appliances, basic
safety precautions should always be
followed to reduce the risk of fire, electric
shock, and/or injury to persons including the
following:
1. Read all instructions before using this
appliance.
2. Do not touch hot surfaces. Use handles or
knobs.
3. To protect against electric shock, do not place
or immerse cord, plugs, or appliance in water
or other liquid.
4. This appliance is not intended for use by
children or by persons with reduced physical,
sensory, or mental capabilities, or lack of
experience and knowledge. Close supervision
is necessary when any appliance is used near
children. Children should be supervised to
ensure that they do not play with the
appliance. Keep the appliance and its cord out
of reach of children.
5. Unplug from outlet when either the appliance
or display clock (if provided) is not in use, and
before cleaning. Allow to cool before putting
on or taking off parts, and before cleaning the
appliance.
6. Do not operate any appliance with a
damaged cord or plug or after the
appliance malfunctions, or has been
damaged in any manner. Do not
attempt to replace or splice a
damaged cord. Return appliance to an
Authorized Service Center for
examination, repair or adjustment.
7. The use of an accessory not
recommended by the appliance
manufacturer for use with this
appliance may result in fire, electric
shock or injury to persons.
8. Do not use outdoors or for commercial
purposes.
9. Do not let cord hang over edge of table
or counter, or touch hot surfaces.
10. Do not place on or near a hot gas or
electric burner, or in a heated oven.
Polarized plug
This appliance has a polarized plug, (one blade is wider
than the other). As a safety feature to reduce the risk of
electrical shock, this plug is intended to fit in a
polarized outlet only one way. If the plug does not fit fully in the outlet, reverse the
plug. If it still does not fit, contact a qualified electrician. Do not attempt to defeat this
safety feature or modify the plug in any way. If the plug fits loosely into the AC outlet
or if the AC outlet feels warm do not use that outlet.
BVCLECM-PMPMN-SS23EM1(US).pdf22023/6/614:54
5
Features
4
Features
A. Warming Plate with Tamper Home
Preheat cups and glasses which helps
retain the essential characteristics of true
espresso; aroma and a rich, sweet taste.
B. ON/OFF Button and Light
The ON/OFF LIGHT will illuminate and
pulse1 CUP & 2 CUP buttons will
to indicate it is warming up. The ON/OFF,
1 CUP & 2 CUP LIGHT stays fully illuminated
when ready. The machine will go to sleep after
20 mins, the ON/OFF LIGHT is off.
C. Group Head - 52mm Size
The size of 52mm is for space-savings design,
however you can still have a true cafe tasting
espresso at home.
D.
Portafilter - 52mm Size
The size used of 52mm is for space savings
design which can still have a good extraction
taste.
E. Steam and Hot Water Wand
Ball joint movement with silicone cover,
so you can move the wand to your desired
position without burning your fingers.
F. Removable 1L Water Reservoir
Push back the Lid and fill with room
temperature water, or the Water Reservoir
by lifting upwards using the Handle located
at the back of Water Reservoir.
H. Dial
Two CupOne CupCleaning Pin
52mm Tamper 12oz Milk Pitcher
I. 1 SHOT
Pours 1 Shot Espresso - 1oz
then automatically stops.
J. 2 SHOT
Pours 2 Shots Espresso - 2oz
then automatically stops.
K. Steam
Fully illuminated when ready to steam.
Flashes when warming up to steam
temperature.
Steam Knob
Use to steam and froth milk.
Hot Water Knob
Pours 7oz then automatically stops.
Use for long black coffee, hot drinks
such as tea, instant soups and to heat
your cups prior to making espresso.
52mm Dual Wall Filter Baskets
Steam Wand
B
C
D
F
G
H
A
IJ
K
E
Pin
Dual Wall
Filter Basket Pin
G. Removable Drip Tray and Grill
Includes a Water Level Indicator which floats
through the Grill indicating when the tray is
full and requires emptying.
BVCLECM-PMPMN-SS23EM1(US).pdf32023/6/614:54

Step 1. Remove Packaging
Ensure all packaging has been removed.
Step 2. Position Machine
Ensure the espresso machine is always
positioned onto a dry,stable, flat horizontal
counter top.
Step 3. Wash Parts
Wash the parts listed below in warm
water with a milddetergent.
- Stainless Steel Milk Pitcher
- Stainless Steel Drip Tray Grill
- Stainless Steel One Cup Filter Basket
- Stainless Steel Two Cup Filter Basket
Rinse and dry each part thoroughly then
place on the machine.
Thermoblock Fast Heating System
The thermoblock ensures quick heat up,
and a precise water temperature for the
best espresso extraction, and milk frothing.
15 BAR Italian Pump
The thermoblock works in conjunction
with the pump to deliver the correct water
temperature at the correct pressure for
complete extraction of oils, coffee solids
and aroma.
Pre-Infusion
Small amounts of water are released onto
the tamped coffee grinds prior to the steady
flow of water, for a richer flavored espresso.
Italian Crema System
Dual Wall Filter Baskets create additional
back pressure creating a subtle aeration
for a great espresso extraction and steady
pour. They ensure a rich velvety espresso
with a signature layer of golden crema.
Dual Wall Filter Baskets are designed for
use with pre-ground grinds, however they
can also be used with freshly ground grinds.
Auto Shot Volumetric Control
Auto Shot is the easiest way to create a
great espresso. Press the 1 SHOT or 2
SHOT buttons, and it pours just the right
amount, then automatically stops.
52mm Group Head and Portafilter
15
DUAL
52
WALL
BAR
15
DUAL
58
WALL
BAR
6 7
Features Before First Use
15
DUAL
58
WALL
BAR
15
DUAL
58
WALL
BAR
15
58
BAR
Important: Below 4 parts are
NOT DISHWASHERSAFE:
- Portafilter
- Drip Tray
- Tamper
- Water Reservoir
Important: Remove the red Plug found
at the base of the Water Reservoir.
D
U
A
L
W
A
L
L
D
U
A
L
W
A
L
L
One Cup
One Cup
Two Cups
Two Cups
S
INSERT
THERMOBLOCK
58MM CAFÉ GROUP HEAD
S
INSERT
THERMOBLOCK
58MM CAFÉ GROUP HEAD
S
INSERT
THERMOBLOCK
58MM CAFÉ GROUP HEAD
19-21g10-12g
¼ cup
2x 1Tbsp
D
U
A
L
W
A
L
L
D
U
A
L
W
A
L
L
One Cup
One Cup
Two Cups
Two Cups
• Power
- Ensure that the dial is in the OFF position.
- Insert the power plug into a 120V AC
power outlet and switch the power on.
- Press the ON/OFF button to turn on the
machine.
- The 1 CUP & 2 CUP buttons will
pulse to indicate the machine is heating
up.
- When the machine is ready,the ON/OFF,
1 CUP & 2 CUP buttons will illuminate.
The machine is now ready to use.
Step 4. Prime espresso machine
- Place 2 large cups under the group head
and steam wand.
- Press the 2 CUP button and water will
start flowing from the group head.
- Allow water to run through until it stops.
- Turn dial to the HOT WATER position.
- Allow hot water to run through for 20
seconds.
- Return dial to OFF position.
BVCLECM-PMPMN-SS23EM1(US).pdf42023/6/614:54

9
Espresso Making Guide
8
Espresso Making Guide
ONE CUP TWO CUP
CENTRE
1. ALIGN
& INSERT
2.TURN
ALIGN and INSERT
HOT
WATER
TURN
OR
E
S
P
R
E
S
S
O
P
R
E
S
S
U
R
E
ONE CUP TWO CUP
LOCK
E
S
P
R
E
S
S
O
P
R
E
S
S
U
R
E
Portafilter
should be in the
center position.
Keep Portafilter
flat, insert into
Group Head.
Empty hot water
from cup.
Turn Portafilter.
Press to either:
- 1 Shot - 1 oz pour.
- 2 Shot - 2 oz pour.
Evenly tamp (press) grinds to
level indicated.
Wipe Filter Basket
with a dry cloth.
Wipe edges to clear
any excess grinds.
Leave Portafilter
in Group Head until
after milk frothing.
Position cup on
Drip Tray under
Portafilter.
Extraction begins
and will automatically
stop.
5. Dry Basket 6. Dose and Tamp
8. Position Cup7. Insert Portafilter into Group Head
9. Extraction
Dose the Filter
Basket with grinds.
Turn DIAL to
HOT WATER.
Half fill cup
with hot water.
Press 1 SHOT button.
Check for water
in reservoir.
Warm cup and
Tamper on top
Warming Plate.
Turn on.
Place cup on
counter top and
position Steam Wand.
Select either:
- One Cup Filter Basket.
- Two Cup Filter Basket.
ON/OFF LIGHT will
illuminate and 1 CUP
& 2 CUP will pluse
= Heating up.
Return DIAL to
OFF position.
Hold Portafilter
under Group Head
while water flows.
ON/OFF , 1 CUP & 2 CUP LIGHTS
fully illuminated = Ready.
1. Start Up
2. Warm Cup
3. Select Filter Baskets 4. Warm Group Head, Portafilter and Filter Basket
BVCLECM-PMPMN-SS23EM1(US).pdf52023/6/614:54

10 11
Espresso Making GuideEspresso Making Guide
12
O’CLOCK
3
O’CLOCK
MAX
140-149°F
RETURN
Steam Wand position:
- Arm at 12 o'clock.
- Tip at 3 o'clock.
10. Prep Milk Pitcher 11. Before Frothing Milk 14. Purge and Clean Steam Wand
12. Start Frothing Milk 15. Milk Finishing Touches
16. Making a second coffee after texturing milk
13. Milk Frothing
Pour milk in one
steady stream.
Tap Pitcher to release
larger air bubbles.
Swirl Pitcher to blend
milk and create a
silky texture.
Return DIAL to the
OFF position.
Wipe Steam Wand
and Tip with a damp
cloth.
Turn DIAL to HOT
WATER for 1-2 secs.
Milky water will
come out of
Steam Wand.
Pro Tip:
To keep optimum
Steam Wand
performance,
always purge and
clean the Steam
Wand after
frothing milk.
Frothing makes
a smooth hissing
noise.
Check milk is
moving in a
whirlpool action.
Insert Steam Wand
Tip just below the
surface of the milk.
Some water
may come out
of Steam Wand.
STEAM LIGHT is ON =
Steam Ready. Pause
Stream by
returning DIAL.
Fill Pitcher with cold
milk to just below the
bottom of the spout.
Press STEAM button
STEAM LIGHT flashes
= Warming up.
Pro Tip:
For best
milk frothing
results, ensure
steam has first
warmed up
(STEAM LIGHT
fully ON).
You will hear
the Pump start.
Turn DIAL to
STEAM position to
start frothing milk.
Milk ready when Pitcher
is too hot to touch for
3 secs.
Return DIAL to
OFF position.
As milk level rises,
lower Pitcher to keep
Tip just below surface.
When desired micro-
foam achieved, immerse
Steam Wand half way.
Remove Pitcher from
Steam Wand.
Important: To make coffee again immediately after texturing milk,
the thermoblock must first be cooled
Press either the 1
CUP. 2 CUP or
STEAM button.
Place a cup under the
steam wand.
Turn the dial to the HOT WATER position
and leave on until hot water comes out.
BVCLECM-PMPMN-SS23EM1(US).pdf62023/6/614:54

The way the espresso pours will tell you
everything. Look out for:
1. Extraction Time
Extraction time provides a good indicator
of the quality of the pour. The optimum
time per shot varies between different bean
types and between freshly and pre-ground
coffee grinds. However, in general, the time
will be between 20-30 seconds for both
One and Two shots.
2. Look for Color Change
The optimum shot contains 3 elements:
Heart: At the base - starts out dark brown.
Body: Blends with the heart - becomes a
rich caramel with reddish reflections
.
Crema: The layer on top of the body -
dark golden.
Crema -
Body -
Heart -
3. Grinds
You may need to vary the coffee grind size
when using different beans.
4. Grind Dosage
For best results, grind dosage should
remain consistent:
One Cup: 6-7g.
Two Cups: 13-14g.
6. Filter Baskets
1312
Tips for Making the Perfect Cup
Freshly Ground
Tamp Force
10-15kg
Pre-ground
Tamp Force
15-20kg
S
INSERT
THERMOBLOCK
58MM CAFÉ GROUP HEAD
S
INSERT
THERMOBLOCK
58MM CAFÉ GROUP HEAD
S
INSERT
THERMOBLOCK
58MM CAFÉ GROUP HEAD
Two CupOne Cup
19-21g10-12g
¼ cup
2x 1Tbsp
One Cup
10-12g
Two Cups
20-22g
D
U
A
L
W
A
L
L
D
U
A
L
W
A
L
L
One Cup
One Cup
Two Cups
Two Cups
Freshly Ground
Tamp Force
10-15kg
Pre-ground
Tamp Force
15-20kg
S
INSERT
THERMOBLOCK
58MM CAFÉ GROUP HEAD
S
INSERT
THERMOBLOCK
58MM CAFÉ GROUP HEAD
S
INSERT
THERMOBLOCK
58MM CAFÉ GROUP HEAD
Two CupOne Cup
19-21g10-12g
¼ cup
2x 1Tbsp
One Cup
6-7g
Two Cups
13-14g
One Cup Two Cups
Important: Ensure beans or pre-ground
grinds are fresh. Oldpre-ground grinds
and oldbeans, no matter the grind size,
will not produce a good tasting espresso.
5. Tamp Force
For best results, e
venly tamp (press)grinds
to the level indicated.
Freshly Ground
Tamp Force
20-30lb
Pre-ground
Tamp Force
30-40lb
Two CupOne Cup
One Cup
10-12g
Two Cups
20-22g
Note: Isolating changes to Grind Size
and Tamp Force will assist in producing a
consistent taste every time.
Note: When using pre-ground bagged
grinds, try using a 2 step dose and tamp
method: Dose in half the grinds then
tamp and repeat.
S
INSERT
THERMOBLOCK
58MM CAFÉ GROUP HEAD
S
INSERT
THERMOBLOCK
58MM CAFÉ GROUP HEAD
S
INSERT
THERMOBLOCK
58MM CAFÉ GROUP HEAD
19-21g10-12g
¼ cup
2x 1Tbsp
D
U
A
L
W
A
L
L
D
U
A
L
W
A
L
L
One Cup
One Cup
Two Cups
Two Cup
REMOVE
BANG
REMOVE
TURN
TURN
17. Cleaning Up
Remove espresso puck
from Portafilter.
Check if the
Drip Tray needs
emptying.
Turn Portafilter and remove from
Group Head.
Wash parts with
warm water.
• Dual Wall Filter Baskets
These work best with pre-ground coffee
grinds, but can also be used for freshly
ground coffee grinds.
BVCLECM-PMPMN-SS23EM1(US).pdf72023/6/614:54

Extraction Guide
There are extraction variations from bean to bean, and everyone’s taste is different.
Use the below as a guide to improve your espresso technique, so it’s just right for you.
UNDER EXTRACTION OPTIMUM EXTRACTION OVER EXTRACTION
Pour ^Quick flow
Under 15 sec
Steady flow
20-30 sec
No flow-drips
Over 35 sec
Color Pale brown
Crema-light brown
Rich caramel
Crema-dark golden
Very dark brown
Crema-dark brown
Taste Sour, Acidic, Watery Rich, Sweet, Vibrant Bitter, Dry,Grainy
Grind ^^ Too coarse
Use a finer grind Just right Too fine
Use a coarser grind
Dosage Not enough grinds
Use more grinds
One Cup: 6-7g
Two Cups: 13-14g
Too many grinds
Use less grinds
Tamp
Not enough tamp force
Tamp firmer*
Just right-firm pressure
20-30lb of force**
Too much tamp force
Tamp lighter
^When using pre-ground bagged grinds, use the Dual Wall Filter Baskets.
^^ Ensure beans or pre-ground grinds are fresh. Oldpre-ground grinds and oldbeans, no
matter the grind size, will not produce a good tasting espresso.
*When using pre-ground bagged grinds, try using a 2 step dose and tamp method:
Dose in half the grinds then tamp and repeat.
** When using pre-ground bagged grinds try tamping a little harder, 30-40lb of force.
Tips for Making the Perfect Cup
Remember practice makes perfect.
Freshly Ground
Tamp Force
10-15kg
Pre-ground
Tamp Force
15-20kg
S
INSERT
THERMOBLOCK
58MM CAFÉ GROUP HEAD
S
INSERT
THERMOBLOCK
58MM CAFÉ GROUP HEAD
S
INSERT
THERMOBLOCK
58MM CAFÉ GROUP HEAD
Two CupOne Cup
19-21g10-12g
¼ cup
2x 1Tbsp
One Cup
10-12g
Two Cups
20-22g
D
U
A
L
W
A
L
L
D
U
A
L
W
A
L
L
One Cup
One Cup
Two Cups
Two Cups
Milk frothing is the steaming of milk.
Key Elements to Frothed Milk
The steam only heats the milk. The milk
also needs to be aerated (add air) to create
the micro-foam, and needs to be blended
well together. Milk that has been frothed
correctly has been heated to between
140-149°F, and has a thick, rich micro-
foam with a silky sheen. It’s all about the
temperature, positioning of the Steam
Wand and when you move the Milk Pitcher.
1. Fill Milk Pitcher
Add coldmilk around 39°F into a chilled
clean Stainless Steel Pitcher.Fill to the
bottom of the spout.
2. Steam Warm Up
3. Position
Place the Steam Wand Arm in the Pitcher
spout at the 12 o'clock position, with the
Steam Wand Tip in the milk at the 3 o'clock
position. Keep the Steam Wand Tip just
under the surface of the milk. This will
create a whirlpool action.
4. Sound
How air is introduced to the milk
determines the consistency of the foam. If
large gulps of air are added to the milk, the
foam will have large bubbles. Introducing
air to the milk in a controlled, gentle
fashion indicated by a gentle hissing sound,
will ensure the milk has fine aerated micro-
foam.
Pro Tip: Milk Frothing Sounds
• Screeching - Tip too deep, lower Pitcher.
• Smooth Hissing - Just right for latte.
• Gurgling - Tip not deep enough, raise Pitcher.
5. Keeping Steam Tip Position
As the steam heats and froths the milk,
the milk will stretch causing the level of
the milk in the Pitcher to rise. As this happens
follow the level of the milk by lowering
the Pitcher, keeping the Steam Wand Tip just
below the surface.
MAX
FILL
FINISHED
MAX
STEAM
12
O’CLOCK
3
O’CLOCK
HOT
WATER
RETURN
STEAM
MAX
FILL
FINISHED
MAX
STEAM
12
O’CLOCK
3
O’CLOCK
HOT
WATER
RETURN
STEAM
1514
Tips for Milk Frothing
MAX
FILL
FINISHED
MAX
STEAM
12
O’CLOCK
3
O’CLOCK
HOT
WATER
RETURN
STEAM
Note: The volume of milk will increase
or ’stretch’ during frothing,so don’t
overfill the Pitcher.
ESPRESSO
ESPRESSO
MACHINE
CLEANING
TABLETS
ESPRESSO
MACHINE
CLEANING
TABLETS
ESPRESSO
MACHINE
CLEANING
TABLETS
ESPRESSO
MACHINE
LEANING
ESPRESSO
MACHINE
CLEANING
TABLETS
For best milk texturing results every time,
ensure steam has warmed up before
texturing milk. Steam is ready when
STEAM light is fully on.
39°F
BVCLECM-PMPMN-SS23EM1(US).pdf82023/6/614:54

6. Amount of Foam
Create the amount of micro-foam you want.
Cappuccinos traditionally have more micro-
foam than a flat white.
(See Espresso Styles on the next page)
7. Immerse Tip
After you have created the amount of foam
you want, immerse the Steam Wand half
way down the milk level. This heats all
the milk and pulls in milk instead of air.
This ensures the milk and foam is blended
together, making it denser and smoother.
8. Correct Temperature
An indicator that correct milk temperature
has been reached is when the Pitcher can only
be heldfor approximately 3 seconds.
Pro Tip: Milk Temperature
• Under - If not heated long enough, it
will be warm with little froth.
• Optimum - between 140-149°F.
• Over - If heated for too long it will
start to boil around 162°F, and will
have a burnt taste with all froth lost.
9. Tap and Swirl the Pitcher
Gently tapping the Pitcher on the benchtop
helps release larger trapped air bubbles.
Swirling helps the milk and froth to
combine for an even consistency and a silky
appearance.
10. Clean & purge steam wand
1716
Tips for Milk Frothing
MAX
FILL
FINISHED
MAX
STEAM
12
O’CLOCK
3
O’CLOCK
HOT
WATER
RETURN
STEAM
Milk Temperature
Full & Skim 140-149°F
131-149°F
131-140°F
149-158°F
Almond
Soy
Coconut
After steaming milk,wipe the steam
wand with a clean damp cloth to
remove any milk residue.
Position the steam wand over the
drip tray. Immediately purge the
steam wand by turning the dial
to the HOT WATER position for 3
seconds.
Return the dial to the OFF position.
Espresso Styles to Try
Espresso (Short Black)
Espresso is a concentrated, full bodied coffee with a stable layer of
‘crema’ on top. An espresso is the foundation of all café coffee.
• Espresso glass (3 oz)
• Single or double shot of espresso (1-2 oz)
Ristretto
A ristretto is an extremely short espresso, distinguished by its
intense flavor and aftertaste.
• Espresso cup (1 oz)
• Half a single shot of espresso (0.5 oz)
Americano
A standard espresso with hot water added. The hot water is added
first so that the ‘crema’ is maintained.
• Cup (6 oz)
• Hot Water (to preference)
• Single or double shot of espresso (1-2 oz)
Con Panna
Con Panna, Italian for ‘with cream’, made up of an espresso topped
with lightly whipped cream. It can also be dusted with cinnamon or
chocolate.
• Cup (6 oz)
• Single or double shot of espresso (1-2 oz)
• Lightly whipped cream - dusted cinnamon.
Macchiato
Macchiato, Italian for ‘to stain or mark’. Traditionally served as a
standard espresso with a dash of cold or frothed milk and a small
dollop of foam into the middle of the ‘crema’.
• Espresso glass (3 oz)
• Single or double shot of espresso (1-2 oz)
• Dash of cold or frothed milk and small dollop of foam.
BVCLECM-PMPMN-SS23EM1(US).pdf92023/6/614:54

18 19
Espresso Styles to Try
Flat White
An espresso with frothed milk and a thin layer of foam
milk on top. The wider cup will create the slim layer of foam, the
signature of the flat white.
• Wide cup (6 oz)
• Single or double shot of espresso (1-2 oz)
• Frothed milk and foam.
Latte
An espresso with frothed milk and a finger width layer of
foam milk on top. The narrower cup will create the thicker layer of
foam.
• Glass or Cup (7 oz)
• Single or double shot of espresso (1-2 oz)
• Frothed milk and foam.
Cappuccino
An espresso with ⅓steamed milk, topped with ⅓creamy
foam and a dusting of chocolate.
• Cup (6-8 oz)
• Single or double shot of espresso (1-2 oz)
• ⅓Frothed milk, ⅓foam - dusted with chocolate.
Mocha
Made in a similar way to a cappuccino but with the addition of
chocolate. Simply stir the chocolate into the espresso prior
to adding the steamed milk and foam.
• Cup or tall glass (6-8 oz)
• Single or double shot of espresso (1-2 oz)
• Chocolate Syrup (to preference)
• ⅓Frothed milk, ⅓foam.
Babyccino
Steamed milk with a layer of foamed milk.
It can also be dusted with chocolate.
• Small cup (3 oz)
• No shot of espresso
• Frothed milk and foam - dusted with chocolate.
The Espresso Machine features
Auto Shot Volumetric Control.
It pours just the right amount of
espresso then automatically stops.
1 Shot - Pours 1 Shot Espresso- 1 oz
2 Shot - Pours 2 Shots Espresso- 2 oz
You can adjust the pour volume to suit how
you like your espresso.
Preparing for Shot Programming
• Check Water Reservoir
Ensure there is enough water in the Water
- The dial is in the OFF position.
- The power plug is inserted into the outlet
and turned on.
-The machine is ON and in the ready state.
Reservoir.
• Power
Ensure that:
1 CUP – shot volume program
- Insert a 1 SHOT filter basket into the group
handle. Fill with coffee grinds and tamp.
- Plcae the portafilter into the group head.
Shot Volume Programming
ON /OFF ON /OFF
READY
LIGHT
HOLD
4 SEC
MAX
2L
MIN
READY
1L
1L
ONE CUP
TWO CUP
Important: If a Shot Volume Program
isn't started within 1 minute of entering
Shot Programming, the machine will exit
back to the Ready state.
Note:
Single shot volumes can be
adjusted between 25mL and 60mL.
- Hold and press the 1 SHOT button for 3
seconds until the machine beeps.
- Press the 1 SHOT button again.
- Espresso will start to pour and the 1 SHOT
button will pulse.
- When you reach your desired single shot
volume, press the 1 SHOT button again.
- The new single shot volume has been
programmed.
- The programming mode has finished and
will return to the ready state.
BVCLECM-PMPMN-SS23EM1(US).pdf102023/6/614:54

Freshly Ground
Tamp Force
10-15kg
Pre-ground
Tamp Force
15-20kg
Two CupOne Cup
One Cup
10-12g
Two Cups
20-22g
21
Shot Volume Programming
20
The espresso making process involves
extracting oils out of coffee grinds. Deposits
of grinds and oils buildup over time affecting
the taste of the espresso and operation of the
espresso machine.
Purging water through the Group Head
and Steam Wand, before and after making
each espresso,is the easiest way to keep your
machine clean.
(See Operating Guide page 11)
Cleaning Tablets
Cleaning Drip Tray
Empty the Drip Tray when required, if the red
Water Level Indicator appears through the
Grill, empty the Drip Tray immediately.
• Weekly
Clean the Drip Tray and Grill with warm water
and a little non-abrasive washing up liquid,
rinse and dry.
Cleaning Warming Plate and Exterior
Wipe over the machine with a damp cloth and
wipe dry. Do not use alkaline cleaning agents,
abrasives or metal scourers, as these will
scratch the exterior surface.
Cleaning Portafilter and Filter Basket
• Every Time
Wash after each use by rinsing them with
warm water under the tap.
• Regular Intervals
In warm soapy water using a milddetergent.
Cleaning Group Head
• Every Time
Run water through before making an
espresso. (See Operating Guide page 11)
• Weekly
- Purge water through by pressing the
1 SHOT button.
- Wipe around the inside rim with a damp
cloth and brush.
Cleaning Filter Baskets
• 2-3 Months
- Soak the Filter Basket overnight in the Milk
Pitcher with warm water and add one
Espresso Machine Cleaning Tablet.
- In the morning rinse the Pitcher and Filter Basket
under running water ensuring all traces of
the cleaning tablet has been removed.
- Place Filter Basket into Portafilter
(without coffee) and insert into Group Head.
- Press the 1 SHOT botton.
- Water will pour through.
• Unblocking Filter Baskets
If the Dual Wall Filter Basket becomes
clogged with coffee grinds:
- Insert the 'Filter' Cleaning Pin in the
exit hole.
ESPRESSO
MACHINE
CLEANING
TABLETS
PLEASE EMPTY TRAY
REMOVE
STEAM
FILTER
UNSCREW
INSERT
INSERT
D
U
A
L
W
A
L
L
ESPRESSO
MACHINE
CLEANING
TABLETS
O
Care and Cleaning
Eco Mode
CAUTION: Do not immerse the machine in
water.
Important: Below parts are
NOT DISHWASHERSAFE:
- Portafilter
- Drip Tray
- Tamper
- Water Reservoir
Note: Over time it is normal for the inside
of the Drip Tray to be stained by the oils in
the coffee grinds.
ESPRESSO
MACHINE
CLEANING
TABLETS
STEAM
FILTER
UNSCREW
INSERT
INSERT
D
U
A
L
W
A
L
L
ESPRESSO
MACHINE
CLEANING
TABLETS
T
H
E
R
M
O
B
L
O
C
K
5
8
M
M
C
A
F
É
G
R
O
U
P
H
E
A
D
I
N
S
E
R
T
Espresso Machine Cleaning Tablets are
available for purchase online or through
major retailers.
LOCK
Note:
Double shot volumes can be
adjusted between 60mL and 110mL.
• 2 CUP – shot volume program
- Insert a 2 SHOT filter basket into the
portafilter. Fill with coffee grinds and tamp.
• Restore default single shot & double shot
volumes
- Press and hold the 1 SHOT and 2 SHOT
buttons for 3 seconds until the machine
beeps.
- The machine has now been restored to
the default volumes.
- Place the portafilter into the group
head.
- Hold and press the 2 SHOT button for 3
seconds until the machine beeps.
- Press the 2 SHOT button again.
- Espresso will start to pour and the 2 SHOT
button will pulse.
- When you reach your desired double shot
volume, press the 2 SHOT button again.
- The new double shot volume has been
programmed.
- The programming mode has finished and will
return to the ready state.
•After 20 minutes of inactivity, the machine will automatically power off.
•The pump will automatically stop after pumping 215mL of water.
•The pump will automatically stop once the steam function has been running for over
3 minutes.
BVCLECM-PMPMN-SS23EM1(US).pdf112023/6/614:54

This appliance has no user serviceable
parts. Any servicing beyond that described in
the Cleaning Section should be performed by
an Authorized Service Representative only.
See warranty available online.
Cleaning Steam Wand
• Every time
• 2-3 Months
- Soak the Steam Wand overnight in the Milk
Pitcher with warm water and add one
Espresso Machine Cleaning Tablet.
- In the morning remove the Pitcher and rinse
ensuring that all traces of the solution have
been removed.
- Wipe Steam Wand and Tip with a damp cloth
ensuring that all traces of the cleaning tablet
have been removed.
- Run Hot Water through the Steam Wand for
40 secs.
• Unblocking Steam Wand
- Insert the 'Steam' Cleaning Pin up the
Steam Wand Tip hole.
- Run Hot Water through the Steam Wand.
• Steam Wand Remains Blocked:
- Unscrew the Steam Wand Tip and soak
overnight in the Milk Pitcher with warm water and
add one Espresso Machine Cleaning Tablet.
- In the morning rinse the Pitcher and Steam Wand
Tip under running water ensuring all traces of
the cleaning tablet have been removed.
- Use the Cleaning Pin to clean the Steam Tip.
- Screw the Steam Wand Tip back into the
Steam Wand Arm.
- Run Hot Water through the Steam Wand for
40 secs.
ESPRESSO
MACHINE
CLEANING
TABLETS
STEAM
FILTER
INSERT
INSERT
ESPRESSO
MACHINE
CLEANING
TABLETS
T
H
E
R
M
O
B
L
O
C
K
5
8
M
M
C
A
F
É
G
R
O
U
P
H
E
A
D
I
N
S
E
R
T
ESPRESSO
MACHINE
CLEANING
TABLETS
PLEASE EMPTY TRAY
REMOVE
STEAM
FILTER
UNSCREW
INSERT
INSERT
D
U
A
L
W
A
L
L
T
H
E
R
M
O
B
L
O
C
K
5
8
M
M
C
A
F
É
G
R
O
U
P
H
E
A
D
I
N
S
E
R
T
22 23
Care and Cleaning
PLEASE EMPTY TRAY
REMOVE
STEAM
FILTER
UNSCREW
INSERT
INSERT
D
U
A
L
W
A
L
L
T
H
E
R
M
O
B
L
O
C
K
5
8
M
M
C
A
F
É
G
R
O
U
P
H
E
A
D
I
N
S
E
R
T
Group Head Rubber Seal
A rubber seal is located in the Group Head
and creates a seal against the Filter Basket
when making an espresso.
Important: When your espresso machine
Note:
is not being used, we recommend that you
do not leave the Portafilter inserted
into the Group Head, as this will reduce
the life of the seal.
MACHINE
CLEANING
TABLETS
PLEASE EMPTY TRAY
REMOVE
STEAM
FILTER
UNSCREW
INSERT
INSERT
D
U
A
L
W
A
L
L
T
H
E
R
M
O
B
L
O
C
K
5
8
M
M
C
A
F
É
G
R
O
U
P
H
E
A
D
I
N
S
E
R
T
Descaling: Group Head and Steam Wand
- Place filter basket into portafilter
(without coffee) & insert into group head.
- Press the 1 SHOT button.
- Water will pour through.
- Repeat if needed.
- Wipe the steam wand with a damp cloth.
- After texturing milk purge the steam
wand by turning the dial to HOT WATER
for 3 seconds.
After continued use, your machine may
develop a build up of mineral deposits and will
require occasional descaling. We recommend
descaling your machine every 4-6 months,
although this period will depend on the
hardness of water and frequency of use.
• Power
Ensure that:
- The power plug is inserted into the outlet and
turned on.
- The machine is ON and in the ready state.
• Descaling
1. Press the 2 CUP button and allow the
descaling solution to pour through. Then
turn the dial to HOT WATER and allow
approximately 100mL of water to pour
through.
2. Press the ON/OFF button to turn off the
machine.
3. Leave the descaling solution in the machine
for 5 minutes.
4. Press the ON/OFF button to turn on the
machine.
5. Repeat Step 1 three times.
6. Discard the descaling solution and rinse the
water tank with water.
7. Fill the water tank with water to the MAX
level.
8. Repeat Step 1 two times with water.
9. After descaling, cancel the descaling
warning by simultaneously pressing the 1
SHOT, 2 SHOT and STEAM buttons for
3 seconds.
• Cancel the descale warning
- After descaling, cancel the descale warning
by simultaneously pressing the 1 SHOT, 2 SHOT
and STEAM buttons for 3 seconds.
Descaling solution
You have 3 options:
A. Espresso Machine Descaling Tablets
or
B. Liquid Descaler
or
C. White vinegar and warm water.
A and B descaling solutions are available
for purchase online or from major retailers.
Preparing for descaling
• Fill water tank with solution
- Fill water tank to the MAX level and add one
Descaling tablet
Allow powder to fully dissolve.
or
B. In an empty Water Reservoir add
one cup of Liquid Descaler. Fill Water
Reservoir with warm water to the MAX level.
Allow solution to mix thoroughly.
or
C. In an empty Water Reservoir add
2 tablespoons of white vinegar.
Fill Water Reservoir to the MAX level with
warm water.
Allow solution to mix thoroughly.
• Place containers
- Place 2 large cups under the group head and
steam wand.
Important: Your machine will let you know
when it’s time to descale. The STANDBY,
1 CUP, 2 CUP and STEAM buttons will
flash 5 times. You will need to descale
your machine and reset it to cancel the
descale warning.
Over time this seal loses its elasticity and
may require replacement. The seal may
need replacing when watery espresso leaks
from around the group head, or if the portafil-
ter feels loose when fully rotated to the
centre position.
BVCLECM-PMPMN-SS23EM1(US).pdf122023/6/614:54

have been removed.
24 25
Descaling: Group Head and Steam Wand
Troubleshooting Guide Troubleshooting Guide
PROBLEM Possible Cause What To Do
Espresso tastes
burnt
Type of coffee being used. Try different brands of coffee.
Using steam function just
before pouring an espresso
shot.
Allow time for the thermoblock to
purge steam and cool down before
pouring a shot of espresso.
The STEAM LIGHT should have
finished flashing and the READY LIGHT
should be fully illuminated.
Coffee is too
cold
Milk may not be heated
enough.
Ensure that milk is heated properly
during frothing,but be sure not to
heat too much and boil the milk.
See Milk Frothing Section pages
15-16
.
No steam from
the Steam Wand
Steam Wand Tip is blocked. See Care and Cleaning, pages
21-22
.
No water in the Water
Reservoir.
Fill reservoir with water. Run Hot
Water through the Steam Wand to
ensure water flows.
Not enough
froth when
frothing
Milk may not be fresh. Ensure the milk being used is fresh.
Milk temperature is too
warm.
Ensure you start frothing with milk
that is around 39°F.
Type of Pitcher being used. For best frothing results use a
chilled Stainless Steel Milk Pitcher.
Milk has been boiled. Start again with fresh, chilled milk.
Heat till the Pitcher can only be heldfor
approximately 3 second, 140-149°F.
The milk is making bubbles
rather than micro-foam.
Ensure the Steam WandTip is
positioned correctly. It shouldbe just
below the surface of the milk.
Tap the Pitcher on the benchtop when
finished to release larger trapped air
bubbles.
Milk is not taking in enough
air.
Keep the Steam WandTip just under
the surface of the milk. This will help
to introduce airto the milkto create
micro-foam.
Pump makes an
unusual noise
No water in reservoir.Fill the Water Reservoir.
Water Reservoir not correctly
positioned.
Place the Water Reservoir firmly into
the back of the unit.
Red Plug from the packaging
may still be inserted.
Remove the red Plug found at the
base of the Water Reservoir.
If this guide does not solve your question, contact Calphalon Customer Care.
Details are on the back page.
PROBLEM Possible Cause What To Do
Portafilter
comes off
during espresso
pour.
Espresso
squirts out of
the Group Head
during pour
Espresso
trickles down
the side of the
Portafilter
Portafilter is not attached
correctly,or has not been
tightened sufficiently.
Ensure all three tabs of the Portafilter
are fully inserted into the
Group Head, and rotated to the center
position. See Operating Guide Section,
page 9.
Coffee grind is too fine. Change to a coarser grind.
Coffee grinds tamped too hard.
Tamp the grinds more lightly.
Top edge of filter is not free of
coffee grinds.
Clean around the top edge of the filter
and wipe the Group Head clean.
The Group Head is dirty. Wipe with a damp cloth. Clean the
seal including the bayonet corner
areas with a brush to remove grinds.
Group Head rubber seal is
damaged or worn.
Contact Calphalon Customer Care.
Details are on the back page
26
.
No espresso
pours
No water in the Water
Reservoir.
Fill reservoir with water. Run water
through the machine without a Filter
Basket to ensure it is fully primed.
Group Head may be blocked.
See Descaling Section, pages
23
.
The Dual Wall Filter Baskets
may be blocked.
Use the Cleaning Pin to unblock the
Filter Basket.
The coffee grounds are too
fine or tamped down too hard.
Empty the Filter Basket and rinse
under water to clean. Wipe the group
head with a cloth.
Refill the filter with grinds and tamp.
Espresso pours
out in drips
(Over Extracted)
Grinds are too fine. Change to a coarser grind.
Coffee tamped too hard. Tamp the grinds more lightly.
Machine has scale buildup.
See Descaling Section, pages
23
.
Espresso does
not have any
Crema
(Under Extracted)
Beans are oldor
pre-ground grinds are dry.
Use fresh beans and grinds.
Be sure to store pre-ground grinds in
an airtight container.
Grinds not compacted enough.
Tamp more firmly.
Grinds
too coarse. Use a finer grind coffee.
Uneven cup
filling
Uneven tamping or
obstruction in the pouring
spouts.
Ensure coffee is tamped evenly and
check there is nothing obstructing the
pouring spouts.
Used Espresso
puck is wet
Dual Wall Filter Baskets can
keep the espresso puck wet.
Keep Portafilter in Group Head
until milk frothing is finished. This
will give more time for the water to
dissipate.
BVCLECM-PMPMN-SS23EM1(US).pdf132023/6/614:54

26 27
Warranty
3 YEAR LIMITED WARRANTY
Sunbeam Products, Inc. or if in Canada Newell Brands Canada ULC (collectively
“Sunbeam”) warrants that for a period of three years from the date of delivery to the
original end user purchaser, this product will be free from defects in material and
workmanship. Sunbeam, at its option, will repair or replace, free of charge, this product or
any component of the product found to be defective during the warranty period.
Replacement will be made with a new product or new component at no cost to the
consumer. If the product is no longer available, replacement may be made with a similar
product of equal or greater value. This is your exclusive warranty. Do NOT attempt to repair
or adjust any electrical or mechanical functions on this product. Sunbeam reserves all
rights to decline coverage if the defect or damage was caused by unauthorized components
or service. This warranty is valid for the original retail purchaser from the date of delivery
and is not transferable. Keep the original proof of purchase. Dealers, service centers, or
retail stores selling Sunbeam products do not have the right to alter, modify, or any way
change the terms and conditions of this warranty. This warranty does not cover normal
wear of parts or damage resulting from any of the following: negligent use or misuse of the
product; use on improper voltage or current; use contrary to the operating instructions
provided by Sunbeam; disassembly, repair, or alteration by anyone other than Sunbeam or
an authorized Sunbeam service center. Sunbeam expressly excludes from this warranty
and denies liability for defects or damage caused by repair or alteration by anyone other
than Sunbeam or an authorized Sunbeam service center. Further, the warranty does not
cover: Acts of God, such as fire, flood, hurricanes and tornadoes.
No terms of this warranty may be construed to apply to non-warranty service and
maintenance. Accordingly, Sunbeam also denies liability for defects and damage caused by
repair or alteration outside the terms of this warranty.
There are no warranties which extend beyond those stated herein. ANY IMPLIED
WARRANTIES THAT MAY BE APPLICABLE TO PRODUCTS, INCLUDING IMPLIED
WARRANTIES OF MERCHANTABILITY OR FITNESS FOR A PARTICULAR PURPOSE, ARE
LIMITED IN DURATION TO THE DURATION OF THIS WARRANTY. Some States do not allow
limitations on how long an implied warranty lasts, so the above limitation may not apply to
you.
UNDER NO CIRCUMSTANCES SHALL SUNBEAM BE LIABLE FOR ANY SPECIAL,
INCIDENTAL, OR CONSEQUENTIAL DAMAGES BASED UPON BREACH OF THIS LIMITED
WARRANTY, BREACH OF CONTRACT, OR STRICT LIABILITY. Some States do not allow the
exclusion or limitation of incidental or consequential damages, so the above limitation or
exclusion may not apply to you.
This warranty gives you specific legal rights, and you may also have other rights which vary
from State to State.
To view the complete suite of products, please visit our website:
www.calphalon.com
How to Obtain Warranty Service
In the U.S.A.
If you have any questions regarding this warranty or would like to obtain warranty support,
please call 1-800-809-7267 or visit the Calphalon® Website. Proof of purchase and proof of
delivery date if different than your date of purchase is required to obtain warranty
performance.
In Canada
If you have any question regarding this warranty or would like to obtain warranty service,
please call 1-800-809-7267.
In the U.S.A. this warranty is offered by Sunbeam Products, Inc, located at 6655 Peachtree
Dunwoody Rd, Atlanta, GA 30328. In Canada, this warranty is offered by Newell Brands
Canada ULC, located at 20B Hereford Street, Brampton, Ontario L6Y 0M1. If you have any
other problem or claim in connection with this product, please write our consumer service
department.
BVCLECM-PMPMN-SS23EM1(US).pdf142023/6/614:54

Due to continued product improvements,
product illustrations and photographs in this User Guide
may differ slightly from the actual product.
BVCLECM-PMPMN-SS_23EM1 (US)_GCDS-JC
NWL0001459339 Rev A
Need help with your appliance?
www.Calphalon.com
1-800-809-7267
Contact our Customer Care Team or
visit our website for information and tips
on getting the most from your appliance.
Product of: Sunbeam Products Inc.
6655 Peachtree Dunwoody Road, Atlanta, GA 30328
MADE IN CHINA
BVCLECM-PMPMN-SS23EM1(US).pdf152023/6/614:54
Other Calphalon Coffee Maker manuals

Calphalon
Calphalon HE120CMG User manual

Calphalon
Calphalon BVCLDCG3 User manual

Calphalon
Calphalon TEMP iQ User manual

Calphalon
Calphalon BVCLDCG1 User manual

Calphalon
Calphalon HE120CMG User manual

Calphalon
Calphalon TEMP iQ User manual

Calphalon
Calphalon BVCLECMP1 User manual

Calphalon
Calphalon BVCLECMPBM1 User manual

Calphalon
Calphalon BVCL-JJ100-A User manual

Calphalon
Calphalon BVCLDCG1 User manual