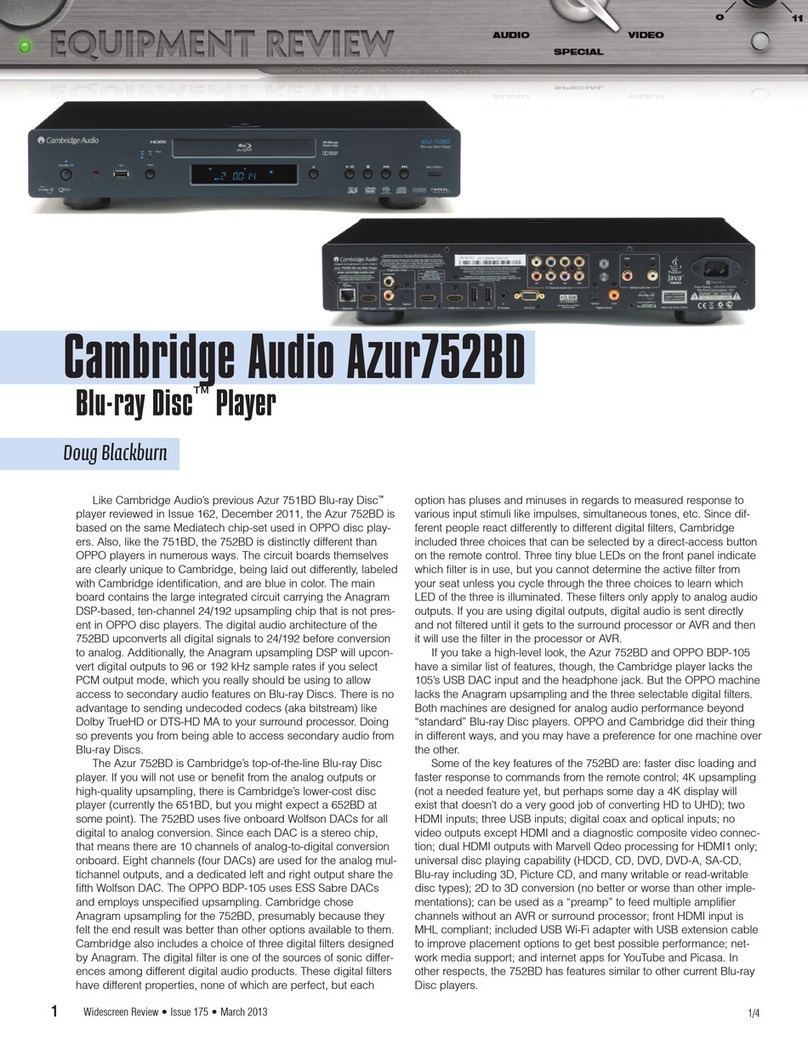
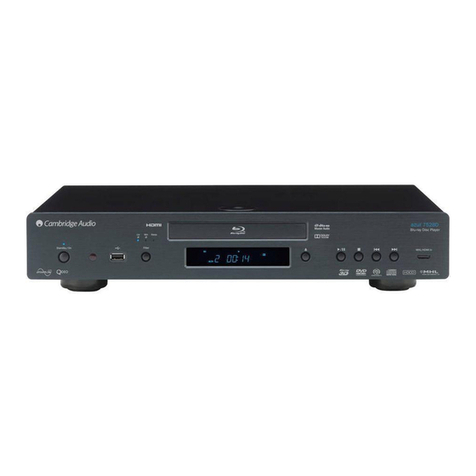
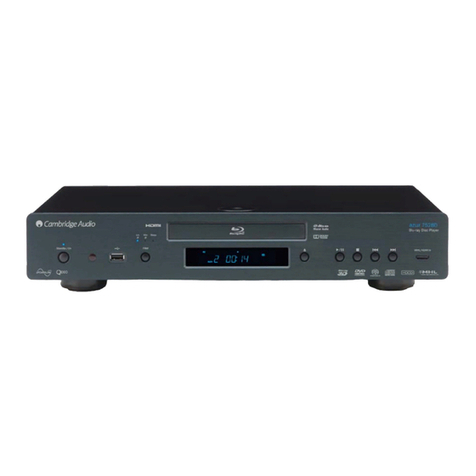
Cambridge Audio Azur 752BD User manual

Service Manual
Azur 752BD Universal Upsampling Blu-ray, DVD & CD player
Issue date: February 2013

2
TABLE OF CONTENTS
Chapter 1, About Maintenance 3
Chapter 2, Block Diagrams 4
Interior Image 6
Chapter 3, Function Module Schematics 7
Servo Circuit 8
Partial Introduction to Main Board System 9
Decoding Chip 10
Main Board Power Supply Circuit 11
Audio Processing Circuit 12
Video Processing Circuit 13
Other Control Circuits of Main Board 15
Panel and Button Control Circuits 16
Troubleshooting Flowcharts and Cases 17
Install Barcode 20
Precautions for Player Disassembly and Reassembly 24
Internal Structure of Unit 25
Remove the Audio Board 27
Replace the Main Board 29
Replace the Front Panel Assembly 31
Replace the Power Board 32
Circuit Diagrams 33
Parts Table 43
Packing Bill of Materials 44
Assembly Bill of Materials 45

Azur 752BDService Manual
3
Chapter One About Maintenance
1.1 Safety precautions
1.1.1 Power supply When maintenance personnel are repairing players ,he should pay special
attention to the power board with ~100V-240V and DC154V-300V which will cause hurt and damage to
persons!
1.1.2 When replacing accessories, please remove the power plug from socket to avoid any injures to
human body.
1.2 Precautions
1.2.1 Precautions for laser head
1ǃDo not stare at laser head directly for laser emission will occur when laser head is working
which will hurt your eyes!
2ǃDo not use wiping water or alcohol to clean laser head ,and you may use cotton swab.
1.2.2 About placement position
1ǃNever place player in positions with high temperature and humidity.
2ǃAvoid placing near high magnetic fields , such as loudspeaker or magnet .
3ǃPositions for placement should best able and secure.
1.2.3 Electro static precautions
1ǃMaintenance facility and working table must be earthed.
2ǃMaintenance man must wear electrostatic ring, and he can use antistatic gloves instead when
electrostatic ring is unavailable or inconvenient to use.
3ǃWhen repairing accessories, antistatic bag is required to pack the accessory.
1.2.4 Precautions for welding
1ǃThe soldering tin wire must satisfy the local environmental protection requirement.
2ǃWelding temperature must not above 350ć
1.3 Required device for maintenance
Digital oscillograph ( 100MHZ) ǃTV set(1080p)ˈreceiver˄support HDMI˅ǃSMD rework station
Multimeter ǃSoldering iron ǃPointed-pinchers ǃCutting nippers ǃForceps ǃElectric screw driver
Terminals connecting cord ǃTest disc etc.
-1-
Note: After replacing loader or main board,
please input BARCODE of the loader to main board again.
For input method, please refer to BARCODE input method on page 20.
-1-
-1-

4
7BDP752-0
Audio DAC Board
2BDP752-0
MAIN BOARD
2.1.1 752BD FRAME SCHEMATIC DIAGRAM
VCC
GND
AOMCLK
AOBCK
AOLRCK
GND
AOSDATA0
AOSDATA1
AOSDATA2
AOSDATA3
GND
AOSDATA4
AODATA5
SCL
SDA
DSD_PCM#
GND
GND
STBY_EN
AU_RESET
AU_AMUTE_MCU
VCC5_STB
TILT-
TILT+
TR-
TR+
FR-
FR+
CO_B+
CO_B-
CO_A+
CO_A-
VDACO#
AUX1
INH
INB
ING
INA
VCC_PDIC
IND
GND
DRFO+
DRFO-
GND
RFO+
RFO-
GND
INC
INE
VHAVC
INF
GND
GND
A3.3V
GND
VCC_LD
GND
VCC_BD_LD
GND
LDD_SDIO_OPU
LDD_CLK_OPU
LDD_SEN_OPU
GIO7
TEST_V
GIO4
GIO5
GIO6
GND
GND
TRAYIN
GND
TRAYOUT
LOAD+
LOAD-
A-
A+
B-
B+
GND
U
V
W
COMMON
5BDP751-0
Power Board
RELAY_ON
GND
+15V_IN
GND
GND
GND
+5V_STB
+5V_STB
-15V
GND
GND
+15V
GND
+12VF
BD LOADER KEM-480 (SONY)+TOHEI
Front Panel Board
3.3V_STB
IR_FP
STBY_KEY
OPEN/CLOSE_KEY
GND
PLAY_LEFT_RIGHT
UP_DOWN
3D INDICATE
GND
4K_2K INDICATE
VCC
VCC
VCC
GND
GND
VDATA
VSTB
VCLK
CN12
CN1
CN17 CN18
CN11
LAN
HDMI2
DIAG.
IR IN
USB1/2
HDMI IN
HDMI1
OPTCAL
RS-232C
Chapter Two Block diagram and version of player
18
17
16
15
14
13
12
11
10
9
8
7
6
5
4
3
2
1
15
14
13
12
11
10
9
..
1
MHL/HDMI
INPUT BOARD
MBDP752-0
GND
HDMI5V_IN_VBUS
GND
USBP1
USBM1
USB5V
MHL/HDMI IN
CN9
20PIN
CN26
CN2
Servo port
Mcu port
CN14 CN21
COAXIAL
NAND FLASH
port
CN6
OPTICAL/COAXIAL
INPUT BOARD
BBDP752-0
-2-

Azur 752BDService Manual
5
2.2.1 752BD OVERALL BLOCK DIAGRAM
MT8530
1st Digital Audio(I2S)
output
HDMI output
AOMCLK
I2S_BCLK_AOBCK
I2S_LRCK_AOLRCK
I2S_DATA_AOSDATAO
AOSDATA1#
AOSDATA2#
AOSDATA3#
I2S_DATA_AOSDATA4
AOSDATA5#
V_CBS
TXC- TXC+TX0- TX0+TX1- TX1+ TX2- TX2+
CN12
1st
I2S/DS
D
Audio
output
To DAC
HDMI
Terminal
Video filter
Q3 L16 etc
Diagnostic
port
Audio
Board
DAC board
Digital audio
Output
circuit
ASPDIF COXIAL
OPTICAL
Rear panel
USB Ports
Front panel
USB Ports
Sil1292
IR INPUT IR-IN
Module
MCU
PANEL KEY
LAN
RS232
ports
K4B1G1646G-BCH9
DDRⅡ1GX4
K9K8G08U0D-SCB0
NAND FLASH 1G
K4B1G1646
G-BCH9
DDR III
HDMI1
Terminal
TPIC
2050
50P
CN11
P9
CN18
SONY
Loader
KEM-
460 or
KEM-
480
P5
CN17 Loader
Frame
Marvell
88DE2755
HDMI output CVBS_OUT
COXIAL
ASPDIF
TO AUDIO
BOARD
TO BD loader
Spindle/sled motor
3 Axis actuator
Open/close
Driver
RF&Servo signal
RESET#
USBM1 USBP1USBM0 USBP0
USB
IR_MCU
IR_FP
IR_MCU
SDA SCL
Key in
UARXD UATXD
TD+ TD- RD+ RD-
12MHZ
Clock circuit
27MHZ
Clock circuit
25MHZ
Clock circuit
DDR_DATA
MEM_ADD
CCIR_OUT_C0~C7
CCIR_OUT_Y0~Y7
AO2I2SD0~D3
AO2I2S BCK MCLK LRCK
A
AOMCLK AOBCK
AOSDATA4 AOLRCK
Spindle/sled motor
Step motor
Sa-act BD
Servo driver signal
HDMI IN
RX2_0+/- RX2_1+/-
RX2-2+/- RX2_C+/-
ESD circuit HDMI
IN
ESD
Circuit
MHL/HDMI
IN
RX1_0+/- RX1_1+/-
RX1-2+/- RX1_C+/-
MHL/HDMI IN
MCU
Reset circuit
Reset
circuit
ESD
Circuit LOAD+ LOAD-
TRAYIN# TRAYOUT#
LOADER
REAR PANEL
REAR PANEL
Front panel
FE_RESET Reset
circuit
Mt8580
-3-

6
2.3.2 752BD interior image
Loader component
MAIN BOARD (OLNY 480)
AUDIO BOARD
POWER BOARD
Rear cover
AC socket
Front panel component
base cover
-4-

Azur 752BDService Manual
7
Chapter III Function module schematics
Section 1 Loader assembly introduction
Disc tray
Laser OPU
Loader frame
Top spindle
Level1 vibration pad
Level2 vibration pad
Loader support
Damping spring
Weight balanced frame
Anti-dust cover
-5-

8
3.1.1.2 Operating principle of servo circuit::
Servo circuit is mainly composed of pick up interface, servo drive, system control and signal
processing circuits and servo software (built in NAND FLASH) and other modules.
Servo drive circuit: servo drive circuit has one drive group. This group is composed of
U2(TPIC2050)and peripheral circuit which are used to drive spindle motor, focus coil, tracking coi and
feed motor. TPIC2050 has servo control circuit and drive circuit built in.
ommon
C servo circuit troubles:
1. Fail to open/close tray door.
2. Fail to load discs for loader driver error.
3. Keep displaying “loading”, “No disc” or “Unkown disc”.
4. Fail to view servo software version in setup menu, loader malfunction.
5. Fail to load disc for poor contact of flat cable that connects the loader.
A B C D E F G H DVDRFO BDRFO
TPIC2050
Mt8580
752BD player adopts SONY 480 loader and MT8580 decoding scheme. And its servo circuit is
mainly composed of decoding chip Mt8580, driver IC tpic2050 and other components.
Please refer to Figure 3.1.1.1 below:
.
SERVO DRIVER
TR+
TR-
FR+
FR-
TIL+
TIL-
U
V
W
COMMON
NAND
FLASH
LOAD+
LOAD-
SA_CO_B-
SA_CO_B+
SA_CO_A+
SA_CO_A-
SLED_B+
SLED_B-
SLED_A+
SLED_A-
DRIVER_CS_IN
DRIVER_SCLK_IN
DRIVER_DATA_IN
DRIVER_DATA_OUT
XRESER_IN
3.1.1 Servo circuit
3.1.1.1 Servo circuit overview:
Figure 3.1.1.1 Block diagram of servo circuit
BD pick up
component
Spindle
motor
Feed
motor
Decoding and servo processing circuit
Tray open/close motor
-6-

Azur 752BDService Manual
9
Section 2 Partial introduction to Main board system
3.2.1. ;Block diagram of decoding circuit:
NFD0~7
MT 8580
NAND
FLASH
Reset
Circuit
Clock Circuit
27MHZ X2
Panel
board
FE_RESET
DQ0~15
DDR III
U105 U105
U203 U204
RD0~13
MCU Circuit
Audio output used for 2I2s and
DSD firmat TO Sil9334
Digital Video output to
MARVELL 88DE2755
DIAG. output
1st digital audio I2S output
To audio process board
HDMI Output
IR_FP
KEY IN
VDATA
VSTB
VCLK
SDA
SCL
BD Loader
XRESET
RESET
27MHZ
Reset
Circuit
USB port Servo drive
circuit
3.2.1.1 Block diagram of decode and peripheral circuit
Decoding chip : This pla yer adopts MT8580 as main chip, whic h inclu des , a , ,
, , and other module s. It supports
,2 , e , 2D to 3D
conversion, 4 K up-scalin g, dual HDMI outputs, dual HDMI inputs and three USB 2.0 high speed ports,
Supported dis c formats in clu de , , , , , etc. For detaile d features, ple ase refer to IC
specificatio ns.
video decodin g udio processing memory controlle r
HDMI transmit ter servo processin g external lin terface 2 channel HD MPEG-2/AVC/VC-1 video
decoding channel multi-format audio decoding motion-adaptive and dge-preserving de-interlacing
BDMV BDLIVE SACD DVD-AUDIO CD
-7-

10
Decoding chip:
Mt8580 mainly includes Video Decode, Audio Processing, Memory Controller, HDMI transmitter, servo
Processing, External Interface, HDMI Receiver modules.
Mt8580 can support BD, DVD, and CD playback, including the latest BD-ROM formats, such as BD-Live
and BonusView. It features AVC, VC1, and MPEG-2 video decoders that can decompress full high-
definition video streams. And for audio decoding, its multi-format decoder is capable of decoding Dolby
TrueHD and DTS-HD lossless audio.
MT8580 is fabricated with advanced silicon process and offers higher CPU performance and more
DRAM bandwidth. This SoC also includes a powerful graphics engine and a variety of peripherals,
including USB 2.0 ports. To support popular network applications, MT8580 also implements 10/100
Ethernet interface and support WLAN connection thru its USB port.
Besides the connectivity features, audio and video output quality and flexibility is another focus of state-
of-the-art Blu-ray devices. MT8580 embeds 4 channels of 148MHz/12-bit video DAC and also an HDMI
1.4 compliant transmitter for 2D/3D video output. And MT8580 also embeds an HDMI 1.4 Receiver for
video input. Its audio output via I2S, SPDIF and HDMI can be configured independently. Moreover,
MT8580 also supports audio bit stream input from HDMI and SPDIF, which is a key function in the growing
Blu-ray HTiB segment
.
HDMI 1.4 output
148MHz/12-bit, 4 CH TV Encoder
HDMI 1.4 Receiver
3D video output
Ethernet
USB 2.0
Key Features:
HD H.264/MPEG-2/AVC/VC-1 video decode
Dual-channel multi-format audio decode
Motion-adaptive, edge-preserving de-interlacing
4185 DMIPS Cortex-A9 CPU x 2
Mali-400 MP
-8-

Azur 752BDService Manual
11
3.2.4 .Main board power supply circuit
3.2.4.1 Block diagram of voltage stabilizing circuit, shown in figure 3.2.2.1:
3.2.4.1.1 主板供电系统框图
DC-DC
TPS54325
PWPR
U1
POWER
SUPPLY
1.1V
1.2V
1.5V
3.3V
U15 MCU
WT61P80
6
AP1117EL
-ADJ
DC-DC
TPS54325
PWPR
U3
DC-DC
TPS54325
PWPR
U8
DC-DC
TPS54325
PWPR
U7
3.3V_MVL
12V
V1
AO4468
PWR_EN1
88DE2755
+5V_STB
+15V_IN
V11
AO4468
STBY_MCU
Sil1292
VCC
PWR_EN3
USB
Power
u24u14u27
Panel
board
HDMI CEC
IR-IN
U5
TPS62203
DBVT
RS232
U36
U2
TPIC2050
LOADER
U26
BAJ2DDO
WHFP
U30
BAJ2DDO
WHFP
8V
+5V_STB
+5V_STB
VCC#
PWR_EN2
3.3V_STB
MT8580&
SIL1292
MT8580&
DDRIII
MT8580&
FLASH
SIL1292
V4/Q7
V8/Q29
Q30
1.5V_MVL#
PWR_EN2
PWR_EN4
1.8V_MVL#
PANEL
IR
KEY
3.2.4 .1 Block diagram of power supply system of main board
-9-

12
Mt8580
COXIAL
INPUT
DSP
ADSP
-21261
Section Three Audio processing circuit
3.3.1 Block diagram of audio signal is shown in figure 3.3.1.1:
Decoding
chip
D/A
converter
Figure 3.3.1.1 Block diagram of audio signal
DATA_LF_RF_MTK
DATA_LS_RS_MTK
BCLK_MTK
LRCK_MTK
DATA_C_SW_MTK
DATA_LSB_RSB_MTK
DATA_LDOWNMIX_RD
OWNMIX_MTK
SLRCK_DSP
SBCLK_DSP
SDATA,_L_RDOWNMIX_ DSP
SDATA_LSB_RSB_DSP
SDATA_C_SW_DSP
SDATA_LS_RS_DSP
SDATA_LF_RF_DSP
MCLK_MTK
U6
74LCXH162244MTD
SBCLK_DAC
SLRCK_DAC
SDATA_LF_RF_DAC
SDATA_LS_RS_DAC
SDATA_C_SW_DAC
SDATA_LSB_RSB_DAC
SDATA_LDOWNMIX_RDOWNMIX_DAC
U17/U20/
U23/U23/
U26
Wm8740
DAC1~DAC5_MCLK
Output Amplifier
Audio output terminal
Audio
processing
board
U18
U19
U21
U22
U24
U25
U27
U28
U30
U31
LEFT_DOWNMIX
RIGHT_DOWNMIX
LEFT_FRONT
RIGHT_FRONT
CENTER
SW
LS
RS
SBL
SBR
COXIAL
OPTICAL
U33
88DE2755
HDMI1
HDMI2_TX2+
HDMI2_TX2-
HDMI2_TX1+
HDMI2_TX1-
HDMI2_TX0+
HDMI2_TX0-
HDMI2_TXC+
HDMI2_TXC-
SPDIF_OUT
HDMI2
TX2+/TX2-/TX1+/TX1-/TX0+/TX0-/TXC+/TXC-
AO2SI2S_BCK
AO2SI2S_LRCK
AO2SI2SD0(MLR)
AO2SI2SD1(SURLR)
AO2SI2SD2(CSW)
AO2SI2SD3(SURBLR)
SPDIF2
OPTICAL_IN_ARC_MVL
OPTICAL
INPUT
COAXIAL_IN
OPTICAL_IN
ARC_MVL_OPTICAL_IN
COAXIAL/OPTICAL
INPUT BOARD
U4
SN74CBT3257
COAXIAL_IN
USBDAC_CIAXIAL_IN
OPTICAL_IN_ARC_
MVL_OPTICAL_IN
-10-

Azur 752BDService Manual
13
Mt8580
V_CVBS
HDMI OUT1
88DE2755
CCIR_OUT_VS
CCIR_OUT_HS
CCIR_OUT_CLK
CCIR_OUT_DE
CCIR_OUT_C[0:7]
CCIR_OUT_Y[0:7]
U33
ESD
Circuit
U46
U45
HDMI1_Tx0-
HDMI1_TX0+
HDMI1_Tx1-
HDMI1_TX1+
HDMI1_Tx2-
HDMI1_Tx2+
HDMI1_TXC+
HDMI1_TXC-
Analog
video
Digital video
output
ESD
Circuit
U17
U18
HDMI2_Tx0-
TX0+
Tx1-
TX1+
Tx2-
Tx2+
TXC+
TXC-
HDMI2_
HDMI2_
HDMI2_
HDMI2_
HDMI2_
HDMI2_
HDMI2_
HDMI OUT2
HDMI2_Tx0-
TX0+
Tx1-
TX1+
Tx2-
Tx2+
TXC+
TXC-
HDMI2_
HDMI2_
HDMI2_
HDMI2_
HDMI2_
HDMI2_
HDMI2_
HDMI1_Tx0-
HDMI1_TX0+
HDMI1_Tx1-
HDMI1_TX1+
HDMI1_Tx2-
HDMI1_Tx2+
HDMI1_TXC+
HDMI1_TXC-
Diagnostic
port
Figure Block diagram of video circuit3.4.1.1
HDMI IN
ESD
Circuit
U19
U20
HDMI_Rx2_2+
HDMI_
HDMI_
HDMI_
HDMI_
HDMI_
HDMI_
HDMI_
Rx2_2-
Rx2_1+
Rx2_1-
Rx2_0+
Rx2_0-
Rx2_C+
Rx2_C-
HDMI_Rx2_2+
HDMI_
HDMI_
HDMI_
HDMI_
HDMI_
HDMI_
HDMI_
Rx2_2-
Rx2_1+
Rx2_1-
Rx2_0+
Rx2_0-
Rx2_C+
Rx2_C-
MHL/HDMI IN
HDMI
RX PORT 2
Sil1292
U11
MHL_HDMI_Rx_2+
MHL_HDMI_Rx_2-
MHL_HDMI_Rx_1+
MHL_HDMI_Rx_1-
MHL_HDMI_Rx_0+
MHL_HDMI_Rx_0-
MHL_HDMI_Rx_C+
MHL_HDMI_Rx_C-
Front panel
BTB
CABLE
ESD
Circuit
RXCK+
RXCK-
RXDO- MHL-
RXDO+ MHL+
RXD1+
RXD1-
RXD2+
RXD2-
RXCK+
RXCK-
RXDO- MHL-
RXDO+ MHL+
RXD1+
RXD1-
RXD2+
RXD2-
Section IV Video processing circuit
3.4.1 Block diagram of video circuit is shown in figure 3.4.1.1:
-11-

14
Video output
Video output signals are classified into 3 types:
Analog output: Video signal is converted into analog video signal (CVBS) by the DAC built in
Mt8580, then processed by video amplification and filter cirucits, output through the diagnostic port to
a display with composite video input port for troubleshooting.
HDMI output: The digital video interface of MT8580 transmits digital video signal to
MARVELL88DE2755 HD video processing chip for format conversion, in which the digital video signal
is converted into 36 bit digital video signal. Then the parallel 36bit video signal is encoded into TMDS
signal, and in the mean time digital audio signal output from Mt8530 is also endoded into TMDS.
88DE2755 also has HDCP encryptor built in. The TMDS signal output from 88DE2755 is transmitted to
HDMI 1 for output. For protection of HDMI 1 port, the circuit also has anti-ESD IC included. For HDMI 2,
video signal is processed into HDMI signal by the MTDS circuit built in Mt8580 and output via HDMI 2
output port.
Video output circuit issues mainly include no video output and output video signal distortion.
HDMI/MHL input
Mt8580 incorporates two sets of HDMI input; one HDMI input port locates on the rear panel and
goes directly into MT8580's HDMI input port. For compatibility with MHL port of mobile device, a
MHL/HDMI conversion IC (sil1292) is added to the other HDMI input port (on the front panel).
Mobile High-Definition Link (MHL) is a proposed industry standard for a mobile audio/video
interface for directly connecting mobile phones and other portable consumer electronics (CE) devices to
high-definition televisions (HDTVs) and displays. The MHL standard features a single cable with a low
pin-count interface able to support up to 1080p high-definition (HD) video and digital audio while
simultaneously charging the connected device
New features of HDMI 1.4
1. HDMI Ethernet Channel (HEC). It allows a 100 Mbit/s Ethernet connection between two HDMI
connected devices so they can share an Internet connection. This feature hasn’t been implemented on
BDP103.
2. Audio Return Channel (ARC). BDP103 has implemented this feature.
3. HDMI 3D. BDP103 has enabled this feature as well as 2D-to-3D conversion.
4. Higher resolution support. HDMI 1.4 increases maximum resolution support to 4K × 2K, i.e.
3840 × 2160p (Quad HD) at 24 Hz/25 Hz/30 Hz or 4096 × 2160p at 24 Hz
-12-

Azur 752BDService Manual
15
Chapter V Other control circuits of main baord
3.5.1 Block diagram of external input interface as shown in 3.5.1.1:
RS232
PORT TRSF322
1E1PWR
MCU
Mt8530
UARXD_RP UARXD3
UATXD3
Figure 3.5.1.1 Block diagram of external input interface
RS232:Ontheplayer,RS232ismainlyusedforremotecontrolcircuit,allowing
externalcontrolsystemtocontroltheplayerviaRS232port.
Cn21:MCUDebugport
Cn6:NANDFLASHDebugport
Cn14:ServosoftwareDebugport,barcodeinputport
USB:3setsofUSBinterfaces forexternalUSBdevices(WIFIadapterisconnectedvia
USB)
U36
UATXD_RP
CN20
CN21
MCU_ISP_SCL
MCU_ISP_SDA
SDA
SCL
CN6
Rear
USB2
Front
USB
CN14
NANDFLASH debug
Server software debug
MCU Debug
Rear
USB1
USB power managment
& ESD circuit
USB power managment
& ESD circuit
USB power managment
& ESD circuit
-13-
Chapter V Other circuits of main board

16
Pt6302
VFD
GRID1~12 SEG1~35
Mt8580
MCU
VDATA
VSTB
VCLK
VFD_OFF
KEY_L/P/U KEY_R_D
OPEN_KEY STBY_KEY
IR_FP_IN IR_MCU
MCU_ISP_SDA
MCU_ISP_SCL
FL-24V
FLAC1
FLAC2
REST#
VDD
Section VI Panel and button control circuits
3.6.1: Block diagram of panel circuit:
VFD
power supply
circuit
Reset
circuit
Q1C12
Press
button
Receiver
module
Remote
input and
output circuit
Figure 3.6.1.1 Block diagram of panel
KBP206G
LM 431A
HOST GND
HOST GND
+5V
+15VBD
-15VAU
+15VAU
FB
B1
NCP1271P65
HOST GND
Section 7 Power supply circuit
3.7.1 Block diagram of power supply circuit is shown in figure 3.7.1.1:
Absorbing
circuit
Power system
filter
Power socket
Overvoltage
protection
circuit
Power-off
control
circuit
Switching IC MOS tube
Transformer
Opto-
coupler
Rectifying
Rectifying
Rectifying
Rectifying
Rectifying
Filtering
Filtering
Filtering
Filtering
Filtering
Figure 3.7.1.1 Block diagram of power circuit
Sampling
circuit
-14-

Azur 752BDService Manual
17
Y
N
Y
Y
N
Y
N N
Y
N N
Y
N
Y
Y
A
Chapter Four Troubleshooting flow chart and cases
Section One Troubleshooting flow chart
Troubleshooting flow chart of Power Not On
Player not power on
Check
whether standby
indication light (blue)
is on
Replace
power cord and
see if it is normal
Check
whether AC
socket is normal
Power cord defective Disassemble player and
replace power board
Press
power button on
remote control and see if
the filter light is
on
Replace
main board and see if
it is normal
Replace power board
Replace
panel or check
whether flat cable between
panel and main board
is normal
Power of main board or MCU
circuit defective, replace
main board
MCU circuit or panel socket
defective, replace main
board
Whether
panel VFD has character
display
Whether
there is video signal
output
Replace main board
Panel display trouble,
replace panel
Replace main board
Whether
player power on is
normal
replace AC socket
Press
power button on
panel and see if
the filter light is
on
-15-

18
N
Y
N
Y
N
Y
N
Y
Y
N
A
Y
N
Y
N
Y
N
Y
B
N
Troubleshooting flow chart of tray open/close, disc reading, play, remote control“ ”
Replace
loader component
and see whether tray
open is
normal
Replace main board
Check
whether loader
frame is stuck
Check whether frame and
motor are normal, and
check whether the belt is off
Replace loader
component or frame
Player
can not read some
discs
Player
can not read all
discs
Pick up is defective or
replace loader component Replace
loader component
and see whether it is
normal
Replace main board
Replace main board
Replace loader component,
during that, you
need to reenter BARCODE
Format
FLASH, update
again and see whether
it is normal
Whether
stuck or pause
issues happen during
disc playing
Replace main board if
abnormal audio or video
happens during playing
Software or FLASH has
trouble Replace
loader component,
test and see whether
it is normal
Replace main board
Loader is defective
Replace
remote control
and see if it is
normal
Replace main board
Replace
panel and see
whether remote is
normal
Check remote control and
its batteries
Tray opening/
closing issue
Disc loading issue
Video output
issue
Remote control issue
Playback issue
-16-

Azur 752BDService Manual
19
Y
N
N
A
N
Y
N
N
Y
Y
N
Y
Troubleshooting flow chart of audio and panel display troubles“ ”
All
audio outputs are
not normal
Whether
digital audio output
is normal Replace main board
Upgrade
software and
see whether output
is normal
Replace
audio board
and see whether
analog audio output
is normal
Replace main board or
panel
Replace main board Audio board is defective
Replace main board
HDMI/MHL
input issue
Audio issue
N
Y
END
Replace main board
Whether
expansion port
or video port functions
are normal?
N
Replace MHL/HDMI
input board is
normal?
Y
MHL/HDMI
Input board is defective
N
Y
Replace main board
Optical/coaxial
input issue
N
Replace
is normal?
Optical/
coaxial input board
Y
Optical/coaxial
input board is defective
-17-

20
Blu-ray
Player MTK Tool
Two-dimensional scanner
Computer
USB port
USB or
Rs232 port
Cn14
Block diagram of barcode entry device connection
Install Barcode
1. After replacing main board or loader assembly, it is required to reinstall barcode.
Before the barcode is , the main board and the loader should not be connected. Connect the
player, PC, two-dimensional scanner and upgrading tools following the diagram above. Mtk tool
should be connected to Cn14.
install
Cn14
-18-
Other manuals for Azur 752BD
2
Table of contents
Other Cambridge Audio Blu-ray Player manuals

Cambridge Audio
Cambridge Audio CXUHD User manual

Cambridge Audio
Cambridge Audio Azur 650BD User manual

Cambridge Audio
Cambridge Audio CXUHD User manual

Cambridge Audio
Cambridge Audio Azur752BD User manual

Cambridge Audio
Cambridge Audio Azur 650BD User manual

Cambridge Audio
Cambridge Audio AZUR 751BD User manual

Cambridge Audio
Cambridge Audio Azur 752BD User manual

Cambridge Audio
Cambridge Audio Azur 752BD User manual

Cambridge Audio
Cambridge Audio azur 651 User manual

Cambridge Audio
Cambridge Audio Azur 752CXU User manual