Camec 43524 User manual

Instruction Manual
12/24/240V HD LED TV/DVD/USB Combo
043524 28( ")

Contents
What’s in the Box
TV Controls/Installation
TV Inputs and Outputs
Remote Control
SYSTEM CONNECTIONS
AV Input
PC Input
HDMI Input
YPbPr Component Input
USB Input
5
6
7
16-18
8
8
9
9
10
COAXIAL Output 10
OSD MENU OPERATION
Picture
Sound
Channel
Feature
Setup
EPG
MEDIA OPERATION
Photo
Music
Mocie
E-Book
Built-in DVD Player Operation
20-21
22-23
23-26
27-30
31-32
33-34
36-37
38
39-41
41
42-47
PVR 35
Cleaning and Maintenance
Troubleshooting
48
49-50
51
Specifications
Antenna Connection 11
Important Safety Instructions
Source Selection 19
1
Base bracket installation
7
First time use
12-14
Remote Control Functions

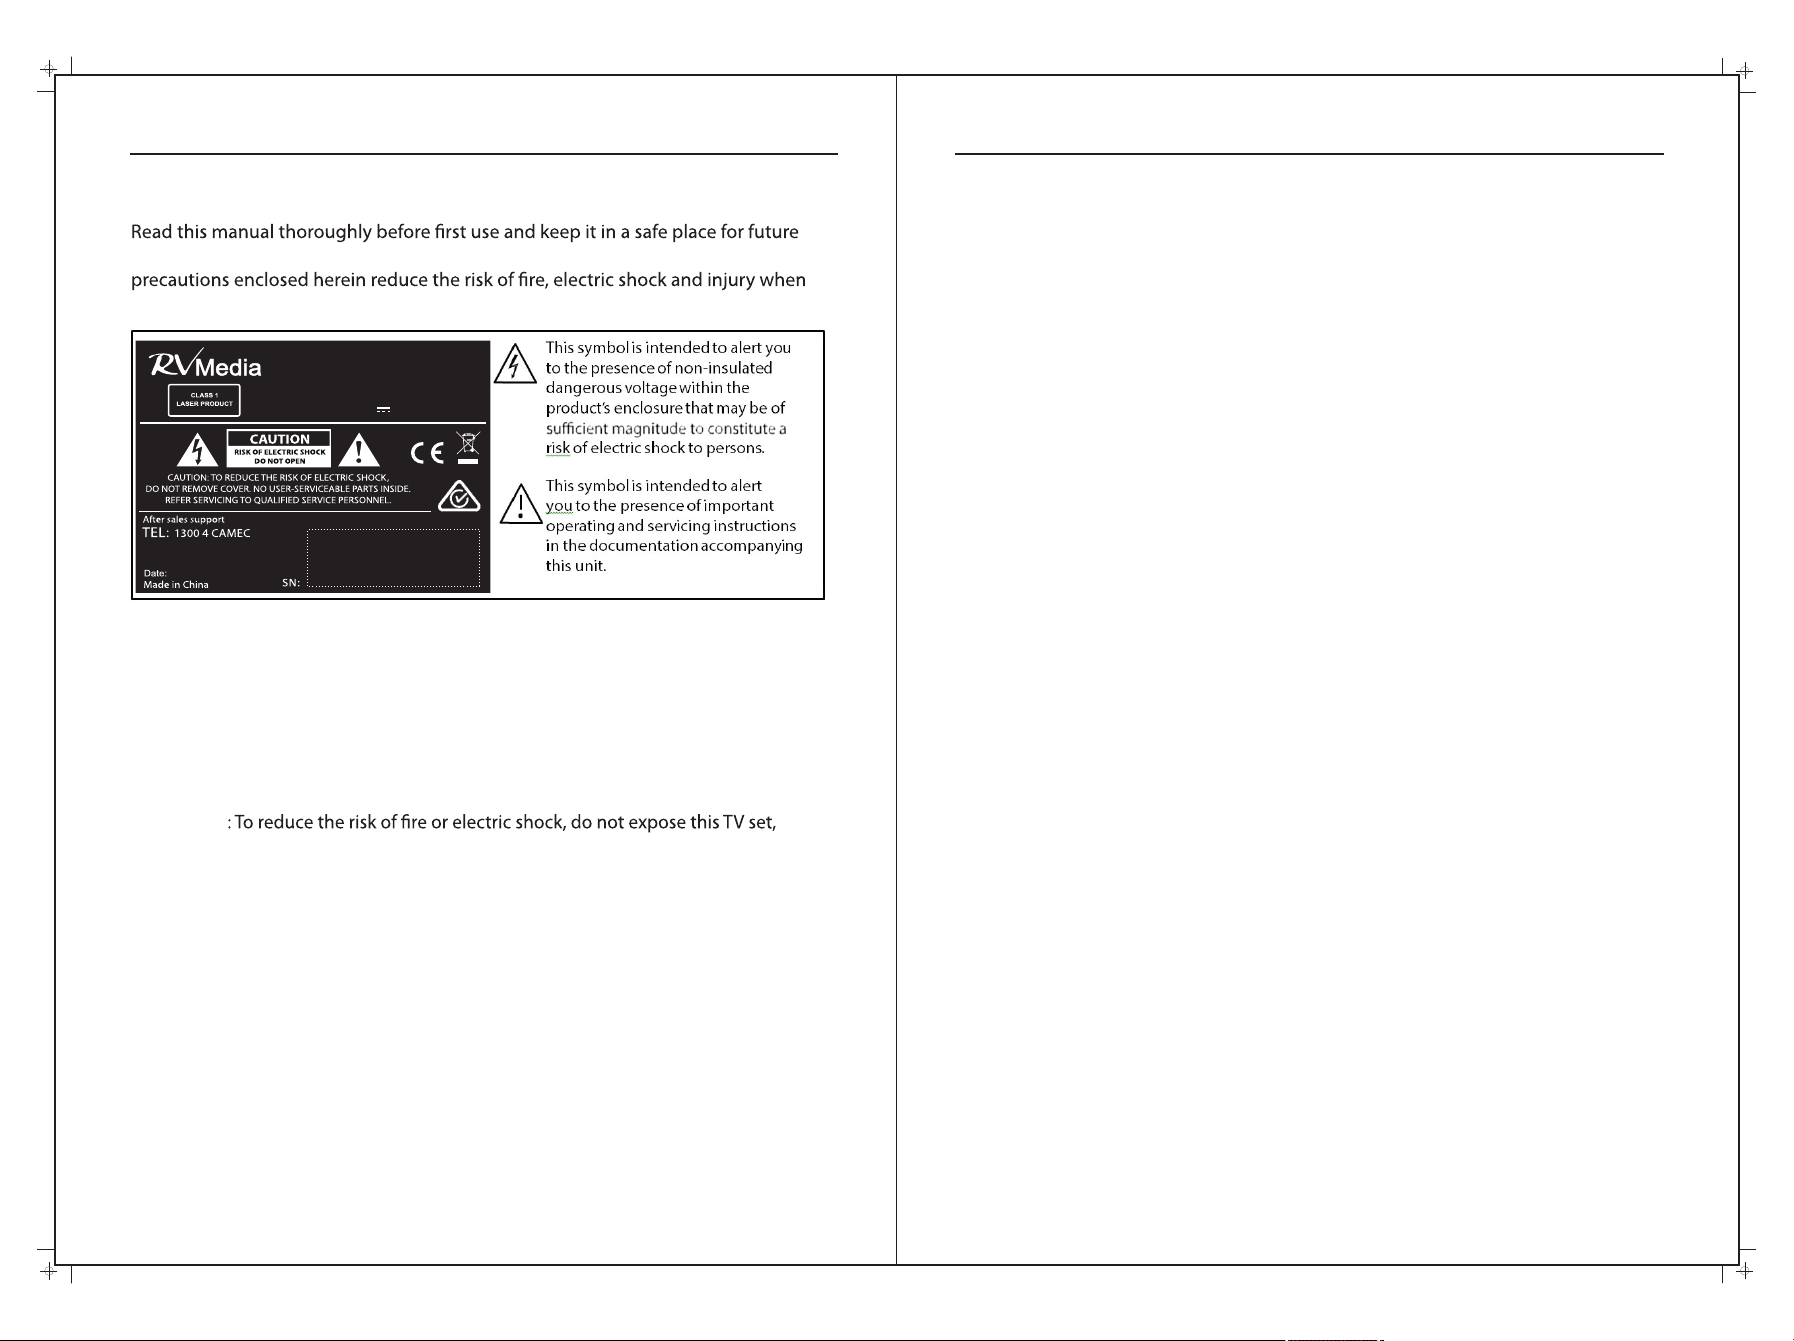
Important Safety Instructions Important Safety Instructions (cont)
reference, along with the warranty card, purchase receipt and carton. The safety
correctly adhered to.
• Before installing this TV set, make sure your outlet voltage corresponds to the
voltage stated on the appliance rating label of the power adaptor being used..
• Do not overload the power outlet.
• CAUTION
the power supply cord, plug and antenna cable to rain or moisture; do not use it
anywhere near water; do not touch the power plug with wet hands.
• Do not let the cord hang over the edge of a table or counter, or touch hot surfaces.
• Do not allow anything to rest on or roll over the power cord and antenna cable.
Protect the cord and run all cables so that no one steps on or trips over them.
• Do not run the cord near heat-producing appliances such as radiators, stoves or
irons. The excessive heat could melt the insulation and expose live wires.
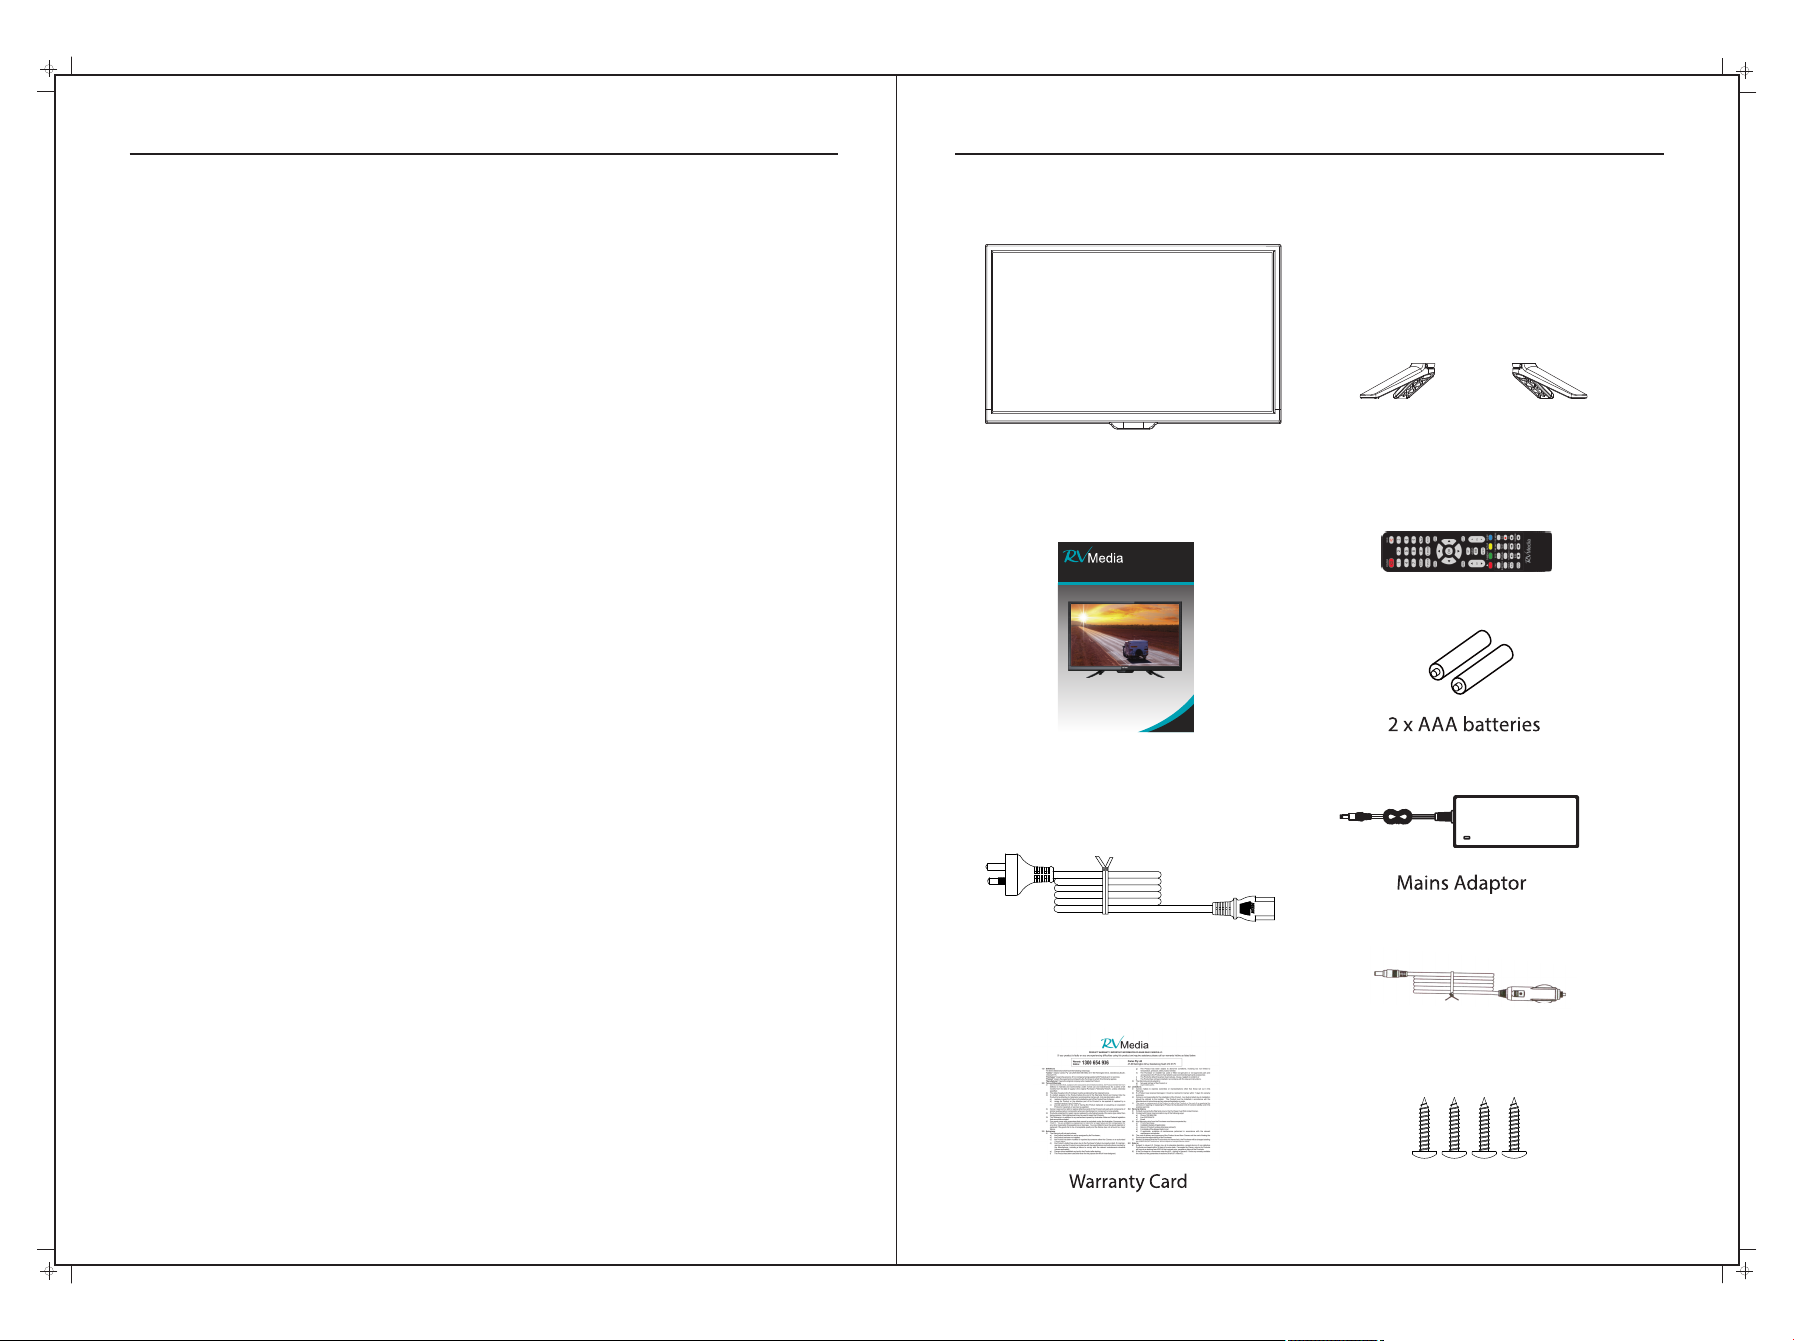
• Only use this TV with the power adaptors supplied. If either plug does
not fit into your outlets, consult your dealer or an RV service center for
• When not in use, disconnect the power cord from the outlet. Hold the plug, not
the cord, when disconnecting the unit. Pulling the cord can damage the internal
wires and may cause a fire.
• Never touch the TV screen, antenna or cord during thunderstorms. Stop use
during thunderstorms; unplug the unit when a thunderstorm is approaching.
Position
• If a television is not positioned in a sufficiently stable location, when stand
mounted, it can potentially be hazardous if it falls. Many injuries, particularly to
children, can be avoided by taking simple precautions such as:
• Using cabinets, shelves or stands that provide a sturdy support for the TV and
are not in areas where the TV can be accidently knocked or bumped .
• Only using furniture that can safely support the television.
• Ensuring the TV is not overhanging the edge of the supporting furniture.
• Not placing the TV on tall furniture (for example, cupboards or bookcases)
without anchoring both the furniture and the TV to a suitable support.
• Educating children about the dangers of climbing up to reach the TV controls.
• Not standing the TV on cloth or other materials placed between the TV and
supporting furniture.
Usage conditions and restrictions
• Follow the instructions in this manual when installing and adjusting the TV set.
Only adjust those controls that are covered in this instruction manual; improper
adjustment of other controls may result in damage. If this happens, unplug the TV
and have it serviced by appropriately qualified personnel.
• Do not change or modify the TV set in any way. Only use the attachments/
accessories specified.
• Do not cover the ventilation openings with items such as newspapers, tablecloths,
curtains etc., as this could impede ventilation.
• Do not insert any objects of any kind into this unit through the ventilation slots or
DVD slot, as they could touch the current-carrying parts or short-circuit parts,
resulting in fire, electric shock or damage to the unit.
• Do not touch the screen with fingers, as this may scratch or smudge the TV screen.
• Do not expose the batteries to excessive heat such as sunshine, fire or the like.
• Unplug the TV set in all of the following circumstances:
• If it has been subject to impact or has been dropped and is damaged.
• If its voltage adaptor plugs, or the wall socket, are damaged.
• The appliance is not intended for use by persons (including children) with reduced
physical, sensory or mental capabilities, or lack of experience and knowledge,
unless they have been given supervision or instruction concerning use of the
appliance by a person responsible for their safety.
• Young children should be supervised to ensure they do not play with the TV.
70cm (28")
HD LED TV
Part Number: 043524
INPUT DC 12V 5A 34W
December 2015
2 3

4 5
What’s in the Box
28" TV with inbuilt DVD Player
Manual
Remote Control
• When deciding where to put the TV set, make sure the location is:
• Well ventilated. Leave at least a 20cm space all around the TV set for good
ventilation.
• Protected from overheating and away from direct sunlight.
• Away from damp and cold.
• Away from areas with extremes of temperature (below 0°C or exceeding 40°C)
or moisture.
• Away from moisture drips or splashes.
• Protected from excessive dust.
• Do not install this equipment in a confined space such as a bookcase or similar.
• Do not put any objects filled with liquids, such as vases, on top of the TV set.
• Do not place any naked flame sources, such as lighted candles, on top of the TV.
Important Safety Instructions (cont)
4 Stand Screws
Instruction Manual
12/24/240V FHD LED TV/DVD/USB Combo
043524 28( " )
240V Power Cord
12/24V Accessory Lead
Stand Brackets

TV Controls
Controls on the TV
7
Base bracket installation
6
200 100
1. After you load a disc, press to play the disc, and press twice to pause.
2. Press the button when the power is on the disc will eject, Press the button again to load the
disc automatically.
3. INPUT - This button switches between all the different sources of the TV. When the OSD is active,
this button acts as the enter button and confirms the menu selection.
4. MENU - This button activates the OSD menu. If a sub-menu is active, pressing this button will return
the selection to the previous menu level.
5. VOL(+) - This button increases the TV’s volume. If the OSD menu is active, pressing this button will
move the selection to the right.
6. VOL(-) - This button decreases the TV’s volume. If the On Screen Display(OSD) menu is active,
pressing this button will move the selection to the left.
7. CH(+) - This button performs the channel up function. If the OSD menu is active, this button functions
as up control for the menu.
8. CH(-) - This button performs the channel down function. If the OSD menu is active, this button
functions as down control for the menu.
9. STANDBY - Turn on the TV by pressing the button once. Press the button again to turn off the TV.
1. Earphone out: Output for headphones or head units such as RV Media Head Units with TV input.
2. AV Inputs: Composite Video & Audio (A/V) in.
3. PC Audio Input: Connect to the audio output jack on a computer.
4. VGA Input: Connect to a computer’s VGA output jack.
5. HDMI Input: HDMI in.
6. COAXIAL Out: Digital Audio output for Surround Sound amplifiers and other devices.
7. RF Input: Connect to an external antenna to receive ATV/DTV TV signals
in ATV/DTV mode.
8. USB: USB/Multimedia input.
9. Y/Pb/Pr Input: Component Video in.
10. POWER: (DC 12/24V) input
Rear Bottom
Rear Side
10
1 2 4 53
EARPHONE
OUT VIDEO RL VGA HDMI
PC
AUDIO
IN
RF
IN USB
8
COAXIAL
OUT Y PrPb
7 96
IN
IN
TV Inputs & Outputs
INPUT
MENU
VOL+
VOL-
CH+
CH-
STANDBY
Instructions:
1. Place the TV on a flat and clean surface
2. Attach the 1st bracket with screws through holes B into A.
3. Attach the 2nd bracket with screws through holes D in to C.
Screws
Screw hole A
Screw hole B
Screw hole C
Screw hole D
DC 12V
For wall mounting, remove the 4 screws
and remove the two Base Brackets.

8 9
System Connection System Connection
NOTE: Please, make sure the inputs and outputs have firm connections before
connecting power.
1. COMPOSITE AV INPUT
Audio/video input: Use the SOURCE button to select AV on the TV.
VGA OUTP UT
PC AUDIO
OUTPUT
VGA OUTPUT
2. PC INPUT
PC input: Use the SOURCE button on the remote control to select PC.
Video Cable Red/White/Yellow (Not supplied)
3. HDMI INPUT
HDMI input: Use the SOURCE button on the remote control to select HDMI.
Source eg. Blu-ray, DVD, Satellite, camcorder etc
HDMI 1
4. YPbPr COMPONENT INPUT
Video component input: Use the SOURCE button on the remote control to select YPbPr.
This input consists of both Video (Green/Blue/Red) and Audio (Red/White)
YPb Pr
EARPHONE
OUT VIDEO RL VGA HDMI
PC
AUDIO
IN
IN
RF
IN USB
COAXIAL
OUT Y PrPb
IN
DC 12V
EARPHONE
OUT VIDEO RL VGA HDMI
PC
AUDIO
IN
IN
RF
IN USB
COAXIAL
OUT Y PrPb
IN
DC 12V
EARPHONE
OUT VIDEO RL VGA HDMI
PC
AUDIO
IN
IN
RF
IN USB
COAXIAL
OUT Y PrPb
IN
DC 12V
EARPHONE
OUT VIDEO RL VGA HDMI
PC
AUDIO
IN
IN
RF
IN USB
COAXIAL
OUT Y PrPb
IN
DC 12V

11
System Connection
Remote Control
7. Antenna connection
Antenna input impedance of this unit is 75ohm. VHF/UHF 75ohm coaxial cable can be
connected to the antenna jack directly.
75ohm coaxial cable
Antenna cable
Antenna lead with 75 ohm male PAL Connector
- Batteries should not be exposed to excessive heat such as direct
sunlight, fire or the like.
- If not being used for a period of time, please remove the batteries
from the remote in case of leakage.
- Do not mix old & new batteries together.
Installing Batteries
1Open the battery compartment
cover on the back of the remote.
2Insert two 1.5V AAA size batteries
using the correct polarity as shown.
Don’t mix old or used batteries with.
3Replace the cover.
Battery
Cover
2 x size AAA 1.5V
Battery
Cover
System Connection
new ones..
To use the remote control, point it
towards the remote sensor near
the power LED at the front of the
television. The remote control has
a range of up to approximately
seven meters from the TV at an
angle of up to 60 degrees.
5. COAXIAL OUTPUT
Allows connection of Digital audio systems and Surround Sound.
6. USB INPUT
Use the SOURCE button on the remote controller to select Media.
USB memory
COAXIAL Cable (Not supplied)
COAXIAL
10
EARPHONE
OUT VIDEO RL VGA HDMI
PC
AUDIO
IN
IN
RF
IN USB
COAXIAL
OUT Y PrPb
IN
DC 12V
EARPHONE
OUT VIDEO RL VGA HDMI
PC
AUDIO
IN
IN
RF
IN USB
COAXIAL
OUT Y PrPb
IN
DC 12V

First Time Use First Time Use cont’d
12 13
Auto Installation
If this is the first time you are turning on the TV and there are no programs stored in the TV
memory, the “Auto Installation” menu will appear on the screen.
Please use the following steps as a guide.
Step 1: Set up Home (Screen brightness setting)
The factory default is “Home” or you can select Dynamic for higher contrast, “Standard” for
a picture to suit most types of viewing or “Mild” for a softer picture.
Step 2: Set up the Country
Please ensure “Australia” is selected. Note the European selection screen is pictured
below for reference.
Step 3: Set up the Menu Language
Select your desired language from the options. English should be set as the default
langrage.
Step 4: Set up the Auto Power Off Function

First Time Use cont’d
14 15
Step 5: TV Connection
“Air” is the default setting for this option and should not be changed.
Step 6: Auto Search
IMPORTANT NOTE. Please make sure your TV Antenna is connected and correctly
orientated before completing this step.
For most Australian applications, select “DTV” on the remote using the ▼/▲ buttons to
select, then press the ENTER button or ►button to scan for the TV Channels.

16 17
Remote Control Unit
P.MODE S.MODE AUTO
DISPLAY
SOURCE
EXIT
MENU
AUDIO
REC.MENU
POWER MUTE
FAV EPG
HOLD
SUBTITLE
INDEX
REVEAL TEXT
SUBPAGE
SIZE
REC
OK
QT
TIME SHIFT
ASPECT
TV/RADIO
CANCEL
MIX
D.MENU SETUP D.DISP
A-B
REPEAT
I/II
SLEEP
1
4
6
11
15
9
21/25
22/26
29
30
33
37
41
34
38/45
42/48
16
2
3
5
8
7
10
13
14
12
17
18/19
20 24/28
23/27
32
31
36
35
40/47
39/46
44/50
43/49
Allows you to navigate the on‐screen menus and adjust the
system settings to your preference.
Press these two buttons to increase/decrease the volume.
Press to change the DTV or DVD audio language.
No. Button Description
POWER Turns the TV on or off to standby mode.
1
2MU T E Press to mute the sound. Press again to regain sound.
0‐9 Press 0‐9 to select a TV channel directly. The cannel will
change after 2 seconds.
3
4
5Return to the previously viewed program.
6
7
AUTO
8
9
P.M ODE
10
S.MO D E
11
12
Select the picture mode.
Select the sound mode.
EX IT
ME NU
Exit from the current menu or sub‐menu.
Allows you to navigate the on screen menus (OSD).
13
14 OK Select the option.
15
16 VOL+/‐
CH+/‐ Press these two buttons to change channels up/down.
AUDIO
17
18
AS PECT Press this button to select the aspect ratio of the screen.
20
DI SPLAY Press to display the source and channel info.
25
26
27
28
Use for adjustments in PC mode.
Delete function button.
Rename function button.
Move function button.
Skip function button.
R (DELETE)
G (RENAME)
Y (MOV E)
B (SKIP)
29 FAV Selects favorite channel(s).
30
TE XT Switch on/off of Teletext window.
31
32
33
34
35
36
SU BT I TLE Press to select the subtitle language.
IN D EX Returns to Index page by Teletext.
RE V EAL Shows hidden words or pages by Teletext.
EP G Press to display EP G (Electronic Program Guide).
SO URCE Press to select signal the source for the TV.
QT
Eject/insert disc.
D.ME N U Quick Teletext navigation or setup settings / DVD: Video
DVD Menu button.
SE TUP DVD system setup.
D.DI S P Quick navigation during Teletext or setup settings / DVD: DVD
Information button.
TI M E SHI F T Press to switch to TIME SHIFT mode.
SL EEP
Press repeatedly to set delay time for the TV to turn off automatically.
Press to record the program immediately.
REC/
37
38 TV/RADIO Press to switch between DTV and radio programs
21
22
23
24
Quick Tune. Quick TV Channel Autotune Button.
I/II
19
Select NICAM audio mode.
Only be available for TV programmers with NICAM transmission,
and default mode is mono.
REC.M E NU Press to switch to REC.MENU immediately (DTV only).
NOTE: After you press the QT button, select “OK” to confirm.

18 19
OSD Menu Operation
Press the SOURCE button to display the input source list.
Press the ▼/▲ buttons to select the input source you want
to watch,
Press the OK button to select the input source.
Source Selection
No. Button Description
42
45
46
47
48
49
50
SI ZE Zoom In or Out of the Teletext window.
Play and Pause Media‐Player / DVD.
Stops playback Media‐Player and DVD.
Fast Rewind Media‐Player and DVD.
Fast Forward Media‐Player and DVD.
Plays the previous Media Player or DVD file/chapter.
Plays the next Media Player or DVD file/chapter..
Holds on the current Teletext page.
HO L D
Displays a sup‐page of upper Teletext options.
SU BPAGE
MI X Sets the transparency of Teletext window.
DVD: Repeat mode selection.
RE P EAT
40
41
43
44
39 CA N CEL Switches the Teletext window to the background; only the
current page no is visible.
Press the MENU button to display the MAIN OSD (On Screen Display) MENU.
Press ▼/▲ buttons to select the MENU you want.
Press ENTER button or button to enter the sub menu, and press button to return back ► ◄
to the previous menu.
Press ▼/▲ buttons to select the option then press the ENTER button or button to enter the►
submenu, press buttons to adjust the value or press ▼/▲ buttons to select in the sub menu.◄ / ►
You can press the MENU button to save and return back to the previous menu, or press
the EXIT button to exit the entire menu.
Input
DTV
ATV
AV
YPbPr
HDMI
PC
Media
DVD
NOTE: For further info on specific remote functions, please see Pages 32 & 33.

20 21
OSD Menu Operation
Picture Menu
Press the MENU button to display the main menu.
Press ▼/▲ buttons to select Picture in the main menu,
then press the ENTER button or ► button to select.
OSD Menu Operation
Press ▲/▼ buttons to select the option that you want to adjust in the Picture menu,
and then press ENTER button or ► button to select.
Press ◄/► buttons to adjust or press ▲/▼ buttons to select and press the ENTER button
or ► button to select the sub menu.
After completing your adjustment, press the MENU button to save and return back to the
previous menu, and press the EXIT button to exit the entire menu.
Brightness
Press ▲/▼ buttons to select Brightness, then press the ENTER button or ► button to
enter and press ◄/► buttons to adjust. Then press the MENU button to return back
the previous menu.
Contrast
Press ▲/▼ buttons to select Contrast, then press the ENTER button or ► button to enter
and press ◄/► buttons to adjust. Then press the MENU button to return back the previous
menu.
Sharpness
Press ▲/▼ buttons to select Sharpness, then press the ENTER button or ► button to enter
and press ◄/► buttons to adjust. Then press the MENU button to return back the previous
menu.
Colour
Press ▲/▼ buttons to select Colour, then press the ENTER button or ► button to enter
and press ◄/► buttons to adjust. Then press the MENU button to return back the previous
menu.
Tint
Press ▼/▲ buttons to select Tint, then press the ENTER button or ►button to enter and
press◄ / ►buttons to adjust.
Colour Temperature
Press ▲/▼ button to select Colour Temperature, then press ENTER button or ►
button to enter and ▲/▼ button to select Standard, Cool, Warm.
Aspect Ratio
Press ▲/▼ button to select Aspect Ratio, then press the ENTER button or ► button
to enter and ▲/▼ buttons to select between 4:3,16:9, Full, Zoom1, Zoom2 or Panorama.
NOTE: 16:9 is the default setting for this TV

22 23
OSD Menu Operation OSD Menu Operation
Sound Menu
Press the MENU button to display the main menu.
Press ▲/▼ buttons to select Sound in the main menu, then press the ENTER button
or ► button to enter.
Press ▲/▼ buttons to select the option that you want to adjust in the Sound menu, then
press the ENTER button or ► button to enter.
Press ◄/► buttons to adjust or press ▲/▼ to select, and press the ENTER or ► button to
select a submenu.
After completing your adjustment, press the MENU button to save and return back to the
previous menu, or press the EXIT button to exit the entire menu.
Sound Mode
Press ▲/▼ buttons to select Sound Mode, and then press the ENTER or ► button to enter.
And then press ▲/▼ buttons to select. (Available Sound modes: Standard, Movie, Speech,
User).
NOTE: You can only adjust the Bass, Treble and Balance when the Sound Mode selected is
“User mode”.
TIP: Press the S-MODE button on the remote to change the Sound Mode directly.
Bass
Press ▲/▼ buttons to select Bass, then press the ENTER or ► button to enter and press
◄/► buttons to adjust. Then press the MENU button to return back the previous menu.
Treble
Press ▲/▼ buttons to select Treble, then press the ENTER or ► button to enter and press
◄/► buttons to adjust. Then press MENU button to return back the previous menu.
Balance
Press ▲/▼ buttons to select Balance, then press ENTER or ► button to enter and press
◄/► buttons to adjust. Then press MENU button to return back the previous menu.
Surround
Press ▲/▼ buttons to select Surround, then press the ENTER or ► button to enter and press
▲/▼ buttons to select ON or OFF for a surround sound effect.
AVL (Auto Volume Level)
Press ▲/▼ buttons to select AVL, then press the ENTER or ► button to enter and press ▲/▼
buttons to select ON or OFF.
SPDIF
Press ▲/▼ buttons to select SPDIF, then press the ENTER or ► button to enter and press
▲/▼ buttons to select .
(Available SPDIF Digital Audio output modes: Off, PCM, Bitstream)
Then press the ENTER button or ► button to enter and press ◄/► buttons to adjust, then
press MENU button to return back the previous menu.
Audio Description
Press ▲/▼ button to Audio Description, then press ENTER or ► button to enter and press
▲/▼ buttons to select ON or OFF.
Channel Menu
Press the MENU button to display the main menu.
Press ▲/▼ buttons to select Channel in the main menu, then press the ENTER button
or ► button to enter.
1. Press ▲/▼ buttons to select the option that you want to adjust in the Channel menu,
then press the ENTER or ► button to enter.
2. Press ▲/▼ buttons to select and press ENTER or ► button to select the sub menu.
3. After completing your adjustment, press the MENU button to save and return back to
the previous menu, or press EXIT button to exit the entire menu.
Channel Management
Press ▲/▼ buttons to select Channel Management, then press ENTER or ► button to enter.

24 25
OSD Menu Operation
Channel Menu Cont’d
Press the RED button to set the current channel to lock (block the channel), if the current
channel already locked, press the RED button again to cancel the lock.
NOTE: Lock must be enabled (YES) in the FEATURE menu for this function to work
(see P24).
Press the GREEN button to set the current channel to delete, if the current channel is
already set to delete, press the GREEN button again and this will cancel the delete option.
If you have a channel set to delete after the operation above, press the MENU button or
ENTER button and the following confirmation dialogue will appear:
Press the YELLOW button to skip the current channel, if the current channel already skipped,
press the YELLOW button again will cancel skip. This feature is useful if a channel is stored
twice or you are not interested in viewing the channel. You can still view the channel by
the channel number on the remote.
Press the BLUE button to swap the channel position.
If one of the channels has been incorrectly placed in the station listing, you may move it to
the current position you want using the ▲/▼ buttons. To select the channel to be moved, press
the BLUE button. Then move the channel to the new location and press the ENTER button
or BLUE button and this will move the station to the new location.
Press ◄ button to choose OK, press ► button choose cancel, press ENTER to confirm.
OSD Menu Operation
Favorite Management
Press ▲/▼ buttons to select Favorite Manager, then press the ENTER or ► button to enter.
Press ▲/▼ buttons to select a Channel, press the RED button to set to Fav1.
Press ▲/▼ buttons to select a Channel, press the GREEN button to set to Fav2.
Press ▲/▼ buttons to select a Channel, press the YELLOW button to set to Fav3.
Press ▲/▼ buttons to select a Channel, press the BLUE button to set to Fav4.
If the current channel is already one of your favorite channels, press the RED/ GREEN/
YELLOW/ BLUE button again to de-select it as a favourite.
Press the MENU button or EXIT button and the successfully updated menu will appear.
Country
Press ENTER button or ► button to enter, then Press ▲/▼ buttons to select the appropriate
country, and press the ENTER or ► button to confirm (default country is Australia).
TV Connection
This selection should always be set to “AIR”
Auto Search
Press ▲/▼ buttons to select Auto Search, then press ENTER or ► button to enter
(When the System Lock is on, please input the default password “0000”).

OSD Menu Operation OSD Menu Operation
26 27
Auto Search cont’d
Press ▲/▼ buttons to select All, Digital, Analogue, then press the ENTER or ► button to select.
When you select the appropriate Auto Search, the dialogue box above will appear. Select
“OK” and press ENTER, otherwise select CANCEL to return back to previous page.
After a few seconds, the channel search display below will appear (ATV version pictured):
When auto search is finished, a “Save Successful” dialogue box will appear for a few
seconds to confirm that the search has completed.
Feature Menu
Press the MENU button to display the main menu.
Press ▲/▼ buttons to select Feature from the main menu, then press ENTER or ► to select.
1. Press ▲/▼ buttons to select the option that you want to adjust in the Feature menu,
then press the ENTER or ► button to enter.
2. Press ◄/►buttons to adjust or press ▲/▼ buttons to select.
3. After finishing your adjustment, press the MENU button to save and return back to the
previous menu and press the EXIT button to exit the entire menu.
Lock (incl Child Lock)
Press ▲/▼ buttons to select Lock, then press the ENTER or ► button to enter.
(You will need to enter the password - default “0000”)
PVR/Timeshift
NOTE: For most RV applications in Australia, you will only need to search the DTV Channels.

OSD Menu Operation OSD Menu Operation
28 29
Enter the current Password next to“Old Password”, (if the Password entered is incorrect,
the password can not be changed). A reminder that the default Password is “0000"
Enter the new Password next to“New Password”.
Enter the new password again next to“Confirm New Password”. If the new Password and
confirmed passwords are the same, a “Successfully Updated popup will appear after a few
seconds, otherwise “Password Mismatch” will be displayed.
Lock Channel (Block Channel)
Press ▲/▼ buttons to select Lock Channel, then press ◄/► keys to select off or on.
Then press the ENTER or ► button to confirm. See also P20.
Parental Guidance
Press ▲/▼ buttons to select Parental Guidance, then press ENTER or ► button to enter the
sub menu. Then press ▲/▼ buttons to select the Rating upwards you would like to restrict
(From M, MA, AV & R, or No Block). Then press the ENTER or ► button to confirm.
Change Password/Pin Code
Press ▲/▼ buttons to select Change Pin Code, then press the ENTER or ► button to enter
and the Change Pin Code menu will appear as follows:
Language
Press ▲/▼ buttons to select Language, then press the ENTER or ► button to enter the sub menu.
OSD Language
Press ▲/▼ buttons to select OSD Language, then press the ENTER or ► button to enter the
sub menu, then press ▲/▼ buttons to select, then press the ENTER or ► button to confirm.
Preferred Subtitle
Press ▲/▼ buttons to select Preferred Subtitle language, then press the ENTER or ► button
to enter the sub menu, then Press ▲/▼ buttons to select, then press the ENTER or ► button
to confirm.
Preferred Audio
Press ▲/▼ buttons to select Preferred Audio, press the ENTER or ► button to enter the sub
menu, then press ▲/▼ buttons to select, then press the ENTER or ► button to confirm.
DTV Teletext Language
Press ▲/▼ buttons to select Digital Teletext language, then press the ENTER or ► button to
enter the sub menu. Then Press ▲/▼ buttons to select, then press the ENTER or ► button to
confirm.
ATV Teletext Language (not available in Australia)
Press ▲/▼ buttons to select Analog Teletext language, then press the ENTER or ► button
to enter the sub menu, Then Press ▲/▼ buttons to select, then press the ENTER or ► button
to confirm.
Clock
NOTE: for DTV operation, clock setting is Automatic. For other situations, please adjust as
per below. Press ▲/▼ buttons to select Clock, then press the ENTER or ► button to enter the
sub menu, then Press ▲/▼ buttons to select and make your adjustment, then press ENTER
or ► button to confirm.
Sleep (Timer)
NOTE: This function is also available on the remote control - see P13.
Press ▲/▼ buttons to select Sleep , then press the ENTER or ► button to enter and press
▲/▼ buttons to select from the following: OFF, 10, 20, 3060, 90, 120, 180 & 240 minutes.
Auto Power Off
Press ▲/▼ buttons to select Auto Power Off, then press the ENTER or ► button to enter and
press ▲/▼ buttons to select between OFF, 1, 2 or 4 hours to turn the TV off if there is no
activity for the selected period (eg no channel or volume changes).
Hearing Impaired
Press ▲/▼ buttons to select the Hearing Impaired function, then press the ENTER or ►
button to enter and press ▲/▼ buttons to select ON or OFF.

OSD Menu OperationOSD Menu Operation
30 31
Setup Menu
Press the MENU button to display the main menu.
Press ▲/▼ buttons to select Setup in the main menu, then press ENTER or ► to enter.
OSD Timer
Press ▲/▼ buttons to select the length of time the On Screen Display stays on, then press the
ENTER or ► button to enter the sub menu, then Press ▲/▼ buttons to select. (Available OSD
Timer options: 5, 10, 15, 20, 25, 30 Seconds or Never), then press the ENTER or ► button
to confirm.
PC Setup
Press ▲/▼ buttons to select PC Setup, then press the ENTER or ► to enter the sub menu,
then Press ► to enter, then press ENTER or ► to confirm (when the PC signal is connected).
A sub menu will then appear with PC specific adjustments such as Horizontal/Vertical position,
phase & clock settings. Please use the default settings if you are unsure how to use these
settings.
Blue Screen
Press ▲/▼ buttons to select Blue Screen rather than the default Black Screen when there is
no source, then press ENTER or ► to enter the sub menu, then Press ▲/▼ to select On or Off.
then press ENTER or ► to confirm. This option is only available on some sources.
Home Mode
This selects the of screen brightness and style your prefer. Press ▲/▼ buttons to select Home
Mode, then press the ENTER or ► button to enter the sub menu, then Press ▲/▼ buttons to
select. (Home, Dynamic, Standard, Mild.), then press the ENTER or ► button to confirm.
Reset TV Setting
Press ▲/▼ buttons to select Reset TV Setting WHICH RESETS ALL MENU SETTINGS, and
then press ENTER or ► to select. The password menu will appear when the Child Lock is on.
Software Upgrade
From time to time we may release new firmware to improve the running
of the television. This menu lets you upgrade that software on the
television. Further details of how to do this will be issued with the firmware if required.
PC Setup
Blue Screen
Home Mode
Reset TV Setting
Software Upgrade
Feature Menu Cont’d
PVR/Timeshift
Press the MENU button to display the main menu.
Press ▲/▼ buttons to select PVR/Timeshift in the main menu, then press the ENTER or ►
to enter.
Partition Select
Press ▲/▼ buttons to select Partition Select, then press the ENTER or ► button to enter the
sub menu, then Press ▲/▼ buttons to select the desired Partition you would like to use on
the USB drive. Note this is not required for normal USB operation, but if you want to use a
USB drive that has data on it as well, it is advisable to create a separate partition for PVR
recording.
Auto Timeshift
Press ▲/▼ buttons to select Auto Timeshift, then press ENTER or ► to enter the sub menu,
then Press ▲/▼ to select On or Off. This function starts buffering a DTV channel as soon as
a channel is changed but is not necessary unless you like pausing and searching Live DTV
a lot so the default setting is “Off”
Timeshift Buffer
This function selects how long time shift will operate when, for example, the Live TV picture
is paused. The default setting is Auto as this determines the duration of the time shift based
on the available memory of the USB drive. To change, press ▲/▼ buttons to select
Timeshift Buffer, then press the ENTER or ► button to enter the sub menu, Then Press ▲/▼
buttons to select from Auto, 30min, 1Hr & 2Hr. The default setting is “Auto”
Timer
Press ▲/▼ buttons to select the record Timer, then press the ENTER or ► button to enter
the sub menu, then Press ▲/▼ buttons to select the start and end time of the recording.
Record List
Press ▲/▼ buttons to select Record List, then press the ENTER or ► button to enter the sub
menu, then Press ▲/▼ buttons to select. Note this function is easier to perfrom using the
EPG - see P29-31
Recorder Start
Press ▲/▼ button to select Recorder Start, then press ENTER or ► button to enter the sub
menu, then Press ▲/▼ button to select. Note it is easier to start recording using the record
button on the remote - see P13.

Remote Control Functions Remote Control Functions
32 33
Channel List
Press the LIST button on the remote control to display the channel list menu.
Press ▲/▼ buttons to select channel that you want to view, then press ENTER to view.
FAV List (Favourite Channel List)
Press the FAV button on the remote control to display the FAV list menu..
Press ▲/▼ buttons to select the channel that you want to view, then press the ENTER button
to view.
Press ◄/► buttons to switch between favorite 1, favorite 2, favorite 3 and favorite 4.
Subtitle
Press subtitle button on the remote control, the subtitle menu will appear as follows:
Press ▲/▼ buttons to select ENG for English Subtitles, then press the ENTER button to
display subtitles in English.
Press ◄/► buttons to select OFF, then press the ENTER button to turn off subtitles.
Press EXIT to exit.
EPG (ELECTRONIC PROGRAM GUIDE)
Press EPG button on the remote control to display the EPG daily mode menu.

EPG Functions PVR TV Recording Functions
34 35
Press the RED button to switch between EPG weekly mode and EPG daily mode.
1. Displays the current channel No. and channel name.
2. Displays the current program’s start-shop time and program name.
3. Displays the current date and time.
Press ▲/▼ buttons to select the channel or program.
Press ◄/► buttons to choose between the channel and program.
1
2
3
To see programs from the previous day(s), press the yellow button on the remote.
To see programmers for the next day or further forward, press the BLUE button on the
remote.
For more information about a program, press INFO on the remote.
Press the GREEN button on the remote to set a Reminder for the selected program. A small
icon will be displayed beside the program.
Press GREEN button again to schedule recording of the selected program.
Press EPG or EXIT once to cancel the operation.
SUBTITLE
Press Subtitle button on the remote control to display Closed Caption text; Press TT/CC
button on the remote control again to stop displaying the text.
Multi-Audio
Press AUDIO button on the remote control to display the multi-audio menu (audio options
are dependant on the available program material).
PVR Recording (DTV Only)
Press the button on the remote to record the current DTV program. Please ensure a USB ●
drive with available space is inserted. If the USB drive is not fast enough to record, the
following Message will be displayed:
You can still attempt to record with the slow USB by selecting“OK” to continue. Press on
the remote control again to start recording and the following notification will appear:
Select “Yes” to start recording. You’ll then see the following notification:
During Recording, there will be a small dialog on the left of screen:
Press on the remote control again to set the recording duration time with the remote.●
Rec Duration Time 0 0 : 0 0
Press on the remote control to stop recording.
Stop recording by selecting “OK”. To continue recording select “Cancel”.

Thumbnails
Thumbnails mode can be shown only in photo mode and highlighted in file browser by
pressing “EXIT” → “Right( )” :►to display thumbnails as per below
Media Operation
36 37
Press the “MEDIA” button on the remote control to access this menu. You can also access
this menu by selecting “MEDIA” as a Source on the remote Control.
Press buttons to select Photo/Music/Movie/Text , and then press the ENTER the ◄ / ►
button to select. NOTE: A USB device must be inserted to use these functions.
Photo
Formats Supported:JPG, JPEG/Progressive JPEG, BMP & PNG.
Media Operation
Slide Show
Press "PLAY" key to start playback.
: Performs the same function as "PLAY" on the remote. Starts playing pictures in slide
show mode
: Same as "PAUSE" key on remote, to pauses the slide show.
: Performs the same function as "STOP" on remote. Stops the slide show, and returns to
the file browser.
: Same as "|<<" / ">>|" buttons on the remote; skip the previous or next file.
: Select to rotate the picture being viewed (0 º、90 º、180 º、270º).
: Select to zoom the picture being viewed.
: Same as "INFO" key on the remote; displays the current file info.
: Select to enter “Photo Setup” menu which includes options for “Repeat Mode”,
“Background Music”, “Music Source”,”Slide Time”, “Effect”.
: To enter the play list menu.
On-Screen Button Operation
Photo Viewing Options
You can view information on the photo being viewed by pressing INFO then press the
button to view or pause, you can see the playback status on the right. Press ▼/▲ or ◄ / ►
buttons to rotate the picture.
Table of contents
Other Camec LED TV manuals