manuals.online logo
Brands
  1. Home
  2. •
  3. Brands
  4. •
  5. Camp Chef
  6. •
  7. Grill
  8. •
  9. Camp Chef PG24CLAU User manual

Camp Chef PG24CLAU User manual

PAGE 1
LK 1
CAMP CHEF
CAMP CHEF
THE WAY TO COOK OUTDOORS
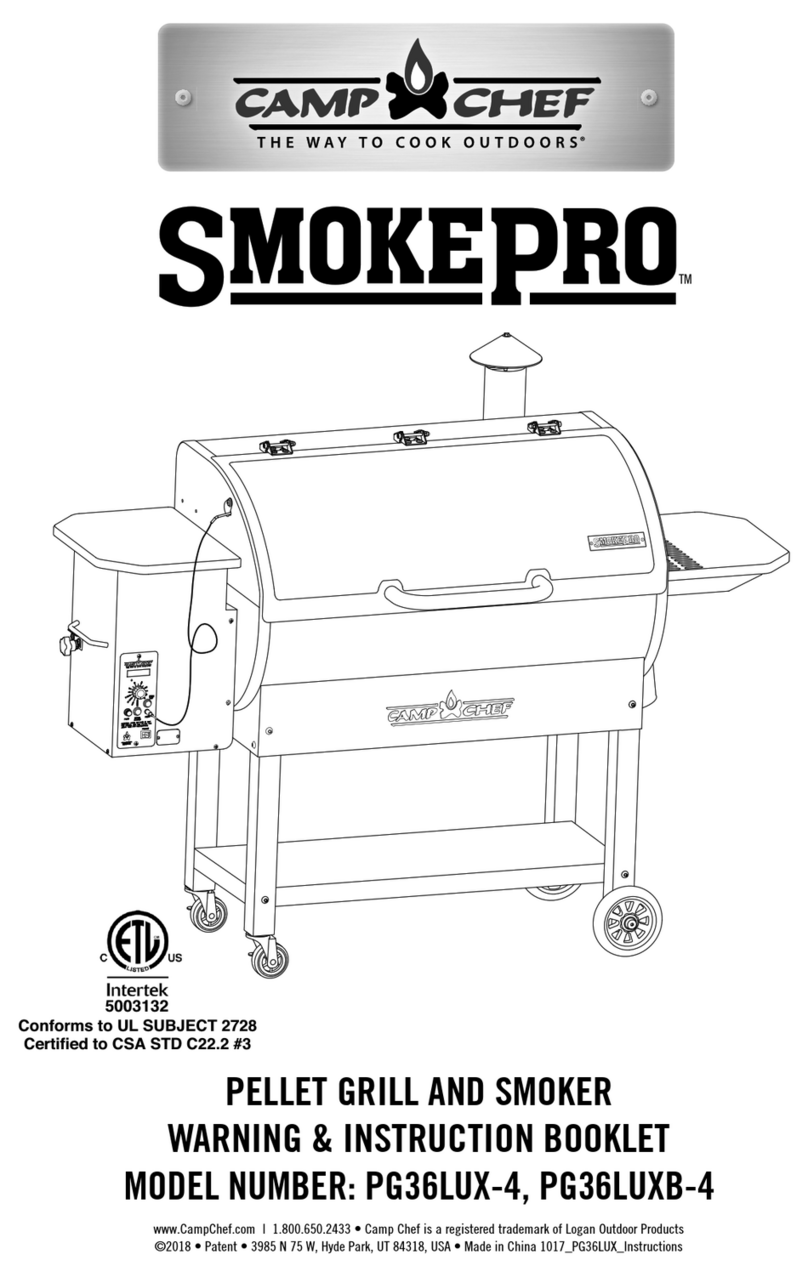
PELLET GRILL AND SMOKER
PELLETGRILL JA SUITSUTAJA
WARNING & INSTRUCTION BOOKLET
OHUTUS- JA KASUTUSJUHEND
MODEL NUMBER: PG24CLAU,
PG24CLCE, PG24CLCH, PG24CLUK
MUDELI NUMBER: PG24CLAU,
PG24CLCE, PG24CLCH, PG24CLUK
Power Rating 220-240 V, 50 Hz 250 Watts
Võimsusklass 220–240 V, 50 Hz, 250 W
Certified to IPX4
Kaitseaste IPX4
www.CampChef.com | 1.800.650.2433 •
Camp Chef is a registered trademark of
Logan Outdoor Products ©2020 • Patent
Pending • 3985 N 75 W, Hyde Park, UT
84318, USA • 0920_PG24CLUK_Booklet
www.CampChef.com | 1.800.650.2433 •
Camp Chef on ettevõtte Logan Outdoor
Products registreeritud kaubamärk ©2020 •
Patenditaotlus on menetluses • 3985 N 75
W, Hyde Park, UT 84318, USA •
0920_PG24CLUK_Booklet
PAGE 2
LK 2
WARNING
HOIATUS
FOR OUTDOOR USE ONLY
KASUTADA AINULT
VÄLISTINGIMUSTES
WARNING
HOIATUS
If the information in this manual is not
followed exactly, a fire or explosion may
result causing property damage, personal
injury or loss of life.
Kui käesolevas juhendis esitatud juhiseid
täpselt ei järgita, võib tekkida tulekahju või
plahvatus, mis põhjustab varalist kahju,
kehavigastusi või surma.
WARNING
HOIATUS
• To installer or person assembling this
appliance:
• Paigaldajale või seadme monteerijale:
Leave this manual with this appliance for
future reference.
jätke see juhend edasiseks kasutamiseks
seadme juurde.
To consumer:
Tarbijale:
Keep this manual with this appliance for
future reference.
hoidke seda juhendit edasiseks
kasutamiseks koos seadmega.
This instruction manual contains important
information necessary for the proper
assembly and safe use of this product.
Käesolev juhend sisaldab olulist teavet, mis
on vajalik toote korrektseks kokkupanekuks
ja ohutuks kasutamiseks.
Read and follow all warnings and
instructions before assembling and using
this appliance.
Lugege enne seadme kokkupanekut ja
kasutamist läbi kõik hoiatused ja juhised
ning arvestage nendega.
Do not discard this instruction manual.
Ärge visake seda juhendit minema.
CAUTION
ETTEVAATUST
Use Only Wood Pellet Fuel Specified By
The Manufacturer.
Kasutage kütusena ainult tootja kirjeldusele
vastavaid puidugraanuleid.
Do Not Use Pellet Fuel Labeled As Having
Additives.
Ärge kasutage lisandeid sisaldavaid
puidugraanuleid.
Only use Camp Chef Premium Pellets with
the following specifications. 8,000-8,300
BTU/LB 0.75-0.85% Ash content
Kasutage ainult Camp Chefi kvaliteetseid
graanuleid, millel on järgmised omadused:
kütteväärtus 2,34–2,43 kWh/kg,
tuhasisaldus 0,75–0,85%.
CAUTION
ETTEVAATUST
Contact local building or fire officials about
restrictions and installation inspection
requirements in your area.
Küsige kohalikelt ehitus- ja
tulekaitseasutustelt teavet teie piirkonnas
kehtivate piirangute ja paigaldusülevaatuse
nõuete kohta.
A MAJOR CAUSE OF FIRES IS
FAILURE TO
MAINTAIN REQUIRED CLEARANCES
(AIR SPACES)
TO COMBUSTIBLE MATERIALS.
TULEKAHJUDE OLULINE PÕHJUS ON
EBAPIISAVA VAHE JÄTMINE
PÕLEVATE MATERJALIDEGA.
IT IS OF UTMOST IMPORTANCE THAT
THIS PRODUCT BE INSTALLED ONLY
IN ACCORDANCE WITH THESE
INSTRUCTIONS.
ÄÄRMISELT TÄHTIS ON
PAIGALDADA TOODE TÄPSELT SIIN
ESITATUD JUHISTE KOHASELT.
WARNING
HOIATUS
The appliance and its accessible parts
become hot during use.
Seade ja selle ligipääsetavad osad muutuvad
kasutamise ajal kuumaks.
Care should be taken to avoid contact with
hot surfaces or components.
Vältige kokkupuudet kuumade pindade ja
osadega.
Children under 8 years of age must be kept
away unless continuously supervised.
Alla 8-aastasi lapsi tohib lubada seadme
lähedusse ainult pideva järelevalve all.
DANGER
OHT
1. Never operate this appliance unattended.
1. Ärge jätke töötavat seadet kunagi
järelevalveta.
2. Never operate this appliance within 3 m
of a stored LP cylinder.
2. Ärge kasutage seadet 3 m raadiuses
vedelgaasiballoonist.
3. N ever operate this appliance within 7.5
m of any flammable liquid.
3. Ärge kasutage seadet 7,5 m raadiuses mis
tahes tuleohtlikust vedelikust.
4. I f a fire should occur, keep away from
appliance and immediately call your fire
department.
4. Põlengu tekkimise korral hoidke
seadmest eemale ja helistage kohe
tuletõrjesse.
Do not attempt to extinguish an oil or grease
fire with water.
Ärge püüdke kustutada põlevat õli või rasva
veega.
Failure to follow these instructions could
result in fire, explosion or burn hazard,
which could cause property damage,
personal injury or death.
Nende juhiste eiramine võib kaasa tuua
tulekahju, plahvatuse või põletusohu ning
põhjustada varalist kahju, kehavigastusi või
surma.
CAUTION
ETTEVAATUST
Always store wood pellets away from heat
producing appliances and other fuel
containers.
Hoidke puidugraanuleid alati eemal soojust
tekitavatest seadmetest ja kütusemahutitest.
Pellets should be stored in a dry
environment.
Graanuleid tuleb hoida kuivas kohas.
WARNING
HOIATUS
Normal use will create a buildup of ash,
grease, and creosote inside the grill.
Tavapärase kasutamise käigus koguneb
grilli sisse tuhka, rasva ja kreosootõli.
The grill must be thoroughly cleaned after
every 50 hours of use or if a buildup of
grease or creosote is noticed inside the grill.
Grilli tuleb põhjalikult puhastada iga 50
kasutustunni järel või kui selle sees on näha
rasva või kreosootõli kogunemist.
Clean the grill by removing all internal parts
and thoroughly scrape away all grease and
creosote from all internal surfaces including
the grease drain and remove debris from the
grill.
Grilli puhastamiseks eemaldage kõik selle
sisemised osad, kraapige kõik sisepinnad,
k.a rasvarenn hoolikalt kogu rasvast ja
kreosootõlist puhtaks ning eemaldage
grillist jäätmed.
The drip tray must always be cleaned prior
to turning the grill to high or cooking in
direct flame mode.
Tilgaalus tuleb puhastada iga kord enne
grilli suurele kuumusele reguleerimist või
otsese leegi režiimi kasutamist.
Excessive buildup of grease and creosote
may result in a grease fire.
Kui rasva ja kreosootõli koguneb liiga palju,
võib see süttida.
If a grease fire does occur, turn off the grill
using the main power switch and close the
lid.
Rasva süttimise korral lülitage grill
peatoitelülitist välja ja sulgege kaas.
Leave the lid closed until the fire
extinguishes itself.
Hoidke kaant suletuna, kuni leek ise kustub.
If an uncontrolled fire does occur,
immediately call the local fire department.
Kontrollimatu põlengu tekkimise korral
helistage kohe tuletõrjesse.
Never put water on a grease fire.
Ärge kunagi valage põlevale rasvale vett.
PAGE 3
LK 3
CARBON MONOXIDE WARNING
HOIATUS VINGUGAASI KOHTA
Follow these guidelines to prevent this
colorless, odorless gas from poisoning you,
your family or others.
Järgige siin esitatud juhiseid, et see värvitu
ja lõhnatu gaas ei saaks mürgitada teid, teie
pereliikmeid või kedagi teist.
Know the symptoms of carbon monoxide
poisoning:
Jätke meelde vingugaasimürgistuse
sümptomid:
headache, dizziness, weakness, nausea,
vomiting, sleepiness, and confusion.
peavalu, uimasus, nõrkus, iiveldus,
oksendamine, unisus ja segasus.
Carbon monoxide reduces the blood’s
ability to carry oxygen.
Vingugaas vähendab vere hapnikukandmise
võimet.
Low blood oxygen levels can result in loss
of consciousness and death.
Vere vähene hapnikusisaldus võib lõppeda
teadvusekaotuse ja surmaga.
See a doctor if you or others develop cold or
flu-like symptoms while cooking or in the
vicinity of this appliance.
Pöörduge arsti poole, kui teil või kellelgi
teisel tekivad küpsetamise ajal või seadme
läheduses viibides gripilaadsed sümptomid.
Carbon monoxide poisoning, which can
easily be mistaken for a cold or flu, is often
detected too late.
Kergesti külmetuse või gripiga segamini
aetav vingugaasimürgistus avastatakse
sageli liiga hilja.
Alcohol consumption and drug use increase
the effects of carbon monoxide poisoning.
Vingugaasi toimet süvendab alkoholi
tarbimine ja uimastite kasutamine.
Carbon monoxide is especially toxic to
mother and child during pregnancy, infants,
the elderly, smokers and people with blood
or circulatory system problems, such as
anemia, or heart disease.
Vingugaas on eriti mürgine rasedatele
naistele ja loodetele, vastsündinutele,
eakatele, suitsetajatele ning vere või
vereringe probleemidega (nt aneemia,
südamehaigus) inimestele.
CHIMNEY (1)
PG24-84H
KORSTEN (1)
PG24-84H
PG24-5 (1)
CHIMNEY CAP ASM
PG24-5 (1)
KORSTNAKATE ASM
1/4-20 X 3 BOLT (1)
1/4-20 X 3 POLT (1)
1/4-20 NUT (1)
1/4-20 MUTTER (1)
M6 X 15 BOLT (3)
M6 X 15 POLT (3)
PG24-85 (1)
CHIMNEY GASKET
PG24-85 (1)
KORSTNATIHEND
COOKING GRATE (2)
PG24-70
KÜPSETUSREST (2)
PG24-70
PULL ROD (1)
PG24SG-3
TÕMBEVARRAS (1)
PG24SG-3
LID
PG24SG-6 ( BLACK)
PG24SG-6B (BRONZE)
PG24SG-6S (STAINLESS)
KAAS
PG24SG-6 (MUST)
PG24SG-6B (PRONKS)
PG24SG-6S (ROOSTEVABA)
THERMOMETER (1)
PG24-44
TERMOMEETER (1)
PG24-44
PROBE COVER (1)
PG24-54
SONDIKATE (1)
PG24-54
FEED GASKET (1)
PG24-34
SISENDI TIHEND (1)
PG24-34
HOPPER ASM (1)
PG24CL-2G (UK)
PG24CL-2F (CE)
PG24CL-2I (AU)
PG24CL-2J (CH)
KOLU ASM (1)
PG24CL-2G (UK)
PG24CL-2F (CE)
PG24CL-2I (AU)
PG24CL-2J (CH)
LEFT REAR LEG (1)
PG24ZG-10CE
VASAK TAGUMINE JALG (1)
PG24ZG-10CE
ASH CUP (1)
PG24-17
TUHATOPS (1)
PG24-17
BOTTOM SHELF(1)
PG24WW-4
ALUMINE RIIUL (1)
PG24WW-4
LEFT FRONT LEG (1)
PG24ZG-11CE
VASAK EESMINE JALG (1)
PG24ZG-11CE
LEG PLUG (2)
PG24-69
JALAKORK (2)
PG24-69
M10 ACORN NUT (2)
M10 KÜBARMUTTER (2)
M10 FLAT WASHER (2)
M10 LAPIKSEIB (2)
PG24CL-1 HARDWARE KIT
PG24CL-1 SEADMEKOMPLEKT
PG24-79 CHIMNEY HARDWARE KIT
PG24-79 KORSTNAKOMPLEKT
UPPER GRATE (2)
PG24SG-5
ÜLEMINE REST (2)
PG24SG-5
DRIP TRAY (1)
PG24SG-4
TILGAALUS (1)
PG24SG-4
M8 NUT (2)
M8 MUTTER (2)
HEAT DEFLECTOR (1)
PG24SG-2
SOOJUSE DEFLEKTOR (1)
PG24SG-2
HANDLE (1)
PG24-57
KÄEPIDE (1)
PG24-57
HANDLE BEZEL (2)
PG24-71
KÄEPIDEME VÕRU (2)
PG24-71
HANDLE DEFLECTOR
KÄEPIDEME DEFLEKTOR
(1) PG24SG-12
(1) PG24SG-12
M6 HANDLE SCREW (2)
PG24-59
M6 KÄEPIDEME KRUVI (2)
PG24-59
SIDE SHELF (1)
PG36CL-1
KÜLGRIIUL (1)
PG36CL-1
M6 X 15 BOLT (4)
M6 X 15 POLT (4)
UPPER GRATE BRACKET
(2) PG24SG-11
ÜLEMISE RESTI KANDUR
(2) PG24SG-11
M6 NUT (4)
M6 MUTTER (4)
PULOUT LOCK (1)
PG24-42
TÜHJENDUSVARDA LUKK (1)
PG24-42
PULLOUT KNOB (2)
PG24-9CE
TÜHJENDUSVARDA NUPP (2)
PG24-9CE
BURNER PULLOUT (1)
PG24-41
PÕLETI TÜHJENDUSVARRAS (1)
PG24-41
GREASE BUCKET (1)
PG24-11
RASVAÄMBER (1)
PG24-11
REAR RIGHT LEG (1)
PG24ZG-12CE
PAREM TAGUMINE JALG (1)
PG24ZG-12CE
FRONT RIGHT LEG (1)
PG24ZG-13CE
PAREM EESMINE JALG (1)
PG24ZG-13CE
WHEEL (2)
PG24-16CE
RATAS (2)
PG24-16CE
WHEEL AXLE (2)
PG24-66CE
RATTATELG (2)
PG24-66CE
M10 ACORN NUT (2)
M10 KÜBARMUTTER (2)
M10 FLAT WASHER (2)
M10 LAPIKSEIB (2)
PAGE 4
LK 4
HOPPER LID (1)
PG24CL-3 (BLACK)
KOLU KAAS (1)
PG24CL-3 (MUST)
AUGER GUARD (1)
PG24CL-4
TIGUAJAMI KATE (1)
PG24CL-4
M4 X 10 SCREW (2)
M4 X 10 KRUVI (2)
LID MAGNET (1)
PGC24-18
KAANE MAGNET (1)
PGC24-18
POWER CORD (1)
PG24-48G (UK)
PG24-48F (CE)
PG24-48I (AU)
PG24-48J (CH)
TOITEJUHE (1)
PG24-48G (UK)
PG24-48F (CE)
PG24-48I (AU)
PG24-48J (CH)
HOPPER HANDLE (1)
PGC24-12
M6 X 15 BOLT (4)
KOLU KÄEPIDE (1)
PGC24-12
M6 X 15 POLT (4)
M6 NUT (2)
M6 MUTTER (2)
HOPPER CLEANOUT (1)
PG24CL-8
KOLU TÜHJENDUSVARRAS (1)
PG24CL-8
PULLOUT LOCK (1)
PG24-42
TÜHJENDUSVARDA LUKK (1)
PG24-42
PULLOUT KNOB (1)
TÜHJENDUSVARDA NUPP (1)
PG24-9CE
PG24-9CE
GUARD PLATE (1)
PG24CL-5
KATTEPLAAT (1)
PG24CL-5
BOTTLE OPENER (1)
BTOP-1
PUDELIAVAJA (1)
BTOP-1
M3X20 4.8 CLASS
SHEAR PIN W/NUT (1)
PG24-25
M3X20 4,8-KLASSI
LÕIKETIHVT MUTRIGA (1)
PG24-25
M3 NYLOC NUT (4)
M3 NYLOC-MUTTER (4)
HOPPER WINDOW ASM (1)
PG24CL-6
KOLU AKEN ASM (1)
PG24CL-6
M3X8 BOLT (4)
M3X8 POLT (4)
AUGER IMPELLER (1)
PG24-49
TIGUAJAMI TIIVIK (1)
PG24-49
AUGER MOTOR WITH IMPELLER (1)
PG24-24CE
TIGUAJAMI MOOTOR KOOS
TIIVIKUGA (1)
PG24-24CE
AUGER BUSHING (1)
PG24-23
TIGUAJAMI PUKS (1)
PG24-23
AUGER (1)
PGC24-8
TIGU (1)
PGC24-8
WIFI CONTROLER (1)
PG24CL-7CE
WIFI-KONTROLLER (1)
PG24CL-7CE
M4.2 X 10 SCREW (4)
BLOWER IMPELLER (1)
PG24-27
M4.2 X 10 SCREW (4)
BLOWER MOTOR WITH IMPELLER (1)
PG24-26CE
MEAT PROBE (4)
PG24-86
M4 X 10 SCREW (2)
HOPPER LID (1)
PG24CL-3 (BLACK)
AUGER GUARD (1)
M4.2 X 10 KRUVI (4)
PUHURI TIIVIK (1)
PG24-27
M4.2 X 10 KRUVI (4)
PUHURI MOOTOR KOOS TIIVIKUGA
(1)
PG24-26CE
LIHASOND (4)
PG24-86
M4 X 10 KRUVI (2)
KOLU KAAS (1)
PG24CL-3 (MUST)
TIGUAJAMI KATE (1)
BURNER (1)
PG24-78
PÕLETI (1)
PG24-78
HEATING ROD (1)
PG24-21CE
KÜTTEVARRAS (1)
PG24-21CE
0320 PG24CLAU14 PARTS
0320 PG24CLAU14 OSAD
PAGE 5
LK 5
1. Do NOT leave this appliance unattended
while in use.
1. ÄRGE jätke seadet kasutamise ajal
järelevalveta.
The user must remain in the immediate area
of the product and have a clear view of the
product at all times during operation.
Kasutaja peab jääma toote vahetusse
lähedusse ja toode peab olema talle
kasutamise ajal kogu aeg selgelt nähtav.
2. Keep children and pets away from grill at
all times.
2. Ärge lubage lapsi ega loomi kunagi grilli
lähedale.
3. The use of alcohol, prescription or non-
prescription drugs may impair your ability
to properly assemble or safely operate this
appliance.
3. Alkoholi, retseptiravimite või uimastite
tarbimine võib halvendada teie võimet
seadet korrektselt kokku panna või ohutult
kasutada.
4. This appliance can be used by children
aged from 8 years and above and persons
with reduced physical, sensory or mental
capabilities or lack of experience and
knowledge if they have been given
supervision or instruction concerning use of
the appliance in a safe way and understand
the hazards involved.
4. Lapsed alates 8. eluaastast, vähenenud
kehalise, meelelise või vaimse võimekusega
või väheste kogemuste ja teadmistega isikud
võivad seadet kasutada juhul kui neile on
õpetatud selle ohutut kasutamist ning nad
mõistavad võimalikke ohte.
Children shall not play with the appliance.
Lapsed ei tohi seadmega mängida.
5. Cleaning and user maintenance shall not
be made by children without supervision.
5. Lapsed võivad seadet puhastada ja
hooldada ainult järelevalve all.
6. For OUTDOOR use only.
6. Kasutada ainult VÄLISTINGIMUSTES.
Do NOT use in a building, garage or any
other enclosed area.
ÄRGE kasutage hoones, garaažis ega muus
kinnises ruumis.
Do NOT use in or on recreational vehicles
or boats. NEVER use this appliance as a
heater.
MITTE kasutada vabaajasõidukis ega
paadis. Seadet EI TOHI kasutada
küttekehana.
7. Do not operate appliance under ANY
overhead construction.
7. Ärge kasutage seadet ÜHEGI
konstruktsiooni all.
Keep a minimum clearance of 1m from the
sides, front and back of appliance to ANY
construction.
Tagage, et seadme vahe MISTAHES
konstruktsioonidega oleks nii mõlemal
küljel kui ka ees ja taga vähemalt 1 m.
Keep the area clear of all combustible
material and flammable liquids, including
wood, dry plants and grass, brush, paper,
and canvas.
Ärge hoidke alas põlevaid materjale ega
tuleohtlikke vedelikke, sh puitu, kuivi taimi
ja heina, hagu, paberit ja lõuendit.
8. This product is not intended for
commercial use.
8. Toode ei ole ette nähtud kasutamiseks
tulunduslikul eesmärgil.
9. Always allow the appliance to cool before
covering with the patio cover.
9. Enne seadme katmist vihmakattega laske
sellel alati maha jahtuda.
10. Always cover the appliance, with patio
cover (if supplied), when not in use.
10. Hoidke seadet kasutusvälisel ajal alati
vihmakatte all (kui see on komplektis).
11. Always unplug grill before installing
patio cover.
11. Enne vihmakatte paigaldamist lahutage
grill alati vooluvõrgust.
12. Use only on a level, stable non-
combustible surface like bricks, concrete or
dirt.
12. Kasutage ainult tasasel, tugeval ja
mittepõleval pinnal, nt tellistel, betoonil või
mullal.
Do not use this appliance on any surface
that will burn or melt like wood, asphalt,
vinyl or plastic.
Ärge kasutage seadet pinnal, mis võib
põleda või sulada (nt puit, asfalt, vinüül või
plast).
13. Make sure burner clean-out is closed
before starting the grill.
13. Veenduge, et põleti tühjendusluuk on
enne grilli süütamist suletud.
14. Make sure the grease bucket is in place
before starting the grill.
14. Veenduge, et rasvaämber on enne grilli
süütamist oma kohal.
15. In the event of a fire unplug the grill
from the power supply, close the lid, and
leave it closed until the fire goes out.
15. Põlengu korral lahutage grill
vooluvõrgust, sulgege kaas ja hoidke seda
suletuna, kuni leek kustub.
After allowing the grill to cool, follow the
cleaning instructions before the next use.
Kui grill on jahtunud, puhastage see enne
järgmist kasutuskorda vastavalt juhistele.
16. Use only food grade hardwood pellets
manufactured for use in pellet grills.
16. Kasutage ainult toiduohutuid
lehtpuidugraanuleid, mis on toodetud
pelletgrillides kasutamiseks.
Using softwood or heating pellets will void
your warranty.
Okaspuidu või küttegraanulite kasutamise
korral kaotab garantii kehtivuse.
17. Do not allow the hopper to run out of
pellets. Pellets can be added at any time.
17. Vältige kolu tühjenemist graanulitest.
Graanuleid saab igal ajal lisada.
The hopper will hold approximately 10kg of
pellets.
Kolusse mahub ligikaudu 10 kg graanuleid.
The pellet usage will vary greatly depending
on the ambient temperature as well as
cooking temperature.
Graanulite kulu võib suuresti kõikuda
olenevalt keskkonna- ja
küpsetustemperatuurist.
18. I t is recommended that you not store
pellets in the hopper for extended periods as
they may absorb moisture from the air and
clog the auger.
18. Soovitatav on mitte hoida graanuleid
pikka aega kolus, sest need võivad imada
õhust niiskust ja ummistada tiguajami.
19. Keep the lid closed during cooking.
19. Hoidke kaant küpsetamise ajal kinni.
The grill is designed to cook with the lid
closed.
Grill on ette nähtud küpsetamiseks suletud
kaanega.
20. Note that the cooking temperature
displayed on the digital readout is measured
near the cooking surface on the left side of
the grill.
20. Arvestage, et digitaalsel näidikul
kuvatavat küpsetustemperatuuri mõõdetakse
grilli vasakul poolel asuva küpsetuspinna
juures.
The actual temperature inside the cooking
chamber will vary slightly throughout.
Küpsetuskambri eri piirkondade tegelik
sisetemperatuur võib sellest veidi erineda.
21. Do not use accessories not specified for
use with appliance.
21. Ärge kasutage tarvikuid, mis ei ole ette
nähtud selle seadmega kasutamiseks.
22. Never use gasoline, gasoline-type
lantern fuel, kerosene, charcoal lighter fluid,
or similar liquids to start or freshen up a fire
in this appliance.
22. Ärge kunagi kasutage seadmes tule
süütamiseks või ergutamiseks bensiini,
bensiini tüüpi lambikütust, süütevedelikku
ega muud sarnast vedelikku.
Keep all such liquids well away from the
appliance when in use.
Hoidke kõiki selliseid vedelikke töötavast
seadmest ohutus kauguses.
23. Ashes should be placed in a metal
container with a tight fitting lid.
23. Tuhk tuleks panna tihedalt sulguva
kaanega metallanumasse.
The closed container of ashes should be
placed on a non combustible floor or on the
ground, well away from all combustible
materials, pending final disposal.
Enne tuha lõplikku kõrvaldamist tuleb
suletud tuhaanum asetada mittepõlevast
materjalist põrandale või maapinnale
kõikidest põlevatest materjalidest piisavalt
kaugele.
When the ashes are disposed by burial in
soil or otherwise locally dispersed they
should be retained in the closed container
until all cinders have thoroughly cooled.
Kui tuhk maetakse pinnasesse või
puistatakse kohapeal laiali, tuleb seda hoida
suletud anumas seni, kuni see on täielikult
jahtunud.
24. C reosote – Formation and need for
removal.
24. Kreosootõli – teke ja eemaldamise
vajadus.
When wood pellets are burned slowly, they
produce tar and other organic vapors that
combine with expelled moisture to form
creosote.
Puidugraanulite aeglasel põletamisel tekivad
tõrv ja orgaanilised aurud, mis moodustavad
koos välja tõrjutud niiskusega kreosootõli.
The creosote vapors condense in a relatively
cool oven flue and exhaust hood of a slow
burning fire.
Kreosootõli kondenseerub aeglase
põletamise korral suhteliselt jahedas
suitsulõõris ja väljalasketorus.
As a result, creosote residue accumulates on
the flue lining and exhaust hood.
Selle tagajärjel koguneb kreosootõli lõõri ja
väljalasketoru siseküljele.
When ignited, this creosote makes an
extremely hot fire.
Süttimise korral põleb kreosootõli väga
kuuma leegiga.
The grease duct should be inspected every
50 hours to determine when grease and/or
creosote build-up has occurred.
Rasvarenni tuleks kontrollida iga 50
kasutustunni järel, et näha, kas sinna on
kogunenud rasva ja/või kreosootõli.
When grease or creosote has accumulated, it
should be removed to reduce risk of fire.
Tuleohu vähendamiseks tuleb kogunenud
rasv ja kreosootõli eemaldada.
25. If the supply cord is damaged, it must be
replaced by the manufacturer, its service
agent or similarly qualified persons in order
to avoid a hazard.
25. Kui toitejuhe on vigastatud, peab tootja,
tema teenindusagent või muu
kvalifitseeritud isik selle ohu vältimiseks
välja vahetama.
25. If the supply cord is damaged, it must be
replaced by the manufacturer, its service
agent or similarly qualified persons in order
to avoid a hazard.
25. Kui toitejuhe on vigastatud, peab tootja,
tema teenindusagent või muu
kvalifitseeritud isik selle ohu vältimiseks
välja vahetama.
DANGER
OHT
Do not work on this grill if it is plugged in.
Ärge tehke grillil hooldustöid, kui see on
vooluvõrku ühendatud.
Electric shock may occur resulting in death
or serious injury.
See võib põhjustada surma või raske
vigastusega lõppeva elektrilöögi.
PAGE 6
LK 6
ASSEMBLY INSTRUCTIONS
Remove all loose parts from the inside of
the grill and hopper.
KOKKUPANEKUJUHISED
Võtke grillist ja kolust välja kõik lahtised
osad.
Lay a blanket or piece of cardboard down to
protect the grill.
Grilli kaitsmiseks laotage maha tekk või
papitükk.
ATTACH THE LEGS
ÜHENDAGE JALAD
With the help of another person flip the grill
upside down on the blanket or cardboard.
Keerake grill teise isiku abi kasutades
tagurpidi tekile või papitükile.
The grill lid and hopper lid will swing open
when doing this so be careful not to damage
the lids.
Selle käigus vajuvad grilli ja kolu kaaned
lahti, nii et olge ettevaatlik ja vältige nende
kahjustamist.
The grill may also want to roll on its lid so
one person should hold the grill steady
while the other person assembles the bottom
legs and wheels.
Samuti võib grill hakata kaanel veerema,
mistõttu üks isik peaks hoidma grilli kinni
samal ajal, kui teine ühendab selle alla jalad
ja rattad.
1. Lay the grill on its back.
1. Asetage grill tagurpidi.
2. Install each of the 4 legs as shown in Fig
1.
2. Paigaldage kõik neli jalga, nagu näidatud
joonisel 1.
Make sure the legs with wheels are attached
to the right side of the grill with the wheels
facing out.
Paigaldage ratastega jalad grilli paremale
küljele nii, et rattad on pööratud väljapoole.
Note:
Märkus
Front legs are marked with an F and back
legs are marked with a B.
Märkus: eesmistel jalgadel on märgis F ja
tagumistel jalgadel märgis B.
M8 X 20 BOLT
M8 X 20 POLT
M8 LOCK WASHER
M8 LUKUSTUSSEIB
FIG. 1
JOON. 1
ATTACH BOTTOM SHELF
PAIGALDAGE ALUMINE RIIUL
1. Install bottom shelf as shown in Fig. 2 by
installing hardware in each of the 4 corners.
1. Paigaldage alumine riiul vastavalt
joonisele 2, keerates kinnitusvahendid
igasse nelja nurka.
2. Stand the grill upright.
2. Pöörake grill õigetpidi.
3. Tighten all hardware.
3. Pingutage kõik kinnitusvahendid.
M8 X 20 BOLT
M8 X 20 POLT
M8 LOCK WASHER
M8 LUKUSTUSSEIB
FIG. 2
JOON. 2
ATTACH CHIMNEY AND CHIMNEY
CAP
ÜHENDAGE KORSTEN JA
KORSTNAKATE
1. Install chimney to grill as shown in Fig
3.
1. Paigaldage korsten grillile, nagu
näidatud joonisel 3.
Make sure to install the gasket between the
grill and the chimney.
Pange grilli ja korstna vahele kindlasti
tihend.
2. Tighten all hardware.
2. Pingutage kõik kinnitusvahendid.
3. Install M6 x 76 Bolt through chimney
cap and secure using Qty (1) M6 nut.
3. Asetage M6 x 76 polt läbi korstnakatte ja
fikseerige see ühe M6 mutriga.
Thread second nut onto bolt leaving
approximately 4cm to the top of the cap.
Keerake poldile teine mutter nii, et see jääb
katte kohale u 4 cm kõrgusele.
Thread cap assembly down into the
chimney bracket until the lower nut hits the
bracket.
Keerake korstnakate koos poldiga korstna
kandurisse, kuni alumine mutter puutub
vastu kandurit.
See Fig 3.
Vt joonis 3.
M6 X 76 BOLT
M6 X 76 POLT
M6 NUT
M6 MUTTER
M6 X 15 SCREW
M6 X 15 KRUVI
CHIMNEY GASKET
KORSTNATIHEND
FIG. 3
JOON. 3
4. The height of the chimney cap can be
adjusted for summer and winter.
4. Korstnakatte kõrgust saab reguleerida
olenevalt sellest, kas on suvi või talv.
In the summer the gap should be
approximately 4cm.
Suvel peaks see olema korstnast u 4 cm
kõrgusel.
In the winter the gap should be
approximately 1.5cm.
Talvel peaks vahe korstnaga olema u 1,5
cm.
5. Tighten all hardware.
5. Pingutage kõik kinnitusvahendid.
INSTALL HANDLE
PAIGALDAGE KÄEPIDE
1. Install the handle as shown in Fig 4.
1. Paigaldage käepide, nagu näidatud
joonisel 4.
2. Tighten all hardware.
2. Pingutage kõik kinnitusvahendid.
FIG. 4
JOON. 4
HANDLE
KÄEPIDE
HANDLE BEZEL (2)
KÄEPIDEME VÕRU (2)
HANDLE DEFLECTOR
KÄEPIDEME DEFLEKTOR
M6 HANDLE SCREW (2)
M6 KÄEPIDEME KRUVI (2)
INSTALL HOPPER HANDLE
1. Install hopper handle as shown in Fig. 5.
PAIGALDAGE KOLU KÄEPIDE
1. Paigaldage kolu käepide, nagu näidatud
joonisel 5.
FIG. 5
JOON. 5
INSTALL HOPPER GUARD AND LID
PAIGALDAGE KOLU KATE JA KAAS
1. Install guard and lid as shown in Fig. 6.
1. Paigaldage kate ja kaas, nagu näidatud
joonisel 6.
The tab on the hopper should be inserted
into the slot on the guard.
Kolul olev keel peaks sisenema katte
pilusse.
Use screws to secure hopper guard and lid
to the hopper.
Kinnitage kolu kate ja kaas kruvide abil
kolu külge.
HOPPER LID (1)
KOLU KAAS (1)
M4 X 10 SCREW (2)
M4 X 10 KRUVI (2)
HOPPER GUARD (1)
KOLU KATE (1)
FIG. 6
JOON. 6
HOPPER LID (1)
KOLU KAAS (1)
M4 X 10 SCREW (2)
M4 X 10 KRUVI (2)
HOPPER GUARD (1)
KOLU KATE (1)
INSTALL SHELF BRACKET
PAIGALDAGE RESTIKANDUR
1. Install the bracket as shown in Fig 7.
1. Paigaldage kandur, nagu näidatud
joonisel 7.
2. Tighten all hardware.
2. Pingutage kõik kinnitusvahendid.
M6 X 15 SCREW (4)
M6 FLANGE NUT (4)
UPPER GRATE BKT (2)
PG24SG-11
M6 X 15 KRUVI (4)
M6 ÄÄRIKMUTTER (4)
ÜLEMINE RESTIKANDUR (2)
PG24SG-11
INSTALL SHELF
PAIGALDAGE RIIUL
(Optional-Do not install if installing sear
box)
(valikuline – ärge paigaldage, kui
paigaldate pruunistuskarbi)
1. Install shelf as shown in Fig 8.
1. Paigaldage riiul, nagu näidatud joonisel 8.
2. Tighten all hardware
2. Pingutage kõik kinnitusvahendid.
M6 X 15 SCREW
M6 X 15 KRUVI
FIG. 8
JOON. 8
GREASE BUCKET
RASVAÄMBER
1. Hang grease bucket from tube as shown
in Fig 9.
1. Riputage rasvaämber torule, nagu
näidatud joonisel 9.
ASH CUP
TUHATOPS
1. Install Ash Cup as shown in Fig 9.
Never use grill without Ash Cup in place.
1. Paigaldage tuhatops, nagu näidatud
joonisel 9. Ärge kunagi kasutage grilli ilma
tuhatopsita.
GREASE BUCKET
RASVAÄMBER
ASH CUP
TUHATOPS
FIG. 9
JOON. 9
INSTALL DRIP TRAY
PAIGALDAGE TILGAALUS
1. Install the Drip Tray as shown in Fig 10
and Fig11.
1. Paigaldage tilgaalus, nagu näidatud
joonistel 10 ja 11.
DRIP TRAY
TILGAALUS
HEAT DEFLECTOR
SOOJUSE DEFLEKTOR
FIG. 10
JOON. 10
DRIP TRAY
TILGAALUS
HEAT DEFLECTOR
SOOJUSE DEFLEKTOR
FIG. 11
JOON. 11
WARMING RACK AND COOKING
GRATE
SOOJENDUSRIIUL JA
KÜPSETUSREST
1. Install the cooking grate as shown in Fig
12
1. Paigaldage küpsetusrest, nagu näidatud
joonisel 12
UPPER GRATE (2)
PG24SG-5
ÜLEMINE REST (2)
PG24SG-5
LOWER GRATE (2)
PG24-70
ALUMINE REST (2)
PG24-70
FIG. 12
JOON. 12
CLEAN-OUT KNOB ASSEMBLY
INSTALLATION
TÜHJENDUSVARDA NUPU
PAIGALDAMINE
Hand tighten the burner clean-out knob as
shown in Fig 13.
Keerake käega peale tühjendusvarda nupp,
nagu näidatud joonisel 13.
PG24-9 (1)
BURNER PULLOUT KNOB
PG24-9 (1)
PÕLETI TÜHJENDUSVARDA NUPP
FIG. 13
JOON. 13
CLEAN-OUT PORT KNOB
TÜHJENDUSVARDA NUPP
1. Clean-out Port knob must be pushed in
when grill is on.
1. Kui grill töötab, peab tühjendusvarda
nupp olema sisse lükatud.
Make sure pullout lock is pushed down and
locks the knob to prevent inadvertent
opening of the clean-out port.
Veenduge, et tühjendusvarda lukk on alla
vajutatud ja fikseerib nupu, et vältida selle
juhuslikku väljatõmbamist.
See Fig 14.
Vt joonis 14.
2. Lift pullout lock and pull clean-out port
knob to empty ash into ash cup.
2. Kui soovite lasta tuha tuhatopsi, tõstke
tühjendusvarda lukk üles ja tõmmake
tühjendusvarda nuppu.
See Fig 15 3. See instructions for burner
clean-out.
Vt joonis 15. 3. Lugege põleti puhastamise
juhiseid.
PAGE 8
LK 8
FIG. 14
JOON. 14
CLEANOUT PORT CLOSED
TÜHJENDUSAVA SULETUD
FIG. 15
JOON. 15
CLEANOUT PORT OPEN
TÜHJENDUSAVA AVATUD
HOPPER CLEAN-OUT KNOB
ASSEMBLY INSTALLATION
KOLU TÜHJENDUSVARDA NUPU
PAIGALDAMINE
Hand tighten the hopper clean-out knob as
shown in Fig 16.
Keerake käega peale kolu tühjendusvarda
nupp, nagu näidatud joonisel 16.
PG24-9 (1)
PG24-9 (1)
PULLOUT KNOB
TÜHJENDUSVARDA NUPP
FIG. 16
JOON. 16
BURNER CLEAN-OUT
Before each use the burner should be
cleaned out by lifting the pullout lock and
pulling the clean-out port knob on the right
side of the grill to open the burner clean-out.
PÕLETI TÜHJENDAMINE
Iga kord enne kasutamist tuleb põleti
tühjendada: selleks tõsta üles
tühjendusvarda lukk ja tõmmata välja grilli
paremal küljel asuv tühjendusvarda nupp, et
avada põleti tühjendusava.
This will allow the ash from previous use to
fall into the cup under the grill.
See võimaldab eelmise kasutuskorra tuhal
langeda grilli all olevasse topsi.
The cup should be removed and emptied
and then reinstalled before each use.
Tops tuleks eemaldada ja tühjendada ning
enne kasutamise algust oma kohale tagasi
panna.
DANGER
OHT
Never Operate the Pellet grill without the
ash cup in place.
Ärge kasutage pelletgrilli kunagi ilma
tuhatopsita.
Make sure the burner clean-out port is
closed and locked before starting the grill.
Veenduge enne grilli süütamist, et põleti
tühjendusava on suletud.
Never open the burner clean-out port when
the grill is hot.
Ärge avage põleti tühjendusava kunagi siis,
kui grill on kuum.
After cleaning out the burner make sure to
close the burner clean-out by pushing the
clean-out port knob in on the right side of
the grill.
Pärast põleti tühjendamist sulgege kindlasti
tühjendusava: selleks lükake sisse grilli
paremal küljel asuv tühjendusvarda nupp.
Make sure to lift the pullout lock and push
the clean-out port knob all the way in and
lock in place with the pullout lock.
Tõstke tühjendusvarda lukk üles, lükake
nupp lõpuni sisse ja fikseerige
tühjendusvarras lukuga.
Every 50 hours of use, remove the grill
grates, grease tray, and heat deflector and
clean the inside of the grill.
Iga 50 kasutustunni järel eemaldage
grillrestid, rasvaalus ja soojuse deflektor
ning puhastage grilli sisemust.
If you notice a lot of ash blowing around in
the grill it is time to vacuum it out.
Kui märkate, et grillis lendleb palju tuhka,
on aeg see välja imeda.
FILLING THE AUGER TUBE
TIGUAJAMI TORU TÄITMINE
CAUTION:
ETTEVAATUST!
ONLY USE THE FEED SETTING
WHEN HOPPER HAS RUN OUT OF
PELLETS.
KASUTAGE TÄITEREŽIIMI AINULT
SIIS, KUI KOLU ON GRAANULITEST
TÜHJAKS SAANUD.
FEED SETTING IS NOT FOR
NORMAL USE.
TÄITEREŽIIM EI OLE MÕELDUD
TAVAKASUTUSEKS.
The first time you use your grill or any time
the hopper has run out of pellets you will
need to fill the auger tube.
Esimest korda grilli kasutades ja alati, kui
kolu on graanulitest tühjaks saanud, peate
täitma tiguajami toru.
This simply means you must fill the auger
tube with pellets until pellets reach the
burner.
See tähendab lihtsalt, et peate tiguajami toru
graanulitega täitma, kuni graanulid jõuavad
põletini.
This is done by selecting FEED from the
main menu.
Selleks tuleb valida peamenüüst režiim
FEED (täitmine).
This will turn the auger on and the
controller will display “FEED”.
Seepeale lülitub tiguajam sisse ja
kontrolleril kuvatakse tekst FEED
(täitmine).
The auger will remain on for no more than 7
minutes.
Tiguajam jääb tööle kõige rohkem 7
minutiks.
This is ample time for the pellets to reach
the burner.
It is easiest to open the burner clean-out by
pulling the knob on the right side of the
grill.
See jätab piisavalt aega, et graanulid
jõuaksid põletini.
Kõige lihtsam on seda kontrollida nii, et
tõmbate välja grilli paremal küljel asuva
tühjendusvarda nupu.
Once you hear pellets dropping into the cup
you can close the clean-out port by pushing
the knob on the right side of the grill and
then select your cooking temperature.
Kui kuulete, et graanulid langevad
tuhatopsi, võite tühjendusava sulgeda ja
seejärel valida soovitud
küpsetustemperatuuri.
(Never operate grill without the ash cup in
place).
(Ärge kasutage grilli kunagi ilma
tuhatopsita.)
Always make sure the burner clean-out port
is closed by pushing in the knob on the right
side of the grill before selecting any of the
cook settings.
Enne mis tahes küpsetusrežiimi valimist
veenduge alati, et põleti tühjendusava on
suletud (st grilli paremal küljel asuv nupp
on sisse lükatud).
Never open the burner clean-out port when
the grill is hot.
Ärge avage põleti tühjendusava kunagi siis,
kui grill on kuum.
EMPTYING THE HOPPER
KOLU TÜHJENDAMINE
This grill is equipped with a hopper drain to
quickly remove the pellets from the hopper.
Grill on varustatud kolu tühjenduskanaliga,
mis võimaldab kolu kiiresti graanulitest
tühjendada.
This can be used to remove pellets if the
grill is being stored for a long time or to
remove pellets to change to a different
flavor pellet.
Seda võib kasutada graanulite
eemaldamiseks, kui grill jäetakse pikemaks
ajaks seisma, või teise maitsega graanulite
kasutusele võtmiseks.
Warning:
Hoiatus!
Never remove the auger guard from the
hopper while the pellet grill is on.
Ärge kunagi eemaldage kolust tiguajami
katet sel ajal, kui pelletgrill töötab.
Never operate the grill without the auger
guard in place.
Ärge kasutage grilli kunagi ilma tiguajami
katteta.
Caution:
Ettevaatust!
The instructions below must be followed
when emptying the hopper.
Kolu tuleb tühjendada vastavalt allolevatele
juhistele.
1. Unplug the grill from the power source.
1. Lahutage grill elektritoiteallikast.
2. Hang a bucket or use a box to catch the
pellets that will come out of the tube on the
rear of the hopper.
2. Riputage kolu alla ämber või kasutage
kasti, kuhu koguda kolu taga olevast torust
tulevad graanulid.
3. Lift the pullout lock on the left side of
the hopper and pull the hopper clean-out
knob.
3. Tõstke kolu vasakul küljel asuv
tühjendusvarda lukk üles ja tõmmake kolu
tühjendusvarda nupp välja.
4. Sweep the remaining pellets in the
hopper towards the drain hole.
4. Pühkige kolusse jäänud graanulid
tühjendusava poole.
5. Push in the hopper clean-out knob and
lock in place using the pullout lock.
5. Lükake kolu tühjendusvarda nupp tagasi
ja fikseerige see tühjendusvarda lukuga.
FIG. 17
JOON. 17
HOPPER CLEANOUT
KOLU TÜHJENDUSVARRAS
PAGE 9
LK 9
APP QUICK START GUIDE
RAKENDUSE LÜHIJUHEND
1. Download the Camp Chef APP from the
Apple APP store or Android Play Store.
1. Laadige Apple’i App Store’ist või
Androidi Play Store’ist alla rakendus Camp
Chef.
2. Turn the Grill controller on using the
main power switch.
2. Lülitage grilli kontroller peatoitelülitist
sisse.
3. Open the Camp Chef APP and follow the
setup instructions for connecting the grill to
your home 2.4 GHz WiFi network.
3. Avage rakendus Camp Chef ja järgige
seadistusjuhiseid, et ühendada grill oma
kodu 2,4 GHz WiFi-võrguga.
Warning -
Hoiatus!
Do NOT leave this appliance unattended
while in use. The user must remain in the
immediate area of the product and have a
clear view of the product at all times during
operation
ÄRGE jätke seadet kasutamise ajal
järelevalveta. Kasutaja peab jääma toote
vahetusse lähedusse ja toode peab olema
talle kasutamise ajal kogu aeg selgelt
nähtav.
Note -
Märkus.
Some functions are only available from the
controller.
Mõned funktsioonid on kasutatavad ainult
kontrolleri abil.
If attempting to start the grill from the APP
it will prompt you to confirm starting the
grill from the controller.
Kui üritate käivitada grilli rakenduses, siis
palutakse teil seda kinnitada ka kontrolleril.
Temperature and Smoke settings can be
adjusted from the APP.
Rakenduses saab muuta temperatuuri ja
suitsu seadeid.
Shutdown can also be performed from the
APP.
Samuti saab rakenduse abil grilli välja
lülitada.
For more information visit
https:/www.campchef.com/app
Lisateavet leiate aadressil
https:/www.campchef.com/app
CONTROLLER EXPLANATION
KONTROLLERI TUTVUSTUS
POWER SWITCH
TOITELÜLITI
Used to turn the main power onto the pellet
grill. “O” is Off. “-“ is On. See Fig. 18
Kasutatakse pelletgrilli toite lülitamiseks. O
tähendab „väljas“. – tähendab „sees". Vt
joonis 18.
Fig. 18
Joon. 18
CONTROLLER FUNCTIONS
KONTROLLERI FUNKTSIOONID
Rotate the dial to scroll through menus,
adjust temperature, or smoke settings.
Keerake valikunuppu, et kerida menüüsid,
reguleerida temperatuuri või suitsu seadeid.
Press the dial to select.
Valiku kinnitamiseks vajutage valikunuppu.
SHUTDOWN
SHUTDOWN
This setting must be used after each use.
See režiim tuleb valida iga kord pärast
kasutamist.
Select SHUTDOWN from the main menu.
Valige peamenüüst režiim SHUTDOWN
(väljalülitamine).
The fan will remain on for up to 20 minutes.
Ventilaator jätkab tööd kuni 20 minutit.
This setting will burn up any extra pellets in
the burner and cool down the grill.
See režiim võimaldab põletisse jäänud
graanulitel lõpuni põleda ja jahutab grilli.
Do not turn the main power switch off when
the grill is hot.
Ärge lülitage peatoitelülitit välja, kui grill
on veel kuum.
FEED -
FEED –
Select FEED from the main menu.
valige peamenüüst režiim FEED (täitmine).
This setting is used to feed pellets to the
burner.
Seda režiimi kasutatakse graanulite
viimiseks põletisse.
It will be used the first time you use the grill
to fill the auger tube and any time you may
inadvertently run the hopper out of pellets.
Seda kasutatakse grilli esimesel
kasutuskorral tiguajami toru täitmiseks ning
seejärel juhtudel, kui kolu on juhuslikult
graanulitest tühjaks saanud.
See instructions on filling the auger tube.
Lugege tiguajami toru täitmise juhiseid.
SET TEMP LOW SMOKE -
SET TEMP LOW SMOKE –
Select SET TEMP from the main menu.
tehke peamenüüs valik SET TEMP
(sättetemperatuur).
Rotate dial to LOW SMOKE and press to
confirm.
Keerake valikunupp valikule LOW SMOKE
(madal suits) ja kinnitage valik
nupuvajutusega.
This setting is used for smoking foods at an
average temperature of 70C.
Seda režiimi kasutatakse toidu
suitsutamiseks keskmise temperatuuriga 70
˚C.
This setting will produce large amounts of
smoke.
Sellel režiimil tekib suur kogus suitsu.
SET TEMP HIGH SMOKE - -
SET TEMP HIGH SMOKE –
Select SET TEMP from the main menu.
tehke peamenüüs valik SET TEMP
(sättetemperatuur).
Rotate dial to HIGH SMOKE and press to
confirm.
Keerake valikunupp valikule HIGH
SMOKE (kõrge suits) ja kinnitage valik
nupuvajutusega.
This setting is used for smoking foods at an
average temperature of 105C.
Seda režiimi kasutatakse toidu
suitsutamiseks keskmise temperatuuriga 105
˚C.
This setting will produce large amounts of
smoke.
Sellel režiimil tekib suur kogus suitsu.
SET TEMP 75C TO 210C -
SET TEMP 75C TO 210C –
Select SET TEMP from the main menu.
tehke peamenüüs valik SET TEMP
(sättetemperatuur).
Rotate dial to the desired temperature and
press to confirm.
Keerake valikunupp soovitud temperatuurile
ja kinnitage valik nupuvajutusega.
SET TEMP HIGH -
SET TEMP HIGH –
Select SET TEMP from the main menu.
tehke peamenüüs valik SET TEMP
(sättetemperatuur).
Rotate dial to HIGH and press to confirm.
Keerake valikunupp valikule HIGH (kõrge)
ja kinnitage valik nupuvajutusega.
This setting can be used to achieve
temperatures up to 260C depending on
ambient temperatures.
Sellel režiimil võib olenevalt
keskkonnatingimustest saavutada
temperatuuri kuni 260 ˚C.
SET SMOKE –
SET SMOKE –
The SET SMOKE setting is available for
temperatures from 70C – 175C.
valik SET SMOKE (suitsu tase) on
kasutatav temperatuuridel 70–175 ˚C.
Select SET SMOKE from the main menu.
Tehke peamenüüs valik SET SMOKE
(suitsu tase).
Rotate dial to the desired SMOKE
SETTING and press to confirm.
Keerake valikunupp soovitud suitsutasemele
ja kinnitage valik nupuvajutusega.
The SMOKE SETTING can be adjusted
from 1-10.
Suitsu taset saab reguleerida vahemikus 1–
10.
A smoke setting of 1 will produce less
smoke and maintain a more even
temperature.
Suitsu tasemel 1 tekib vähem suitsu ja
temperatuur on ühtlasem.
As the smoke setting is increased more
smoke will be produced.
Mida kõrgem on valitud suitsutase, seda
rohkem suitsu tekib.
Note that as the smoke setting is increased
temperature fluctuations will increase.
Arvestage, et kõrgematel suitsutasemetel
suurenevad ka temperatuuri kõikumised.
BREAKING IN THE GRILL
GRILLI SISSEPÕLETAMINE
We suggest turning the grill to 175C for ½
hour before cooking on the grill for the first
time.
Soovitame enne grilli esimest kasutamist
lülitada see pooleks tunniks tööle
temperatuuril 175 ˚C.
This will burn off any manufacturing oils
and cure the paint.
See põletab ära kõik tootmise käigus peale
kantud õlid ja muudab värvi kõvemaks.
Make sure to follow the instructions for
filling the auger tube before breaking in the
grill.
Enne grilli sissepõletamist täitke vastavalt
juhistele tiguajami toru.
WARNING
HOIATUS
Always start the grill with the lid open.
Süüdake grill alati avatud kaanega.
The lid must be closed after the start cycle.
Kaas tuleb sulgeda pärast süütamistsükli
lõppu.
COOKING
KÜPSETAMINE
Once the auger tube has been properly filled
you can begin cooking by selecting SET
TEMP from the main menu and setting the
desired temperature.
Kui tiguajami toru on täidetud, saate
alustada küpsetamist: selleks tehke
peamenüüs valik SET TEMP
(sättetemperatuur) ja määrake soovitud
temperatuur.
Upon confirming the set temperature the
grill will go into the Startup mode.
Pärast sättetemperatuuri kinnitamist läheb
grill soojenemisrežiimi.
The control will display START during the
startup cycle.
Soojenemisrežiimi ajal kuvatakse näidikul
sõna START.
After 6 minutes the control panel will
change to the temperature display screen.
Pärast 6 minuti möödumist ilmub
juhtpaneelile temperatuuri näit.
WARNING
HOIATUS
Do not over-fire the grill by over feeding
pellets into the burner prior to startup.
Grilli ülekuumenemise vältimiseks ärge
laadige põletisse enne süütamist liiga palju
graanuleid.
If flame is inadvertently extinguished never
restart the grill without first cleaning out the
burner.
Leegi kogemata kustutamise korral ärge
süüdake grilli uuesti enne, kui olete põleti
tühjendanud.
Improper use can cause an uncontrolled fire.
Ebaõige kasutamine võib põhjustada
kontrollimatu põlengu.
DIRECT FLAME MODE
OTSESE LEEGI REŽIIM
Pull grill knob out all the way to allow
direct heat as shown in Fig 19.
Tõmmake grilli nupp lõpuni välja, et anda
toidule otsest kuumust, nagu näidatud
joonisel 19.
Best for burgers and steaks.
Sobib kõige paremini burgerite ja steikide
valmistamiseks.
Fig. 19
Joon. 19
PAGE 10
LK 10
WARNING
HOIATUS
Always clean grease tray to remove excess
grease drippings prior to cooking in Direct
Flame Mode.
Alati enne otsese leegi režiimil küpsetamist
tuleb rasvaalus sinna tilkunud rasvast
puhastada.
A dirty grease tray may result in excessive
flare ups or grease fire.
Määrdunud rasvaalus võib põhjustada suuri
leeke või rasva süttimist.
If grease fire does occur, turn off grill using
the main power switch and close the lid.
Rasva süttimise korral lülitage grill
peatoitelülitist välja ja sulgege kaas.
Leave the lid closed until fire is
extinguished.
Hoidke kaant suletuna, kuni leek kustub.
If an uncontrollable fire does occur,
immediately call local fire department.
Kontrollimatu põlengu tekkimise korral
helistage kohe kohalikku tuletõrjesse.
Never put water on the fire.
Ärge kunagi valage põlevale rasvale vett.
INDIRECT FLAME MODE
KAUDSE LEEGI REŽIIM
Push grill knob in all the way for indirect
heat as shown in Fig 20.
Lükake grilli nupp lõpuni sisse, et anda
toidule kaudset kuumust, nagu näidatud
joonisel 20.
Best for chicken, slow smoking and low
temps.
Sobib kõige paremini kanale, aeglaseks
suitsutamiseks ja madalate temperatuuride
kasutamiseks.
Fig. 20
Joon. 20
SHUTDOWN
SHUTDOWN
When you are done cooking select
SHUTDOWN from the main menu.
Kui olete küpsetamise lõpetanud, valige
peamenüüst režiim SHUTDOWN
(väljalülitamine)
The display screen will display
SHUTDOWN.
Ekraanil kuvatakse tekst SHUTDOWN.
In this setting the fan will remain on for 20
minutes to finish burning any pellets in the
burner and cool the grill down.
Selles režiimis jääb ventilaator 20 minutiks
tööle, et põletada põletisse jäänud graanulid
lõpuni ja jahutada grilli.
After 20 minutes the display screen will turn
off.
20 minuti järel lülitub ekraan välja.
At this point the main power switch should
be switched to off.
Seejärel võib peatoitelüliti välja lülitada.
Before grill can be used, the power switch
must be turned off and back on.
Enne grilli kasutamist tuleb peatoitelüliti
välja ja uuesti sisse lülitada.
BYPASS MODE
KIIRÄIVITUS
The bypass may be used if there is a power
failure, or the grill is accidentally turned off,
or anytime you need to restart the grill and it
is still hot.
Kiirkäivitust võib kasutada voolukatkestuse
korral, samuti pärast grilli juhuslikku
väljalülitamist või alati, kui grill on vaja
uuesti süüdata siis, kui see on veel kuum.
The bypass mode should only be used if the
grill has been off less than 3-4 minutes.
Kiirkäivitust võib kasutada ainult siis, kui
grill on olnud välja lülitatud vähem kui 3–4
minutit.
This method is used to bypass the normal
startup mode and get the grill cooking again
quickly.
Kiirkäivituse korral jäetakse tavaline
soojenemisrežiim vahele, et grillil saaks
kiiremini küpsetamist alustada.
The burner must still be hot enough to ignite
new pellets or this method will not work.
Põleti peab olema uute graanulite
süütamiseks veel piisavalt kuum, vastasel
korral see meetod ei tööta.
BYPASS can be selected during the initial
startup of the grill only by selecting
BYPASS from the STARTUP screen.
Kiirkäivituse saab valida grilli algse
soojenemise ajal, kui teha kuval STARTUP
(soojenemine) valik BYPASS (kiirkäivitus).
If the grill fails to ignite using the bypass
mode then restart the grill using the normal
startup procedures.
Kui grill ei sütti kiirkäivituse režiimis, siis
süüdake see uuesti tavapärasel moel.
MEAT PROBES
LIHASONDID
Note-Only use meat temperature probe
model (PG24-86) with this appliance.
Märkus. Kasutage koos selle seadmega
ainult liha temperatuurisondi PG24-86.
This smoker has built in meat probes to
measure the temperature of the food as it is
being cooked.
Sellel suitsutajal on sisemised lihasondid
toidu temperatuuri mõõtmiseks küpsetamise
ajal.
To use these probes insert the wire through
the stainless flaps on the side of the firebox.
Sondide kasutamiseks sisestage juhe läbi
tuleruumi küljel olevate roostevabade
labade.
Insert the probes into the food.
Torgake sondid toidu sisse.
Plug the connectors into the receptacles on
the side of the control panel.
Torgake pistikud juhtpaneeli küljel
asuvatesse pesadesse.
If the probes are not installed correctly or
the probe is bad no temperature will display.
Kui sondid on valesti paigaldatud või ei ole
töökorras, siis temperatuuri ei näidata.
CAUTION
ETTEVAATUST
Do not use meat probes when grill
temperature exceeds 175˚C.
Ärge kasutage lihasonde siis, kui grilli
temperatuur on üle 175 ˚C.
Damage to the probes may occur.
See võib sonde kahjustada.
Do not allow meat probe wires to lie in the
direct heat zones (as shown by shaded
areas).
Ärge jätke lihasondi juhtmeid otsese
kuumuse alasse (joonisel varjutatud alad).
Direct heat will damage the meat probe
wires.
Otsene kuumus kahjustab lihasondide
juhtmeid.
Always route the meat probes through ports
on the side of the grill.
Viige lihasondide juhtmed alati läbi grilli
küljel asuvate avadega.
Do not submerge wire in water. Not
dishwasher safe.
Ärge kastke juhet vette. Ei sobi
nõudepesumasinas pesemiseks.
CLEANING
PUHASTAMINE
Clean grates using a wire grill brush.
Kasutage restide puhastamiseks traatharja.
This should be done with each use.
Seda tuleks teha pärast igat kasutuskorda.
DO NOT use oven cleaner or abrasive
cleaners on the painted grill surfaces.
ÄRGE kasutage grilli värvitud pindadel
ahjude puhastusvahendit ega abrasiivseid
puhastusained.
Use warm soapy water on all painted
surfaces.
Kasutage värvitud pindadel sooja seebivett.
Clean grease pan, grease trough, and grease
drain tube occasionally.
Puhastage aeg-ajalt rasvapanni, rasvarenni
ja rasva äravoolutoru.
A spatula can be used to scrape excess
grease and a grill brush to brush clean.
Liigse rasva kaapimiseks võib kasutada
pahtlilabidat ning seejärel harjata
grilliharjaga puhtaks.
Do not allow grease to build up on the
grease tray or in the grease trough as this
can cause flare-ups inside the grill.
Ärge laske rasval koguneda rasvaalusele ega
rasvarenni, sest see võib põhjustada grillis
suuri leeke.
Make sure not to obstruct the flow of grease
off of the tray and into the grease trough.
Ärge tõkestage rasva voolamist aluselt
rasvarenni.
Make sure not to block the airflow to the
temperature sensor on the left side of the
grill.
Ärge tõkestage grilli vasaku külje kaudu
toimuvat õhuvoolu temperatuurianduri
juurde.
WARNING
HOIATUS
Normal use will create a buildup of ash,
grease, and creosote inside the grill.
Tavapärase kasutamise käigus koguneb
grilli sisse tuhka, rasva ja kreosootõli.
The grill must be thoroughly cleaned after
every 50 hours of use or if a buildup of
grease or creosote is noticed inside the grill.
Grilli tuleb põhjalikult puhastada iga 50
kasutustunni järel või kui selle sees on näha
rasva või kreosootõli kogunemist.
Clean the grill by removing all internal parts
and thoroughly scrape away all grease and
creosote from all internal surfaces including
the grease drain and remove debris from the
grill.
Grilli puhastamiseks eemaldage kõik selle
sisemised osad, kraapige kõik sisepinnad,
k.a rasvarenn hoolikalt kogu rasvast ja
kreosootõlist puhtaks ning eemaldage
grillist jäätmed.
The drip tray must always be cleaned prior
to turning the grill to high or cooking in
direct flame mode.
Tilgaalus tuleb puhastada iga kord enne
grilli suurele kuumusele reguleerimist või
otsese leegi režiimi kasutamist.
Excessive buildup of grease and creosote
may result in a grease fire.
Kui rasva ja kreosootõli koguneb liiga palju,
võib see süttida.
If a grease fire does occur, turn off the grill
using the main power switch and close the
lid.
Rasva süttimise korral lülitage grill
peatoitelülitist välja ja sulgege kaas.
Leave the lid closed until the fire
extinguishes itself.
Hoidke kaant suletuna, kuni leek ise kustub.
If an uncontrolled fire does occur,
immediately call the local fire department.
Kontrollimatu põlengu tekkimise korral
helistage kohe tuletõrjesse.
Never put water on a grease fire.
Ärge kunagi valage põlevale rasvale vett.
PAGE 11
LK 11
CHIMNEY CLEANING
KORSTNA PUHASTAMINE
When wood pellets are burned slowly, they
produce tar and other organic vapors that
combine with expelled moisture to form
creosote.
Puidugraanulite aeglasel põletamisel tekivad
tõrv ja orgaanilised aurud, mis moodustavad
koos välja tõrjutud niiskusega kreosootõli.
The creosote vapors condense in a relatively
cool oven chimney of a slow burning fire.
Kreosootõli kondenseerub aeglaselt põleva
leegi korral suhteliselt jahedas korstnas.

This manual suits for next models

3

Other Camp Chef Grill manuals

Camp Chef PG24MG User manual

Camp Chef

Camp Chef PG24MG User manual

Camp Chef PG24CL User manual

Camp Chef

Camp Chef PG24CL User manual

Camp Chef SmokePro PG24DLX User manual

Camp Chef

Camp Chef SmokePro PG24DLX User manual

Camp Chef SMOKEPRO PG24DLX-3 User manual

Camp Chef

Camp Chef SMOKEPRO PG24DLX-3 User manual

Camp Chef FTG900PG User manual

Camp Chef

Camp Chef FTG900PG User manual

Camp Chef FTG900-2 User manual

Camp Chef

Camp Chef FTG900-2 User manual

Camp Chef smokepro PG24SG User manual

Camp Chef

Camp Chef smokepro PG24SG User manual

Camp Chef TB90LW User manual

Camp Chef

Camp Chef TB90LW User manual

Camp Chef FTG600P User manual

Camp Chef

Camp Chef FTG600P User manual

Camp Chef SHPRL User manual

Camp Chef

Camp Chef SHPRL User manual

Camp Chef GB90D User manual

Camp Chef

Camp Chef GB90D User manual

Camp Chef PPG20 User manual

Camp Chef

Camp Chef PPG20 User manual

Camp Chef PG30SGG User manual

Camp Chef

Camp Chef PG30SGG User manual

Camp Chef PG24MZGX User manual

Camp Chef

Camp Chef PG24MZGX User manual

Camp Chef Pro 90X User manual

Camp Chef

Camp Chef Pro 90X User manual

Camp Chef SMOKEPRO PG36LUX-2 User manual

Camp Chef

Camp Chef SMOKEPRO PG36LUX-2 User manual

Camp Chef Smoke Pro PG24SE-5 User manual

Camp Chef

Camp Chef Smoke Pro PG24SE-5 User manual

Camp Chef BB90L-2 User manual

Camp Chef

Camp Chef BB90L-2 User manual

Camp Chef SMOKE PRO PG24XT User manual

Camp Chef

Camp Chef SMOKE PRO PG24XT User manual

Camp Chef SMV24S-4 User manual

Camp Chef

Camp Chef SMV24S-4 User manual

Camp Chef WOODWIND PG24WWS-2 User manual

Camp Chef

Camp Chef WOODWIND PG24WWS-2 User manual

Camp Chef FPGG User manual

Camp Chef

Camp Chef FPGG User manual

Camp Chef FTG475 User manual

Camp Chef

Camp Chef FTG475 User manual

Camp Chef DELUXE GRILL BOX 14 User manual

Camp Chef

Camp Chef DELUXE GRILL BOX 14 User manual

Popular Grill manuals by other brands

Outdoor Gourmet FSOGBG1203 user manual

Outdoor Gourmet

Outdoor Gourmet FSOGBG1203 user manual

mastro 65 Series instruction manual

mastro

mastro 65 Series instruction manual

Uniflame GBT1111W-C owner's manual

Uniflame

Uniflame GBT1111W-C owner's manual

Barbecook Brahma K Induction installation instructions

Barbecook

Barbecook Brahma K Induction installation instructions

Uniflame GTC1205B owner's manual

Uniflame

Uniflame GTC1205B owner's manual

Klarstein Steakreaktor 2.0 manual

Klarstein

Klarstein Steakreaktor 2.0 manual

Campingaz TEXAS DELUXE EXTRA Assembly instructions

Campingaz

Campingaz TEXAS DELUXE EXTRA Assembly instructions

Char-Broil 463234711 Product guide

Char-Broil

Char-Broil 463234711 Product guide

BLACK EARTH SS CI owner's manual

BLACK EARTH

BLACK EARTH SS CI owner's manual

Bakers Pride Dante CH-10 Installation and operating instructions

Bakers Pride

Bakers Pride Dante CH-10 Installation and operating instructions

Lagrange 179 manual

Lagrange

Lagrange 179 manual

Jamestown Knox 604865 user manual

Jamestown

Jamestown Knox 604865 user manual

Wolfgang Puck BCGL0030 user manual

Wolfgang Puck

Wolfgang Puck BCGL0030 user manual

Nexgrill 720-0925PG Assembly instructions

Nexgrill

Nexgrill 720-0925PG Assembly instructions

Napoleon Gourmet Gas Grill Instruction guide

Napoleon

Napoleon Gourmet Gas Grill Instruction guide

Salton George Foreman GRP4BBWTMR owner's manual

Salton

Salton George Foreman GRP4BBWTMR owner's manual

Homall T-CG23-0248-BK Assembly instructions

Homall

Homall T-CG23-0248-BK Assembly instructions

MaxxGarden 20733 Manual instruction

MaxxGarden

MaxxGarden 20733 Manual instruction

manuals.online logo
manuals.online logoBrands
  • About & Mission
  • Contact us
  • Privacy Policy
  • Terms and Conditions

Copyright 2025 Manuals.Online. All Rights Reserved.