manuals.online logo
Brands
  1. Home
  2. •
  3. Brands
  4. •
  5. Campomatic
  6. •
  7. Dishwasher
  8. •
  9. Campomatic DW909XE User manual

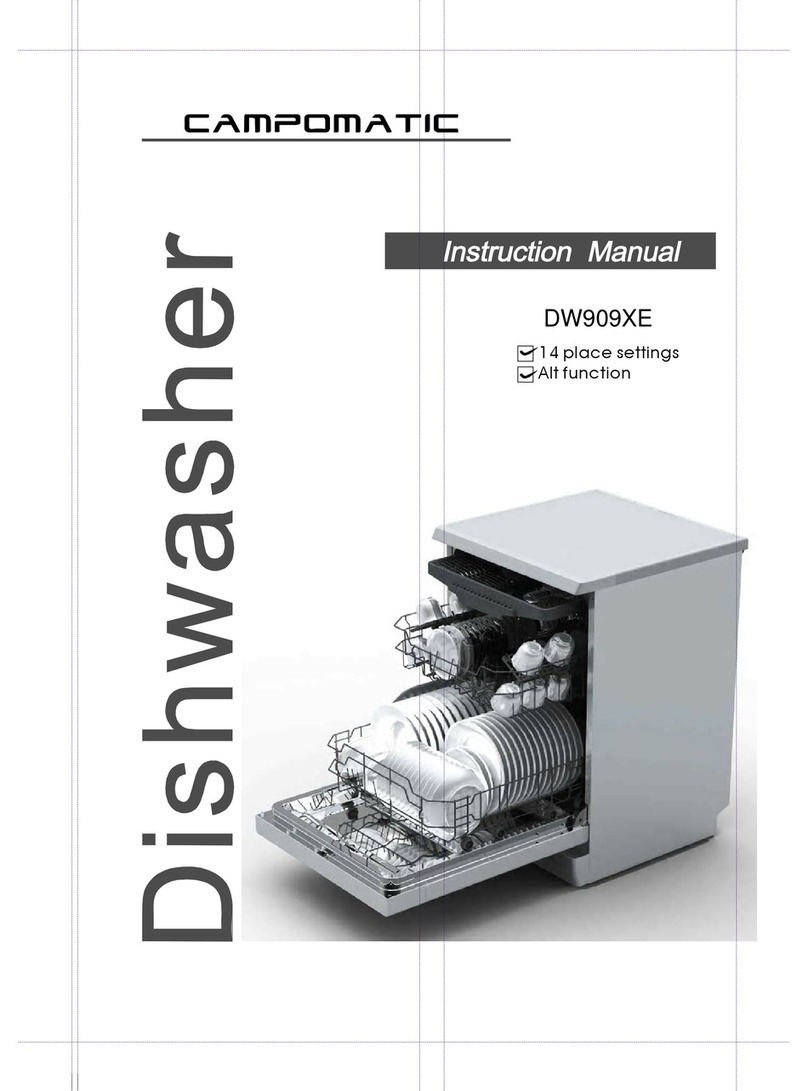
Campomatic DW909XE User manual

DW909XE
14 place settings
Alt function
All manuals and user guides at all-guides.com
all-guides.com
Witheachwashcycle.
Compartment
For programmes with pre-wash only.
(Follow the user instructions!)
Electric indicator on control panel (if provided).
Check the rinse aid level
(On models with water softener system only.)
Electric indicator on control panel (if provided).
If there is no salt warning light in the control panel
(for some models), you can estimate when to fill the salt into
the softener by the number of cycles the dishwasher has run.
Check the regeneration
salt level
Load the baskets
Select a programme
Close the door, turn on the water tap and press the Start/Pause button. The machine will start working
after about 10 seconds.
Running the dishwasher
Switch off the appliance
Turn off the water tap,
unload the baskets
Fill the detergent dispenser
Warning: wait a few minutes (about 15 minutes) before unloading the dishwasher to avoid handling
the dishes and utensils while they are still hot and more susceptible to break.
They will alsodry better.Unload the appliance, starting from the lower basket.
Changing the programme
Add forgotten dishes in the
dishwasher.
Scrape off any large amount of leftover food. Soften remnants of burnt food in pans,
then load the baskets. Refer to the dishwasher loading instructions.
Press the Programme button until the selected programme lights up.
( See the section entitled Operationg instruction )“”
When the working cycle has finished, the buzzer of the
dishwasher will sound 8 times, then stop.
Turn off the appliance using the power switch button.
If the appliance is switched
off during a wash cycle.
Openthedoor carefully.
Hotsteammayescape
when the door is opened!
If the appliance is switched off during a wash cycle, when switched
on again, please re-select the washing cycle and operate the dishwasher
according to the original Power-on state ).
Switch on the appliance Press the Power button to switch on the appliance, Open the door.
For detailed operating method read the corresponding content onthe instruction manual.
1. Arunning cycle canonly be modified ifit hasbeen running for a short time. Otherwise the detergent
may have already been released and the water already drained. If this is the case, the detergent
dispenser must be refilled.
2. Press the Start/Pause button then press the program button for more than 3 seconds to cancel the
running programme.
3. Select a new programme.
4. Restart the dishwasher.
1.Press the start/pause button to stop the machine.
2.Open the door.
3.Add the forgotten dishes.
4.Close the door, then press the start/pause button, the dishwasher will
start running again after 10 seconds.
All manuals and user guides at all-guides.com
To review the section on troubleshooting Tips
willhelp you tosolve some common problems
by yourself .
Dear Customer,
Please carefully readthismanualbefore usingthe
dishwasher,it will help you to use and maintain the
dishwasher properly.
Pass it on to anysubsequent owner of the appliance.
Thismanualcontains sections on safety Instructions,
Operating Instructions, InstallationInstructionsand
Troubleshooting Tips, etc.
The manufacturer, following a policy of constant
development andupdating of the product, may
make modifications without giving prior notice.
Keep it as arefer in the later days.
If you can not solvethe problems by yourself ,
please ask for the help of professional technicians.
This appliance isintended tobe used in household
andsimilarapplications suchas:
-staff kitchen areas in shops, offices and other
working environments;
-farm houses;
-by clients inhotels, motels and other residential
type environments;
-bedand breakfast type environments.
Dishwasher Features.................................... ...3
A Water Softener...........................................4、
Attention before or after loading the Dishwasher
Baskets..........................................................9
FilteringSystem.............................................13
Caring for the Dishwasher..................... .........14.
B Loading the Salt into the Softener.................5、
C Fill theRinseAid Dispenser.........................5、
D FunctionofDetergent.................................6
、
Wash CycleTable...........................................11
Turning on theAppliance................................12
Change the Programme.............. ................12....
At the Ene ofthe Wash Cycle...........................12
PositioningtheAppliance................... ..........15..
Water Connection.................................. .......16.
About Power Connection........................ .......15.
Start of dishwasher................................ ......17..
Before callingforservice........................... .....18.
Errorcodes.................................... ..............19.
Technical information.............................. .....20..
Control Panel...................................................3
The Method Loading Normal Dishware.............10
All manuals and user guides at all-guides.com
This appliance must be grounded. In the event of a
malfunction or breakdown, grounding will reduce
the risk of anelectric shock by providing a path of
least resistance of electric current. This appliance
is equipped with a cord having an equipment-
grounding conductor and a grounding plug.
The plug must be plugged into an appropriate outlet
that is installed and grounded in accordance with
all local codes and ordinances.
Keep children away from detergent and rinse aid, keep
child away from the open door of the dishwasher,
there could still be some detergent left inside.
ren
Donotabuse,siton,orstandonthedoorordish
rack of the dishwasher.
Do not touch the heating element during or
immediately after use.
(This instruction is only applicable to machines
with a visual heating element.)
Do not wash plastic items unless they are marked
dishwasher safe or the equivalent. For plastic items
not so marked, check the manufacturer's
recommendations.
Use only detergent and rinse additives
designed for an automatic dishwasher.
Never use soap, laundry detergent, or hand
washing detergent in your dishwasher. Keep
these products out of the reach of children.
During installation, the power supply must not
be excessively or dangerously bent or flattened.
Do not tamper with controls.
Do not place any heavy objects the
door when it is open. The appliance could tip
forward.
on or stand on
When loading items to be washed:
1) Locate sharp items so that they are not likely
to damage the door seal;
2 Warning: Knives and other utensils with
sharp points must be loadedin the basket
with their points down orplaced in a
horizontalposition.
)
When using your dishwasher, youshould
prevent plastic items from coming into contact
with the heating element.(This instruction is only
applicable to machines with a visual heating
element.)
Ifthesupplycordisdamaged, itmust bereplaced
bythemanufactureroritsserviceagentora
similarly qualified person in order to avoid a
hazard.
Please dispose of packing materials properly.
Use the dishwasher only for its intended function.
Remove the door to the washing compartment when
removing an old dishwasher from service or discarding it.
Dishwasher detergents are strongly alkaline, they
can be extremely dangerous if swallowed.Avoid
contact with skin and eyes and keep children away
from the dishwasher when the door is open.
Check that the detergent comparment is empty
after completion of the wash cycle.
The applianceis to be connected to the water
mains using new hose sets and that old hose-sets
should not be reused.
The maximum number of place settings to be
washed is .14
The maximum permissible inlet water pressure is
1Mpa.
The minimum permissible inlet water pressure is
0.04Mpa.
Children should be supervised to ensure that they do
not play with the appliance.
This appliance is not intended for use by persons
(including children with reduced physical, sensory or
mental capabilities, or lack of experience and
knowledge ,unless they have been given supervision
or instruction concerning use of the appliance by a
person responsible for their safety.
)
When using your dishwasher, follow the precautions listed below:
The door should not be left open,
since this could increase the risk of tripping.
Improper connection of the equipment-grounding
conductor can result in the risk of an electric shock.
Check with a qualified electrician or service
representative if you are in doubt whether the
appliance is properly grounded. Do not modify the
plug provided with the appliance; If it does not fit
the outlet. Have a proper outlet installed by a
qualified electrician.
Do not operate your dishwasher unless all
enclosure panels are properly in place. Open
the door very carefully if the dishwasher is
operating, there is a risk of water squirting out.
All manuals and user guides at all-guides.com
Dispose of the dishwasher packaging material correctly.
All packaging materials can be recycled.
Plastic parts are marked with the standard international abbreviations:
PE for polyethylene, e.g. sheet wrapping material
PS for polystyrene,e.g.paddingmaterial
POM polyoxymethylene, e.g. plastic clips
PP polypropylene, e.g. Salt filler
ABS Acrylonitrile Butadiene Styrene, e.g. Control Panel .
Packaging materialcouldbedangerous for children!
For disposing ofpackage and the appliance please goto arecycling centre. Therefore cut
off the powersupplycable and make the doorclosing device unusable.
Cardboard packaging ismanufactured from recycledpaper and shouldbedisposedin the
waste paper collection for recycling.
By ensuring this product is disposed of correctly, you will help prevent potential negative
consequences for the environment and human health, which could otherwise be caused
by inappropriatewaste handling of thisproduct.
For moredetailed informationabout recycling of this product, please contact your local
city office and your household waste disposal service.
DISPOSAL: Do not dispose this product as unsorted municipal waste. Collection of such
waste separately for special treatment is necessary.





All manuals and user guides at all-guides.com
beforeusingit for the first time.
To get the best performance from yourdishwasher,read all operating instructions
11 12
Back View
1
2
3
4
5
7
8
910
Front view
Lower basket
Salt container
Dispenser
Cupshelf
Spray arms
Filter assembly
Inlet pipe connector
Drain pipe
Upperbasket
Cutlery rack
Top spray arm
1
Innerpipe
5
6
7
8
9
10
12
11
3
24
6
Power Button:To turn on/offthe powersupply.
Program Button :To Pressthebutton toselect
appropriate Program.
Programindicators:to show whichprogram you
have chose;
1.
2.
3.
4. Alt Button: Dual zone wash function, press the button
toselect either upperbasket or lower basket loaded,
and the response indicator willblinking.
5.
6.
7.
DelayButton : To Press the button to delay.
Child lock button: press the buttons simultaneously
to lock theprogram.
Start /Pause button: To start the selected washing
program or pause the washing program when the
machine is working.
8.
9.
10.
11.
Salt warning lights: To show when the salt container
needto be refilled.
rinse aid warning lights: Toshowwhen the
dispenser need to be ref illed.
Delay t ime ,Remain t ime ,or error codes indicator.
SprayArms indicators : to show whick sprayarms
will work.
All manuals and user guides at all-guides.com
all-guides.com
The water softener must be set manually, using the water hardness dial.
The water softener is designed to remove minerals and salts from thewater, which wouldhave
a detrimentalor adverse effect on the operation of the appliance.
The higher the content of these minerals and salts,the harder your water is.
The softener should be adjusted according to the hardness of the water in your area. Yourlocal WaterAuthority
can advise youonthehardnessofthewater inyourarea.
Adjusting Salt Consumption
The dishwasher is designed to allow for adjustment in the amount of salt consumed based onthe hardness of
the water used.This is intended tooptimiseand customise the level of salt consumption.
1. Switch on theappliance;
2. Press the Start/Pause button for more than 5 seconds to start the water
softener set model within 60seconds after the appliance was
switched on;
3. Press the button to select the proper set according to
your local environment, the sets will change in the following
sequence: H1->H2->H3->H4->H5->H6;
4. Press the On/Off button or no operation for 5 seconds to end the set up model.
Start/Pause
WATER SOFTENER
The hardness ofthe watervariesfrom place to place.If hard water is used inthe dishwasher, deposits will
form on the dishesand utensils.
The applianceis equipped with aspecial softener that uses a salt container specifically designed to eliminate
lime and minerals from the water.
Contact your local water board for information on the hardness of your water supply.
dH mmol/l
0~90~5 0~0.94 H1 0/
10-20
6-11
1.0-2.0 H2 20 60
21-30
12-17 2.1-3.0 H3 30 50
H4 40
40
fH
0~6
7-14
15-21
Clarke
WATER HARDNESS
Selector Position Salt consumption
(gram/cycle) Auto nomy
(cycles/1kgs)
Please follow the steps below for adjustment in salt consumption.
18-22 31-40 22-28 3.1-4.0
If your model does not have any water softener, you may skip this section.
Clark:Britishdegree
fH: French degree
DH: German degree
dH=1.25Clarke=1.78fH=0.178mmol/l
1
41-60
23-34 4.1-6.0 H5 50 30
H6 60 20
29-42
The manufactory setting: H4 (EN 50242)
35-55 61-98 43-69 6.1-9.8
Before using your dishwasher for the first time:
A. Set the water softener
B. Add 1.5Kg dishwasher salt and then full fill the salt container with water
C. Filltherinseaiddispenser
D. Fill in detergent
All manuals and user guides at all-guides.com
1. The salt container must only be refilled when the salt warning light in the control panel comes on.
Depending on how well the salt dissolves, the salt warning light may still be on even though the
salt container is filled.
If there is no salt warning light in the control panel (for some Models),you can estimate when to fill
the salt into the softener by the cycles that the dishwasher has run.
2. If there are spills of the salt, a soak or a rapid program should be run to remove the excessive salt.
Always use the salt intended for use with dishwasher.
The salt container is located beneath the lower basket and should be filledas explained
inthe following:
Attention!
Only use salt specifically designed for the use in dishwashers! Every other type of
salt not specifically designed for the use in adishwasher, especially table salt, will
damage the water softener. In case of damages caused by the use of unsuitable
salt the manufacturer does not give any warranty nor is liable for any damages caused.
Only fill withsalt justbefore starting one of thecomplete washingprograms.
This will prevent any grains of salt or salty water, which may have been spilled,
remaining on the bottom of the machine for any period of time, which may cause
corrosion.
Therinse aid isreleasedduring the final rinse to prevent water from forming droplets onyour dishes, which can
leave spots andstreaks. Italso improvesdryingby allowing water toroll off the dishes. Your dishwasheris
designed to use liquidrinseaids.The rinseaiddispenser islocated inside thedoornext to the detergent dispenser.
To fill the dispenser, open the cap and pour the rinse aid into the dispenser until the level indicator turns completely
black. The volume ofthe rinse aidcontaineris about 110ml.
RinseAid Dispenser
Function of RinseAid
Rinse aid is automatically added during the last rinse, ensuring thorough rinsing, and spot and streak free drying.
Attention!
Only use branded rinse aid for dishwasher. Never fill therinseaid dispenser withanyothersubstances
(e.g. Dishwasher cleaning agent, liquid detergent). This would damage the appliance.
Full fill the salt container withwater,Itisnormalfor asmall amount ofwatertocomeout of the
salt container.
AAfter the lower basket has been removed, unscrew and remove the cap from the salt container.
C
DAfter filling the container , screw the cap tightly back clockwise.
EThe saltwarning lightwill stopbeing after thesalt container has beenfilled withsalt.
FImmediately after filling the salt into the salt container, a washing program should be started
program Otherwise thefilter system, pump or other important parts of the machine maybe damaged
bysalty water.This isoutofwarranty.
(Wesuggest to use a short
).
B Place the end of the funnel(supplied) into the hole and introduce about 1.5kg ofdishwasher salt.
All manuals and user guides at all-guides.com
To open the dispenser, turn the cap to the "open" (left) arrow and lift it out.
Pour the rinse aid into the dispenser,being careful not to overfill.
Replace the cap by inserting italigned with "open" arrow and turning it tothe closed (right) arrow.
Adjusting RinseAid Dispenser
The rinse aid dispenser has six or four settings. Always start with the dispenser
set on "4". If spots and poor drying are a problem, increase the amount of rinse
aid dispensed by removing thedispenser lid and rotating the dial to "5". If the
dishes still are notdrying properly or are show spots, adjust the dial to the next
higher lever until your dishes are spot-free. The recommended setting is "4".
(Factory value is "4".)
Increase the dose if there are dropsof water orlimespotsonthe dishes after washing.
Reduce it ifthere are sticky whitish stains on your dishes or abluish film on glassware or
knife blades.
1
2
3
As the rinse aid diminishes, the size of the black dot
onthe rinse aid level indicator changes,as illustrated below.
Full
3/4full
1/2full
1/ 4full- Should refilltoeliminate spotting
Empty
When to Refill the RinseAid Dispenser
Ifthereis no rinse-aid warning light in thecontrolpanel, you can estimate the amount from the colour
of the optical level indicator C located next to the cap. When the rinse-aid container isfull, the whole
indicator will be dark .As the rinse-aid diminishes, thesize of the dark dot decreases. You should never let
the rinse aid level fall 1 / 4 full.
during the nextwash.
Don't forget to replace the cap before you close dishwasherdoor.
Clean up any rinse aid spilled while during filling with an absorbent cloth to avoid excessive foaming
Detergents with its chemical ingredients are necessary to remove dirt, crush dirt and transport it out of the dishwasher.
Most of the commercial quality detergents are suitable forthis purpose.
""
ProperUse of Detergent
Useonly detergent specifically made for the use indishwashers. Keep your detergent fresh and dry.
Don't putpowdereddetergentinto thedispenser untilyou're ready to wash dishes.
Attention!
All manuals and user guides at all-guides.com
AmountofDetergent to Use
Dishwasher detergent is corrosive! Take care to keepit out of reach of children.
Based ontheir chemicalcomposition, detergentscan besplitin two basic types:
The use of normal washing programs incombinationwith concentrated detergents
reduces pollution and is good for your dishes; these wash programs are specifically matched
to the dirt-dissolving properties of the enzymes of the concentrated detergent. For this reason
normal wash programsin which concentrated detergentsareused canachieve the same
results that can otherwise onlybe achieved using intensive programs.
“”
“”
“”
Detergenttabletsofdifferent brandsdissolve atdifferentspeeds. Forthis reason some
detergenttablets cannot dissolve and develop theirfull cleaning power during short
programs. Therefore please use long programs whenusingdetergent tablets, to
ensure the complete removal of detergent residuals.
The dispenser must be refilled before the start of each wash cycle following the instructions
provided in the wash cycle table . Your dishwasher uses less detergent and rinse aid than
Conventionaldishwasher. Generally, only one tablespoon of detergent is needed for
anormalwashload. Moreheavily soileditems needmoredetergent.Alwaysaddthe
detergentjust before starting the dishwasher, otherwise it couldget damp and will not
dissolve properly.
Concentrated Detergent
DetergentTablets
Detergent Dispenser
conventional, alkaline detergentswith causticcomponents
low alkaline concentrated detergents with natural enzymes
Normally new pulverised detergent is without phosphate.Thus the watersoftener function of
phosphate is not given. In this case we recommend to fill salt in the salt container even when
the hardness of water is only 6 dH. If detergents without phosphate are used in the case of hard water
often white spots appear on dishes and glasses. In this case please add more detergent to reach
better results. Detergents without chlorine do only bleach a little. Strong and coloured spots will not
be removed completely. Inthiscase please choosea program with a higher temperature.
°
Detergents
There are 3 sorts of detergents
1.Withphosphate and withchlorine
2.With phosphate and without chlorine
3.Withoutphosphate and without chlorine
Always add the detergent just before starting each wash cycle.
Only use branded detergent aidfordishwasher.
If the lid is closed: press release button.The lid will spring open.
Detergent tablet
Detergent powder
All manuals and user guides at all-guides.com
Fill the detergent dispenser with detergent.
The marking indicates the dosing levels , as
illustrated on the right:
The place of main wash cycle detergent placed.
The place of pre-wash cycle detergent placed.
Please observe the manufacturers dosing and storage
Recommendations asstated onthedetergent packaging.
Close the lid and press until it locks in place.
If the dishes are heavily soiled, place an additional
detergent dosein the pre-wash detergent chamber.This detergent will take effect during the pre-wash phase.
A
B
Fill in Detergent
You find information about the amount of detergent for thesingle programme onthe last page.
Please aware, that according tothe level soiling and the specific hardnessof waterdifferencesare possible.
Pleaseobservethemanufacturer's recommendationson the detergent packaging.
All manuals and user guides at all-guides.com
all-guides.com
Cutlery with wooden,horn china or
mother-of-pearl handles
Plastic items that arenot heat resistant
Older cutlery with glued parts that arenot
temperatureresistant
Bonded cutlery items or dishes
Pewter or cooper items
Crystal glass
Steel items subject to rusting
Wooden platters
Items madefromsynthetic fibres
Some types of glasses can become
dull aftera large number of washes
Silver and aluminum parts have a
tendencyto discolourduring washing
Glazed patterns may fade ifmachine
washed frequently
Are not suitable Are oflimited suitability
Dishesand itemsofcutlery must notlie inside oneanother, or cover each other.
To avoid damage to glasses, theymust not touch.
Load large items which are most difficult to clean into the lower basket.
The upper basket isdesigned to holdmoredelicate and lighter dishware such as glasses, coffee
andtea cups
Long bladed knives stored in an upright position are apotential hazard!
Long and/or sharp itemsof cutlery such as carving knives must be positioned
horizontallyin the upperbasket.
Please do not overload your dishwasher. This is important forgood results and for
reasonable consumption of energy.
Load hollow items such as cups, glasses, pans etc. With the opening facing downwards so that
water cannot collect in the container or a deepbase.
Consider buying utensils which are identifiedasdishwasher-proof.
Usea mild detergentthat isdescribed as'kind todishes'. If necessary, seekfurther
information fromthedetergent manufacturers.
For particular items,select a programwithas low atemperature aspossible.
Toprevent damage, do not take glass and cutlery out of the dishwasher immediately
after the programme has ended.
(For best performance of the dishwasher, follow theseloading guidelines.
Features and appearance of baskets and cutlerybasketsmay vary from yourmodel.)
Scrape off any largeamounts ofleftover food.Soften remnants of burnt food in pans.
It is not necessary torinse thedishes under running water.
Place objects in the dishwasher in following way:
1.Items such as cups, glasses, pots/pans, etc. are faced downwards.
2.Curved items, or ones with recesses, should be loaded aslant so that water can run off.
3.All utensils are stacked securely and can not tipover.
4.All utensils are placed in the way that the spray arms can rotate freely during washing.
Very small items should not be washed in the dishwasher as they could easily fall out of the basket.
To prevent water dripping from the upper basket into the lower basket, we recommend that you
empty the lower basket first and thenthe upper basket.
All manuals and user guides at all-guides.com
The upper basket is designed to hold more delicate
and lighter dishware such as glasses, coffee and
teacups and saucers, aswellas plates, small bowls
andshallowpans (as long astheyarenot too dirty).
Position the dishes andcookwareso thatthey will
notgetmoved bythespray of water.
We suggest that you place large items and the most
difficultto cleanitemsareto be placedintothelower
basket: suchaspots, pans, lids, serving dishes and
bowls, as shown in the figure below. It is preferable to
place serving dishes and lids on the side of the racks
in order to avoid blocking the rotation of the top spray
arm.
Pots,servingbowls,etc,mustalwaysbeplacedtopdown.
Deep pots should be slanted to allow water to flow out.
Please be reminded that:
The Bottom Basket features folding spikes so that larger or more pots and pans can be loaded.
Folding Spikes of Lower Basket
For better stacking of pots and pans,
the spikes can be folded down as
show in the picture right.
Adjusting the Upper Basket
The height of the upper basket can be adjusted in order to
create more space for largeutensils bothfor the upper
/lower basket. The height of the upper basket can be
adjusted byplacingthewheels on differentheight of the
rails. Long items, serving cutlery, salad servers and knives
shouldbe placedon theshelf sothat theydonotobstruct
therotationofthesprayarms..
Folding back the cup shelives
For better stacking of pots and pans,
the spikes can be folded down as
show in the picture right.
Cutleryshouldbe placed inthecutlery rackseparately
from each other in the appropriate positions, and do
make sure the utensils do not nest together, this may
causebadperformance.
All manuals and user guides at all-guides.com
Starting a cycle wash
1 Draw out the lower and upper basket, load the dishes and push them back.
It iscommended to load the lower basket first, then the upper one (see the section entitled
Loading the Dishwasher ).
2 Pour in the detergent (see the section entitled Salt, Detergent and RinseAid ).
3 Insert the plug into the socket. The power supplyis 220-240 VAC /50 HZ, the specification
of thesocket is 10A 250VAC. Make sure that the water supply is turned on to full pressure.
4 Closethedoor,pressthePowerbuttontoswitchonthemachine.
5 Press the program button , the wash program will be changed as follows direction:
If a program is selected, the response light will light. Then press the Start/Pause button, the
dishwasher begins to start.
“”
“”
Intensive->Normal->Eco->Glass->60min->Rapid->Soak;
*EN 50242 : This programme is the test cycle. The information for comparability test
in accordance with EN 50242, as follows:
Capacity: 14 setting
Position Upper basket: upper wheels on rails
Rinse aid setting: 6
The power consumption of off-mode is 0.6W, left-on mode is 0.8W.
Means: need to fill rinse into the Rinse-Aid Dispenser.
()
Eco.
Intensive
Normal
(*EN 50242)
(or )3in1
5/30g
(or )3in1
5/30g
(or )3in1
5/30g
Rapid
Pre-wash (50 )
Main wash(65 )
Rinse
Rinse
Rinse (55 )
Drying
℃
℃
℃
Pre-wash (45 )
Wash (50 )
Rinse
Rinse (60 )
Drying
℃
℃
℃
Pre-wash
Wash (50 )
Rinse
Rinse (60 )
Drying
℃
℃
Wash (40 )
Rinse
Rinse (45 )
℃
℃
180
175
165
40
1.2
0.93
1.5
0.6
17
14
11
10
60 min
Pre-wash (50 )
Wash (62 )
Rinse (60 )
Drying
℃
℃
℃60 10
1.15
5/30g
20g
Soak
Rinse
80.1
3.5
Glass
115 14
0.87
5/25g
Pre-wash
Wash (40 )
Rinse
Rinse (60 )
Drying
℃
℃
Fornormallysoiledloads,
such as pots plates glasses
and lightly soiled pans.
、、
Standarddailycyclefor
normallysoiled loads, such
aspots plates glasses.、、
For heaviest soiled crockery,
andnormally soiled pots
pans dishes etc with dried
onsoiling;
、
、
tForlightly soiled loads hat
donot need excellent drying
efficiency.
Ashorter wash for lightly
soiled loadsand quick wash
Torinsedishes that you plan
towash laterthat day
Forlightly soiled crockery
and glass
All manuals and user guides at all-guides.com
When the working cycle has finished, the buzzer of the dishwasher will sound for 8 seconds, then stop. Turn off
the appliance using the Power switch button, shut off the water supply and open the door of the dishwasher.
Wait for afew minutes before unloading thedishwashertoavoidhandlingthe dishes and utensils while they
are still hot and more susceptible to breakage. They will also dry better.
Switch Off theDishwasher
The program light is on but is not blinking, only in this case the programme has ended.
Power1.Switch off the dishwasher by pressingthe button.
2.Turnoffthewatertap!
Open the door carefully.
Hot dishes are sensitive to knocks. The dishes should therefore be allowed to cool down around 15 minutes
before removing from the appliance.
Open the dishwasher's door, leave it ajar and wait a few minutes before removing the dishes. In this way they
will be cooler and the drying will be improved.
Unloadingthe dishwasher
It is normal that the dishwasher is wet inside.
Empty the lower basket first and then the upper one.This will avoid water dripping from the upper Basket onto
the dishes in the lower one.
If you open the door , the machine will pause. The program lightwill
stop blinking and the buzzerwill mooing every minuteunless you close the door . After
you close the door ,the machine will keep on working after 10 seconds.
during awashcycle
Premise:
1 Acycle that is underway can only be modified if it has only been running for a short time. Otherwise, the
detergent may have already been released, and the appliance may have already drained the wash water.
If this is the case, the detergent dispenser must be refilled (see the section entitled "Loading the
Detergent " ).
2 Press the Start/Pause button , the machine will be in standby state, press the program button more than
3s then you can change the programto the desired cycle setting (see the section entitled " Starting awash
cycle. . ." ).
Aforgotten dish can be added any time before the detergent cup opens.
Add forgotten dishes.
Close the door
After the spray arms stop working,you can open the door
completely.
2
3
Open the door a little to stop the washing.
14
5
6
Press the Start/Pause button
Press the button, the dishwasher will run
after 10 seconds.
Start/Pause
When you press the Start/Pause button to pause during washing, the running indicator will
stop blinkingand the dishwasher will mooingeveryminute unless you pressthe
Start/Pause button to start.
Wash the arms in soapy and warm water and use a soft brush to
clean the jets. Replace them afterrinsing them thoroughly.
When following this procedure from step1 to step 3, the filter system will be removed;
when following it from Step 3 to Step 1, the filter system will be installed.
It is dangerous to open the door when washing, because the hot water may scald you.
All manuals and user guides at all-guides.com
The filter preventslarger remnants of food or other objects from getting inside the pum.
Theresidues may blockthe filter, in thiscase they must be removed.
The filter system consists ofa coarse filter,a flat (Main filter)
And a microfilter(Fine filter).
Food and soil particles trapped inthis filter arepulverizedbya
special jet onthe lower spray arm and washed down to drain.
Larger items, such as pieces of bones or glass, that could block
the drainaretrappedin the coarse filter.To removetheitems
caught by the filter, gently squeeze the tap on thetop of this
filterandliftout.
Thisfilter holds soiland food residuesin the sumpareaand
prevents itfrombeingredeposit on the dishes during wash cycle.
Main filter
1
Coarse filter
2
Fine filter
3
2
3
1
Filterassembly
Thefilter efficiently
For best performance and results, the filter must be cleaned regularly. this reason, it isa good idea to
remove thelarger food particlestrapped in the filter after each wash cycle by rinsing the semicircular filter and
cup under running water. To remove the filter device, pull the cup handle in the upward direction.
removes food particles from the wash water,allowing it to be recycled during the cycle.
For
The dishwasher must never be used without the filters.
Improper replacement of the filter may reduce the performance level ofthe appliance
and damage dishesand utensils.
1
2
Step 1 Turn the filter in anti-clockwise direction,:
Step 2 lift the filter assy up:
When following this procedure from step1 to step 2, the filter system will be removed;
when following it from Step 2 to Step 1, the filter system will be installed.
All manuals and user guides at all-guides.com
all-guides.com
The control panel can be cleaned by using a lightly dampened cloth.
After cleaning, make sure to dry it thoroughly.
For the exterior, use a good appliance polish wax.
Neveruse sharp objects, scouring pads or harsh cleaners onany part ofthe dishwasher.
ProtectAgainst Freezing
1.Cut offthe electricalpower to the dishwasher.
2.Turn off the water supply and disconnect the water inlet pipe from the water valve.
3.Drain the water from the inlet pipe and water valve. (Use a pan to gather the water)
4.Reconnect the water inlet pipe to the water valve.
5.Remove the filter at the bottomof the tub and use a sponge to soak up water in the sump.
please take frost protection measures onthe dishwasher in winter.Every fter washing cycles,
please operate as follows time a
:
Cleaning the Filter
CleaningThe Door
To clean the coarse filter and the fine filter, use a cleaning brush. Reassemble the filter parts as shown in the figures
on the last page and reinsert the entire assembly in the dishwasher, positioning itin its seat and pressing downwards.
When cleaning the filters, don't knock on them. Otherwise, thefilters could be
contorted andtheperformance ofthe dishwashercouldbe decreased.
To clean theedge around the door,you should use only a soft warm, damp cloth.
To avoid penetrationof waterinto the door lock and electrical components, do not
use a spray cleaner of any kind.
Never use a spray cleaner to clean the door panel as it may damage the door lock
and electricalcomponents.
Abrasive agentsor some paper towels should not be used because of the risk of
scratching or leaving spots on the stainless steel surface.
Cleaning the SprayArms
If your dishwasher cannot work because of the ice,
please contact professional service persons.
It is necessary to clean the spray arms regularly for hard
waterchemicalswillclogthe sprayarmjetsandbearings.
- Inspect the filters for blockingafter every time the dishwasher has been used.
- By unscrewing the coarse filter, you can remove the filter system. Removeany foodremnants and
cleanthefilters underrunningwater.
Remarks:
The entirefilter assembly should be cleanedonce a week.
Toremove thelower spray arm, pullout the spray arm upward.
To remove the upper spray arm, hold the nut, rotate the arm
clockwise toremoveit.
Wash the arms in soapy and warm water and use a soft brush to
clean the jets. Replace them after rinsing them thoroughly.
All manuals and user guides at all-guides.com
Itis recommend thatyourun a washcycle with the
dishwasher empty and thenremove the plug from the
socket, turn off the water supply and leave the door of
the appliance slightly open. This will help the door
sealsto lastlongerandpreventodoursfromforming
withinthe appliance.
If the appliance must be moved, try to keep it in the
verticalposition. Ifabsolutelynecessary,itcanbe
positioned on its back.
Oneofthefactorsthatcauseodourstoforminthe
dishwasher is food that remains trappedin the seals.
Periodic cleaning with adamp sponge will preventthis
from occurring.
Ensure the voltage and frequency of the power being corresponds to
those on the ratingplate. Only insert the plug into an electrical socket which is earthed
properly. If the electrical socket to which the appliance must be connected is not
appropriate fortheplug, replace the socket, ratherthanusinga adaptors or thelikeas
they couldcause overheatingandburns.
Pleaselook at therating label to know the rating voltage and connectthe dishwasher to the appropriate powersupply.
Use the required fuse 10 amp, timedelay fuse or circuitbreaker recommended and provide separate circuit serving
only this appliance.
Position the appliance in the desired location.The back should rest against the wall behind it, and the sides,
along the adjacent cabinetsor walls.The dishwasheris equipped with water supply and drain hoses that can
be positioned either tothe right or the left sides to facilitate properinstallation.
Once the appliance is positioned for levelling, the height of the dishwasher
may be altered via adjustment of the screwing level of the feet. In any case,
the appliance should notbe inclinedmore than 2 .
For personal safety:
DO NOT USEAN EXTENSION CORD OR AN ADAPTER PLUG WITH THIS APPLIANCE.
DO NOT, UNDERANY CIRCUMSTANCES, CUT OR REMOVE THE EARTHING
CONNECTION FROM THE POWER CORD.
Before cleaning or performing maintenance, always
remove the plug from the socket.
Tocleantheexteriorandrubberpartsofthedishwasher,
donot usesolventsor abrasive cleaning products.
Only use a cloth with warm soapy water.
To remove spots or stains from the surface of the
interior, use a cloth dampened withwaterana little
vinegar, or a cleaning product madespecifically for
dishwashers.
Remove the Plug
No Solvents orAbrasive Cleaning Moving theAppliance
Seals
After every wash, turn off the water supply to the
appliance and leave the door slightlyopen sothat
moisture and odours are not trapped inside.
After EveryWash
When not in Use for aLongTime
This appliance must be earthed. In the event of a malfunction or breakdown, earthing will reduce the risk of
electric shock by providing a path of least resistance for the electric current. This appliance is equipped with a
cord having an equipment-earthing conductor and an earthing plug. The plug must be plugged into an
appropriate outlet that is installed and earthed in accordance with all local standards and requirements.
All manuals and user guides at all-guides.com
for personal safety:
DO NOT USE AN EXTENSION CORD OR AN ADAPTER PLUG WITH THIS APPLIANCE.
DO NOT, UNDER ANY CIRCUMSTANCES, CUT OR REMOVE THE
FROM THE POWER CORD. EARTHING
CONNECTION
Improper connection of the equipment earthing conductor can result in the risk of an
electric shock.
Check with a qualified electrician or service representative if you are in doubt whether the
appliance is properly earthed.
Do not modify the plug provided with the appliance. If the plug does not fit properly to the
outlet, please have a qualified electrician to install a proper outlet.
Insert the drainhose into adrain pipe with a minimum diameter of40mm, or letit run into the sink, making sureto
avoid bendingor crimping it. The topof the hosemust belessthan 1000mm.
A
Counter
Front
Drain pipe
NOTE
The top of the hose
must be less than
1000mm.
φ40mm
B
Connect the cold water supply hose to a threaded 3/4(inch) connector and make sure
that it is fastened tightly in place.
If the water pipes are new or have not been used for an extended period of time, let the
water run to make sure that the water is clear. This precaution is needed to avoid the
risk of the water inlet to be blocked and damage the appliance.
Please close the hydrant after using.
All manuals and user guides at all-guides.com
The following things should be checked beforestarting the dishwasher.
The content of this manual is very helpfulto the users.
After installation, please make sure to keep this manual.
1
The dishwasher is level andfixed properly
2
The inlet valve is open
3
There is a leakage at the connections of theconducts
4
The wires aretightly connected
5
The power is switched on
6
The inlet and drain hoses are knotted
7
Allpackingmaterials andprintings shouldbe taken out fromthe dishwasher
Extension Hose
Ifyou needa drainhoseextension, makesure tousea similar drain hose.
It mustbe no longer than 4 metres; otherwise thecleaning effectof the dishwasher could be reduced.
Water Outlet
Connect the waterdrain hose. The drain hose must be correctly fittedto avoid water leaks.
Ensure that the water drain hose is not kinked or squashed.
If the sink is 1000 higher from the floor, the excess water in hoses cannot be drained directly
into the sink. Itwillbe necessary todrain excesswater from hoses into abowlorsuitable
container that is held outside and lower thanthe sink.
How to Drain Excess Water From Hoses
Syphon Connection
The waste connection must be at a height less than 100 cm (maximum) from the bottom of the dish.
The water drain hose should befixed .
All manuals and user guides at all-guides.com

Other manuals for DW909XE

1

Other Campomatic Dishwasher manuals

Campomatic DW814EW Operation instructions

Campomatic

Campomatic DW814EW Operation instructions

Campomatic DW814EW User manual

Campomatic

Campomatic DW814EW User manual

Campomatic tl10e User manual

Campomatic

Campomatic tl10e User manual

Campomatic DW909XE User manual

Campomatic

Campomatic DW909XE User manual

Campomatic DW914BI User manual

Campomatic

Campomatic DW914BI User manual

Campomatic DW999ES User manual

Campomatic

Campomatic DW999ES User manual

Campomatic DW214C User manual

Campomatic

Campomatic DW214C User manual

Campomatic DW911ES User manual

Campomatic

Campomatic DW911ES User manual

Campomatic DW924BI User manual

Campomatic

Campomatic DW924BI User manual

Popular Dishwasher manuals by other brands

Jenn-Air JDB9600CWT User instructions

Jenn-Air

Jenn-Air JDB9600CWT User instructions

EAS Electric EMD12W3 instruction manual

EAS Electric

EAS Electric EMD12W3 instruction manual

inventum IVW4508A user manual

inventum

inventum IVW4508A user manual

AYA AYA1247DB4-S user manual

AYA

AYA AYA1247DB4-S user manual

Siemens SE24269 Instructions for use

Siemens

Siemens SE24269 Instructions for use

Electrolux MDB125RHD3 Use & care manual

Electrolux

Electrolux MDB125RHD3 Use & care manual

LG DF455 Series owner's manual

LG

LG DF455 Series owner's manual

Asko D3152XL Use and care guide

Asko

Asko D3152XL Use and care guide

Frigidaire FDB2410LD Factory parts catalog

Frigidaire

Frigidaire FDB2410LD Factory parts catalog

Fisher & Paykel DISHDRAWER DD24DAX9N user guide

Fisher & Paykel

Fisher & Paykel DISHDRAWER DD24DAX9N user guide

Asko DSD746U user manual

Asko

Asko DSD746U user manual

KitchenAid KDTE334G User instructions

KitchenAid

KitchenAid KDTE334G User instructions

Maytag Jetclean MDB9100 user guide

Maytag

Maytag Jetclean MDB9100 user guide

GE GLD3806T Dimensions and installation information

GE

GE GLD3806T Dimensions and installation information

Pelgrim GVW765 manual

Pelgrim

Pelgrim GVW765 manual

Miele G4780 operating instructions

Miele

Miele G4780 operating instructions

Candy CDIM 5136 User instructions

Candy

Candy CDIM 5136 User instructions

GE GDWT360RSS manual

GE

GE GDWT360RSS manual

manuals.online logo
manuals.online logoBrands
  • About & Mission
  • Contact us
  • Privacy Policy
  • Terms and Conditions

Copyright 2025 Manuals.Online. All Rights Reserved.