Information
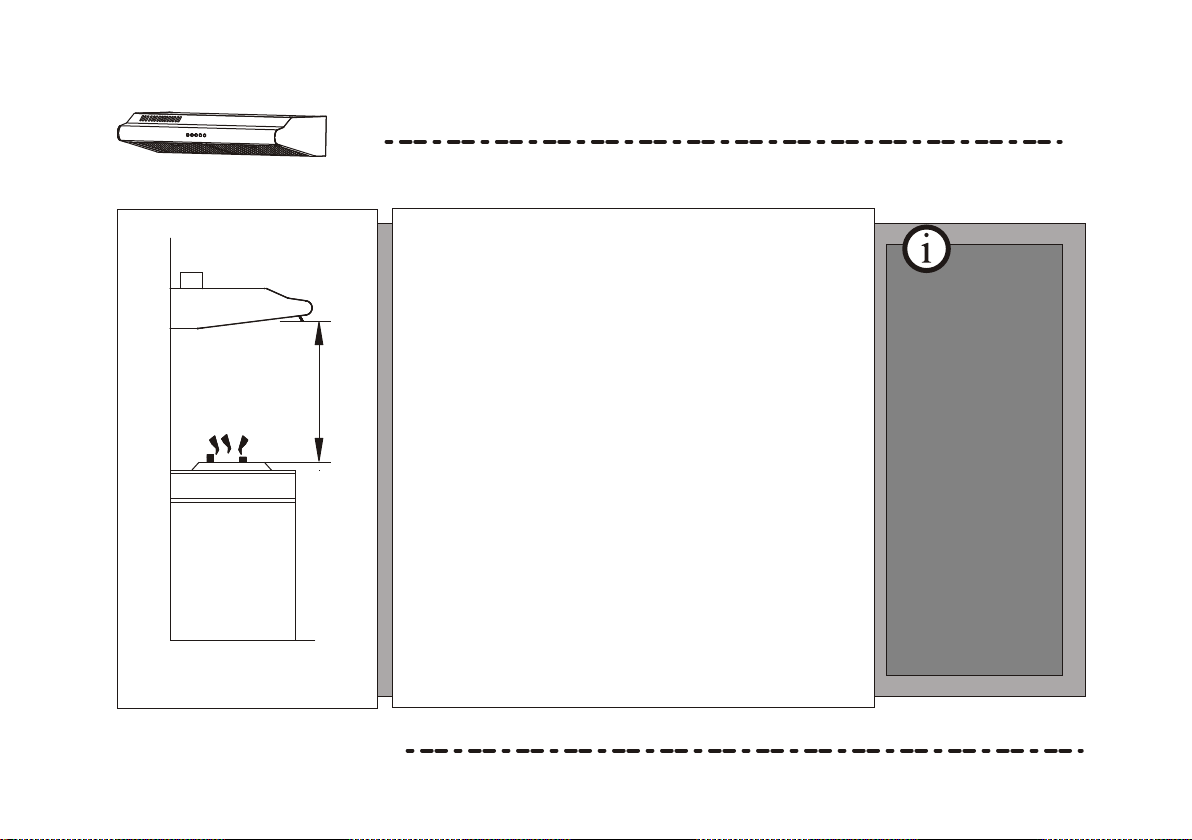
We recommend that after
installation the bottom of
the hood should be no less
than 650mm and no more
than 750mm above the
stove's heating elements
and burners.
We recommend that after
installation the bottom of
the hood should be no less
than 650mm and no more
than 750mm above the
stove's heating elements
and burners.
2
3
B
A
Vertical discharge
Vertical is the most common.
If you select this venting direction, you only need
to open the ducting knockout A.Remove the
ducting knockout by inserting a Flat head
screwdriver under one end and prying it up. Then
snip or break the attanchment points by tin snips.
You must make sure that the ducting knockout B is
not removed.
B
A
Horizontal discharge
Assuming that the range hood is located against an
outside wall, horizontal discharge is preferred
provided that there are no obstructions such as, wall
joists, or where openings are difficult to make.
If you select this venting direction, you only need to
open the ducting knockout B.
Same with removing the ducting knockout A, you must
make sure that the ducting knockout A is not removed.
Sufficient air
is needed for
proper
combustion
and
exhausting
of gases
through the
flue
(chimney) of
fuel burning
equipment to
prevent back
drafting.