Canary Products O Breeze FM102BL User manual

OBreeze
FM102BL
Instruction Manual
Thank you for purchasing Canary Products.
Please do not return back to store. We will
resolve any issue you have- simply email
info@canaryproducts.com
To properly use this Mist Fountain/Diffuser, please read the instruction manual
carefully. Please keep this instruction manual for future reference. An extra copy
will also be available online at canaryproducts.com.
FEATURES AND FUNCTIONS
•The changing LED Lamp generates comfortable & relaxing lighting.
•Our unique patent pending inline control mist maker can be set to any color by
pressing the button and selecting the desired color. You can also select two
different mist levels; high and low.
•When the water-level is low, the sensor will automatically shut the fogger unit
off. The auto-shut off protects the ceramic disc from running dry.
•USE ONLY MINERALIZED WATER OR TAP WATER. Distilled water can
reduce the effect of the mist or not allow it to mist at all. Minerals in the water
allow the sensor to work due to its conductivity. IF FOR SOME REASON-
YOUR ITEM STILL DOES NOT FOG- WHENYOU ADD TAP WATER- add
a ¼ spoon of salt to the water, and you should see it fog immediately (This
allows the sensors to sense the ions in the water).
•Drop a couple of drops of your favorite essential oil in this mist fountain for
relaxing aromatherapy.
•
TECHNICAL DATA
Working Voltage
(VAC)
Working Electric
Current (A)
Ultrasonic
Frequency(KHz)
24
0.5
1700±40
Generate mist
(ml/h)
Water temp. Range
( ℃)
Lifespan of Ceramic
Disc ( hour)
≥250
0 ~ 50
>1000

ASSEMBLYAND OPERATING INSTRUCTIONS
A. Splash Guard
B. Plastic Tower Stand
C. Glass Bowl
D. Metal stand (8 leg pieces with a metal round holder)
E. Screw Driver
F. Fogger Unit
ASSEMBLY DIAGRAM

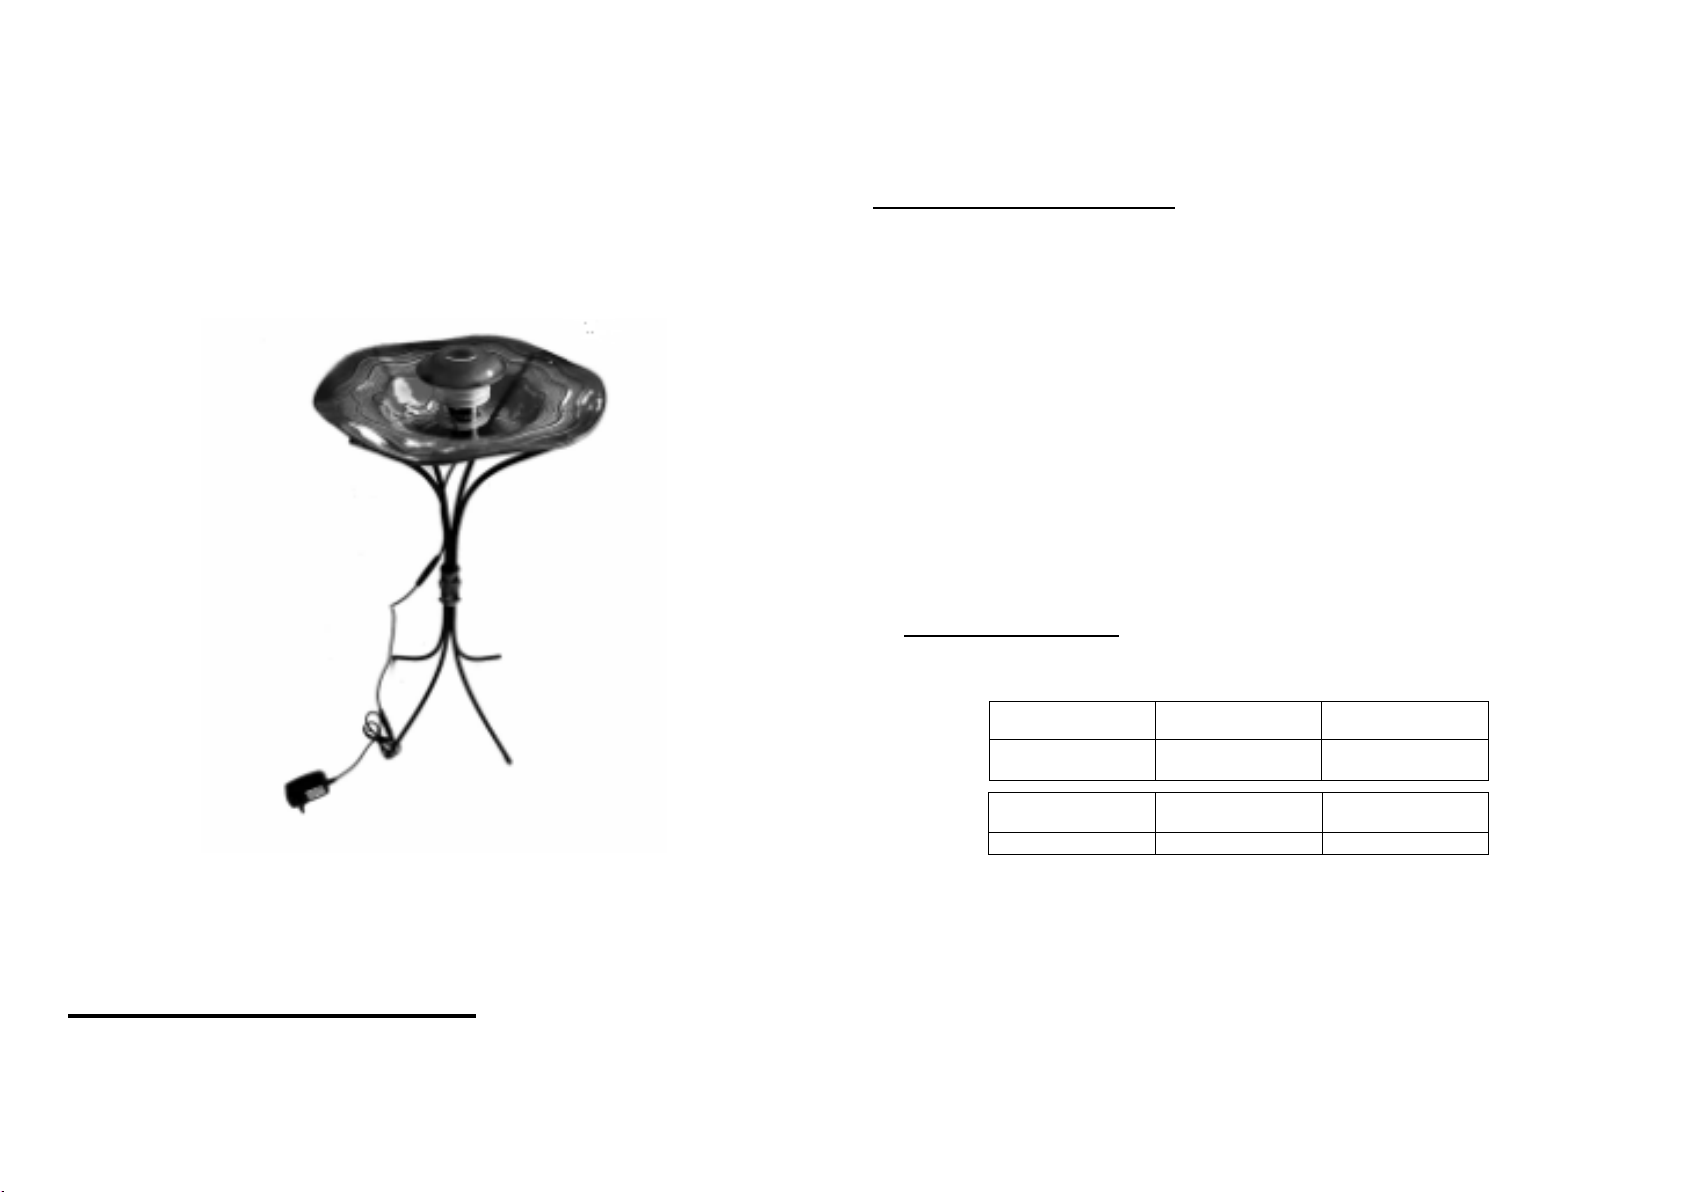
STEP BY STEP: ASSEMBLY INSTRUCTIONS: Floor Mist Fountain
(FM102BL/FM102WT)
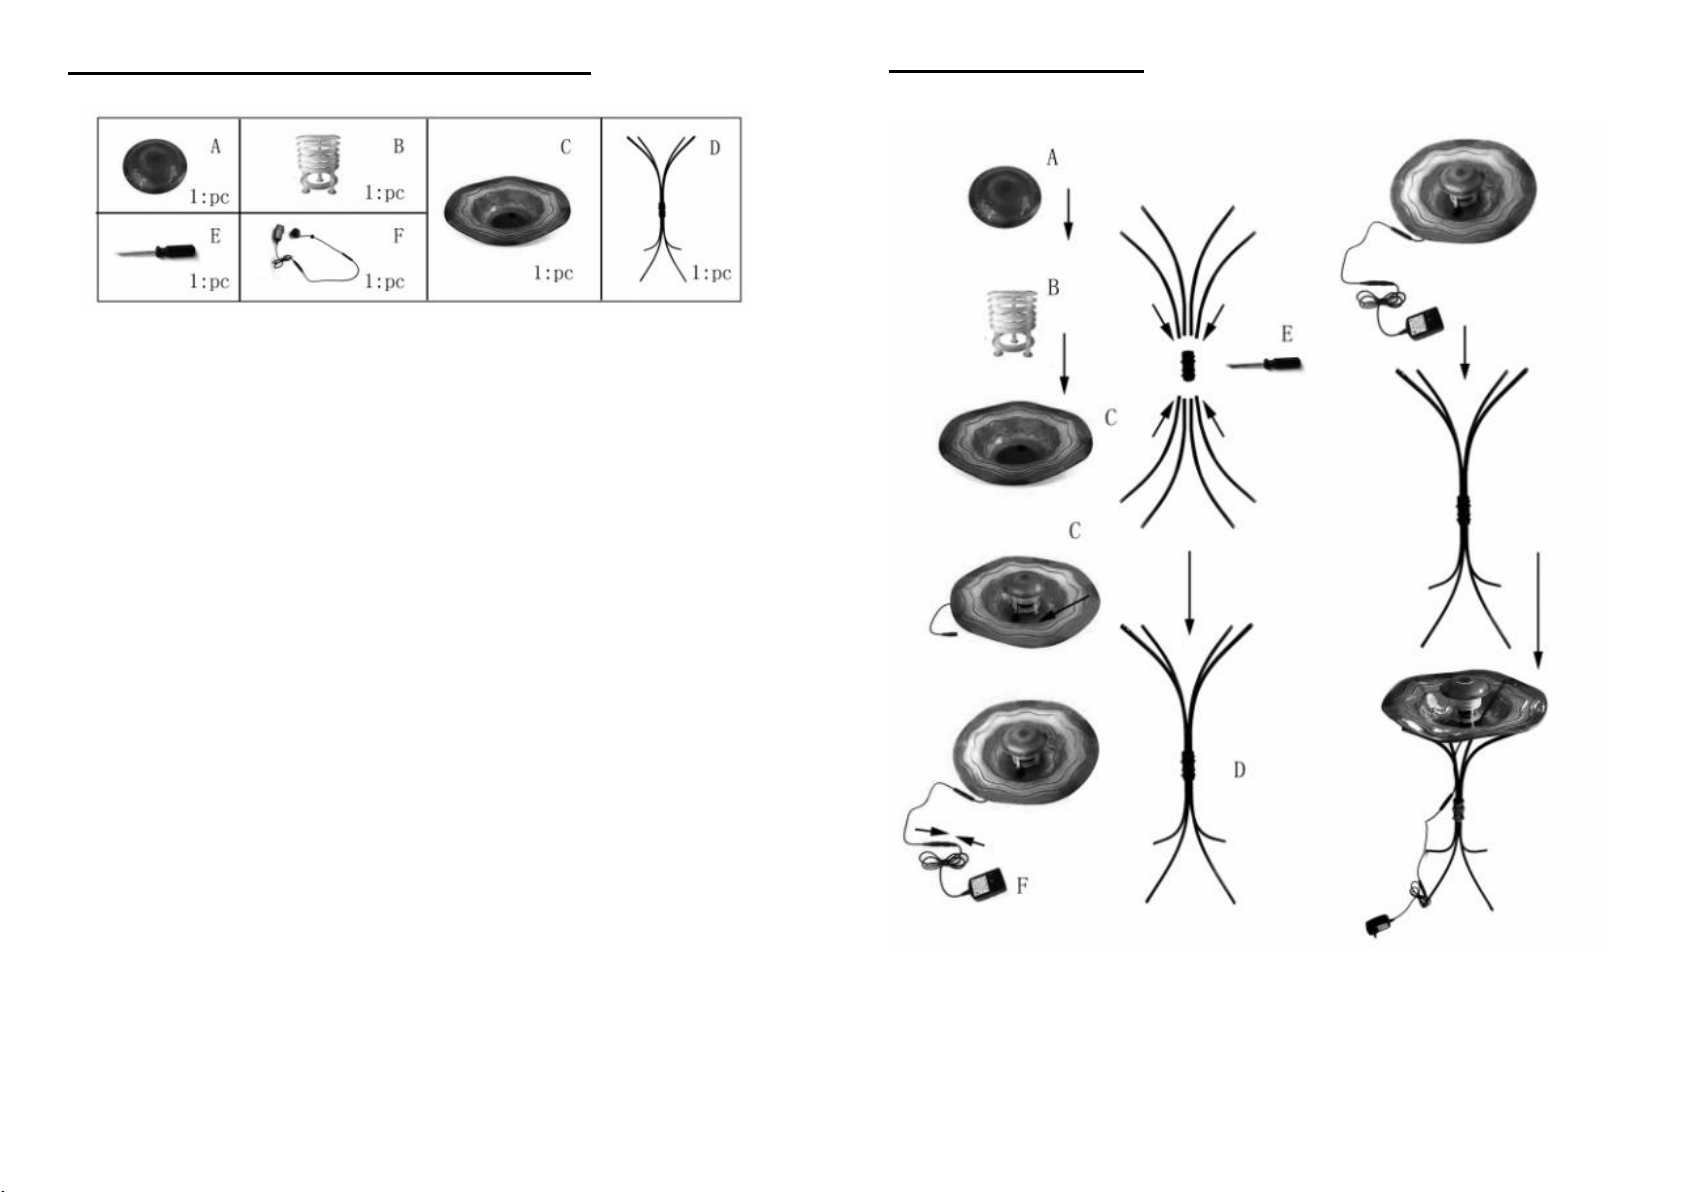
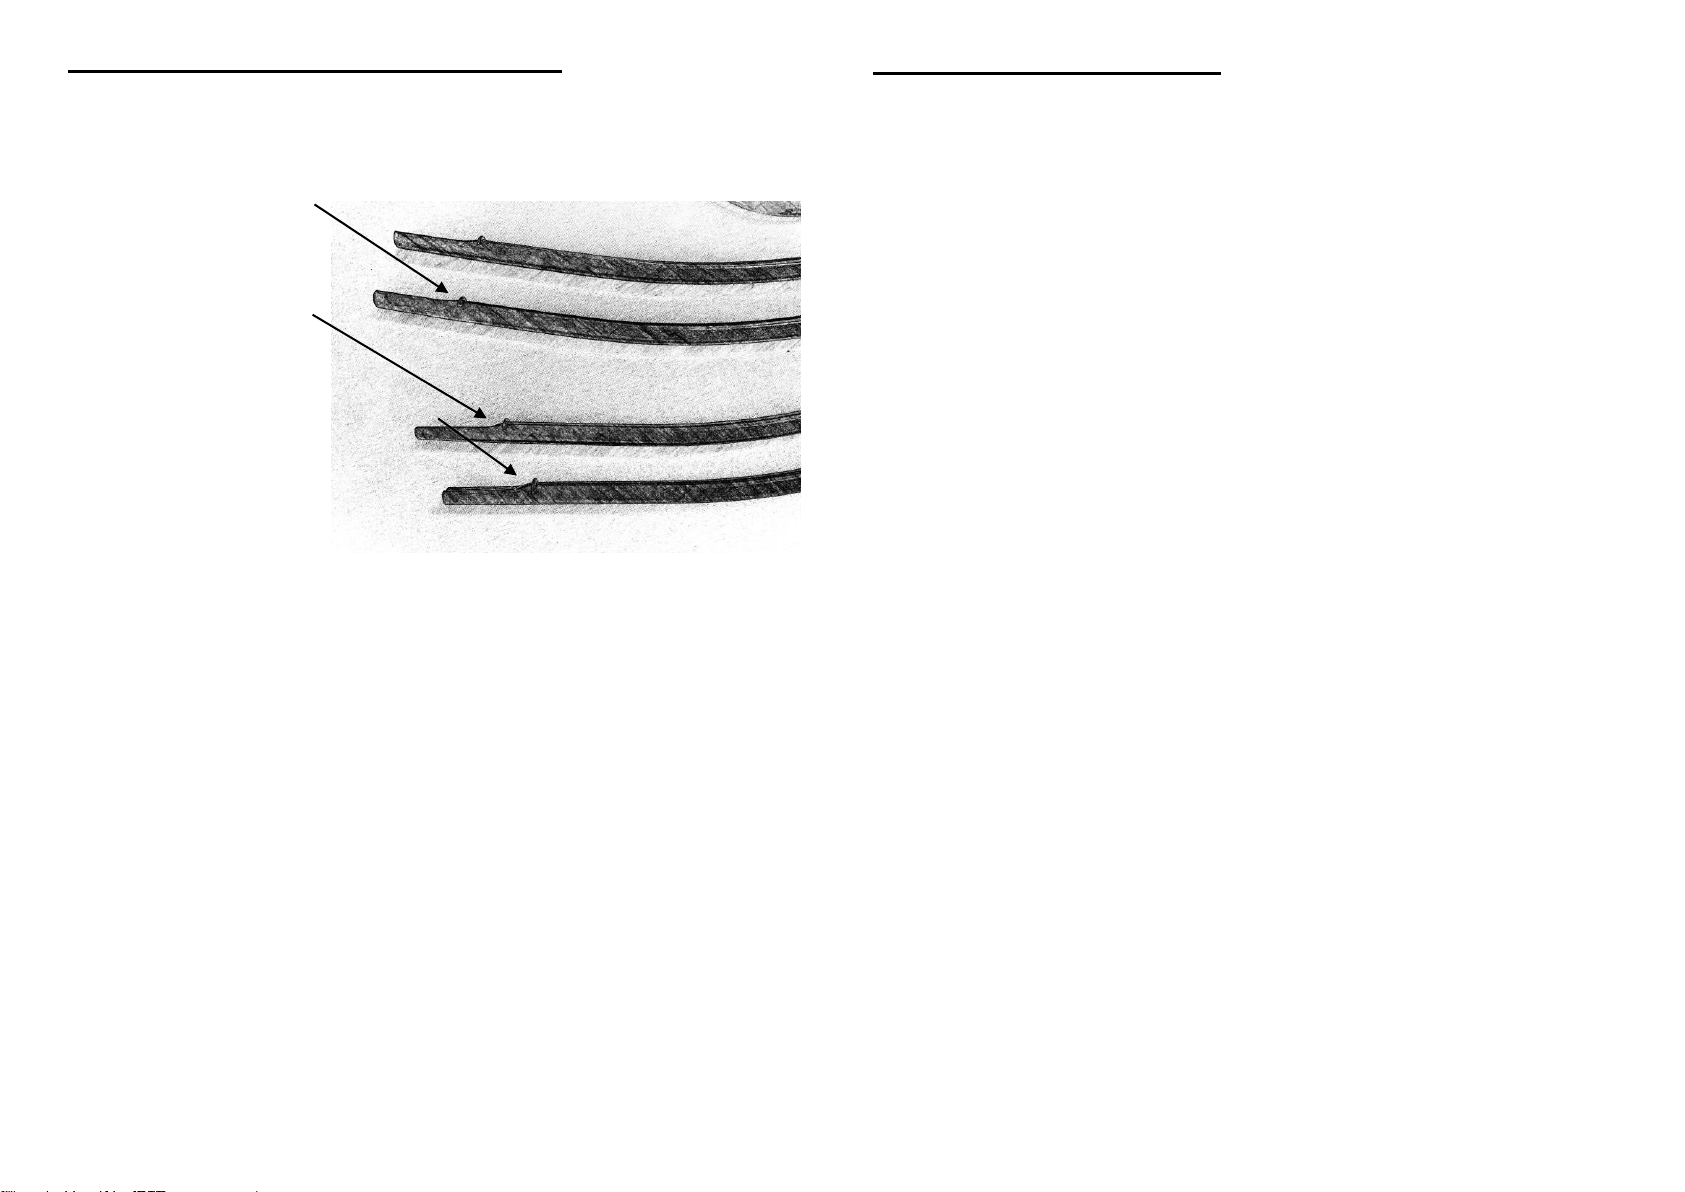
a) Items comes with 8 legs with edges to as shown below. Insert each leg
into the “Round Metal Leg Holder”
(i) See the images below of the top legs with edges:
b) Tighten the 4 top legs with the screw first.
c) Insert the 4 remaining legs next to the opposite side of the “Round
Metal Leg Holder”.
d) Place the bowl on the stand
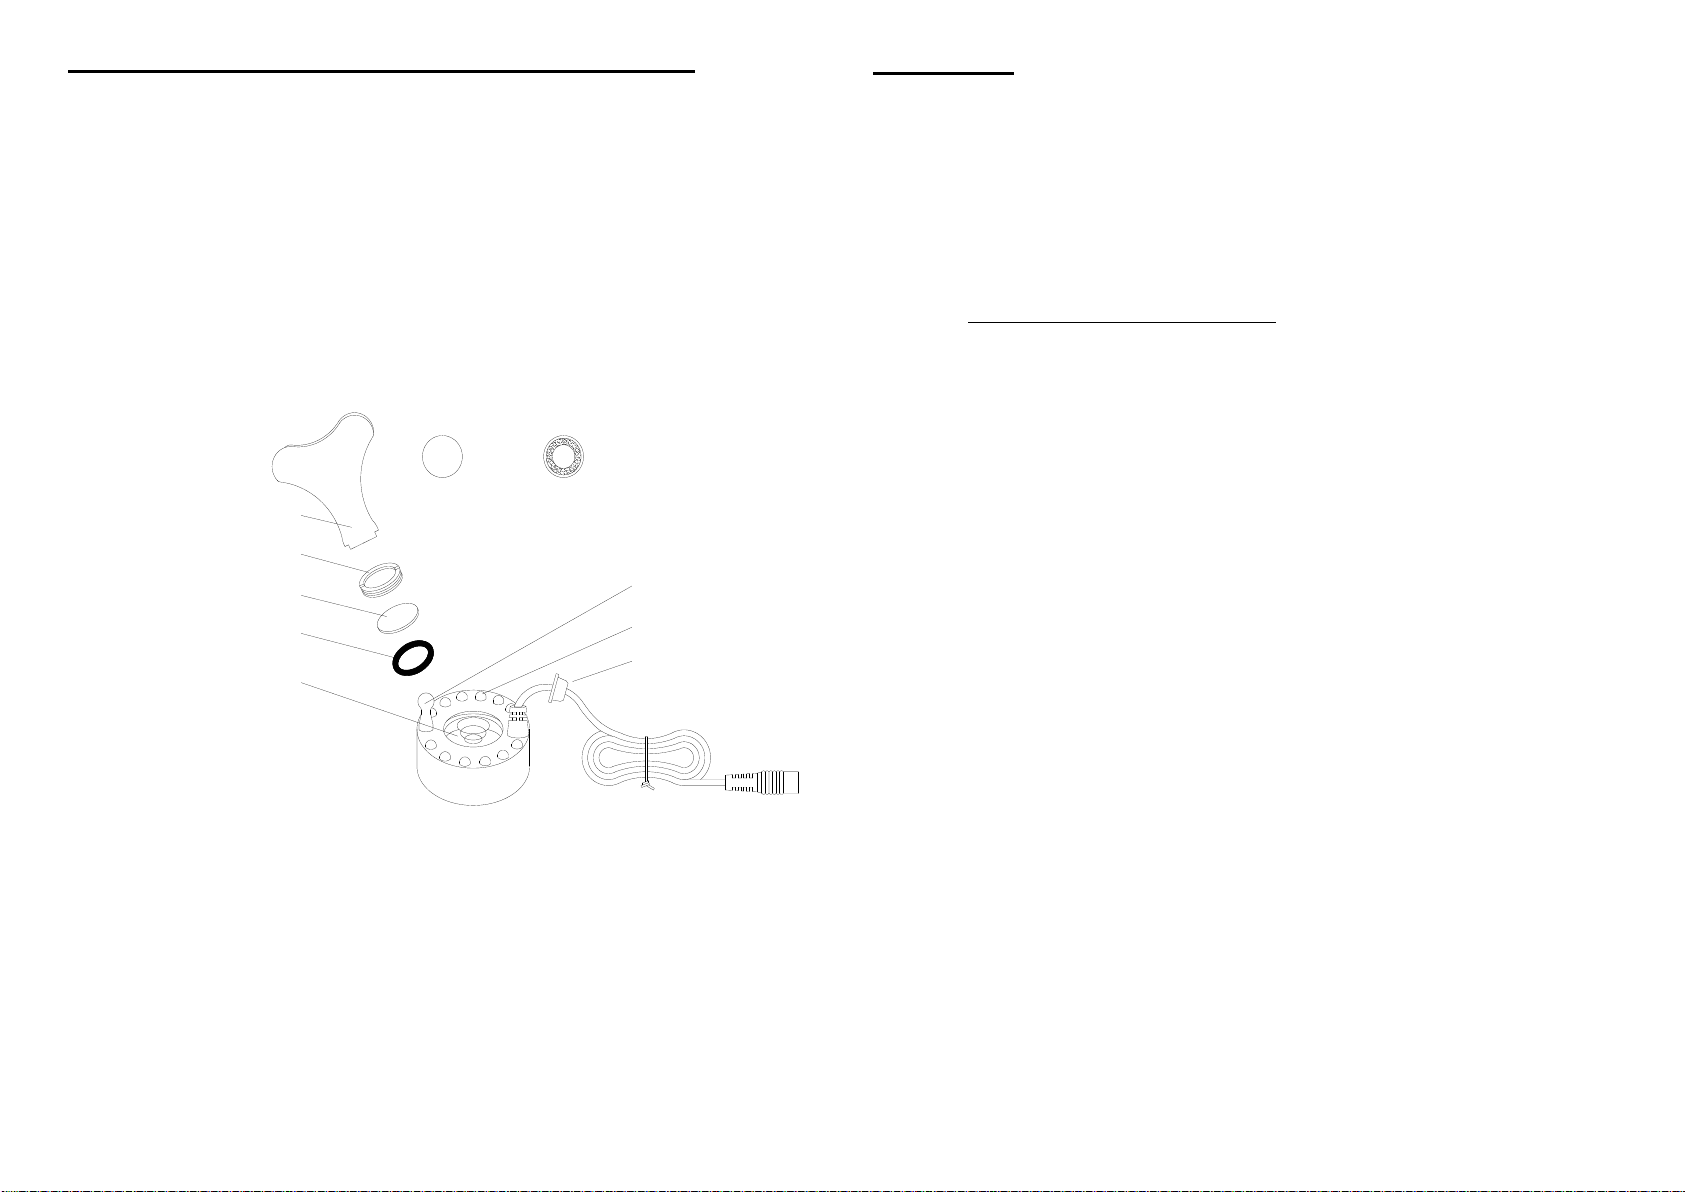
e) Place the fogger in the bowl and push the cord and inline control
through the hole of the bowl.
f) Push the grommet through the hole to block the hole in the bowl.
g) Place the white plastic tower stand over the fogger; adjust
accordingly.
h) Place the splash guard on the tower.
i) Fill it with tap water until the metallic sensor on the fogger is
covered with water.
j) Turn the fogger on by pressing the ON switch on the line control
MAINTENANCE & SERVICE
1. Be sure to pour clean water and replace with fresh tap water at least once a
week
2. Clean the ceramic disc and the surface of the mist maker with a soft cloth or
cotton stick in clean water once every two weeks. DO NOT touch or scratch the
ceramic disc or the water lever sensor switch. DO NOT use any kind of
detergent or cleaning sprays to clean any part of the mist maker.
3. Clean the bowl once every two weeks with a soft cloth to stop calcium build up
from hardening on your bowl.
4. If the unit cannot generate mist after running for some time, please check and
confirm there is enough water in the bowl. If the LED light is also off and not
creating mist, please make certain that it is receiving electricity and check the
on and off switch.
5. If the unit cannot generate mist and is only spraying water, the water in the bowl
may be dirty. Simply replace the water in the bowl and it should start working
normally. If it continues to spray, but not mist, please make sure the level of the
water is not higher than ½” above the water level sensor.
6. After running some time (approximately 1500 hours), the mist will start to
reduce. At this time, it is advisable to replace the ceramic disc with a new one.
Please purchase a new ceramic disc & tool from your local distributor and refer
to the Fogger Unit Drawing to install the new ceramic disc. It is advisable to
purchase Canary Products ceramic fogger disc so that it will fit your fogger
unit accordingly.

Behind Of
Ceramic Disc
Tool Front Of
Ceramic Disc
Ceramic Disc
Winding Ring
Mist Cavity
Sealing Washer LED Lamp
Rubber Tuck
Water Lever
Sensor Switch
INSTRUCTIONS FOR REPLACING FOGGER UNIT DISC
a. Unplug the unit and remove from the glass bowl. Dry the fogger unit completely
with a soft cloth.
b. Insert the tool into the winding ring and unscrew counter clockwise.
c. Remove the winding ring and old ceramic disc.
IMPORTANT: note the front and back of the ceramic disc. Be sure to reinstall
with the correct side; white side up.
d. The inside area of the unit cavity must be completely dry before the parts are
installed.
Fogger Unit Drawing
Note: This item is purchased separately once your fogger has run approximately 1500
hours.
For any questions or issues, please email us at info@canaryproducts.com. We will
respond to your email within 24 hours.
WARRANTY
Our fogger has a 1 year hassle free warranty. Please provide proof of purchase
when claiming a warranty. If defective within 30 days, we will ship free of charge.
If defective after 30 days, only a shipment fee will be charged. The part will be for
free.
Please pay for shipping after you receive a confirmation from us via email.
Website: http://www.canaryproducts.com
Mailing Address: P.O. Box 1561 Cypress, CA 90630
Email: [email protected]
Other Canary Products Humidifier manuals