CandCNC MP3000E Series User manual

MP3000E Series
USER MANUAL
All content Copywrited 2005 by CandCNC. All rights reserved.
No repoduction allowed without permission of CandCNC
Including Table I/O Card, MTA100 Card, Port2 Expansion Card
PRELIMINARY

*
Single 9 Pin Cable interface to the MPG101B
OPTIONAL Hand Controller
(PORT2 CARD Installed)
Single Cable serial interface to remote
Power Supply and Drive cabinet.
Gives ESP to MACH interface
Single Cable interface to MTA100
terminal card for interface to Motor
drives of EZPlug Cards
Plug-in for
UNIVERSAL POWER PAK
REAR PANEL FEATURES
+5 VDC
+12 VDC
C
o
m
m
o
n
SERIES E
UBOB II
Technology
™
POWER ADAPTER
INTERNAL
POWER
ON
OFF
to
MTA100/ESP
PORT2 PASSTHROUGH
(NO CONNECTION)
AXIS I/O Out
SERIAL PASSTHROUGH
to
ESP CONTROLLER
15
69
MP3000E INTRO

Built-in Self Test for EXPANSION
Modules verifies operation
Input for EXPANSION
Modules (DTHC, SPINDLE SPEED)
True RS232 Serial signals
Used for DTHC and ISS-02
Interface to MACH
Connection for REMOTE
Table I/O Card for
Inputs and Outputs
SINGLE PORT
Interface
PORT EXPANDER
Technology
Optional PORT2
Expansion for
Hand Controller
Indicator for Charge Pump active
10.062
3.266
Basic Features
INTRODUCING THE MP3000 Master Control Unit
SERIAL INPUT
To PC
Multi-Axis Interface
Port1 INPUT
To PC
CP PWR
DTHC / SPS
Push
Read
TEST
Isolated Table I/O
INPUT
SERIES E
PORT2 OPTION
Hand Controller
UBOB II
Technology
™
MP3000
MP3000 EXPANSION
MODULE
Multi-Axis Interface
15
69
Expanded Single port interface + serial (True RS232 signals)
Modular design allows for easy upgrades and easy repair
Bi-directional communication with MACH3
100% Digital Control
Field Ungradable to DTHC or Spindle Speed with single plug-in card
Custom Screens allow 100% control form MACH3
Charge Pump Active Indicator
Unit is plug compatible with other quality CandCNC products
Buffered Step & Direction (4 or 5 axis operation options)
All 8 power outputs double buffered: all 9 inputs opto isolated
Rear Panel connector for MPG (hand controller)
Exclusive remote Table I/O card makes hooking up homes and limits quick and easy. Two High Current relay outputs at the table where they belong.
All connects made via standard data cables (DB25 & DB9)
Universal Power Pak allows operation world wide
Works with any TTL level step & dir type motor drives including ALL versions of Gecko drives
Included interface card for multiple output options
Quality components. Designed and built in the USA.
Two Year Warranty Parts and Labor. Free unlimited support
Voltage control to + -
Built-in self test
Usable with hand or machine torches
Optional Arc Good sensor for machines not equipped with that signal.
Presettable volts from MACH3 screen or from Cut Profile.
Unlimited Cut Profiles store/recall critical settings; Select your material from a list. Edit.Add new profiles
Full DTHC operation from one screen in MACH
TOTAL DC (analog) ISOLATION between Plasma (Tip Volts) and computer/controller logic
On-the-fly push button adjustment for Preset Volts allows dynamic height adjust
New “TIP SAVER” feature has Head Lock to prevent diving on turns or over voids
Last setting retained on power down
Advance Digital Torch Height Controller responds thousands of times per second
Advanced logic functions like Auto THC enable, Torch off on Fault, Stop on fault, etc
Optimized for use with touch-n-go surface sensing
Compatable with SheetCAM
DTHC Features
1/4 volt
MP3000 INTRO

The setup of the MP3000 Series Interface involves the installation of
MACH3 software and some support files on the PC to be used for the
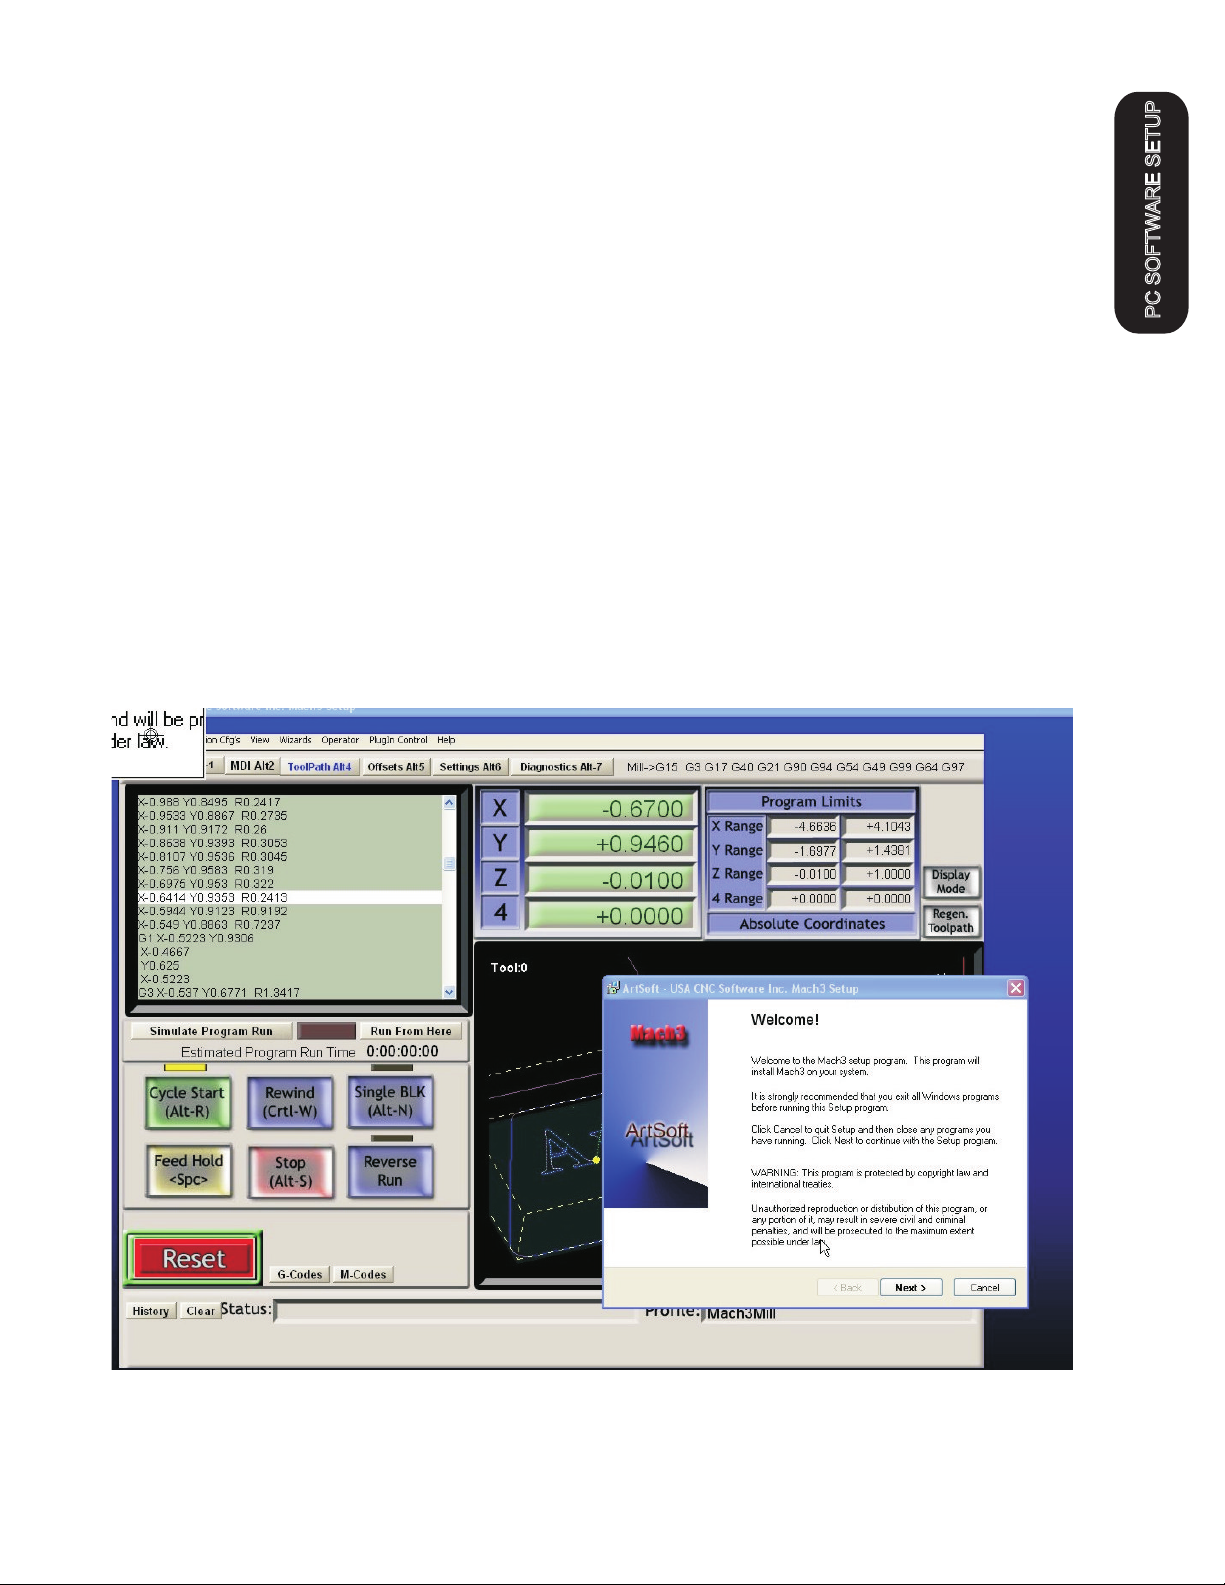
machine controller. While we will guide you through the setup for MACH3
the MACH3 manual gives more in depth instructions on each feature.
Familiarize yourself with the controls on the MP3000 and with the loading
and operation of MACH3 with the proper profile. The initial part of this
manual is devoted to getting MACH3 properly installed with the right
support files and profile to run the MP3000. After you have the software
installed and the cables and satellite cards hooked up you will be guided
through a series of tests to determine if everything is working. We ask that
you go through the setup and manual in the order presented. If at some
point you cannot get the expected results and check your connections and
setup with no success then call our tech support person (also the engineer,
assembler, tester, webmaster and marketing guy!) at 903-364-2740. While
we work a lot of strange hours we may not always be available to answer
the call so leave a detailed message of the problem and how to get in touch
with you will hear back from one of the staff.
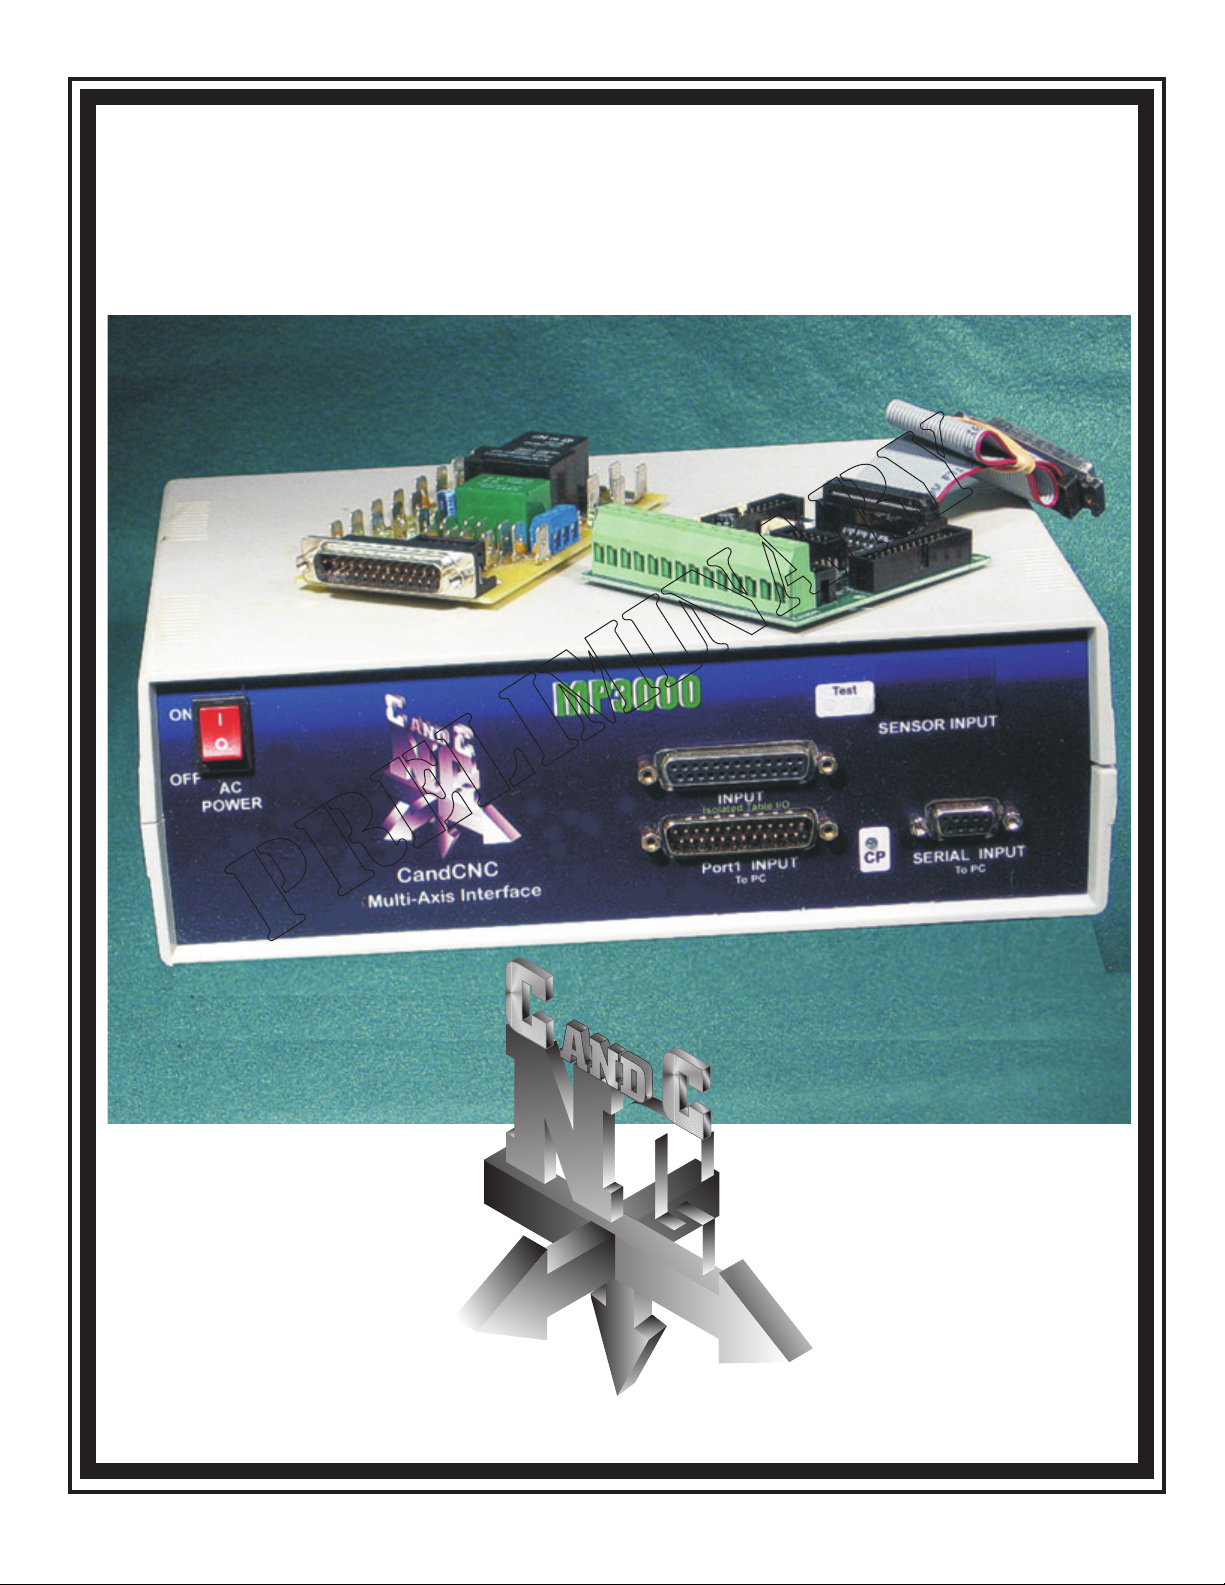
Installation and setup of your MP3000.
There are a series of steps you must complete to setup and interface the
MP3000 with your PC and Your Plasma torch
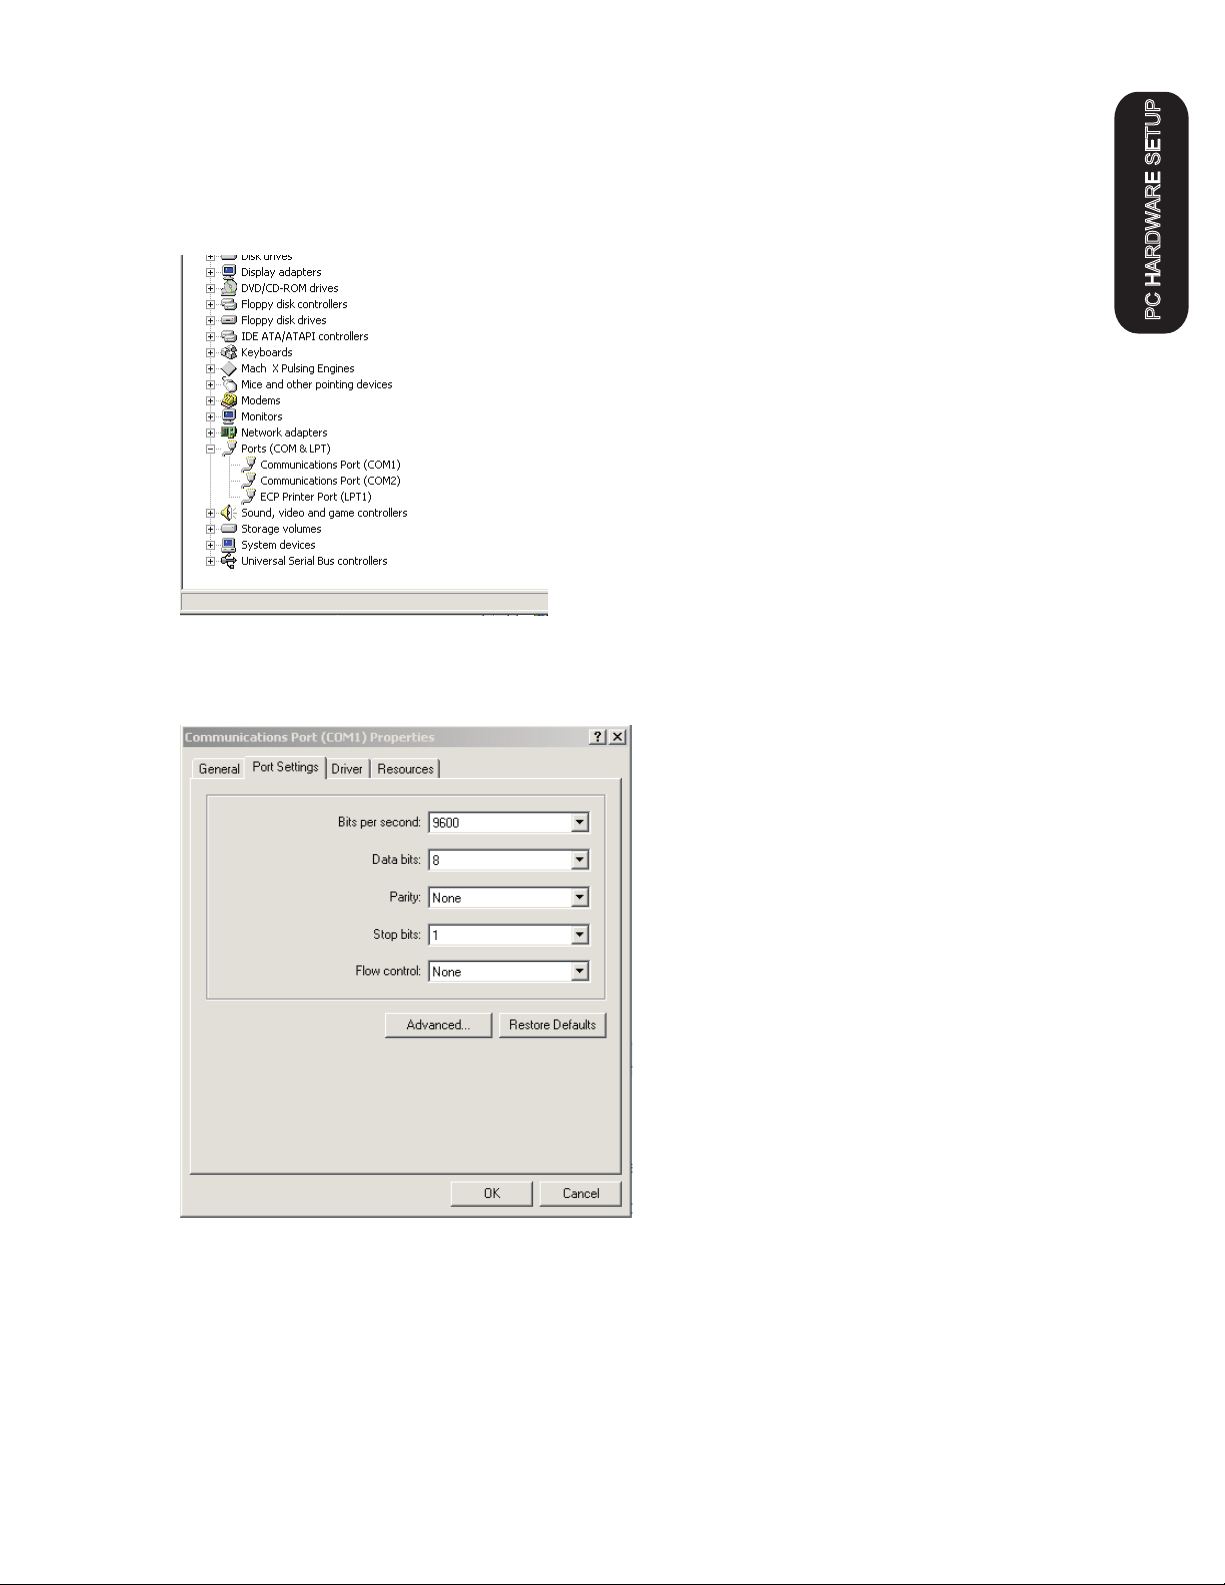
·Install and setup the Primary parallel port in your PC
·Setup and configure the first serial port (COM1) on your PC
·Install MACH3 software
·Copy your MACH3 license into the MACH3 main folder
·Run the install program from the CandCNC disk to load custom
screens and setup files and Plug-ins
·Open MACH3 and check screens and configure the PLUG-INs
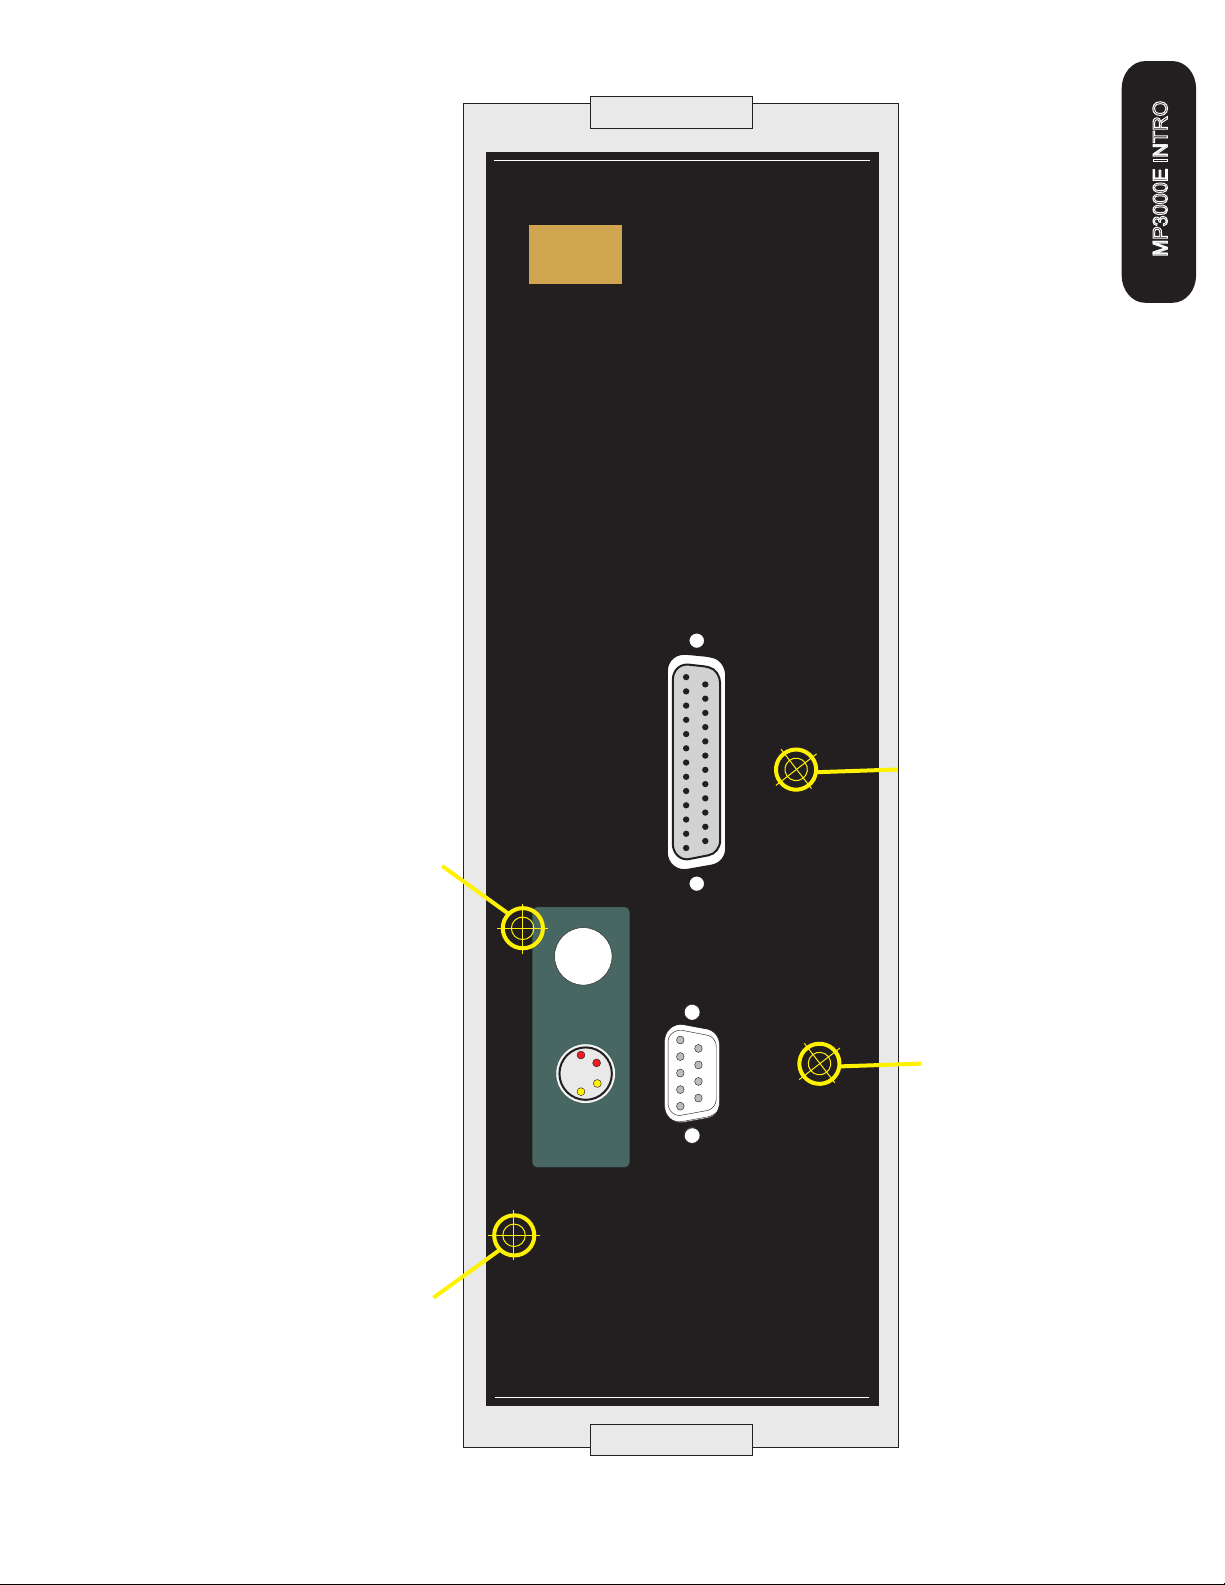
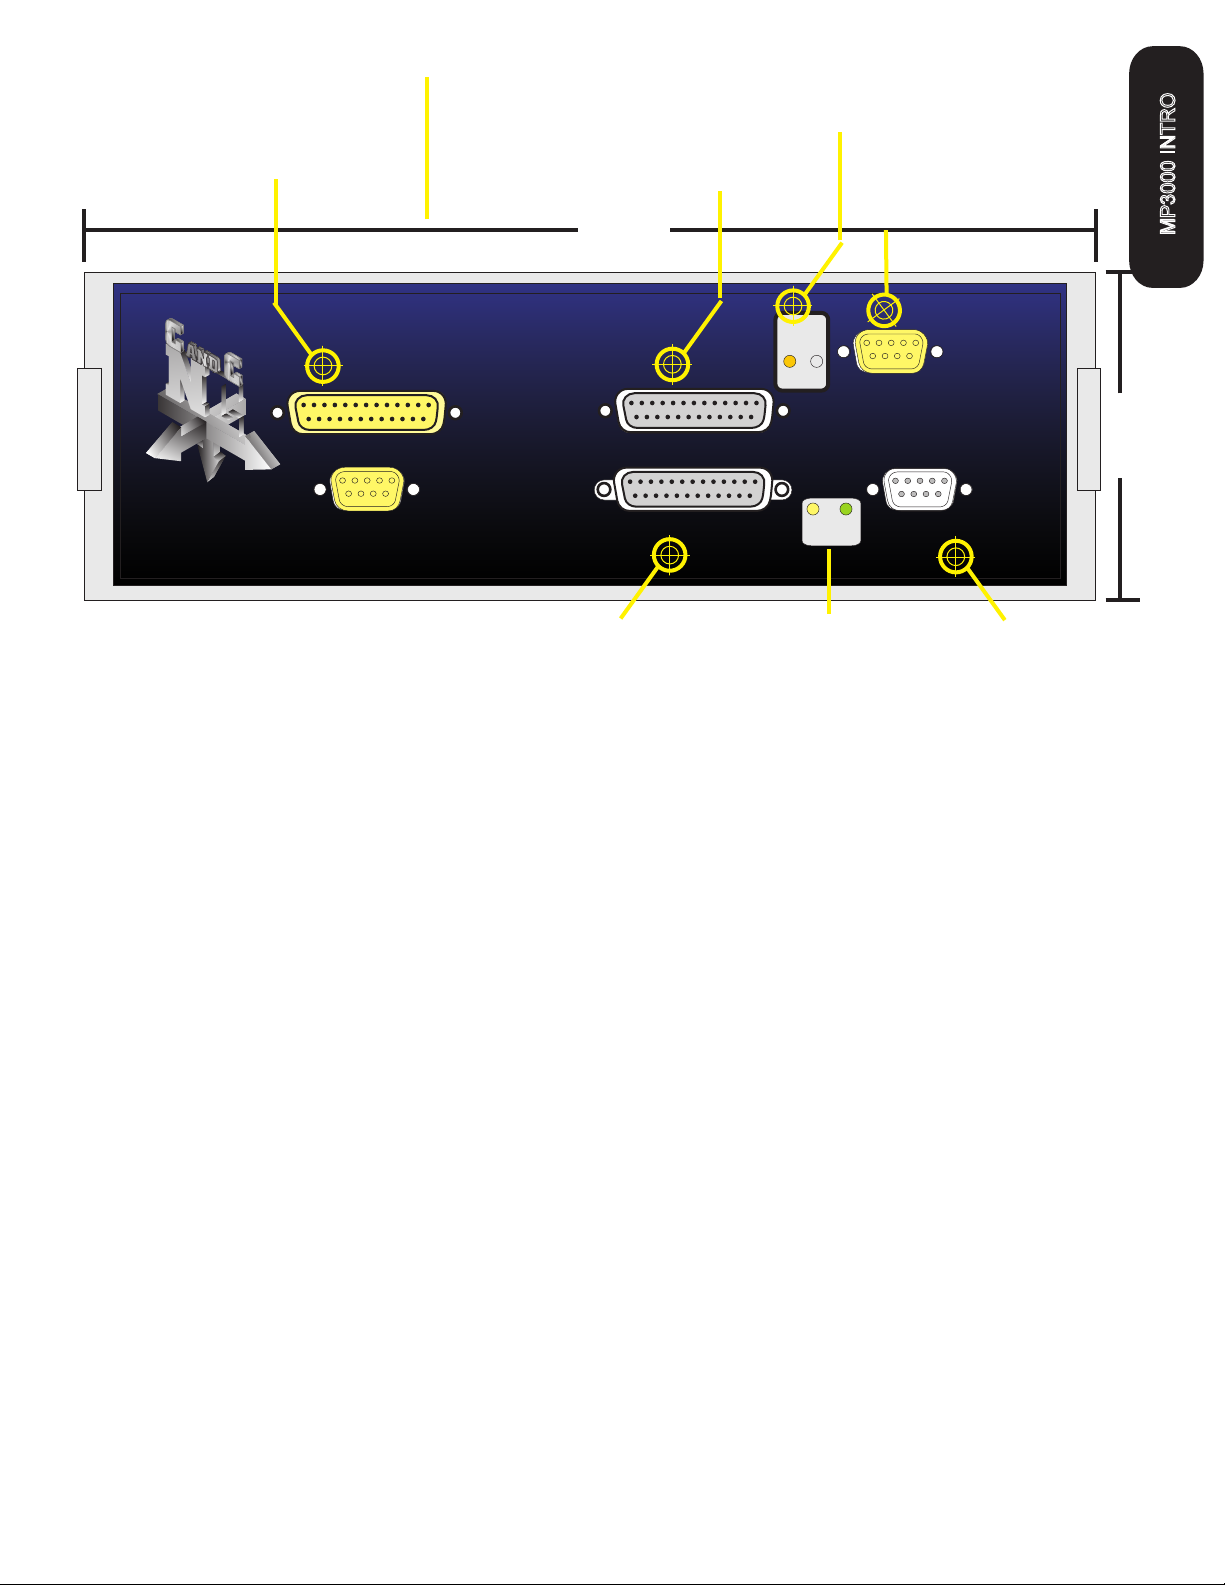
·Connect the 2 PC port cables (one 25Pin, one 9 Pin) to the front of
the MP3000
·Connect the Table I/O card to the Table I/O port on the front of the
MP3000
·Connect the Axis I/O Card to the motor drive modules, or the EZPlug
Gecko cards (stepper or servo) via the provided MTA100 Card
·Run a quick series of tests to confirm the ports are working and that
MACH3 is configured correctly
·Do final checkout.
·Setup and test any Expansion Cards (DTHC or Spindle Speed)
·Fire up the machine and cut a test file.
GENERAL SETUP

INSTALL and SETUP PRIMARY and/or SECONDARY PARALLEL
PORTS
NOTE: USE THIS SECTION ONLY IF YOUR PC DOES NOT HAVE A BUILT-IN
PARALLEL PORT and/or SERIAL PORT OR YOU HAVE PURCHASED THE
MPG101B HAND CONTROLLER THAT USES A SECOND PARALLEL PORT.
Use the same procedure to install a primary (PORT1) Parallel Port (if your
PC does not have one) or a second port. Do not attempt to use two
separate parallel port cards of the same type to get two ports. For two
ports use a Dual Parallel Port card. CandCNC stocks low cost parallel and
parallel/serial PCI expansion cards.
Make sure the card you install has drivers for the version of Windows you are
running. Win2000 drivers may or may not work in XP (or visa versa). When you
install the card in your computer and turn it back on, it should find the new
hardware and when prompted, you should use the disk that comes with the port
card to install the correct drivers. There should be instructions with the card on
the proper way to install the drivers.
After you install the parallel port and Windows recognizes the port(s) then open
the device manager from the Hardware section under Windows /Control
Panel/System and open the Ports icon and find the Port entries. Open that and
click on the resources tab.
Write down the first number in the Input/Output range (DE00 in this case above). We will
have to enter that number in the MACH3 setup procedure later
PC HARDWARE SETUP

You will have to setup the COM1 serial port in Windows. It should be setup with
9600 baud, 8 bits, no parity, 1 stop bit, no Flow control.
Testing: We will test the functionality of the com port after we hook up the
MP3000 to the computer.
PC HARDWARE SETUP
INSTALL and SETUP PRIMARY and/or SECONDARY PARALLEL
PORTS

PC SOFTWARE SETUP
Start Install of MACH3 software by clicking on the MachProgram/ file . If you already
have a version of MACH on the PC, you will be prompted to upgrade the version. Let it upgrade. If you have a
version than 3.042.20 then be aware that while there will probably be no problems we have not tested
the custom drivers (plug-ins) with versions after 3.42.020. You will see the screen above when you start the
install.
MACH3ver3.042.020.exe
NEWER
Software Install Instructions
If you are installing from the Support CD you can find the MACH3 ver 3.042.020 in the BladeRunner\MACH-
PROG folder as . If you are installing from a web download you will first have to UNZIP
the files you downloaded and place them in a Folder on your PC. Name the folder something that you can easily
identify later. Unzip the files all into that folder (MACH3 program, BladeRunner-Install.exe, etc)
While MACH will run under Windows Vista a lot of other programs you may need won’t. Vista uses LOT’s of
resources so your PC needs to be the fastest one with 2G of RAM to have a shot at making it work. We do not
currently support Vista so PLEASE don’t call and ask for support for MACH from us if you are running anything
but WIN2000 or XP (any level).
Mach3VersionR3.042.exe
A NOTE ABOUT HARDWARE (PC) THAT YOU NEED TO RUN MACH:
1. Not all hardware is compatible with MACH3 regardless of how fast the PC is. It’s rare that a PC rated over
1.8GHZ won’t run MACH but not unheard of. Usually the problems show up as jerky motor movements, bad
motion in running code and other control problems. Things like Inputs and Outputs and not getting any motor
movement is NOT typically a MACH / PC issue. If in doubt about the ability of the PC run DriverTest.exe (With
MACH not running) located in the MACH3 folder.
2. The minimum computer recommended is a 1 GHZ processor with 256MRam. We find that a 1.8 or 2.4 GHZ
with 512M RAM tends to work better especially if the MB has on-board video. The higher you can run the core
freq in MACH the more Steps per Second you can get and the smoother the pulse train of those steps. There
are also Windows processes that can effect the timing in MACH. Never run realtime virus protection or other
“tray” programs not needed for basic Windows functions.
INSTALL MACH SOFTWARE

About the MACH3 License
You must copy your MACH3 license (provided when you purchase a full copy
from the Mach3 website or from an authorized dealer) into the main MACH3
folder. A MACH2 license will work as well. You can check to make sure your
license is active by re-loading MACH3 after the license copy and opening the
Help/About and making sure the “licensed to” line is NOT “Demo”. The
MP3000E-DTHC( THC functions) WILL NOT WORK WITH A DEMO copy of the
software. The other motor drive functions will work. If you cannot get the THC
button to show active (green LED), then check your copy to make sure the
license is there. If you upgrade the version, the license will remain but if you
manually remove the MACH3 folder or change it’s name prior to loading a new
copy the license file will have to be re-installed into the working directory.
Setting up the Port 2 address. (Used only if you have installed a second
parallel port) for use with the MPG101B Hand Control. The new UBOB
interface card used in all CandCNC products has a Port Expander that
increases the number of IO signals and eliminates the need for a second
parallel port unless you are adding the optional Hand Controller. It’s
recommended you do not install the Hand Control unit until you have the
MP3000 working correctly and cutting from the screen and keyboard.
Within MACH3 on the Ports and Pins/ Port Setup and Axis Selection tab:
·If you are using a motherboard parallel port for PORT1 , confirm the
address is 0X378 in PORT address box in MACH
·If you are using a PORT1 or PORT2 expansion card, Enter the hex
address you recorded earlier for your parallel port(s). The actual address
you have written down should be proceeded by a
”0X” (Zero, X) so something like DE00 becomes 0XDE00 for the input
value (or 0xde00 will work since the value is not case sensitive)
·For PORT2 installs Make sure the “Use Pins 2-9 as Inputs” box is checked
·If the port1 address is correct the CP (Charge Pump) LED should be on
when MACH3 is out of RESET. If it does not come on, then Port 1 may not
be working correctly. We have found that some older Parallel Port add-in
cards do not work properly with XP. Make sure your card has specific
drivers for the version of Windows you are running.
PC SOFTWARE SETUP

INSTALLING CandCNC Custom drivers, profiles and screen sets.
CurrentProducts.
AFTER
The Support CD has a folder named AUTO INSTALL FILES. Under that are two folders. One is
Open that folder and you will see the auto-install files for the various
products. For any MP3000E product run the MP3000E -Instal.exe FIRST. If you have the
MP3000-DTHC or are adding the DTHC module to your existing MP3000-Basic then run the
MP3000E-UBOBII-DTHC_Install the MP3000E-Instal file.
Tree structure of Support CD: Root Folder
.
The MP3000E-Instal.exe Auto Install does the following:
Installs the custom MACH XML (Profile) and SET (Screen file) files into the MACH3 directory
Installs 2 custom Plug-ins used in all of CandCNC’s products .
Adds in the proper side files for the screen files (embedded VB)
Removes the default Icons MACH installs on the Desktop (except for LOADER) and puts a MP3000 Icon on
the Desktop so you can start your MP3000 directly from that ICON.
Removes unneeded XML’s from MACH so they don’t show up in the Loader List.
!
!
!
!
!
PC SOFTWARE SETUP

Load and Testing MACH
MP3000-Basic
.
After you have installed MACH and run the MP3000E_INSTALL on the Support CD, open
MACH using either the and the MP3000-Base selection from the list OR
using the Icon created in the desktop.
You should see the following screen or something very close. If you are missing the icon or
it’s not in the selection list, re-run the MP3000E-INSTALL again. If you have the Profile
(MP3000-Basic) listed in the MACH Loader and the screen does not display go to the top
menu bar and select VIEW/Load Screens and naviagate to the MACH3 folder and select
MP3000-Basic.set. If it is missing any of the Bitmaps (picture buttons and/or backgrounds
then confirm the Installer created the CandCNC folder under the MACH3/Bitmaps Folder
and there are files in that folder. We have included a ZIp file on the CD of all the bitmaps
and the ZIP file is on the CandCNCSupport Forum site in the FILES/MP3000 Support Files
Folder. You can UNZIP the files in the Bitmaps.ZIP file directly to the
MACH3/Bitmaps/CandCNC folder. Along with bitmaps and other features the MP3000
screens contain several custom functions embedded as code behind certain buttons. If you
elect to use another screen SET file with the MP3000 be aware some functions may not
work
MACH Loader
PC SOFTWARE SETUP

PC SOFTWARE SETUP
Checking PORT1 and (optional) PORT2 Setup in MACH CONFIG
NOTE: Not all computers will run with a Kernel Speed greater than 35000HZ. If you start
MACH after loading our Auto Install (see next page) and MACH locks ups you may need
to run at a lower Kernel Speed. We have modified the install to set the default Kernel
Speed at 45000. You will need to increase that speed if you are running a servo based
system and you need more Pulses per Second to get the RPM from the motors.
Example: With 500 line encoders (2000 pulses per rev) you will need 66,000 pps to
produce 2000 RPM of the motor. Pulse rates over 60,000 need to be tested with a
specific computer to verify it can operate at that Kernel Speed.
Setting up and confirming Parallel addresses in MACH
NOTE: Each PROFILE (XML) you setup in MACH has it’s own separate set of
settings (config) it maintains, so any changes or additions to a setup changes
the profile and ONLY that profile. So, adding in a port profile, tuning motors,
changing a pin function, etc, is saved . If you
have multiple profiles you will need to make the listed changes/setup in each
one.
only in the profile you have loaded

MACH Setup
CHECKING PLUG-IN LOAD
The auto install program should load
the ccc_comm and ccc_UBOB plug-ins
and Enable them. Some installs will
also load the ccc_pendant as well. If
you do not have an MPG101B Hand
Controller then disable (RED X) the
ccc_pendant plug-in if it is Enabled.
Open the CONFIG (yellow tab) on the
ccc_comm and set your environment
up to match the products you are
running. You can start with “Neither”
in both selection lists. Later if you add
the DTHC or Spindle Speed Modules
the install SHOULD change the settings
but always check to make sure the
changes were made. If you have a
DTHC (MP3000-DTHC) and have loaded
the DTHC upgrade install and the DTHC
does not appear to be communicating
with the screen (MACH) check the
settings in the ccc_Comm plug-in.
There are currently no settings to
change in the ccc_UBOB plug-in

NEW SETTING FOR UBOBIII UNITS
For units shipped after 10/27/09 thre will be a label on the front with the UBOBIII
(UBOB 3) logo. The UBOB III uses a slightly different signaling for the ouputs.
You must open the UBOB plugin in the CONFIG in the Config Plugins and selec
the UBOB 3. If you are having problems with any of the outputs (random on/off
or won’t stay on) then check thisconfig setting. Older plugin versions do not have
the option and so will not open the dialog box below.
ADDENDUM ADDED 10/25/09
SERIAL INPUT
To PC
Multi-Axis Interface
Port1 INPUT
To PC
CP PWR
DTHC / SPS
Push
Read
TEST
Isolated Table I/O
INPUT
SERIES E
PORT2 OPTION
Hand Controller
UBOB III
Technology
™
MP3000
MP3000 EXPANSION
MODULE
Multi-Axis Interface
UBIOB III Logo

MP3000 Interface Control
THC
SENSOR
OR
SPINDLE
SPEED
Table Limits
Homes
Safety
Remote E-Stop
30A Relay
15A Relay
15A Relay
REMOTE
TABLE I/O
CARD
POWER SUPPLY
MOTOR DRIVES
PC
Mounted on table Mounted at plasma or VFD
Single DB25 Cable
Single DB9 Cable
Single DB9 Cable
Single DB25 Cable
MP1000 Master Controller Interface Block Diagram
To Table Motors
FIGURE 5
AXIS I/O
Sensor Cable
TABLE I/O
Parallel
Ports
Serial
Port
NOTE: Entire MP3000 can be installed inside the
Power Control Enclosure. A
Special mounting plate and kit is
available from CandCNC
MP3000 Setup

ESP Smart Power
Module
EZPLUG
Stepper/servo
cards
MOTOR
DRIVER
MOTOR
DRIVER
MOTOR
DRIVER
Buffered
Step & Dir
X5
Main Switch
Main Fuse
AC Line IN
MP3000 Interface Control
Motor DC
FAN
REMOTE Power
& Motor Drive
Box
Single DB25 Cable
MP3000 to Power Supply & Motor Drivers
Note: ESP & EZPlug modules
are sold
as separate items
Components Available
from CandCNC
FIGURE 6
Note: MTA100 Extension Card comes with
MP3000 Units
MTA100
CARD
MP3000 Setup

HARDWARE SETUP
Plugging in Universal Power Pak
Checking PWR LED
Installing External I/O Cards
TABLE I/O Setup (Homes, Limits, Relays)
MTA150 Setup (Motor Driver, S&D signals)
Motor Driver Options
Setting up outputs
OPTIONAL PORT2 Interface (port 2 signals)
Connecting MP3000 to
Wiring options fo
>
>
>
>
>
>
>
>
>
>
>
>
MP3000 Setup

Standard IEC
POWER Cord
Use correct cord for
Plugs in your country
INPUT POWER
100 - 240VAC 50/60 HZ
Cord supplied is for North America
AC Plugs (120 60HZ)
For UBOB Builders Kits the plug must be removed (cut off)
and the wires stripped back for use with the input screw
terminals on the UBOBII card (see illustration). There are 4
wires + a shield. The two Yellow rires are BOTH + 12VDC.
The Two RED wires are BOTH +5VDC. The sheild is
Ground (common) for all 4 power wires. See the power
hookup on next page.
If you are using the MP3000 on another voltage (like 220VAC 50HZ) you
will need to change out the plug on the end of the supplied cord. You
can also use an IEC cord with the proper connector to fit the wall socket
you need to connect to. IEC cords are the same cords used on Personal
Computers. There are no switches or settings to change on the Power
Pak when changing voltages of line frequency.
MP3000 Setup
Table of contents