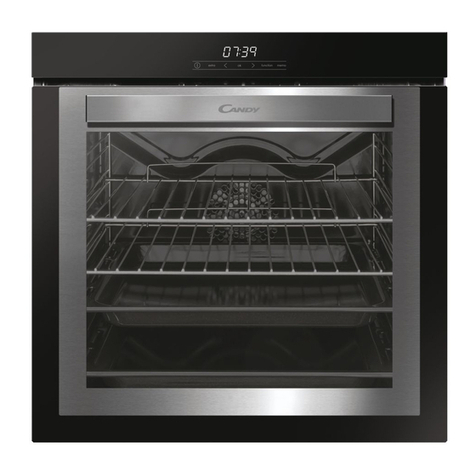
CANDY HOOVER HSO45C5S4 User manual


EN 4

EN 5
Thank you for choosing one of our products.
For the best results, please read this manual
carefully and retain it for future reference. Be-
fore installing the oven, take note of the serial
number, which you may need if any repairs are
required. Check that the oven has not been
damaged during transportation. If in doubt,
oven. Keep all packaging materials out of reach
of children. When the oven is switched on for
-
velop. This is caused by the grease on the ele-
not worry, just wait for the smoke to dissipate
before putting food in the oven. The manufac-
turer accepts no responsibility in cases where
the instructions contained in this document
are not observed.
NOTE: The oven functions, properties and ac-
cessories cited in this manual will vary depend-
ing on the model you have purchased.
Product description
Use of the appliance
Cleaning & maintenance
Installation
6
11
13
14
16
17
135

EN 6
SAFETY INSTRUCTIONS
Children should not play with the appliance.
The appliance can be used by those aged 8 or over and by those with
limited physical, sensorial or mental capacities, without experience or
knowledge of the product, only if supervised or provided with instruc-
tion as to the operation of the appliance, in a safe way with awareness of
the possible risks.
Cleaning and maintenance should not be carried out by unsupervised
children.
WARNING: the appliance and accessible parts become hot during use.
Be careful not to touch any hot parts.
WARNING: the accessible parts may become hot during use. Young
children should be kept away.
WARNING: in order to avoid any danger caused by the accidental re-
setting of the thermal interruption device, the appliance should not be
powered by an external switching device, such as a timer, or be con-
Children under 8 should be kept at a safe distance from the appliance if
not continuously supervised.
Do not use a steam cleaner or high pressure spray for cleaning opera-
tions.
Disconnect the appliance from the mains electricity supply before car-
rying out any work or maintenance on it.
Care should be taken to avoid touching heating elements inside the
oven.
INSTALLATION RECOMMENDATIONS/WARNINGS
The manufacturers have no obligation to carry this out. If the assistance
of the manufacturer is required to rectify faults arising from incorrect
installation, this assistance is not covered by the guarantee. The instal-
-
lowed. Incorrect installation may cause harm or injury to people, animals
or belongings. The manufacturer cannot be held responsible for such
harm or injury.

EN 7
No additional operation/setting is required in order to operate the appli-
ance at the rated frequencies.
The appliance must not be installed behind a decorative door in order to
avoid overheating.
The oven can be located high in a column.It is not recommended to in-
stall the oven under cooktop.If this is necessary,be sure to leave a large
enough gap for the cooktop according to the manufacturer’s instruc-
to allow proper circulation of the fresh air required for cooling and pro-
-
ELECTRICAL WARNINGS
THE APPLIANCE MUST NOT BE CONNECTED TO THE POWER
SOURCE USING PLUG OR SOCKETS, BUT MUST BE DIRECTLY CON-
NECTED TO THE SUPPLY MAINS. The connection to the power source
an installation compliant to the current safety legislation the oven must
be connected only placing an omnipolar breaker, with contact sepa-
ration compliant to the requirements for overvoltage category III, be-
tween the appliance and the power source. The omnipolar breaker
must bear the maximum connected load and must be in line with cur-
rent legislation. The yellow-green earth cable should not be interrupted
by the breaker. The omnipolar breaker used for the connection must be
easily accessible when the appliance is installed. The connection to the
considering the polarity of the oven and of the power source. The dis-
in accordance with the wiring rules.
The socket must be suitable for the load indicated on the tag and must
have ground contact connected and in operation. The earth conduc-
tor is yellow-green in colour. This operation should be carried out by a

EN 8
the socket with another suitable type. The plug and the socket must be
conformed to the current norms of the installation country. Connection
to the power source can also be made by placing an omnipolar breaker,
with contact separation compliant to the requirements for overvoltage
category III, between the appliance and the power source that can bear
the maximum connected load and that is in line with current legislation.
The yellow-green earth cable should not be interrupted by the break-
er. The socket or omnipolar breaker used for the connection should be
easily accessible when the appliance is installed. The disconnection may
be achieved by having the plug accessible or by incorporating a switch in
lf the power cable is damaged, it should be substituted with a cable or
special bundle available from the manufacturer or by contacting the cus-
tomer service department. The type of power cable must be H05VV-F.
-
al. The earth conductor (yellow-green) must be approximately 10 mm
longer than the other conductors. For any repairs, refer only to the Cus-
tomer Care Department and request the use of original spare parts.
Failure to comply with the above can compromise the safety of the ap-
pliance and invalidate the guarantee.
WARNING: the accessible parts can become hot when the grill is in use.
Children should be kept at a safe distance.
Do not use rough or abrasive materials or sharp metal scrapers to clean
the oven door glasses, as they can scratch the surface and cause the
glass to shatter.
the service department.
the lamp to avoid the possibility of electric shock.
After cleaning, reassemble them according the instructions.
Only use the oven for its intended purpose, that is only for the cook-
ing of foods: any other use, for example as a heat source, is considered
improper and therefore dangerous. The manufacturer cannot be held
responsible for any damage resulting from improper, incorrect or unrea-
sonable usage.
EN 9
The use of any electrical appliance implies the observance of some fun-
damental rules:
Do not pull on the power cable to disconnect the product from the
power source;
Do not touch the appliance with wet or damp hands or feet;
In general the use of adaptors, multiple sockets and extension cables is
not recommended;
and do not tamper with it.
ENSURE THAT AN ELECTRICIAN OR QUALIFIED TECHNICIAN
MAKES THE ELECTRICAL CONNECTIONS. The power supply to which
the oven is connected must conform with the laws in force in the coun-
try of installation. The manufacturer accepts no responsibility for any
damage caused by the failure to observe these instructions. The oven
must be connected to an electrical supply with an earthed wall outlet or
a disconnector with multiple poles, depending on the laws in force in the
country of installation. The electrical supply should be protected with
suitable fuses and the cables used must have a transverse section that
can ensure correct supply to the oven.
CONNECTION. The oven is supplied with a power cable that should
only be connected to an electrical supply with 220-240 Vac power be-
tween the phases or between the phase and the neutral. Before the
oven is connected to the electrical supply , it is important to check pow-
er voltage indicated on the gauge and the setting of the disconnector.
The grounding wire connected to the oven’s earth terminal must be
connected to the earth terminal of the power supply.
WARNING. Before connecting the oven to the power supply, ask a qual-
-
minal. The manufacturer accepts no responsibility for any accidents or
other problems caused by failure to connect the oven to the earth ter-
minal or by an earth connection that has defective continuity.
NOTE: as the oven could require mainteinance work, it is advisable to
keep another wall socket available so that the oven can be connected to
this if it is removed from the space in which it is installed. The power ca-

EN 10
USE RECOMMENDATIONS/WARNINGS
During runing cooking modes, moisture may condense inside the oven
cavity or on the glass of the door. This is a normal condition. To reduce
-
ting food inside the oven. ln any case, the condensation disappears
when the oven reaches the cooking temperature.
Cook the vegetables in a container with a lid instead of an open tray.
Avoid leaving food inside the oven after cooking for more than
A long power supply failure during an occurring cooking phase may
cause a malfunction of the monitor. ln this case contact customer ser-
vice.
When you place the shelf inside, make sure that the stop is directed up-
wards and in the back of the cavity. The shelf must be inserted com-
pletely into the cavity.
steam oven, or it may be dangerous after the steam oven is started.
WARNING: Never remove the oven door seal.
For a correct use of the oven it is advisable not to put the food in direct
contact with the racks and trays, but to use oven papers and/ or special
containers.
The dripping pan collects the residues that drip during cooking.
WARNINGS
Any excess of spilled material should be removed before cleaning.
WARNING: before initiating any cleaning cycle:
1. Clean the oven door;
2. Remove large or coarse food residues from the inside of the oven us-
ing a damp sponge. Do not use detergents;
3. Remove all accessories and the sliding rack kit (where present);
4. Do not place tea towels.
maximum level indicated on the tank.
WARNING: Risk of burn and damage to the appliance: using the steam
function released steam can cause burns: Open the door carefully to
avoid injury after using a cooking function with steam.

EN 11
1. Control panel
2. Water tank
3. Grids
4. Shelf positions (lateral wire
grid if included)
5. Trays
6. Lateral wire grids
7. Door
8.
Product description
ACCESSORIES
Metal grid
Collects residues that drip when cooking food
on the grills. Holds baking trays and plates.
*Push into the oven as indicated by the arrow.
Write here your serial number for future reference.
1
2
3
4
5
6
7
8

EN 12
(only if present)
(only if present)
Measures the internal temperature of food
during cooking.
WARNINGS:
Do not preheat or start cooking before
properly inserting the meat probe.
Do not try to insert the meat probe in frozen
food.
Holds food in steam mode.
Located on both sides of the oven cavity, holds
metal grills and drip pans.
Hinges which ensure an automatic soft and
smooth movement during the closing phase of
the oven door.
Two guide rails which facilitate the cooking
status check as they allow easily the extraction
and repositioning of trays and grids inside the
oven cavity.
Te le scopi c gu ide s (only if present)
Softclose (only if present)

EN 13
Function Description
Manual mode This function allows to choose cooking functions, temperature and dura-
tion.
In this menu you can see and select recently used and favorite programs as
well as generate customized recipes according to your taste.
Last used/Last used on app: see the last programs used with duration,
temperature and preheating (if selected) used directly on your oven or via
app.
Favorites/My recipes: see the list of your favorite recipes and/or programs.
U-Create: create and see customized recipes.
Recipes In this menu you can access a variety of recipes already integrated on your
oven.
WiFi In this mode you can connect your oven to a network and enroll it with the
Haier App.
Settings
Access this menu to change language, set time of day, adjust brightness,
activate or deactivate sounds, units,edit your WiFi and Remote Control set-
tings.
Remote
Control
When remote control is On you can access and control your oven ONLY by
the connected device.
Lock This function enables to lock the screen/door in order to prevent any un-
wanted use by minors
* Depending on the oven model.

EN 14
* Depending on the oven model.
Default temperature Functions
GRILL:
This function uses only the top heating element,and the grill
level can be adjusted. Use with the door closed. Place white
meats at a
placed on
the shelf with the drip pan underneath. Preheat for 5 minutes.
165°C
GRILL+FAN:
The top heating element is used with the fan circulation the
air inside the oven.Preheating is necessary for red meats but
not for white meats.Place the food to be grilled directed on
the shelf centrally.Slide the drip pan under the shelf to collect
the juices.Make sure that the food is not too close to the grill.
Turn the food over halfway through cooking.
165°C
MULTILEVEL:
This function distributes heat better due to the combination
of fan and back heating elements, ensuring evenly baked re-
sults.
210°
MULTILEVEL +GRILL:
Uses the top & back heating element with the fan to circulate
the air inside the oven. Use with the door closed. Slide the
drip tray under the shelf to collect juices. Turn food over half-
way through cooking.Preheating is required for red meats
but not for white meats.
165°C
ECO MULTI-LEVEL:
This function is tested in accordance with the CENELEC EN
60350-1 for the purpose of energy consumption declaration
and energy class.
Use of the appliance

EN 15
Temper ature range Functions
40~100°
STEAM PURE:
Cook at low temperature, with full steam power.By way of ra-
dial ventilation, the steam is distributed to ensure the food is
evenly heated and cooked.This holds the advantage of being
70~130°
STEAM WARM:
You can allow food regeneration while preserving its nutri-
ments.In this function, the cooking chamber is heated with
steam and warm air, which allows rapid and consistent heat-
ing of the food without drying it.
50~230°
STEAM CRISPER:
Mix steam power with a fan, you can achieve crispy meals
without any fat. This type of function is particularly suited to
large meat and seafood dishes for example; large sized bread
Function Description
H2O circuit
clean
H20 circuit clean allows to clean the circuit each time is needed for a
This function performs a cleaning cycle of the circuit, to keep it clean
It is important to ensure that there is water inside the tank before
starting this function.
clean
H20 cavity clean let the user clean the cavity with steam power.
This function performs a cleaning cycle by injecting steam into the
cavity for 15 minutes. At the end of the cycle, any crusting that may
have formed due to high-temperature cooking inside the oven cav-
ity,will be softened and become much easier to remove with a wipe.
Descaling
This function performs a cleaning cycle through cleaning media, to
NOTE:
Cleaning media must be carbonic acid scale remover.
* Depending on the oven model.
Note: If you had used water in any functions, a circuit discharge will be requested before the oven goes into standby mode.

EN 16
Regular cleaning can extend the lifecycle of
your appliance. Wait for the oven to cool before
carrying out manual cleaning.
WARNING:
Never use abrasive detergents, steel wool
or sharp objects for cleaning, as they may
irreparably damage surface.
Do not use corrosive or abrasive cleaning
products.Use only water, soap or bleach-
based detergents (ammonia).
Immediately remove scale, grease, starch
or protein stains.Otherwise, these stains
may be causes corrosion.Do not let water
into the steam oven.
Do not use high pressure or steam jet clean-
ing devices.
GLASS PARTS
Clean the glass oven window with absorbent
kitchen towel after every use. For stubborn
stains, use a detergent-soaked sponge, wrung
out, then rinse with water.
OVEN WINDOW SEAL
If dirty, the seal can be cleaned with a damp
sponge.
After each use of the oven, a minimum of
cleaning will help keep the oven perfectly
clean.
Do not line the oven walls with aluminium
foil or single-use protection available from
stores. Do not place boxes or food directly
on the cavity bottom. Use trays or grids.
In order to prevent eccessive dirting of
your oven and the resulting strong smokey
smells, we recommend not using the oven
at very high temperature. It is better to ex-
tend the cooking time and lower the tem-
perature a little.
In addition to the accessories supplied with
the oven, we advise you only use dishes and
baking moulds resistant to very high tem-
peratures.
Trays are dishwasher safe.
Cleaning and maintenance

EN 17
SAVING AND RESPECTING THE
ENVIRONMENT
Where possible, avoid pre-heating the oven
infrequently as possible, because heat from
the cavity disperses every time it is opened.
oven between 5 and 10 minutes before the
planned end of the cooking time, and use the
residual heat that the oven continues to gener-
ate. Keep the seals clean and in order, to avoid
any heat dispersal outside of the cavity. lf you
the “delayed cooking” programme makes en-
ergy saving more simple, moving the cooking
WASTE MANAGEMENT AND
ENVIRONMENTAL PROTECTION
This appliance is labelled in
accordance with European Di-
rective 2012/19/EU regarding
electric and electronic appli-
ances (WEEE). The WEEE con-
tain both polluting substances
on the environment) and base
elements (that can be reused).
treatments to correctly remove and dispose of
the pollutants and recover all the materials. In-
dividuals can play an important role in ensuring
that the WEEE do not become an environmen-
tal problem; it is essential to follow a few basic
rules:
The WEEE should not be treated as domes-
tic waste;
The WEEE should be taken to dedicat-
ed collection areas managed by the town
council or a registered company.
ln many countries, domestic collections may
be available for large WEEEs. When you buy a
new appliance, the old one can be returned to
the vendor who must accept it free of charge
equivalent type and has the same functions as
the purchased appliance.
DECLARATION OF COMPLIANCE
By placing the mark on the appliance, we
-
ropean safety, health and environmental re-
quirements which are applicable in legislation
for this product.

FR 18
Merci d’avoir choisi un de nos produits. Pour de
meilleurs résultats, veuillez lire attentivement
ce manuel et le conserver pour consultation ul-
térieure. Avant d’installer le four, prenez note du
numéro de série dont vous pourriez avoir besoin
que le four n’a pas été endommagé pendant le
transport. En cas de doute, consultez un tech-
tous les matériaux d’emballage hors de portée
des enfants. Lorsque le four est allumé pour la
première fois, une fumée forte risque de se for-
mer. Cela est provoqué par le fait que la graisse
cela se produit, ne vous inquiétez pas, il suf-
mettre des aliments dans le four. Le fabricant
décline toute responsabilité en cas de non-res-
pect des instructions contenues dans ce docu-
ment.
REMARQUE : les fonctions, propriétés et ac-
cessoires du four mentionnés dans ce manuel
varient selon le modèle que vous avez acheté.
Consignes de sécurité importantes
Description du produit
Fonctionnement du produit
Utilisation de l’appareil
Installation
19
24
26
27
29
30
135

FR 19
Consignes de sécurité importantes
CONSIGNES DE SÉCURITÉ
Les enfants ne doivent pas jouer avec l’appareil.
L’appareil peut être utilisé par les enfants à partir de 8 ans et par les per-
sonnes ayant des capacités physiques, sensorielles ou mentales limitées,
sans expérience ou connaissance du produit, uniquement s’ils sont super-
visés ou s’ils ont reçu des instructions sur le fonctionnement de l’appareil,
de manière sécurisée et en ayant conscience des éventuels risques.
non surveillés.
au cours de l’utilisation. Veillez à ne toucher aucune partie chaude.
cours de l’utilisation. Tenez les jeunes enfants à l’écart de l’appareil.
accidentel du disjoncteur thermique, l’appareil ne doit pas être alimenté par
un commutateur extérieur, comme une minuterie, ni être raccordé à un cir-
cuit qui est régulièrement allumé et éteint.
Les enfants de moins de 8 ans doivent être gardés à bonne distance de l’ap-
pareil s’ils ne sont pas constamment surveillés.
Ne pas utiliser de nettoyeur vapeur ou de vaporisateur à haute pression
pour les opérations de nettoyage.
d’entretien.
four.
RECOMMANDATIONS D’INSTALLATION/AVERTISSEMENTS
Les fabricants n’ont aucune obligation de le faire. Si l’assistance du fabricant
est requise pour remédier à des défauts dérivant d’une installation incor-
recte, cette assistance n’est pas couverte par la garantie. Les instructions
suivies. Une installation incorrecte peut endommager ou blesser des gens,
des animaux ou des biens. Le fabricant ne peut être tenu pour responsable
d’un tel dégât ou d’une telle blessure.
Aucun réglage/opération supplémentaire n’est requis pour faire fonction-
ner l’appareil aux fréquences nominales.

FR 20
Le four peut être placé en hauteur dans une colonne. Il est déconseillé d’ins-
taller le four sous la table de cuisson. Si cela est nécessaire, assurez-vous de
-
-
tilation dans l’espace du four pour permettre une circulation correcte de l’air
frais requis pour refroidir et protéger les parties situées à l’intérieur. Réalisez
AVERTISSEMENTS CONCERNANT LES RISQUES ÉLECTRIQUES
L’APP AREIL NE DOIT PAS ÊTRE RACCORDÉ À LA SOURCE D’ALIMENTA-
TION À L’AIDE D’UNE FICHE OU D’UNE PRISE, MAIS DOIT ÊTRE DIREC-
TEMENT RACCORDÉ AU SECTEUR D’ALIMENTATION. Le raccordement
Pour que l’installation soit conforme à la législation de sécurité en vigueur,
le four ne doit être branché que sur un disjoncteur omnipolaire, avec une
séparation de contact conforme aux exigences applicables à la catégo-
rie de surtension III, entre l’appareil et la source d’alimentation. Le disjonc-
teur omnipolaire doit supporter la charge maximale raccordée et doit être
conforme à la législation en vigueur. Le câble de terre jaune-vert ne doit pas
être interrompu par le disjoncteur. Le disjoncteur omnipolaire utilisé pour
la connexion doit être facilement accessible lorsque l’appareil est installé.
-
d’alimentation. La déconnexion doit être réalisée en incorporant un inter-
La prise doit être adaptée à la charge indiquée sur l’étiquette et doit avoir
le contact de terre raccordé et en état de fonctionnement. Le conducteur
normes en vigueur dans le pays d’installation. Le raccordement à la source
-
polaire, avec séparation des contacts conforme aux exigences de la caté-
Table of contents
Languages:
Other CANDY HOOVER Oven manuals

CANDY HOOVER
CANDY HOOVER Rosieres RFZ3170PN User manual

CANDY HOOVER
CANDY HOOVER Haier HWO60SM5S9BH User manual

CANDY HOOVER
CANDY HOOVER I-Turn 6 Series User manual

CANDY HOOVER
CANDY HOOVER FCXNE828X User manual

CANDY HOOVER
CANDY HOOVER ROSIERES User manual

CANDY HOOVER
CANDY HOOVER ROSIERES RFC303379PNI User manual

CANDY HOOVER
CANDY HOOVER FCS 100 User manual

CANDY HOOVER
CANDY HOOVER ROSIERES User manual