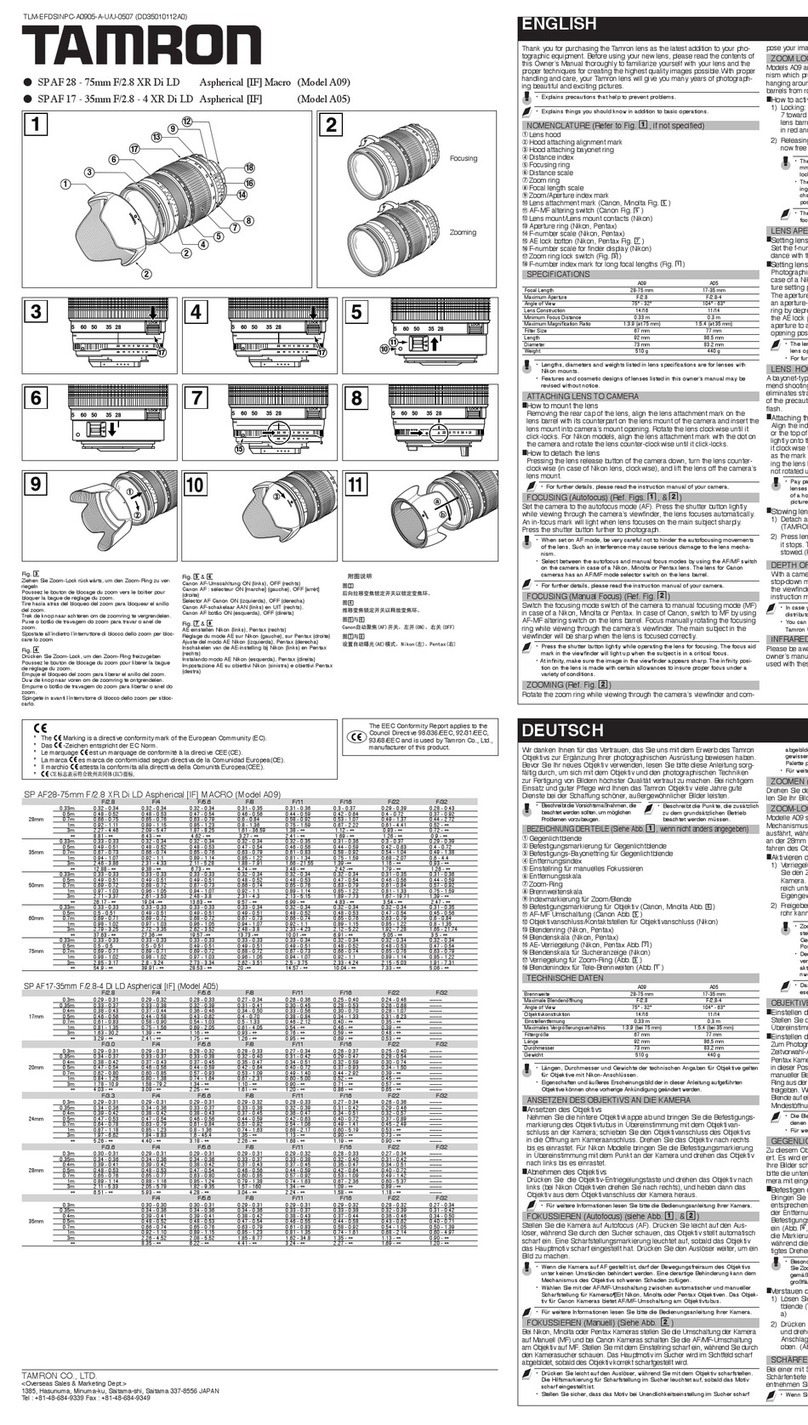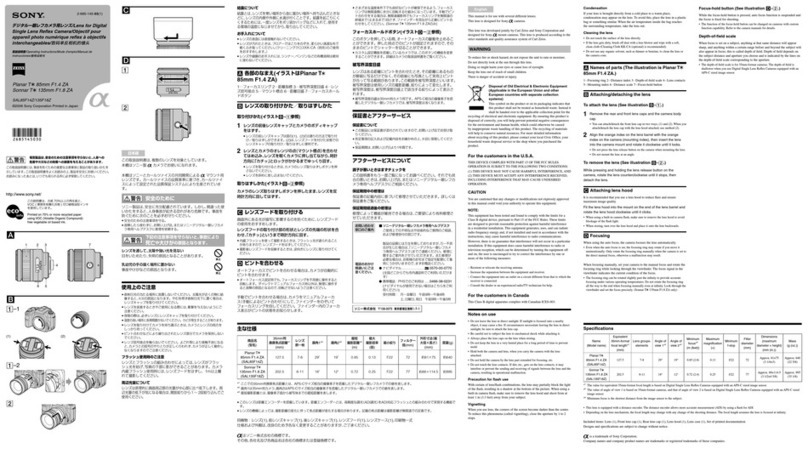
2. Setting the Focus Mode
To
shoot
in
autofocus (AF) mode, set the focus mode switch to AF
8.
To
shoot
in
manual focus (MF) mode, set the focus mode switch to MF, and turn the focusing ring to set the focus
8.
r:¥1
.·.··'.,,·
'·,·
'··'·
·,,·
'·,·
,·
,··
·,•
,.·
...
•
...
'·,
.·•
••.
•
..
•,
•.
.•,.•
'.W
,.'
•..
b,
..
,.·.·..
·
,
·
,.
·
,
•• ,
.
••
.
~~
..
'
.••,·.
•
.:
'
..
n'
..•.•
,
''
. .
•••·
.•
·.
t
·'
.·.,·
,·,·h
·····
.·
e
·,··
··
·.,
..
•·,,•.,·•.,•
..
•.,,
c
,,
..
·.·,.,,
a.·
..
.
,.
·
,·.
·.·.
''
..
,·m
··
···,
..
,.
,
..
•.•
.,·,.
e
..
•.,•
,.,
,
...
•
,,
'
..
,·
.r
.·•,,'
~
..
,,.,·
..
,,,
..
.A.•,.•
..
•.F
.,,·,'·,
·.•,
•·
.••,.
·•
,.·
·.·,
m.
,.•
.'.
,•
..,..
,•
••·
.••·.•·
.•
·.·
··
o
··
·
,•
·
,.••.••,
.
•,
•
·,.
·.
··
·..
·
,.
d,.,•'.',,
·.
,
'··.'·
,
'.
e··
·,
,
'.
•·
,···
·,
,·
.
,.'
·'
·
.•
·
,.
••.·,•.•
.
•·.·
·.
'
·,
·
··
s
..
,
.•.
'
'.
•.•.·
·
·
.
·
·.·
,
··
·
·
,·
···,
~
,
•
,
O
,,.
·,
,·.
··
,
·
,.
·
·,•,.,.,
.•
,.,,.,·,·,-,N,
·,
•
,.
·.··
,··
·
,··'·,·,,,,
..•,.,..
,•,.
e,·
,·
···'.•.
•
,.
•
,•,.
•,·
,.
·,·
,.••,
•
,.
•.•,•.•.$
,•
·,·.
•
,.·,
•.•
.•,
•.·•.
·.
H.
·,·
.'
,'.·
···
,•
.
,.·
•.•.·•,·,
.·
•.
O..
,.••.•
·
.·
·.
·
•.·•.•
·,
···.
'
~
~
f.
.
the
halfway
and
UJ
...
,
....
turntng
,
th~
focustnQ
r1ng
~
(J::ull
;
tlmfJ
mamualifocus)
be..
delayed.
3. Hood (Sold Separately)
The ES-68 hood can keep unwanted light out of the lens, and also protects the lens from rain, snow, and dust.
To
attach the hood, align the hood's attachment position mark with the red dot
on
the front of the lens, then turn the
hood
in
the direction of the arrow until the lens's red dot is aligned with the hood's stop position mark
e.
To
remove the hood, hold down the button on the side and turn the hood
in
the direction of the arrow until the position
mark on the hood aligns with the red dot
0.
The hood can be reverse-mounted on the lens for storage.
pict~
.
re
.,,
rnay
··
···
be
· ·
····
~
~
~~b~~~t~J1t)~~m~
···,·
i
'
S
·'···
not
•.
a~ac
~
~d
·····
properly.
~n~
~
~~E{chirg
or~~ta()hin~
·
,
·
t~
l
~
~~(lit
grasp
tne
,,
bas~
~f
t~e
h<;>od
··
~o
turf1
·
it.
To
prevent
deformation,
do
not
en
tna
rirl1
••••
~~
the
hood
t~
~~
~
~
~~
;
attached
tothe ·
camer8,\Yitl'l
the
hoodrev~
,
fli-rnounted,
remOve
the
t'}ood
before
removing
the
lens
frorrf
the
camera.
4. Filters (Sold Separately)
You
can attach filters to the filter mounting thread (049 mm)
on
the front of the lens.
11
••············
-~J~
····
o)J
·
e
······
~
i
·
l
·
!
~
•
r
••·•••
rnay
·····
be
••••••
attached.
5. Extension Tubes (Sold Separately)
You
can attach extension tube EF12
II
or EF25
II
for magnified shots. For shooting distance and magnification, see
the extension tube specifications.
eThe lens length is measured from the mount surface to the front end of the lens. Add 23.9 mm when including the
lens cap and dust cap.
e The size and weight listed are for the lens only, except as indicated.
e The extenders cannot be used with this lens.
8
The close-up lenses cannot be used with this lens. (The end of the lens will become heavy, causing the focus to
become unstable.)
e CASE (Sold Separately)
LP1
014
e All data listed is measured according to Canon standards.
e Product specifications and appearance are subject to change without notice.
This device complies with Part 15 of the FCC Rules. Operation is subject to the following two conditions: (1) This
device may not cause harmful interference, and (2) this device must accept any interference received, including
interference that may cause undesired operation.
Do not make any changes or modifications to the equipment unless otherwise specified
in
the instructions. If such
changes or modifications should be made, you could be required to stop operation of the equipment.
This equipment has been tested and found to comply with the limits for a class B digital device, pursuant to part 15
of the FCC Rules.
These limits are designed to provide reasonable protection against harmful interference
in
a residential installation.
This equipment generates, uses and can radiate radio frequency energy and, if not installed and used
in
accordance with the instructions, may cause harmful interference to radio communications.
However, there is no guarantee that interference will not occur
in
a particular installation. If this equipment does
cause harmful interference to radio or television reception, which can
be
determined by turning the equipment off
and on, the user is encouraged to try to correct the interference by one or more
of
the following measures:
• Reorient or relocate the receiving antenna.
• Increase the separation between the equipment and receiver.
• Connect the equipment into an outlet on a circuit different from that to which the receiver is connected.
• Consult the dealer or an experienced radio!TV technician for help.


