manuals.online logo
Brands
  1. Home
  2. •
  3. Brands
  4. •
  5. Canon
  6. •
  7. Digital Camera
  8. •
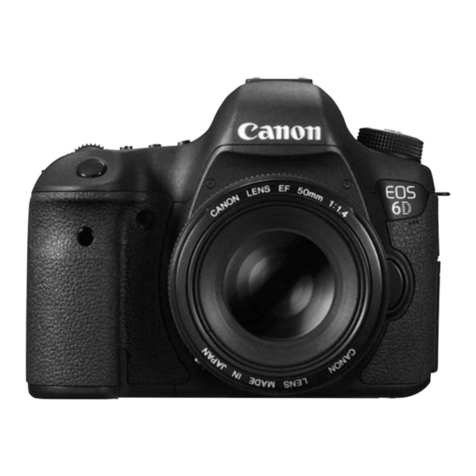
  9. Canon EOS 60D User manual

Canon EOS 60D User manual

CaHOH
I I
I !
I B
w
Setting Copyright information _
When you set the copyright information, it will be appended to the
image as Exif information.
'4 Select [Copyright information].
®_Under the [_f_] tab, select [Copyright
information], then press <__>.
_Select the desired option.
_ Select [Enter author's name] or
[Enter copyright details], then press
_+ The text entry screen will appear.
_ Select [Display copyright info.] to
check the copyright information
currently set.
_ Select [Delete copyright
information] to delete the copyright
information currently set.
,_ Enter text.
_ Refer to "Text Entry Procedure" on
the next page and enter the copyright
information.
_ Enter up to 63 alphanumeric
characters and symbols.
4,, Exit the setting.
_ After entering the text, press the
<MENU> button to exit.
108
Setting Copyright Information _
Text Entry Procedure
®_Changing the entry area
Press the <[_> button to toggle
between the top and bottom entry
areas.
_Moving the cursor
Press the <_1_> key to move the
cursor.
_ Entering text
In the bottom area, press the <AT > or < _1_ > key to select a
character, then press <__> to enter it.
_ Deleting a character
Press the <_> button to delete a character.
_ Exiting
After entering the text, press the <MENU>button to finalize the text
entry and return to the screen in step 2.
_ Canceling the text entry
To cancel the text entry, press the <IN}:O,> button to cancel it and
return to the screen in step 2.
_] You Can also enter the copyright information with EOS Utility (provided
software),
109
Setting the Color Space _
The color space refers to the range of reproducible colors. With this
camera, you can set the color space for captured images to sRGB or
Adobe RGB. For normal shooting, sRGB is recommended.
in Basic Zone modes, sRGB is set automatically.
_Select [Color space].
_ Under the [_=] tab, select [Color
space], then press <__>.
_et the desired color space.
®_Select [sRGB] or [Adobe RGB], then
press <__ >.
About Adobe RGB
This color space is mainly used for commercial printing and other
industrial uses. This setting is not recommended if you do not know
about image processing, Adobe RGB, and Design rule for Camera File
System 2.0 (Exif 2.21). The image will look very subdued in a sRGB
personal computer environment and with printers not compatible with
Design rule for Camera File System 2.0 (Exif 2.21). Post-processing of
the image with software will therefore be required.
[] _#If the image is captured with the Color space Set to Adobe RGB, the file
name will start with "_MG±" (first character is an underscore).
## The ICC profile is not appende d. See explanations about the !co prefi!e
in the Software Instruction Manual in the CD-ROM.
110
Advanced Operations
In Creative Zone modes, you
can set the shutter speed and/
or aperture to set the exposure
as desired. By changing the
camera settings, you can
obtain various results.
_ The # icon on the upper right of the page title indicates
that the function can be used only in Creative Zone modes
(P/ Tv/ Av/ M/ B).
_ After you press the shutter button haffway and let go, the
LCD pane[ and viewfinder information wH[remain displayed
for approx. 4 sec. ((_4).
®_Settab[e functions in Creative Zone modes are Hsted in
"Function Availability Table According to Shooting Modes"
on page 276.
P" Program AE
The camera automatically sets the shutter speed and aperture to suit
the subject's brightness. This is called Program AE.
* <P> standsfor Program.
* AE stands for Auto Exposure.
Set the Mode Dial to <P>.
Focus the subject.
_ Look through the viewfinder and aim
the selected AF point over the
subject. Then press the shutter button
halfway.
_y,,The AF point which achieves focus
flashes in red, and the focus
confirmation light <O> in the
viewfinder's bottom right lights (with
One Shot AF).
_y,,The shutter speed and aperture will
be set automatically and displayed in
the viewfinder and on the LCD panel.
Check the display.
_ A standard exposure will be obtained
as long as the shutter speed and
aperture display do not blink.
_,_ Take the picture.
_ Compose the shot and press the
shutter button completely.
112
P: Program AE
If the "30'' shutter speeG and the maximum aperture
blink, it indicates underexposure,
Increase the ISO speed or use flash.
Jfthe "8000" shutter speed and the minimum aperture
blink, it indicates overexposure.
Lower the ISO speed or use an ND filter (sold
separately) to reduce the amount of light entering the
lens.
r_q
L_ Differences Between <P> and <0> (Full Auto)
With <('7>, many functions such LheAF mode. drive mode. and built-in
flash are set automatically to prevent spoiled shots. The functions you can
set are limited. With < P >, only the shutter speed and aperture are set
automatically, You can freely set the AF mode. drive mode. built-in flash
and other functions {p.276).
About Program Shift
In the Program AE mode you can freely change the shutter speed and
aperture combination (Program) set automatically by the camera while
maintaining the same exposure. This is called Program shift.
To do th s. press the shutter button down halfway, then turn the <_>
dia! until the desired shutter speed or aperture is displayed.
Program shift is canceled automatically after the picture is taken
Program shift cannot be used with flash.
113
Tv: Shutter=Priority AE
In this mode, you set the shutter speed and the camera automatically
sets the aperture to obtain the standard exposure suiting the brightness
of the subject. This is called shutter-priorly AE. A faster shutter speed
can freeze the action or moving subject. Or a slower shutter speed can
create a blurred effect, giving the impression of motion.
*<Tv > stands for Timevalue.
Frozen action
(Fast shutter speed: 1/2000 sec.)
...............................................11
i ........ .....................J
Blurred motion
(Slow shutter speed: 1/30 sec.)
Set the Mode Dial to <Tv>.
Set the desired shutter speed.
_ While looking at the LCD panel, turn
the <_> dial.
_.,_,Focus the subject.
# Press the shutter button halfway.
_y,,The aperture is set automatically.
__., Check the viewfinder display and
shoot.
_ As long as the aperture is not
blnking, the exposure wil be
standard.
114
Tv: Shutter-Priority AE
UIf the maximum aperture blinks, it indicates
underexposure.
Turn the <_> dial to set a slower shutter speed until
the aperture stops blinking or set a higher ISO speed.
If the minimum aperture blinks, it indicates
overexposure.
Turn the <_> dial to set a faster shutter speed until
the aperture stops blinking or set a lower ISO speed.
_] Shutter Speed DispJay
The shutter speeds from "8000" tc "4" indicate the denominator of the
fractional shutter speed. For example. "128" indicates 1/125 sec. Also, "0"5"
indicates 0.5 sec. and "15'' is !5 sec.
115
Av" Aperture=Priority AE
In this mode, you set the desired aperture and the camera sets the
shutter speed automatically to obtain the standard exposure suiting the
subject brightness. This is called aperture-priority AE. A higher
f/number (smaller aperture hole) will make more of the foreground and
background fall within acceptable focus. On the other hand, a lower
f/number (larger aperture hole) will make less of the foreground and
background fall within acceptable focus.
*<Av > standsfor Aperture value (aperture opening).
Blurred backgroundSharp foreground and background
(With a high aperture f/number: f/32) (With a low aperture f/number: f/5.6)
Set the Mode Dial to <Av>.
Set the desired aperture.
_ While looking at the LCD panel, turn
the <_> dial.
_,_ Focus the subject.
¢_ Press the shutter button halfway.
_y,,The shutter speed is set automatically.
m__Rml_._ Check the viewfinder display and
shoot.
_ As long as the shutter speed is not
blinking, the exposure will be standard.
116
Av: Aperture-Priority AE
UIf the "30" shu[[er speed blinks, it indicates
underexposure.
Turn the <_> dial to set a larger aperture (smaller
f/number) until the blinking stops or set a higher ISO
speed.
If the "8000" shutter speed blinks, it indicates
overexposure.
Turn the <_> dial to set a smaller aperture (larger
flnumber) until the blinking stops or set a lower ISO
speed.
Aperture Display
The higher the f/number, the smaller the aperture opening will be. The
apertures displayed will differ depending on the lens. If no lens is attached to
the camera "00" will be displayed for the aperture.
Depth of Field Preview#
Press the depth-of-field preview button
to stop down the lens to the current
aperture setting. You can check the
depth of field (range of acceptable focus)
through the viewfinder.
®A higher flnumber Will make more of the foreground and baCkgrOund fail
within acceptable focus. However, the viewfinder will look darker.
® The depth-of-field effect can be Clearly seen on the Live View image as
you change the aperture and press the dePth:of-field preview button
(p.!52),
® The exposure will be locked (AE lock) while the depth-of-field preview
button is pressed. 117
M" Manual Exposure
In this mode, you set both the shutter speed and aperture as desired. To
determine the exposure, refer to the exposure level indicator in the
viewfinder or use a commercially-available exposure meter. This
method is called manual exposure.
*<M> standsfor Manual.
Standard exposure index _,_.y
Exposure level mark
Set the Mode Dial to <M>.
Set the shutter speed and
aperture.
_ To set the shutter speed, turn the
<_> dial.
_ To set the aperture, turn the <0 > dial.
If the aperture cannot be set, press the
<UNLOCK>button below the <G> dial
((_4), then turn the <_> dial.
Focus the subject.
_4 Press the shutter button halfway.
_y,,The exposure setting will be displayed in
the viewfinder and on the LCD panel.
_ The exposure level mark <|> indicates
how far the current exposure level isfrom
the standard exposure level.
,Set the exposure.
_ Check the exposure level and set the
desired shutter speed and aperture.
_ Take the picture.
_'_ If ihe its: Auio L!ghting optimizer] (Pii0i)iS s_tto anYihi_g 0ther than
[o!sab!e], the image may still !00k bright even if a darker exposure has been set,
118
E_3Selecting the Metering Mode _
You can select one of four methods to measure the subject brightness.
In Basic Zone modes, evaluative metering is set automatically.
Press the <m> button. (_6)
Select the metering mode.
_ While looking at the LCD panel, turn
the <_> dial.
C8_Evaluative metering
This is a general-purpose metering mode suited for
portraits and even backlit subjects. The camera
sets the exposure automatically to suit the scene.
Co3Partial metering
Effective when the background is much brighter than
the subject due to backlighting, etc. Partial metering
covers approx. 6.5% of the viewfinder area at the
center,
E_3Spot metering
This is for metering a specific spot of the subject or
scene. The metering is weighted at the center
covering approx. 2.8% of the viewfinder area.
E3 Center-weighted average metering
The metering is weighted at the center and then
averaged for the entire scene.
119
Setting Exposure Compensation _
Exposure compensation can brighten (increased exposure) or darken
(decreased exposure) the standard exposure set by the camera.
Although you can set the exposure compensation up to _+5stops in 1/3-
stop increments, the exposure compensation indicator on the LCD
panel and in the viewfinder can only display the setting up to _+3stops. If
you want to set the exposure compensation setting beyond _+3stops,
you should use the Quick Control screen (p.44) or follow the
instructions for [t_-" Exp. comp./AEB] on the next page.
Increasedexposureforabrighterimage_
Decreasedexposureforadarkerimage
32q s.sCq0e13
Set the Mode Dial to <P>, <Tv>,
or <Av>.
Set the exposure compensation
amount.
®_After pressing the shutter button
halfway ((_4), turn the <O> dial. If
the exposure compensation cannot
be set, press the < UNLOCK> button
below the <O> dial ((_4), then turn
the <_> dial.
Take the picture.
® To cancel the exposure
compensation, set the exposure
compensation amount back to <_>.
U If the [t_: Auto Lighting Optimizer] (p.101) is set to anything other than
[Disable], the image may still look bright even if a darker exposure has been set.
[]
120
The exposure compensation amount will remain in effect even after you
set the power switch to <OFF>.
Becareful not to turn the <0> dial andchange the exposure comDensatlo_
[naavertenl y. It is safesl to setthe [9: Lock Q] menuto [Enable]. Before
turning the <O > dial Dressthe <UNLOCK> button (_34), then turn the <O, >dial.
If the amount set exceeds +3 stops, the end of the exposure level
indicator will display <4> or <_>.
Auto Exposure Bracketing (AEB)*
By changing the shutter speed or aperture automatically, the camera
brackets the exposure up to _+3stops in 1/3-stop increments for three
successive shots. This is called AEB.
*AEBstandsforAuto ExposureBracketing.
AEB amount
2
Select [E×po. comp./AEB].
® Under the [O1"]tab, select [Expo.
comp./AEB], then press <@>.
Set the AEB amount.
® Turn the<_ > dialto setthe AEB amount.
® Press the <_1_ > keyto set the exposure
compensation amount, if AEB is
combined withexposure compensation,
AEB will be applied centering on the
exposure compensation amount.
® Press <_-_> to set it.
_y,,Whenyouexitthemenu,<_ >andtheAEB
levelwill bedisplayedontheLCDpanel.
Take the picture.
® Focusandpresstheshutterbuttoncompletely.
Thethreebracketedshotswillbetakenin this
sequence:Standardexposure,decreased
exposure,andincreasedexposure.
ca"ceHngAEB
® Follow steps 1 and 2 to turn offthe AEB amount display.
® AEB will be canceled automatically when you set the power switch
to <OFF> or when the flash is ready to fire.
Jftile drive mode is Set to <rl> you must press the Shutter button three
times. When <I::_H> or <_J> is set and you ho!d down the shutter button
complete!y, the three bracketed shots wi!lb e take0 cent!nuous]y. The0
the camera wi!! stop sho0ting. When <_®> or <_®2> is set, the three
bracketed shots will be taken continuously afte[ a 10-sec. or 2-sec: delay:
@ Neither flash nor bulb exposures can be used with AEB: 121
* AE Lock*
Use AE lock when the area of focus is to be different from the exposure
metering area or when you want to take multiple shots atthe same exposure
setting. Press the <--)(-> button to lockthe exposure, then recompose andtake
the shot. This is called AE lock. Itis effective for backlit subjects.
AELock Effects
1
2
Focus the subject.
_ Press the shutter button halfway.
_y,,The exposure setting will be displayed.
Press the <-)(- > button. (84)
_y,,The <=X=>icon lights in the viewfinder
to indicate that the exposure setting is
locked (AE lock).
_ Each time you press the <-)(- > button,
it locks the current auto exposure
setting.
Recompose and take the picture.
_ If you want to maintain the AE lock
while taking more shots, hold down
the <--X-> button and press the shutter
button to take another shot.
.........................................XE ....................
ES_* 3ointthat achieved focus. Iselected AF point.
EO_Eo_E_ AE lock is applied at the center AF point.
* Whenthelens'focusmodeswitchissetto<MF>,AElockisappliedatthecenterAFpoint.
122
B: Bulb Exposures
When bulb is set, the shutter stays open as long as you hold down the
shutter button completely, and closes when you let go of the shutter
button. This is called bulb exposure. Use bulb exposures for night
scenes, fireworks, the heavens, and other subjects requiring long
exposures.
...............................................J
buLb _I(
Elapsed exposure time
Set the Mode Dial to <B>.
Set the desired aperture.
_ While looking at the LCD panel, turn
the <_> or <0> dial.
Take the picture.
_ While you hold down the shutter
button, the exposure will continue.
_y,,The elapsed exposure time will be
displayed on the LCD panel.
OSince bulb exposures produce more noise than usual, the image might
look a little grainy.
When [._C.Fn II -1: Long exp. noise reduction] is set to [1: Auto] or
[2: On], noise generated by the bulb exposure can be reduced (p.254_.
For bulb exposures, using a tripod and Remote Switch (p.124) is
recommended.
You can also use a remote controller (sold separately, p." 26) for bulb
exposures. When you press the remote controller's transmit button, the
bulb exposure will start immediately or 2 sec. later. Press the button
again to stop the bulb exposure. 123
B: Bulb Exposures
Using the Eyepiece Cover
if you take a picture without looking at the viewfinder, light entering the
eyepiece can throw off the exposure. To prevent this, use the eyepiece
cover (p.23) attached to the camera strap.
During Live View shooting and movie shooting, attaching the
eyepiece cover is unnecessary.
_ Remove the eyecup.
_ Push the bottom of the eyecup to
remove.
_'_ Attach the eyepiece cover.
_ Slide the eyepiece cover down into
the eyepiece groove to attach it.
ill Using the RemOte Switch
Remote Switch RS-60E3 (sold separately) comes with an approx.
60cm!2.0ft cord. When connected to the camera's remote control
terminal, Remote Switch RS-60E3 can be used to press the shutter
button halfway and completely.
124
Mirror Lockup _
Although using the self-timer or Remote Switch can prevent camera
shake, using mirror Iockup to prevent camera vibrations (mirror shock)
can also help when you use a super telephoto lens or shoot close ups
(macro photography).
When [...Q.C.Fn III -5: Mirror Iockup] is set to [1 :Enable], shooting
with mirror Iockup will be possible (p.257).
_Focus the subject, then press the shutter button
completely.
_y,,The mirror wiii swing up.
_Press the shutter button completely again.
_y,,The picture istaken andthe mirror goesback down.
UIn very bright light such as at the beach or a ski slope on a sunny day,
take the picture promptly after mirror lockup.
Do not point the camera toward the sun. The sun's heat can scorch and
damage the shutter curtains
If you use the self-timer and mirror lockup in combination with a bulb
exposure, keep pressing the shutter button completely (self-timer delay
time 4-bull exposure time). If you let go of :he shutter button during the
self-timer countdown, there will be a shutter-release sound, but no
picture will be taken
® When [1: Enable] is set, single shooting will take effect even if the drive
mode is set to continuous.
When the self-timer isset to <_®> or <_®2>, the picture will be taken
after 10 sec or 2 sec. respectively.
If 30 seconds elapse after the mirror has locked up, it will go back down
automatically. Pressing the shutter button completely again locks up the
_nirror again.
For mirror Iockup, using Remote Switch RS-60E3 (sold separately) is
recommended (p.124).
You can also Iockup the mirror and shoot with a remote controller [sold
separately, p.126). Setting the remote controller to a 2-sec. delay is
recommended.
125
Remote Control Shooting
With Remote Controller RC-6 (sold separately), you
can shoot remotely up to approx. 5 meters/16.4 feet
from the camera. You can either shoot immediately or
use a 2-sec. delay.
You can also use Remote Controller RC-1 and RC-5.
_ Focus the subject.
2Set the lens focus mode switch to
<MF>.
_ Youcan also shootwith <AF>.
Press the <DRIVE>button. (_6)
4
control
sensor
5
Select the self-timer.
®_Look at the LCD panel and turn the
<_> dialto select <_®> or <_®2 >.
Press the remote controller's
transmit button.
_ Pointthe remote controller toward the
camera's remote control sensor and
press the transmit button.
_* The self-timer lamp lights and the
picture is taken.
camera misOperation may occur near Certain types of fluorescent lightS,
During wireless remote control, try to keep the camera away from
fluorescent !ight sources.
126

Other manuals for EOS 60D

13

Other Canon Digital Camera manuals

Canon PowerShot ELPH 330 HS User manual

Canon

Canon PowerShot ELPH 330 HS User manual

Canon PowerShot SD580 IS User manual

Canon

Canon PowerShot SD580 IS User manual

Canon PowerShot A420 User manual

Canon

Canon PowerShot A420 User manual

Canon PowerShot S100 DIGITAL ELPH Use and care manual

Canon

Canon PowerShot S100 DIGITAL ELPH Use and care manual

Canon PowerShot D30 User manual

Canon

Canon PowerShot D30 User manual

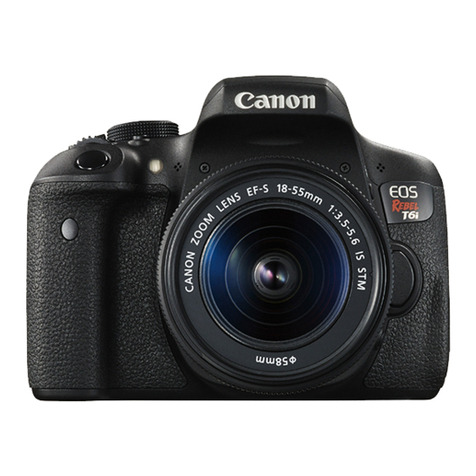
Canon EOS REBEL T6i User manual

Canon

Canon EOS REBEL T6i User manual
Canon POWERSHOT A630 User manual

Canon

Canon POWERSHOT A630 User manual

Canon EOS 70D Installation guide

Canon

Canon EOS 70D Installation guide

Canon EOS Rebel T4i User manual

Canon

Canon EOS Rebel T4i User manual

Canon EOS 20D Digital User manual

Canon

Canon EOS 20D Digital User manual

Canon EOS REBEL T2I User manual

Canon

Canon EOS REBEL T2I User manual

Canon PowerShot Elph 190 S User manual

Canon

Canon PowerShot Elph 190 S User manual

Canon EOS 5D Mark III User manual

Canon

Canon EOS 5D Mark III User manual
Canon 3633B005 User manual

Canon

Canon 3633B005 User manual

Canon EOS C500 User manual

Canon

Canon EOS C500 User manual

Canon EOS Rebel SL1 18-55mm IS STM Kit User manual

Canon

Canon EOS Rebel SL1 18-55mm IS STM Kit User manual

Canon EOS 5D Mark 2 s Operation instructions

Canon

Canon EOS 5D Mark 2 s Operation instructions

Canon EOS 750D User manual

Canon

Canon EOS 750D User manual

Canon PowerShot G12 User manual

Canon

Canon PowerShot G12 User manual

Canon PowerShot 350 User manual

Canon

Canon PowerShot 350 User manual

Canon powerShot SX720 HSsd500 User manual

Canon

Canon powerShot SX720 HSsd500 User manual

Canon WP-DC35 User manual

Canon

Canon WP-DC35 User manual

Canon EOS EOS 30D Quick reference guide

Canon

Canon EOS EOS 30D Quick reference guide

Canon PowerShot N2 User manual

Canon

Canon PowerShot N2 User manual

Popular Digital Camera manuals by other brands

Sony Cyber-Shot DSC-HX90 Service manual

Sony

Sony Cyber-Shot DSC-HX90 Service manual

Yangda Sky Eye-30HZ manual

Yangda

Yangda Sky Eye-30HZ manual

AOS X-PRI manual

AOS

AOS X-PRI manual

Casio EX-FH100BK brochure

Casio

Casio EX-FH100BK brochure

Garmin VIRB Ultra 30 Quick start manual

Garmin

Garmin VIRB Ultra 30 Quick start manual

FujiFilm Finepix L50 Series owner's manual

FujiFilm

FujiFilm Finepix L50 Series owner's manual

Fracarro CB-700WDR user manual

Fracarro

Fracarro CB-700WDR user manual

Nikon J3 user manual

Nikon

Nikon J3 user manual

Trust PowerCam Optical Zoom 970Z manual

Trust

Trust PowerCam Optical Zoom 970Z manual

Minolta RD-175 instruction manual

Minolta

Minolta RD-175 instruction manual

Sony DSC-V1 Operating Instructions (English) Camera guide

Sony

Sony DSC-V1 Operating Instructions (English) Camera guide

Velleman CAMCOLVC2N user manual

Velleman

Velleman CAMCOLVC2N user manual

Sony DSC-H50 instruction manual

Sony

Sony DSC-H50 instruction manual

Dahua Technology DHI-ITC237-PW6M-LZF1050 user manual

Dahua Technology

Dahua Technology DHI-ITC237-PW6M-LZF1050 user manual

Kodak EasyShare CD22 user guide

Kodak

Kodak EasyShare CD22 user guide

Casio Exilim EX-S8 user guide

Casio

Casio Exilim EX-S8 user guide

Olympus T-10 Manuel d'instructions

Olympus

Olympus T-10 Manuel d'instructions

Vivitar ViviCam F328 user manual

Vivitar

Vivitar ViviCam F328 user manual

manuals.online logo
manuals.online logoBrands
  • About & Mission
  • Contact us
  • Privacy Policy
  • Terms and Conditions

Copyright 2025 Manuals.Online. All Rights Reserved.