capello Sleep & Charge CR22 User manual

ooooo
Sleep & Charge
dual alarm clock with
dual USB charging

CAUTION: TO REDUCE THE RISK OF ELECTRIC SHOCK, DO NOT REIVOVE COVER (OR BACK).
NO USER-SERVICEABLE PARTS INSIDE. REFER SERVICING TO QUALIFIED SERVICE PERSONNEL.
DANGEROUS VOLTAGE: The lightning flash with arrowhead symbol, within an equilateral triangle
is intended to alert the user to the presence of uninsulated dangerous voltage within the product's
enclosure that may be of sufficient magnitude to constitute a risk of electric shock to persons.
ATTENTION: The exclamation point within an equilateral triangle is intended to alert the user to
the presence of important operating and maintenance (seruicing) instructions in the literature
accompanying the appliance.
WARNING: Changes or modifications to this unit not expressly approved by the party responsible for compliance
could void the user's authority to operate the equipment.
ATTENTION: POUR EVITER LES CHOC ELECTRIOUES, INTHODUIRE LA LAME LA PLUS LARGE DE LA FICHE DANS
LA BORNE CORRESPONDANTE DE LA PRISES ET POUSSER JUSQU'AU FOND.

NoTE: This equipment has been lested and found to comply with the limits for a class B digital device, pursuant to
Part 15 of the Fcc Rules. These limits are designed to proviie reasonable protection againJt harmful interference in a
residential installation' This equipment generates, uses and can radiate radio frequ*"v?"isy;nj, if not instaled and
used in accordance with the instructions, may cause harmful interference to radio communications. However, there is no
guarantee that interference will not occur in a particular installation. lf this equipment does cause harmful interference to
radio or teleYision reception, which can be determined by turning the equipment otf and on, tne usei ls encouraged to try
to correct the interference by one or more of the following rn"a"ir"s,
. Reorient or relocate the receiving antenna.
. lncrease the separation between the equipment and receiver.
' connect the equipment into an outlet on a circuit different from that to which the receiver is connected.
' Consult the dealer or an experienced radio/TV technician for help.
compliance information: This device complies with Part 15 of the Fcc Bules. operation is subject to the following two
conditions: (1 ) this device may not cause harmful interference, and (2) this device rr"t """"pt inv interference received,
including interference that may cause undesired operation.
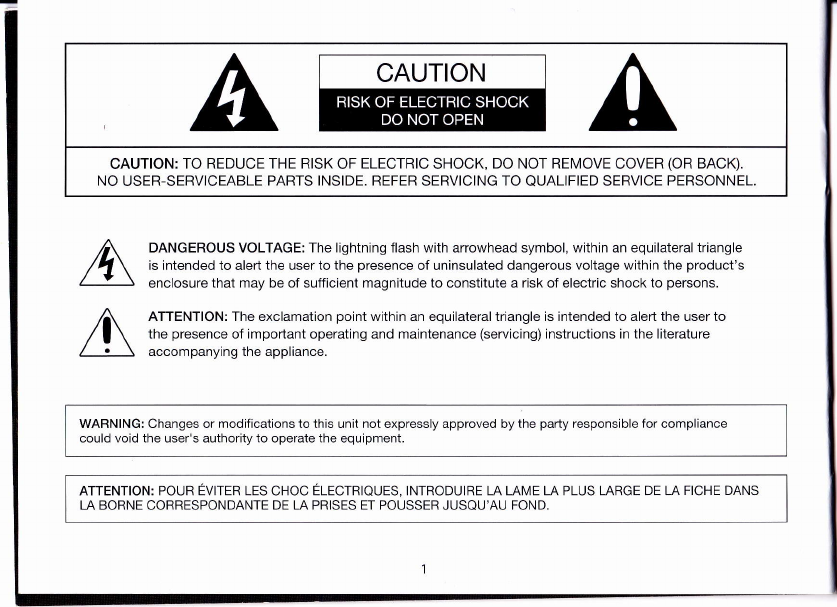
wARNING: To PREVENT F|RE oR sHocK HAZARD, Do Nor EXposE THrs uNrr ro RA|N oR MorsruRE.
SURGE PRorEcroRs: lt is recommended to use a surge protector for Ac connection. Lightning and power surges
ARE NOT covered under warranty for this product.
cAN rcES-3 (B)/ NMB-3 (B)

a. Do not expose ihis unit or the Ac/Dc adaptor to dripping or splashing water' Keep liquid-filled objects
such as vases, away from this unit and AC/DC adaptor'
b.ToensurethatthisunitiScompletelydisconnected,unp|ugitfromthewall'
c. Ensure that the AC/DC adaptor is easily accessible'
d. Please note the information printed underneath the unit'
e.Batteriesshouldnotbeexposedtoexcessiveheatsuchasdirectsunshine'fire'etc'
f.DonotimpedetheVentilationofthisunitbycoveringtheVentilationopeningsWithitemssuchas
newspapers, table-cloths, curtains, etc'
g. Keep open flames, such as lighted candles, away from this unit'
h. Do not place this unit in closed bookcases, racks, or other spaces without proper ventilation'
i.USeonlythesameorequivalenttypebatteriesaSthereisadangerofexplosioniftheincorrectbatteries
are used or they are installed incorrectly'
j. Dispose of batteries properly according to environmental regulations'

!i
O inside the box
cR22 sleep & charge dual alarm clock with dual USB charging, AC power adapter and user guide.
() AC power source
lnsert the small end of the AC adaptor into the DC ln Jack
(loc€ted on the rear of the unitl. Cdnneci il; Jt[; ;;;i;
wall outtet providing 1OO-240V AC, SO/OO Hi. - - -
The output of the provided AC/DC Adaptor is DC SV 2.2A.
not6i Disconned both ends of tho power cord.wh€n not in use.
Use onty the suppleo nc aoaptor,,iitn tre tiiili;;#;:,"""
AC ln - 100-240V AC, solooH, I oc Ort _ sti.i;i " ""-"-
adjusting the volume
Press the vol + or vol - button repeatedry to increase or decrease the vorume to a safe
listening level.
AC outlet
AC/DC adapter ptug

location of controls
O Audio oN / oFF
O TUNE DOWN / HOUR
O TUNE UP / MIN
@ Speaxer
O VOLUME-
@ VOLUME +
o cLocK sET (audio'off')
AM/FM/L|ne-ln (audio'on')
@ ALARM 1
O ALARM 2
@ NAP/SLEEP
(D LED Display
@ SNOOZE/BRIGHTNESS
(E RADIO PRESETS
sDrod.oF
*o'o.e,,*-@ | u*:*" l nnoro euzz ser@

9gooooooooooooooooooo
ooooooooooooooooooooo
99goooooooooooooooooo
ooooooooooooooooooooo @ USB charging ports
@ Battery compartment
(bottom of unit)
DC Power adapter jack
Line-ln jack
FM Antenna wire
@
a
@
a
I
,|
LED Display indicators
O RmRv r
@ ALARM 2
@ SLEEPi NAP/SNOOZE
@ nudio oN / oFF
@ Low Battery
@ PM Time Setting
EE@O
I
I0
-
Al.=

A backup battery installation
V rwo (2) ,AAA] size batteries (sord separatery) shourd be used to backup the crock and keep the
atarm settings in memory ouring tne event tne ic;d;tJ. ;t;.nnected or there is power failure'
O Open the battery door by pushing in on.the tabs' then removing the door'
(alnserttwo(2)AAAbatteriesfollowingthecorrectpolarityindicatedinthebatterycompartment.
! Reptace tne oattery door back on the compartment'
notes:ThebatteriesareusedtobackuptheclockandalarmtimeswhentheAcadaptorisdisconnectedorthere
ls a power taiture''i"trliin"ltjteritt "t" tt"ommended forthe longesi backup time'
The battery indicator **iti iltuminat" on tne display when there are no batteries or whgn the batteries are low
n*fi*;;:*u,l;ry, do not disconnect the Ac power adapter otherwise the current time, alarm and station
Presets will be erased'
battery precautions when using batteries in this device:
. Walning - Danger ol explosiqn if batteries are incorrectly replaced Replace only with the same or equivalent type'
: :*":*tt,''*i*'iff"Ti;fflTi3il'liil;'*""*'teriesasindicatedinthobattsrvcompartment'
. g1"","* 3il5y"ffilfffil-1lil:1l"tli'i"tllii;*"',.e' Recharseabre and carbon-zinc) or ord batteries with
, fi;::f,:; ," .", to be used for a tong period of time, remove the batteries to prevent damag€ or iniurv from
. B:TIl'Jil?J];llJ3?1"no, n"t'nt"nded to be recharsed - it can overheat and rupture'
' A"ir"ti,'d"it"w tan-ufacturer's directions)

o
o
o
@
I
t
I
i
i
I
$
l
@ setting the clock
O Ptug in the CR22 but leave the power 'OFF'.
@ Press and hold the CLOCK SET button until the display begins to flash.
@ Then press the TUNE DOWN / HOUR button repeatedly to advance to the correct current hour
@ Next press the TUNE UP/ MIN button repeatedly to advance to the correct current minute.
@ When you reach the correct current time, press the CLOCK SET button again to confirm.
note: lf you do not press any button tor about 1 minute while setling the clock, the clock setting will be canceled.
@ setting the alarm
Slide the ALARM 1 switch to the "SET" position and the disptay will begin flashing.
Press the TUNE DOWN / HOUR or TUNE UP / MIN buttons to set the desired alarm time.
Next press the VOLUME + or VOLUME - button to set the maximum alarm volume.
slide the ALARM 1 switch to RADIo or BUZZ position to complete the process, the alarm time
will disappear and the clock and alarm indicator will appear in the display.
notes: Befor; sotting the alarm, make sure that the clock time is set correcily (see ,,Setiing the clock,,).
To wake to lhe radio alarm, first tune to the desked station and adjust the volume (soe 'Playing the radio').
To set ALARM 2 simply follow the same directions above but use the ALARM 2 switch.

silencing the alarm
QWhentheALARMlsounds,slidetheALARMlswitchtothe.oFF,positiontosilencethealarm.
OToreactivateALARMlthenexttimeitisneeded,slide-theALARMlSwitchtothe..RADlo''or
,,BUZZ" position ana tne nr_inirr I Lln *irr appear on the display, then check to make sure the
alarm time is correct'
note:TosilenceorreactivateALARM2simplyfollowthesamedirectionsabovebutusetheALARM2switch.
snooze
oWhenthealarmsounds,pressingtheSNoozE/BRlGHTNEssbuttonwilltemporarlysilence
- ii" "r"i.. ft,e alarm will sound a-gain after approximently 10 minutes.
oRepeatedlypresstheSNoozE/BRlGHTNEssbuttontocyclethroughandSelectoneofthe
snooze presets. r* 10 * 20 * 30 - 4O - 50 + 60 -
rl
notesl once the snooze function has been activated, press ihe sNooZE / BRIGHTNESS button anytime and
the disotav wiil show u," |."|1riiiii.liii"ir'i"-."n!i,"iti'olv'it'i' tt'" sttooze I eRte HrNess button to adjust or
modityth6 cunent snoozetime setting'
8l setting the brightness
wThere are three revels of display brightness available (the default setting is high)' with the unit 'oFF"
press the sNoozi) eRGirilesSbutton to cycle through and select the desired setting'
-* H|GH .+ MEDIUM -+ LOW -_l
9

setting the sleep timer
The CR22 features a sleep timer to allow you to fall asleep while listening to the radio. After the
preset time duration ends, the radio will automatically shut off.
O Witn tne unit powered 'ON', press the NAP / SLEEP button. The SLEEP icon and "15" will appeat
on the display briefly indicating the unit will turn off after 15 minutes.
(O To increase the sleep time duration, up to a maximum of 90 minutes, repeatedly press the NAP /
SLEEP button to select one of the following sleep time presets.
r+15+30+60+90+OFI
| - rc+ru+ou-Yv+vrr_l
With the sleep timer active, press the NAP / SLEEP button once to view the remaining sleep time.
To cancel the sleep timer function, repeatedly press the NAP / SLEEP button until "OFF" appears
in the display.
o
o
.A
@ setting the nap timer
O With the CR22 powered 'OFF', press the NAP / SLEEP button once to activate the nap timer.
lD Repeatedly press the NAP / SLEEP button to cycle through and select one of the following nap
time presets. r*15*30+60*90*OFF-1
lt
O With the nap timer active, press the NAP / SLEEP button once to view the remaining nap time.
@ The buzzer will sound at the end of the nap duration. Press the NAP / SLEEP button to silence
the buzzer. To cancel the nap timer function before the-buzzer sounds, repeatedly press the
NAP / SLEEP button until "OFF" appears in the display.
10

@ plavine_ le r:*
With the CR22 plugged in and powered 'ON" press theAM^/ FM / Line-ln button then select
O With the CR22 plugged In ano oowelEu vrr ' 1,r eee u rv
- i-nf or nfrl and ihe irequency indicator will appear on the display.
, ;':-";;,;"","", irJir-; up / MrN or rUNE DowN / HouR button to manual' adjust the
- irring on tne display until the desired station appears' , ,h+ir +ha
;",."l;;;;;, ;;"";;. hord the rUNE uI IUlL:iIy):,R:y*'"i:."::J::iH[I"
liJ'il,l"llill?;:::,li#i;:i;:eth;il; T9,lHi::'":iJ'::i:"1fli.:',""'":T:X[T;
:f5lit":lT$["";?fiil:';:#il^f"-pi*L",,niirthe desired station appears on the disprav'
notes: Fully extend the FM wire antenna to increase reception sensitivity'
Hil# il;;iluv.r. o, ,oiirJ pnon". u*"v tro. tn. FNI antenna as this mav cause interference'
Do not place the Fru "nt"nn" n.ui iiJnC po*"r iorptor as this may lead to reception interference'
@ setting radio Presets
ro preset a radio station to memorv, first follow the steps above.to tune " ]i1il^1..11 131."^l;
@ To preset a radio statlon ro [leIIrury' rrrrL rurrvv'
O Press and hold the RADIO PRESET: qYT?l,tt^:111e a pre.set for the current station' "P" will
.pp".i""a ;*+'; lthe preset number) will blink on the display
ilffffi ;rft Jt",l'i* "' iu*E DowN / HouR qytl:l.l?^:"1* n:'"".:":*Ti"J.1'=,1"13);
o F[:: lffi INBfu"JJJBI+!'J,",,:; ;n"#';J;H,';iil-J;,;"; Ge station wir be saved into
o
."toty. n"p""t these stefs for up td 10 presets' as desired'
trl To recall a preset station, repeatedly press the RADIO PRESETS button until the desired preset
- number appears in the display and the station tunes ln'
note:Savinganewstationpres€tinthesamepositlonasapreviouslysavedstationWillreplacethg
pi"Jouirv "iot.o ttation for that presot number'
11
L

USB charging ports
The CR22 features two(2) USB ports located on the rear of the unit (see ,,location of controls,,).
These usB ports support powering and_charging roria"ui""r including iphones, ipads, ipods,
E-readers, digital cameras and moie (USB ca"Ote"s sotO separatetyl.
@ changing the input source
with the cR22 powered 'oN" repeatedry press the AM / FM / Line-rn button to change the input
source to cycle bewteen AM Radio, FM Radio or AUX lN.
3 aux-in connection
(D To risten to music from an exler.n?r audio device (e.g. ipad, ipod shuffre, mobire phone, Mp3
player, digitar media prayer, etc.), turn on your cn)ianj po*"|. on the externar audio crevice.
@ rnsert one end of a 3.5mm audio cabre (sord separatery) into the Line-out / Headphone jack of
your externar audio device and the other end inio tne [tfug-tru ;act< on the cRzi. -
O Press the AM / FM / Line-ln button to switch the input source to AUX mode.
o select the music you wish to risten to on your externar audio device then press pray and sound
will be projected through the GR22 speaker.

specifications
general: Dc 5V 2.2AAdapter (center Positive)
ll""ii", *;; ..........""""""""""""""""""""""""""""""""""""""' ' 1oo-240v - 50/60H2 0'8A
Battery Backup """""""""2x 1'5V nAM,size batteries
radio section: 87'5 - 1oB MHz
'i,l*n:::ll$ :: *'.171oKHz
Specifications are subiect to change without notice'
L

l
l
t_
FAQs
Q: Why is the USB port not charging my devices?
A: Make sure that the USB plug is firmly connected into both ports of the cR22 and your USB
compatible device and that the cR22 is plugged in to a power source as the USB charging
ports will not operate from the backup batteries.
Q: Why will my Nook / netbook device not charge when I connect it to the USB charger?
A: Even though it may be USB compatible, some devices, including the Nook and some larger
tablets/neibooks require a higher output to charge them than the 5V/1.0A USB ports on the
cR22. Please check your device manufacturer's charging specifications as you may be
required to only use the charger supplier with your device at time of purchase.
Q: How do lturn the alarm(s) off?
A: Slide the sounding ALARM 1 or ALARM 2 switch to "OFF" to silence the alarm.
Q: What if I don't want the alarm(s) to go off on the weekends?
A: You can disable the alarm(s) on days you do not need it by sliding the ALARM 1 / ALARM 2
switch to the ,,oFF" position. The ALARM 1 / ALARM 2 icons will disappear from the display,
indicating that the alarm is turned off and will not sound until you reactivate the alarm'
Q: The display is flashing "12:O0"?
A: This appears during the initial setup or could be a result of an extended power output or if
the cR22 was unplugged for an extended period. simply follow the steps in the 'setting the
clock' section of this user guide to reset the current time.
For further assistance, please visit our website at hellocapello.com or contacl
customer service at [email protected] or'l-855-896-1795
14

Table of contents
Other capello Alarm Clock manuals