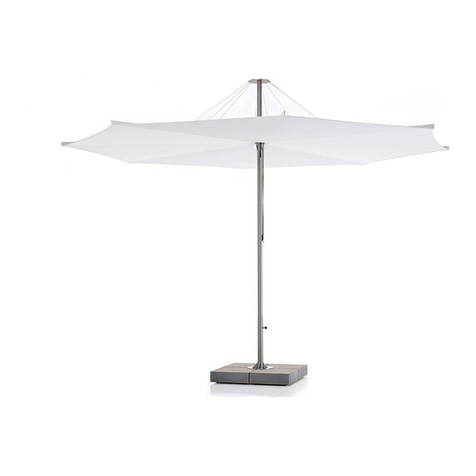
CARAVITA RIVIERA 2012 User manual

RIVIERA 2012
Handling
Instructions
Page 2
Bedienungs-
anleitung
Seite 7
Instructions pour la
manutention
Page 12
Instrucciones para
la operación
Página 17

RIVIERA 2012 Page / Seite / Page / Página 2
CAUTION !
IMPROPER USE OF THIS UMBRELLA MAY LEAD TO PROPERTY DAMAGE OR SERIOUS INJURY. THEREFORE, YOU MUST
CAREFULLY READ AND FOLLOW THE ASSEMBLY AND INSTALLATION INSTRUCTIONS AND HEED THE FOLLOWING
WARNINGS:
• DO NOT use the umbrella in high winds!
• DO NOT use or shelter under the umbrella during electrical storms!
• DO NOT sit or climb on the umbrella!
• DO NOT leave children unsupervised in proximity to the umbrella!
• DO NOT use this umbrella other than for its intended purpose!
• DO NOT use the umbrella without its base!
• DO NOT modify this umbrella in any way!
FAILURE TO USE DUE CARE OR TO FOLLOW THE INSTRUCTIONS OR TO HEED THESE WARNINGS MAY RESULT IN
PROPERTY DAMAGE OR SERIOUS INJURY AND MAY VOID THE WARRANTY!
UNPACKING THE UMBRELLA
Inspect all received boxes for damages (opened ends, gouges, scratches, tears or any holes). If there is any sign of
damage please contact your retailer or Caravita Customer Service immediately and make notation on the BOL.
Using scissors or a box cutter cut adhesive tape and plastic straps. Be careful not to damage the umbrella inside the
box.
DO NOT DISCARD OF YOUR PACKAGING MATERIALS UNTIL ALL ITEMS HAVE BEEN ABLE TO BE INSPECTED. IT IS
IMPORTANT TO NOT DAMAGE THE CARDBOARD WHEN OPENING AS CARDBOARD SHOULD BE FOLDED
TEMPORARILY AND STORED UNTIL ALL ITEMS ARE REVIEWED AND DEEMED IN PERFECT CONDITION.
MOVING THE UMBRELLA
The umbrella should be carried by two people. One at each end of the umbrella. Please hold the umbrella with both
hands. DO NOT DRAGTHE UMBRELLA BY PULLINGTHE PROTECTION BAG ORTHE FABRIC! This may cause tears.
Do not hold on to the struts when carrying the umbrella. They might bend.

RIVIERA 2012 Page / Seite / Page / Página 3
SETTING UP THE UMBRELLA
Prepare your mobile stand or ground anchor as instructed by their corresponding manual and have the required
accessory hardware ready for install. All sheet stands that use pavers should have the appropriate pavers installed
and llable stands should be lled with appropriate weighted material.
For safety-purposes, two people should set up the umbrella.
Remove the protection bag before installing if
you do not have a push-rod which enables you to
remove the protection bag from a set up umbrella.
Before setting up the umbrella, make sure the area is clear of people and objects underneath that could be harmed
or damaged and or could cause damage to the umbrella.
Please be aware, that the umbrella is very tall, and thus hard to balance in an upright position. For this reason hold
the umbrella rmly when installing to reduce the risk of injury.
Bring the bottom of the umbrella to the stand. One person guides the mast into the tube of the stand while the
other person pushes the umbrella into an upright position. The pole should slide into the tube of the stand. Secure
with tightening knobs. Alternatively, one person can press the mast to the ground (creating a stopper for the mast
with their foot) while the second person pushes the umbrella into an upright position next to the stand. Then the
umbrella is lifted into the tube of the stand.
The purpose of the plastic mesh attached to the struts is to provide protection to the shade against
damage during transport. Once the umbrella is open, the mesh can be removed carefully with scissors or
a knife. Be careful not to damage the shade!

RIVIERA 2012 Page / Seite / Page / Página 4
Make sure that the umbrella mast
in the stand is secured rmly by the
tightening knobs.
OPENING THE UMBRELLA
Remove the protection bag, if not
done already, and the binding belt.
Loosen all 8 struts by pulling them
slightly outward at the end of the
strut. During transport it is possible
that the struts can wedge together,
which can hinder opening the
umbrella.
When the umbrella is properly
secured, grasp the end of the rope
below the cover and begin pulling
the shade open until the fabric is
taut.
Then, insert the locking pin into one
of the holes in the umbrella mast.
The umbrella should be easy to
open. Be cautious when opening
the shade if around other persons.
CAUTION:
IF THE UMBRELLA DOES NOT OPEN
EASILY, DO NOT USE FORCE!
If the umbrella does not open immediately close the
umbrella. Loosen the struts once more, make sure
that none of them have folded inward. Try to open the
umbrella once again. If the error cannot be detected ple-
ase contact your dealer or the Caravita customer service.
DO NOT USE FORCE!
The excess rope can be secured to
the cleat. Cleat only at umbrellas up
to 4m round or 3x3m square.

RIVIERA 2012 Page / Seite / Page / Página 5
CLOSING THE UMBRELLA
Secure the cover with the binding
belt to keep from moving around in
the wind. Movement in the canopy
cover can chafe and can wear itself
through at the frame.
Unrig the rope from the cleat and
hold it taut with one hand while
removing the locking pin from the
umbrella pole.
Before closing the umbrella com-
pletely, pull out the fabric from
between the struts and fold it
around the umbrella so it cannot
be damaged from getting caught
between the struts.
B8
Let the umbrella descend slowly.
Pull the protective bag over the
umbrella. The optional push-rod
can be used to assist in installing.

RIVIERA 2012 Page / Seite / Page / Página 6
MAINTAINING THE CANOPY
Wet umbrellas should never be stored or kept in their protection bags for long periods of time.
Fallen leaves and other foliage should be removed immediately to avoid staining or fungus growth on fabric.
Microorganisms (mold, bacteria, blue-green algae, algae) can develop if the conditions of trapped moister, dirt and
heat extended for long periods of time. In the past years many microcides, although very eective, have been ban-
ned by law in most coutries of Western Europe because of their toxicity, and have been replaced by other less pollu-
ting microcids. These however, show dierent and generally more limited spectra of eect.
Dirt is best brushed o dry on a regular basis. Stains can be treated with lukewarm water and a soft brush. Treat
stubborn stains by hand washing with some commercial mild detergent, rinse well with clear water, let dry and
treat with water repellent if necessary afterwards. Speciality dealers may oer special liquid detergents, follow
instructions carefully.
WASH IN COLD WATER ONLY!
DO NOT WASH IN WARM OR HOT WATER!
Acrylic fabrics shrink even at low temperatures!
MAINTAINING THE FRAME
Wash the surfaces with water and mild detergent if necessary. Stainless steel parts can be brightened with
commercial stainless steel polish. Lubricate all joints and rollers with oil or silicone spray.
STORING THE UMBRELLA
1. Freestanding
It is recommended to secure the canopy cover from moving in the wind with the binding belt and to pull the
protective bag over the umbrella. Movement in the canopy cover can chafe and can wear itself through at the frame.
This is not covered by the warranty. If the protective bag is used, the umbrella should be completely dry. If the cover
is wet, mold and mildew can form.
If you do not have a ground sleeve/permanent stand, be warned, that even a closed umbrella can be blown over
with very high winds. Make sure that the stand is suciently ballasted or store the umbrella horizontally in a dry
room.
2. Storage
Store the umbrella in a dry and clean place, that is free of pests. The canopy cover should be completely dry to
prevent mold or mildew from forming.

RIVIERA 2012 Page / Seite / Page / Página 7
WARNUNG !
UNSACHGEMÄSSE HANDHABUNG DIESES SCHIRMES KANN ZU SACHBESCHÄDIGUNGEN UND SCHWEREN
VERLETZUNGEN FÜHREN. DESHALB RATEN WIR DRINGEND DIESE BEDIENUNGSANLEITUNG GENAU ZU LESEN UND
ZU BEFOLGEN UND DIE FOLGENDEN WARNHINWEISE ZU BEACHTEN:
• Benutzen Sie den Schirm nicht bei starkem Wind!
• Bei Gewittern den Schirm nicht benutzen und sich nicht unterstellen!
• Nicht auf den Schirm klettern oder sich daran hängen!
• Kinder nicht unbeaufsicht in der Nähe des Schirmes lassen!
• Den Schirm nur zu seinem vorgesehen Zweck benutzen!
• Den Schirm nicht ohne geeigneten Standfuss verwenden!
• Den Schirm und seine Konstruktion nicht modizieren!
DAS NICHT BEACHTEN DER WARNHINWEISE UND DER BEDIENUNGSANLEITUNG KANN ZU SACHBESCHÄDIGUNGEN
UND SCHWEREN VERLETZUNGEN FÜHREN. DER HERSTELLER VERWEIGERT JEDE HAFTUNG BEI UNSACHGEMÄSSEM
GEBRAUCH DES PRODUKTS.
ENTPACKEN DES SCHIRMES
Prüfen Sie den angelieferten Karton auf Beschädigungen wie Druckstellen, Eindellungen, Risse oder Löcher.
Sofern der Karton eine dieser Beschädigungen aufweist, diese bitte sofort bei Ihrem Fachhändler, dem anliefernden
Spediteur oder der Caravita Hotline reklamieren.
Die Klebebänder und Kunststobänder bitte vorsichtig mit einem Messer aufschneiden ohne dabei den Schirm im
Karton zu beschädigen.
DEN KARTON SELBST BITTE NICHT ZERSCHNEIDEN ODER ZERREISSEN SONDERN VORLÄUFIG AUFBEWAHREN.
ER LÄSST SICH LEICHT ZUSAMMENFALTEN UND PLATZ SPAREND IN KELLER ODER GARAGE AUFBEWAHREN.
TRANSPORTIEREN DES SCHIRMES
Der Schirm lässt sich am besten zu zweit transportieren. Je eine Person trägt ein Ende des Schirmes. Dazu
den Schirm bitte mit beiden Händen umgreifen. DEN SCHIRM NICHT AN DER SCHUTZHÜLLE ODER AM
SCHIRMBEZUG HERUMZERREN. Dies kann Risse hervorrufen. Den Schirm nicht an einzelnen Schirmstreben
tragen. Diese können dadurch verbiegen.

RIVIERA 2012 Page / Seite / Page / Página 8
AUFSTELLEN DES SCHIRMES
Bitte den mobilen Standfuss oder die Bodenhülse, nach der entsprechenden Anleitung vorbereiten und das
Montagematerial bereitlegen. Der mobile Fuss sollte mit ausreichend Ballast belegt sein.
Zur Sicherheit sollten 2 Personen den Schirm aufstellen.
Bitte jetzt die Schutzhülle entfernen, wenn Sie
keine Schubstange mitbestellt haben, mit welcher
Sie die Schutzhülle auch bei stehendem Schirm
entfernen können.
Vor dem Senkrechtstellen des Schirmes bitte dafür sorgen, dass keine Personen oder Gegenstände die beschädigt
werden können in Reichweite des Schirmes sind.
Beachten Sie bitte, dass der Schirm sehr lang ist und daher schwer in Balance zu halten ist sobald er aufrecht steht.
Deshalb sehr vorsichtig vorgehen damit Ihnen der Schirm nicht entgleitet und Personen verletzt werden.
Bringen Sie das Mastrohr zum Standfuss. Eine Person hält das Mastrohr in das Standrohr während die zweite Person
den Schirm aufrichtet. Das Mastrohr gleitet in das Standrohr. Alternativ kann die erste Person das Mastrohr auch auf
den Boden drücken (oder mit dem Fuß eine Art Anschlag bilden) während die zweite Person den Schirm neben dem
Standrohr aufrichtet. Dann den aufgerichteten Schirm in das Standrohr heben.
Die an den Streben befestigten Kunststonetze dienen dem Schutz des Schirmes gegen Transportschäden und
können bei geönetem Schirm mit einem Messer oder einer Schere vorsichtig entfernt werden. Achten Sie darauf
den Schirm dabei nicht zu beschädigen.

RIVIERA 2012 Page / Seite / Page / Página 9
Stellen Sie sicher das der Schirmmast
im Standrohr des Ständers gut ver-
ankert ist und die Klemmschrauben
angezogen sind.
ÖFFNEN DES SCHIRMES
Entfernen Sie die Schutzhülle, wenn
nicht schon geschehen, und den
Bindegurt.
Lockern Sie alle 8 Streben indem
Sie diese am Strebenende leicht
nach außen ziehen. Während des
Transportes kann es vorkommen,
dass sich die Streben verkeilen, was
das Önen des Schirmes unmöglich
machen würde.
Wenn der Schirm ordentlich be-
festigt ist, greifen Sie das Ende des
Zugseils unter dem Bezug und
önen Sie den Schirm indem Sie
daran ziehen bis das Tuch gut ge-
spannt ist.
Stecken Sie dann den Sperrbolzen
durch eines der Löcher im Schirm-
mast.
Der Schirm sollte sich leicht önen
lassen. Beachten Sie, dass keine
Passanten durch den Schirm verletzt
werden!
ACHTUNG: LÄSST SICH DER SCHIRM
NICHT OHNE WEITERES ÖFFNEN
KEINE GEWALT ANWENDEN !
Schließen Sie den Schirm wieder. Lockern Sie nochmals
die Schirmstreben. Stellen Sie sicher, dass keine nach
Innen geklappt ist. Versuchen Sie nochmals den Schirm
zu önen. Lässt sich der Fehler nicht ermitteln bitte
Ihren Fachhändler oder die Caravita Hotline anrufen.
KEINESFALLS GEWALT ANWENDEN !
Das lose Zugseil kann am Seilwickler
verzurrt werden.
Seilwickler nur an Schirmen bis zu
4m rund oder 3x3m quadratisch.

RIVIERA 2012 Page / Seite / Page / Página 10
SCHLIESSEN DES SCHIRMES
Sichern Sie die Plane mit dem Gurt-
band gegen wehen im Wind. Ein
ständig atterndes Tuch kann sich
am Gestell durchscheuern.
Lösen Sie das Zugseil vom Seilwick-
ler und halten Sie es mit einer Hand
stra gespannt während Sie mit der
anderen den Sperrbolzen aus dem
Mast ziehen.
Bevor sie den Schirm vollständig
schließen, ziehen Sie das Tuch
zwischen den Streben heraus wie
bei einem Regenschirm, damit es
nicht zwischen den Streben einge-
klemmt und beschädigt werden
kann.
B8
Lassen Sie den Schirm langsam
herunter.
Ziehen Sie die Schutzhülle über
den Schirm. Die optionale Schub-
stange kann dabei von Hilfe sein.

RIVIERA 2012 Page / Seite / Page / Página 11
PFLEGE DES TUCHES
Schirme nie über einen längeren Zeitraum in nassem oder feuchtem Zustand lagern oder in der Schutzhülle lassen.
Abgefallene Blätter (Laub) nach Möglichkeit sofort entfernen (Ausgangspunkt für mikrobiellen Befall).
Mikroorganismen (Schimmelpilze, Bakterien, Blaualgen, Algen) treten besonders dann auf, wenn die Faktoren
Feuchtigkeit, Verschmutzung und Wärme gleichzeitig über einen längeren Zeitraum gegeben sind. In den letzten
Jahren wurden zahlreiche Mikrozide, die zwar sehr gut wirksam waren, aufgrund der Toxizität (=Giftigkeit) durch
Gesetze in nahezu allen Ländern Westeuropas verboten und durch andere, weniger umweltbelastende Mikrozide
ersetzt. Diese weisen aber wiederum andere, im Regelfall begrenztere Wirkungsspektren auf.
Verschmutzungen werden am besten in regelmäßigen Abständen trocken ausgebürstet. Flecken können mit hand-
warmem Wasser und einer weichen Bürste behandelt werden. Hartnäckige Flecken durch Handwäsche mit etwas
handelsüblichem Feinwaschmittel behandeln, gut mit klarem Wasser nachspülen, trocknen lassen und mit Imprä-
gniermittel nachbehandeln. Vom Fachhandel werden üssige Reinigungsmittel verschiedenster Art angeboten,
Gebrauchsanweisung stets genau befolgen.
NUR KALT WASCHEN !
KEINESFALLS WARM ODER HEISS WASCHEN !
Acryltücher laufen bereits bei niedrigen Temperaturen ein !
PFLEGE DES GESTELLS
Oberächen mit schonendem Reinigungsmittel abwaschen wenn nötig. Edelstahlteile können mit handelsüblicher
Edelstahlpolitur aufgefrischt werden. Sollten Geräusche an den Gelenken oder Rollen auftreten, etwas Sprühöl oder
Silikonspray verwenden.
LAGERUNG DES SCHIRMES
1. Stehend im Freien
Es empehlt sich das Tuch immer mit dem Gurtband gegen Flattern zu sichern und eventuell auch die Schutzhülle
überzuziehen. Ein atterndes Tuch kann sich am Gestell durchscheuern. Dies ist nicht von der Gewährleistung
gedeckt. Wird die Schutzhülle übergezogen, sollte der Schirm absolut trocken sein. Ist das Tuch feucht kann sich
Schimmel bilden.
Haben Sie keine feste Bodenverankerung, bitte beachten, dass auch ein geschlossener Schirm bei starkem Wind
umfallen kann. Sorgen Sie für einen ausreichend schweren Ständer oder lagern Sie den Schirm horizontal in einem
trockenen Raum.
2. Einlagerung
Lagern Sie den Schirm an einem trockenen und sauberen Ort, der frei von Mäusen ist. Das Tuch sollte absolut
trocken sein um Schimmelbefall zu verhindern.

RIVIERA 2012 Page / Seite / Page / Página 12
ATTENTION!
LA MANIPULATION INAPPROPRIÉE DE CE PARASOL PEUT CAUSER DES DOMMAGES AINSI QUE DES BLESSURES
GRAVES. POUR CETTE RAISON NOUS VOUS PRIONS IMPÉRATIVEMENT DE BIEN VOULOIR LIRE CES INSTRUCTIONS
TRÈS PRÉCISÉMENT ET DE SUIVRE LES AVERTISSEMENTS SUIVANTS:
• N’utilisez pas le parasol par vent fort!
• N’utilisez pas le parasol lors d’un orage et ne rester surtout pas dessous!
• Ne grimpez pas sur le parasol ou ne vous accrochez pas à celui-ci!
• Ne laissez pas les enfants sans surveillance près du parasol!
• Utilisez le parasol que pour son utilisation prévue!
• Ne pas utilisez le parasol sans pied de parasol adéquat!
• Ne modiez pas le parasol et sa construction!
LE FAIT DE NE PAS PRENDRE EN CONSIDÉRATION LES AVERTISSEMENTS ET LE MODE D’EMPLOI PEUT CAUSER
DES DOMMAGES OU DES BLESSURES GRAVES. LE FABRICANT REFUSE TOUTE RESPONSABILITÉ LORS D’UNE
MANUTENTION INCORRECTE DU PRODUIT.
DÉBALLAGE DU PARASOL
Vériez lors de la livraison si le carton est endommagé, voir s’il a des trous, déchirures ou des empreintes. Si le carton
est endommagé, veuillez réclamer immédiatement auprès de votre revendeur, votre livreur ou la maison Caravita.
Coupez les bandes adhésives et les bandes en plastique précautionneusement avec un couteau sans endommager
le parasol dans le carton.
PRIÈRE DE NE PAS COUPER OU DÉCHIRER LE CARTON ET DE LE STOCKER. IL SE PLIE FACILEMENT ET NE PREND PAS
BEAUCOUP DE PLACE DANS UNE CAVE OU UN GARAGE.
TRANSPORT DU PARASOL
Le plus simple est de transporter le parasol à deux. Chaque personne prend un bout du parasol. En plus il faut
le prendre avec les deux mains. SURTOUT NE PAS TIRER LE PARASOL À LA HOUSSE DE PROTECTION OU
À LA TOILE DU PARASOL. Il y a un grand risque de déchirure. Ne pas porter le parasol à une seule baleine.
Celles-ci pourraient se tordre.

RIVIERA 2012 Page / Seite / Page / Página 13
INSTALLATION DU PARASOL
Veuillez svp placer le pied de parasol ou l’ancrage suivant le mode d’emploi. Le pied mobile devra être lesté
susamment.
Pour des raisons de sécurité nous recommandons 2 personnes pour installer le parasol.
Maintenant vous pouvez enlever la housse de
protection, si vous n’avez pas commandé de barre
d’enlèvement avec le parasol, avec laquelle vous
pourriez enlever cette housse lorsque le parasol est
debout.
Avant de positionner le parasol verticalement veuillez bien vérier que personne et aucun objet se trouve près du
parasol.
Veuillez prendre en considération que le parasol est très long et qu’il est dicile de le tenir en équilibre, dès qu’il est
debout. C’est pour cette raison qu’il faut être très prudent et éviter que le parasol vous échappe et que des passants
soient blessés.
Approchez le mât du parasol vers le pied de parasol. Une personne tiendra le mât pendant qu’une deuxième
personne positionnera le parasol verticalement. Placez le mât dans le tube du pied de parasol. Comme variante
la première personne presse le mât du parasol vers le sol (ou bloque avec son pied) pendant que la deuxième
personne lève le parasol à côté du tube du pied de parasol. Ensuite mettre le parasol dans le tube de xation du pied
de parasol.
Les lets en plastique xés sur les baleines sont des protections de transport et peuvent être enlevées précauti-
onneusement lorsque le parasol est ouvert, soit avec un couteau ou un ciseau. Veuillez faire attention de ne pas
endommager le parasol.

RIVIERA 2012 Page / Seite / Page / Página 14
Veuillez vérier que le mât du pa-
rasol soit bien installé dans le tube
de xation et que les vis à molette
soient bien serrées.
OUVERTURE DU PARASOL
Si vous possédez une barre
d’enlèvement: Enlevez la housse
de protection, si vous ne l’avez
pas encore fait ainsi que la bande
élastique.
Débloquer les 8 baleines en tirant
les extrémités légèrement vers
l’extérieur. Parfois il arrive que
pendant le transport les baleines
s’enchevêtrent. Dans ce cas il ne sera
pas possible d’ouvrir le parasol.
Lorsque le parasol est bien xé,
prenez le bout de la corde et
tirez jusqu‘à ce que la toile soit bien
tendue.
Mettez la goupille dans un des trous
prévus sur le mât pour maintenir le
parasol ouvert.
Le parasol devrait s’ouvrir facile-
ment. Veuillez vérier que personne
ne soit blessé par le parasol!
ATTENTION: NE PAS FORCER SI LE
PARASOL NE S’OUVRE PAS!
Refermez le parasol. Vérifiez si toutes les baleines
sont débloquées. Rassurez-vous qu’aucune baleine
soit vers l’intérieur. Ressayez de rouvrir le parasol.
Si vous ne trouvez pas l’erreur, contactez votre
revendeur ou appelez la hotline de Caravita.
SURTOUT NE PAS FORCER!
La corde peut être enroulée sur
l’enrouleur au mât.
Enrouleurs uniquement sur les para-
sols jusqu‘à 4m rond ou 3 x 3m carré.

RIVIERA 2012 Page / Seite / Page / Página 15
FERMETURE DU PARASOL
Fixer la toile avec la bande élastique
pour que le parasol ne otte pas au
vent. En laissant la toile otter au
vent, celle-ci peut frotter contre les
baleines et s’abimer.
Prenez la corde de l’enrouleur et
tenez-là fermement dans une main
pendant que vous retirez la goupille
du mât.
Avant de fermer le parasol complè-
tement, veuillez tirer la toile entre
les baleines comme pour les parap-
luies pour que celle-ci ne se coince
pas entre les baleines et soit abimée.
B8
Fermez lentement le parasol.
Tirez la housse de protection sur le
parasol. Une barre d’enlèvement
livrée en option peut vous aider.

RIVIERA 2012 Page / Seite / Page / Página 16
SOIN DE LA TOILE
Surtout ne jamais stocker les parasols durant une longue période mouillés ou humides ou les laisser dans la housse
de protection.
Enlever les feuilles tombées immédiatement (cause initiale pour une infestation microbienne).
Les micro-organismes (moisissure, bactéries, algues bleues, algues) se forment particulièrement lorsque les facteurs
humidité, salissure et chaleur arrivent en même temps durant une longue période. Ces dernières années un grand
nombre de microcides, qui étaient très ecaces, ne sont plus en vente à cause de leur toxicité et sont défendus
par la loi dans la plupart des pays de l’Europe de l’Ouest et remplacés par d’autres microcides moins ecaces, qui
polluent moins l’environnement. Ceux-ci par contre ne seront pas ecaces aussi longtemps.
Les salissures s’enlèvent le plus facilement avec une brosse quand le parasol est sec. Les taches s’enlèvent à l’aide
d’eau tiède et avec une brosse tendre. Les taches plus résistantes peuvent être traitées par lavage à la main avec du
savon doux et ensuite rincez la toile bien minutieusement, laissez sécher et traiter la toile avec un imperméabilisant.
Des magasins spécialisés ont diérents produits à disposition. Veuillez bien lire le mode d‘emploi.
LAVER UNIQUEMENT À L‘EAU FROIDE !
SURTOUT NE JAMAIS LAVER À L‘EAU CHAUDE!
Les toiles acryliques rétrécissent déjà au lavage à basse température!
SOINS DE L’ARMATURE
Nettoyez l’armature avec un produit de nettoyage doux si nécessaire. Les pièces en acier inox peuvent être
rafraîchies avec un produit à polir pour l’acier inox. Si les poulies ou les jointures grincent vous pouvez utiliser un
spray de lubriant ou un spray de silicone.
STOCKAGE DU PARASOL
1. Debout à l’extérieur
Nous vous conseillons de toujours xer la toile avec la bande élastique pour éviter qu’elle otte au vent et de mettre
la housse de protection. Une toile ottant au vent peut abimer celle-ci en frottant contre l’armature et ne sera pas
un cas de garantie. Avant de mettre la housse de protection veuillez bien vérier que le parasol soit sec. Autrement
la toile risque d’obtenir des taches de moisissure.
Si vous n’avez pas de xation permanente au sol pour votre parasol, veuillez également noter qu’un parasol fermé
peut tomber en cas de vent fort. Prenez des pieds de parasols assez lourds ou stocker le parasol horizontalement
dans une pièce sèche.
2. Stockage
Stocker le parasol à un endroit sec et propre, sans souris. La toile doit être absolument sèche pour éviter la
moisissure.

RIVIERA 2012 Page / Seite / Page / Página 17
¡Precaución!
EL USO INADECUADO DE ESTA SOMBRILLA PUEDE CONDUCIR A DAÑOS MATERIALES O LESIONES GRAVES. POR
LO TANTO, DEBE LEER Y SEGUIR LAS INSTRUCCIONES DE MONTAJE E INSTALACIÓN Y TOMAR EN CUENTA LAS
SIGUIENTES ADVERTENCIAS:
• ¡NO utilice la sombrilla en vientos fuertes!
• ¡NO utilice o refúgiese bajo la sombrilla durante las tormentas eléctricas!
• ¡NO sentarse o subirse en la sombrilla!
• ¡NO deje a los niños sin supervisión en proximidad de la sombrilla!
• ¡NO utilice esta sombrilla fuera de su propósito intencionado!
• ¡NO utilice la sombrilla sin su base!
• ¡NO modique esta sombrilla de ninguna forma!
¡FRACASO EN TENER CUIDADO, EN SEGUIR LAS INSTRUCCIONES O PRESTAR ATENCIÓN A ESTAS ADVERTENCIAS
PUEDE RESULTAR EN LESIONES O DAÑOS A LA PROPIEDAD Y PUEDE ANULAR LA GARANTÍA!
DESEMBALAR LA SOMBRILLA
Inspeccione todas las cajas recibidas para daños (extremos abiertos, rayones, roturas o cualquier agujero).
Si hay alguna señal de daños por favor póngase en contacto con su distribuidor o servicio al cliente de Caravita
inmediatamente y haga anotaciones en la Orden de Reparto.
Utilizando unas tijeras o un cortador de caja, corta la cinta adhesiva y las cintas de plástico. Tenga cuidado de no
dañar la sombrilla dentro de la caja.
NO DESECHE DE LOS MATERIALES DE EMBALAJE HASTA QUE TODOS LOS ELEMENTOS HAN SIDO INSPECCIONADOS.
CARTON PUEDE SER FACILMENTE DOBLADO TEMPORALMENTE Y ALMACENADO HASTA QUE TODOS LOS
ELEMENTOS SON EXAMINADOS Y SE CONSIDERA EN PERFECTAS CONDICIONES.
MOVIENDO LA SOMBRILLA
La sombrilla debe ser llevada por dos personas. Uno en cada extremo de la sombrilla. Por favor sostenga la sombrilla
con ambas manos. ¡NO ARRASTRE SOMBRILLA JALANDO LA BOLSA DE PROTECCIÓN O LA TELA! Esto puede
provocar roturas. No sujete las varillas cuando lleve la sombrilla. Pueden doblarse.

RIVIERA 2012 Page / Seite / Page / Página 18
INSTALANDO LA SOMBRILLA
Prepare su base móvil o anclaje para el suelo como se indica en su manual correspondiente y tenga los accesorios
necesarios listos para instalar. Todas las bases que utilizan bloques de hormigón para instalación deben tener los
bloques apropiados y bases rellenables deben estar lleno del material apropiado.
Por razones de seguridad, dos personas deben de realizar la instalación de la sombrilla.
Retire la bolsa de protección antes de instalar
si no tiene una barra de empuje que permite
quitar la bolsa de protección de una sombrilla
para instalación.
Antes de instalar la sombrilla, asegúrese de que el área esté libre de personas y objetos por debajo que podrían ser
perjudicados o dañados o podría dañar la sombrilla.
Por favor tenga en cuenta que la sombrilla es muy alta y por lo tanto difícil de equilibrar en posición vertical. Por esta
razón sostenga rmemente la sombrilla al instalar para reducir el riesgo de lesiones.
Lleve la parte inferior de la sombrilla a la base. Una persona guía el mástil en el tubo de la base mientras que la
otra persona empuja la sombrilla en posición vertical. El mástil debe deslizarse en el tubo de la base. Asegure con
tornillos de pomo.
Alternativamente, una persona puede presionar el mástil al suelo (creando un tapón para el mástil con su pie)
mientras la segunda persona empuja la sombrilla en posición vertical próxima a la base. Luego se levanta la
sombrilla en el tubo del base/stand.
El propósito de tener mallas plásticas conectadas a las varillas es para protección de la sombra contra los daños de
transporte. Una vez que la sombrilla este abierta, pueden ser retirados con cuidado con unas tijeras o un cuchillo.
Tenga cuidado de no dañar la sombra.

RIVIERA 2012 Page / Seite / Page / Página 19
Asegúrese de que el mástil de la
sombrilla colocado dentro de la
base este asegurado rmemente
por los tornillos de pomo.
ABRIENDO LA SOMBRILLA
Retire la bolsa de protección, si no se
ha hecho ya y el cinturón.
Suelte las 8 varillas jalando ligera-
mente hacia fuera en el extremo de
cada varilla. Durante el transporte
es posible que las varillas pueden
atorarse juntos, lo cual dicultaría la
apertura de la sombrilla.
Cuando esté bien asegurada la som-
brilla, tome el extremo de la cuerda
por debajo del toldo y comience a
jalar la sombra abierta hasta que la
tela esté tensa.
Entonces, inserte el pasador de
seguridad en uno de los agujeros en
el mástil de la sombrilla.
La sombrilla debe de abrirse
fácilmente. Tenga cuidado al abrir
la sombra si alrededor de otras
personas.
PRECAUCIÓN:
¡SI LA SOMBRILLA NO SE ABRE
FÁCILMENTE, NO APLIQUE
LA FUERZA!
Si la sombrilla no se abre, inmediatamente cierra la
sombrilla. Suelte las varillas una vez más, asegúrese
que ninguno de ellas se ha doblado hacia dentro.
Trate de abrir la sombrilla otra vez. Si el error no puede
ser detectado, por favor póngase en contacto con su dis-
tribuidor o el servicio de atención al cliente de Caravita.
¡NO APLIQUE FUERZA!
La cuerda sobrante puede jarse al
sujetador de cuerda.
Sujetador de cuerda sólo colocado
en sombrillas en medidas de hasta
4m octagonal o 3x3m cuadrada.

RIVIERA 2012 Page / Seite / Page / Página 20
CERRANDO LA SOMBRILLA
Asegure el toldo con el cinturón
para impedir movimiento en el
viento. Movimiento en el toldo
puede rozar y desgastar el toldo a
través del varillaje.
Desate la cuerda del sujetador y
sosténgalo tenso con una mano,
quitando el pasador de seguridad
que cierra dentro del mástil de la
sombrilla.
Antes de cerrar la sombrilla com-
pletamente, saque la tela que está
entre las varillas y dóblela alrededor
de la sombrilla para que no pueda
ser dañada de quedar atrapada
entre las varillas.
B8
Deje que la sombrilla descienda
lentamente.
Aplique bolsa de protectora sobre
la sombrilla. La barra de empuje
opcional puede utilizarse para
ayudar en la instalación.
Table of contents
Languages:
Other CARAVITA Patio Furniture manuals

CARAVITA
CARAVITA BIG BEN 2 LIGHT User manual

CARAVITA
CARAVITA SUPREMO User manual

CARAVITA
CARAVITA AMALFI User manual

CARAVITA
CARAVITA SUPREMO User manual

CARAVITA
CARAVITA SAMARA User manual

CARAVITA
CARAVITA SAMARA User guide

CARAVITA
CARAVITA BELVEDERE User guide

CARAVITA
CARAVITA AMALFI DUO-QUADRO User guide

CARAVITA
CARAVITA BIG BEN User manual

CARAVITA
CARAVITA AMALFI User guide
Popular Patio Furniture manuals by other brands

Kettler
Kettler EDMONTON operating instructions

Patio Sense
Patio Sense Pinellas 62414 instructions

Garden Oasis
Garden Oasis 9878-26265-968 owner's manual

Essential Garden
Essential Garden S-778N owner's manual

Patioflare
Patioflare PF-DS217-ST Assembly instructions

Mimosa
Mimosa 3M SQUARE 3191028 Assembly instructions