CARPENTER CCN65Z User manual

0° Coil Siding Nailer
Model No. CCN65Z

3
TABLE OF CONTENTS
TECHNICAL SPECIFICATIONS
SAFETY GUIDELINES
KEY PARTS DIAGRAM
TECHNICAL INFORMATION
TYPES OF NAILS
OPERATING INSTRUCTIONS
MAINTENANCE
TROUBLESHOOTING
EXPLODED VIEW
PARTS LIST
4
5
8
9
10
11
22
26
27
28
TABLE OF CONTENTS

54
TECHNICAL SPECIFICATIONS
SAFETY GUIDELINES
Model No. CCN65Z contact us 1-888-666-1887
Operating pressure
Dimensions
(Length*Height*Width)
Net Weight
Nail capacity
Fastener Details
Air consumption
Air inlet
Driving Power
CFM: Cubic feet per minute refers to the volumetric flow of air. This information Is used to
determine the proper compressor to suit your needs.
NPT: National Pipe Thread.
PERSONAL SAFETY
These precautions are intended for the personal safety of the user and others working
with the user. Please take time to read and understand them.
Make sure you read and understand this manual before using this tool. Make sure other
users read and understand this manual before they use the tool.
SAFETY GUIDELINES
This manual contains information that relates to PROTECTING PERSONAL SAFETY and
PREVENTING EQUIPMENT PROBLEMS. It is very important to read this manual carefully
and understand it thoroughly before using the product. The symbols listed below are used to
indicate this information.
70 – 115 psi (4.8 – 7.9bar 5 – 8.5 kgf/cm2)
11.1""(L)*12.44"(H)* 5.71"(W)
(282mm*316mm*145mm )
5.0 lbs (2.3kg)
300 nails (1 coil)
0º 1-1/2” to 2-1/2” Plastic Collated Coil Nails
0.49 ft3/cycle at 90 psi
(1.4 ltr/cycle at 6.9 bar)
(1.4 ltr/cycle at 7 kgf/cm2)
3/8 NPT Thread
440 in./lbs at 90 psi
DANGER!
Potential hazard that could result in serious
personal injury including possible death.
WARNING!
Potential hazard that could result in serious
personal injury to the tool user or others in the
work area.
CAUTION!
Potential hazard that could result in damage
to the tool or property.

76
WARNING!
Potential hazard that could result in serious personal injury to
the tool user or others in the work area.
• Always wear eye and hearing protection when using the air compressor. Failure
to do so may result in sight or hearing loss.
• Do not overload the tool. Allow the tool to operate at its optimum speed for
maximum efficiency.
• Do not point the tool towards yourself or other people, even when the tool has
stopped. Keep hands, feet, and all other parts of the body clear from work area.
• Do not attempt to clear nailer jams while the air hose is connected.
• Do not keep the trigger or the Push Lever pressed while loading nails.
SAFETY GUIDELINES
SAFETY GUIDELINES
NOTE: Some commercial air line drying liquids are harmful to “O” rings and seals—
Do not use these low temperature air dryers without checking compatibility.
SAFETY GUIDELINES
CAUTION!
• DANGER! Potential hazard that could result in serious personal
injury including possible death.
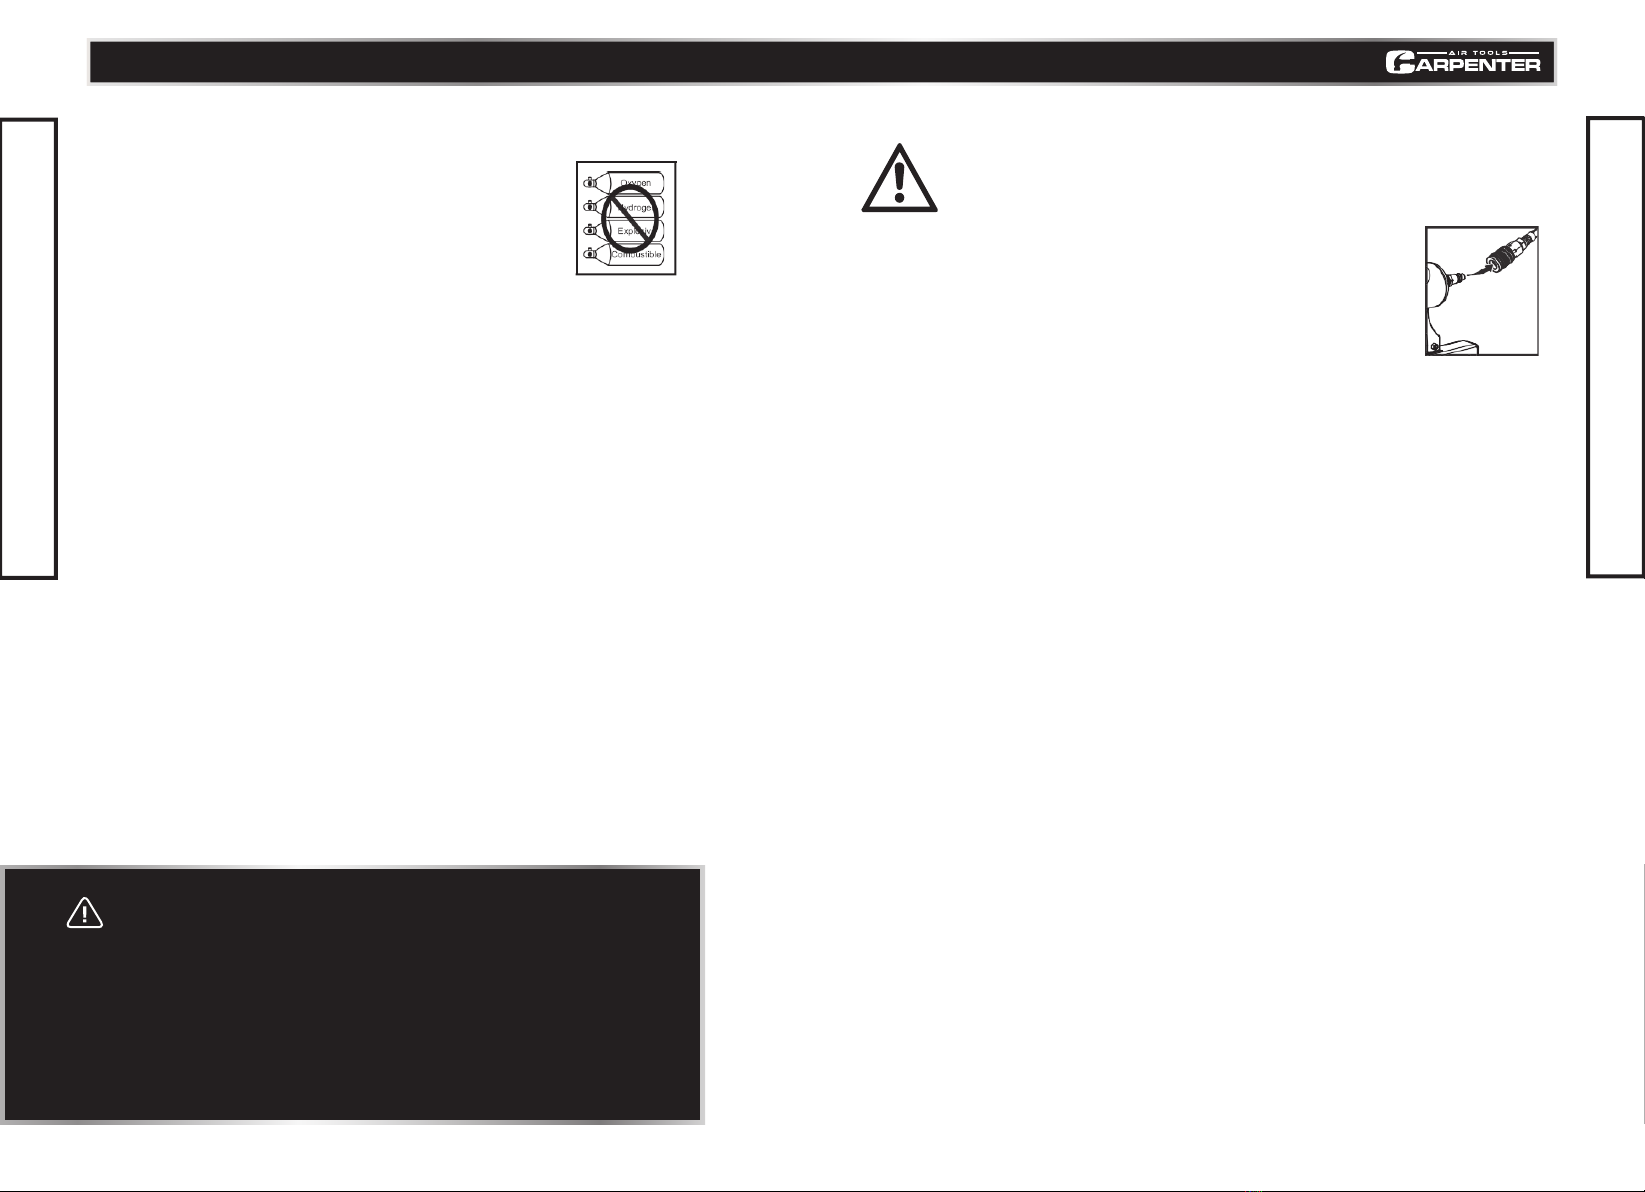
• Do not use oxygen or any other combustible or bottled gas to
power air-powered tools. Failure to observe this warning can
cause explosion and serious personal injury or death.
• Do not use this tool in the presence of flammable liquids, dust or gases. Sparks that
are created during use may ignite these materials.
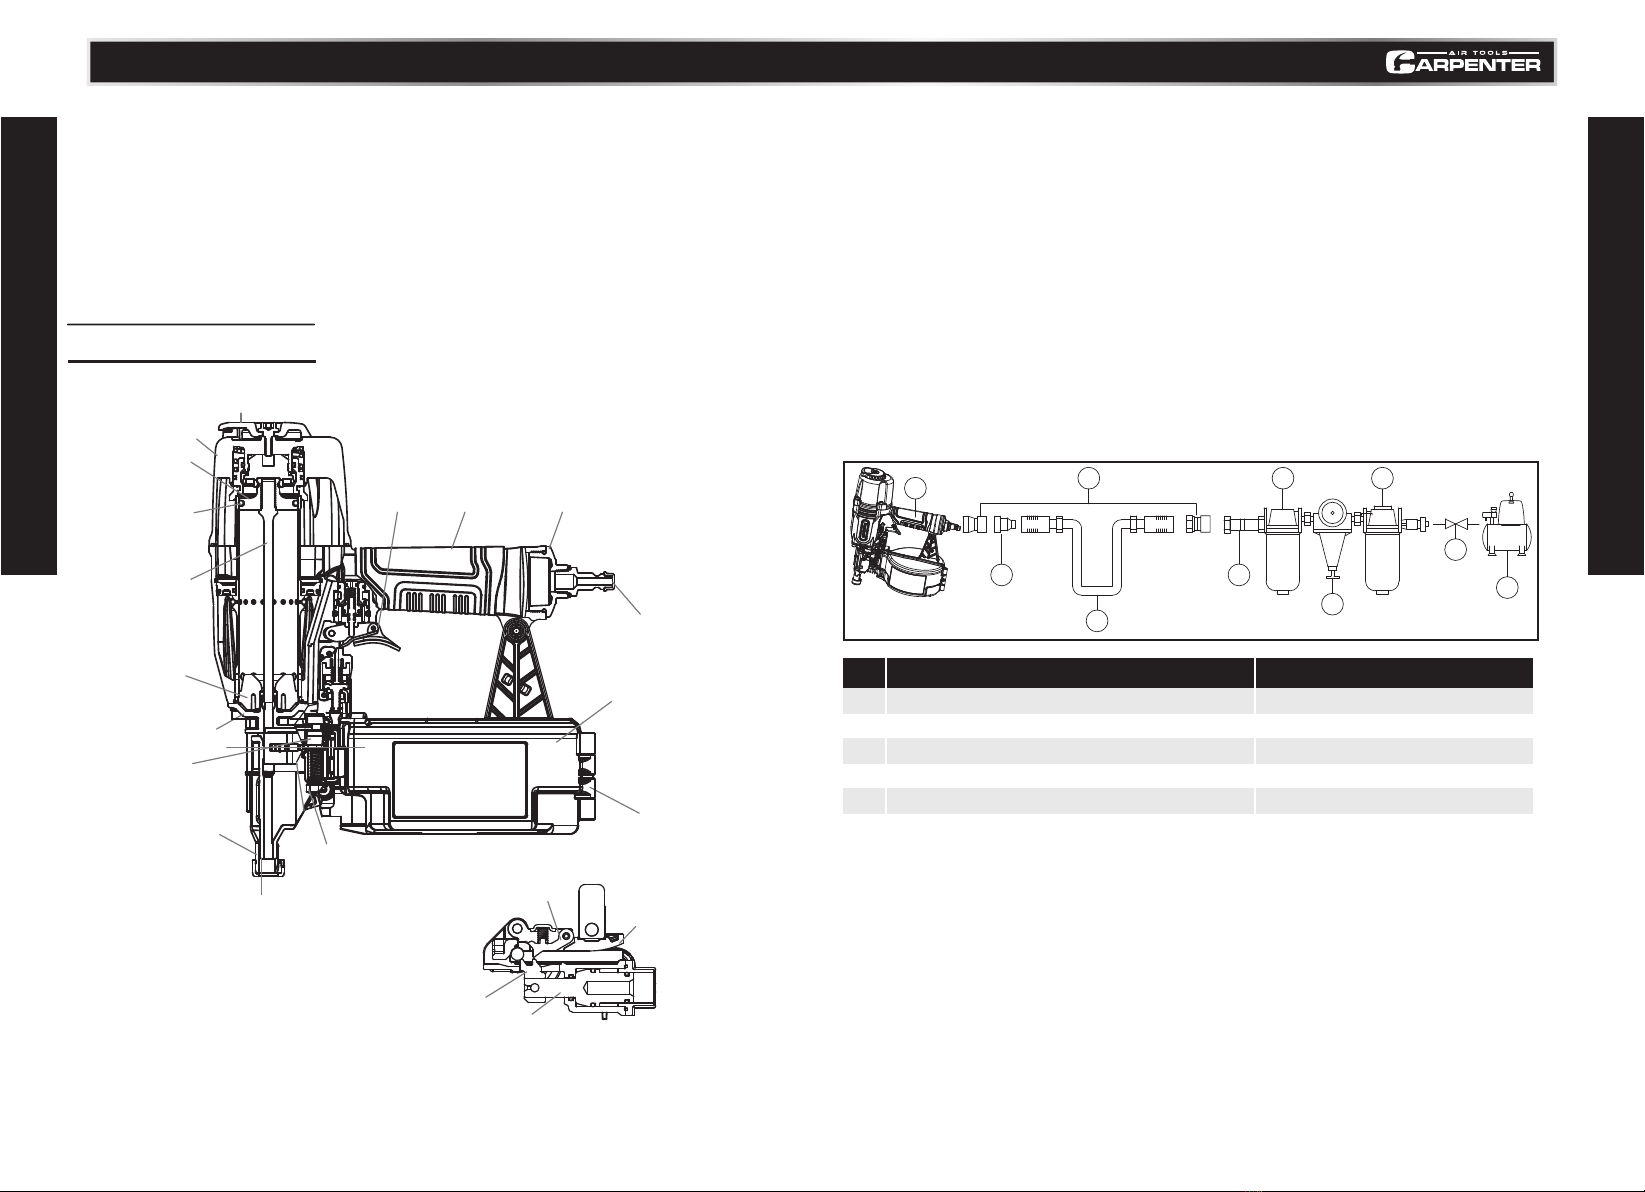
• Use only compressed air to power air-powered tools. Use an approved air hose with
a minimum length of 25' (7.6 m).
• Do not allow inexperienced or untrained individuals to operate any air-powered tool.
• Keep hands and other parts of the body away from the Outlet (Firing Head) during use.
• Nails or objects in the workpiece can cause serious injury if they are deflected by the
workpiece.
• Keep children away from the work area. Do not allow children to handle power tools.
• Never point nailer toward yourself or anyone else.
• Always assume the nailer contains fasteners. Never point the nailer toward yourself or
anyone else, whether it contains fasteners or not. If fasteners are mistakenly driven, it
can lead to severe injuries. Never engage in horseplay with the nailer. Respect the
nailer as a dangerous working implement.
• Disconnect the tool from the air supply and turn off the
compressor before performing any maintenance, when the
tool is not in use, when it is being handed to another person,
when it is left unattended, or when loading and changing
nails. Failure to comply may result in injury or damage to
equipment.
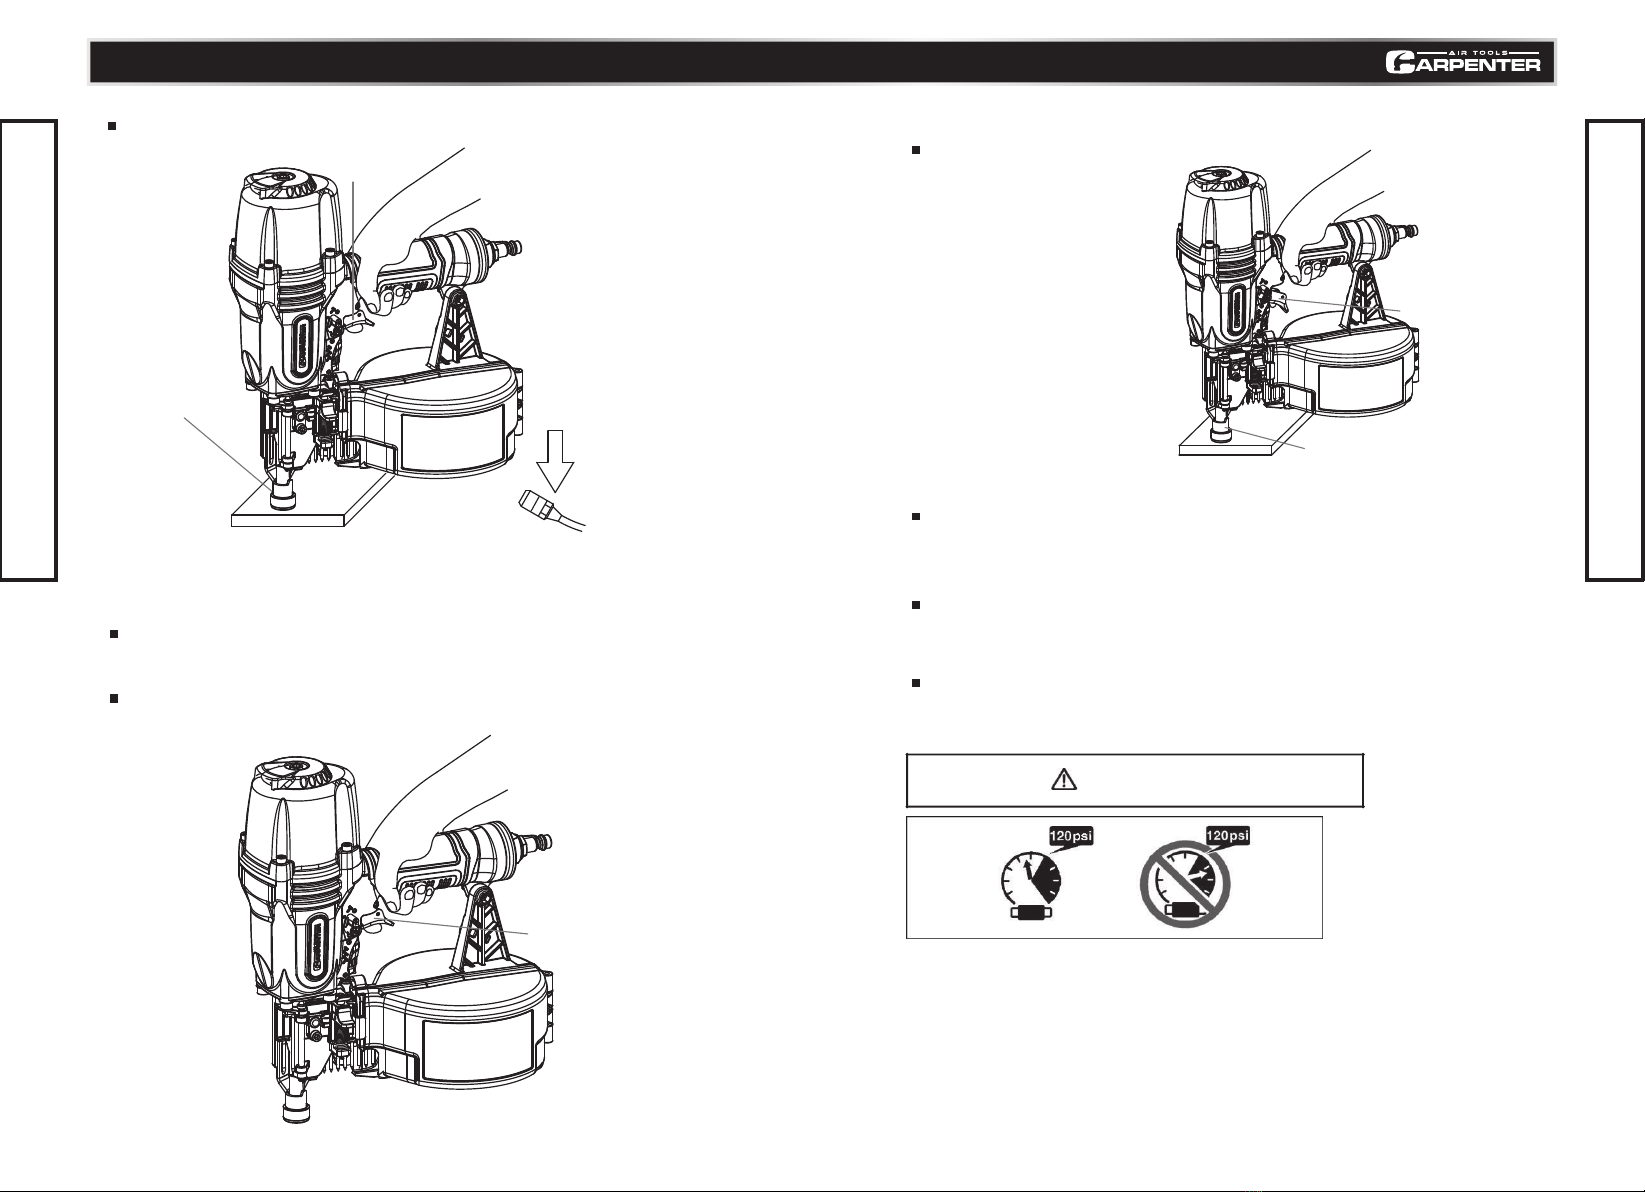
• Do not exceed the maximum or minimum pressures.
Operating the tool at the wrong pressure (too low or
too high) may cause excessive noise or rapid wear.
• Use only Non-Detergent Air Tool Lubricating Oil for this tool.
• Near and below freezing, moisture in the air line may freeze and prevent tool
operation. Do not store in a cold weather environment to prevent frost or ice
formation. Frost and ice on the tools operating valves and mechanisms could
cause tool failure.
Potential hazard that could result in damage to the tool or property.
Model No. CCN65Z contact us 1-888-666-1887

1
Air-powered Coil Siding Nailer
6
Regulator
2
Quick connector
7
Filter
3
Quick coupler
8
Cut -off valve
4
Air hose
9
Air compressor
5
Lubricator
98
NAME OF PARTS
Compatible compressors
OPERATION
NOTE: The information contained in this Manual is designed to assist you in the safe
operation of the Nailer.
Some illustrations in this Manual may show details or attachments that differ from those
on your own Nailer.
GUIDELINES FOR PROPER USE AND OPERATION
Be sure to use a proper air compressor with CARPENTER Air Tools. The compressor should be able to
supply a minimal air delivery of 4.7 CFM @ 90 PSI to ensure the compressor can run continuously with
the CARPENTER 15º Wire Collated Coil Siding Nailer.
General use
No. Description No. Description
The CARPENTER 15º Wire Collated Coil Siding Nailer. drives 1-1/2” to 2-1/2” 15º Wire Collated Coil Nails
and plactic coil nails. The tool is lightweight and durable, stands up to the elements and provides
consistently accurate results over the life of the tool. An ideal tool for a variety of construction projects,
including installation of asphalt roofing shingles and insulation boards. It also features a high-capacity
side-load magazine, tool-less depth adjustment, durable construction, and more.
•It is recommended that a filter-regulator-lubricator be used and be located as close to the tool
•If a filter-regulator-lubricator is not installed, place up to 6 drops of compressor oil into the air
inlet plug before each use.
•If a filter-regulator-lubricator is installed, keep the air filter clean. A dirty filter will reduce the
air pressure to the tool, which will cause a reduction in power, efficiency, and general
•Verify that all of the connections in the air supply system are sealed in order to prevent air leakage.
Read and follow all the safety instructions at the beginning of this manual and inspect the
air-powered nailer prior to each use in order to ensure that the proper power source is being used
and verify that the tool is in proper working order
Model No. CCN65Z contact us 1-888-666-1887
KEY PARTS DIAGRAM
TECHNICAL INFORMATION
Top Cover
Exhaust Cover
Piston
Piston O-Ring
Driver Blade
Nose
Bumper
Push Lever
Firing Head(outlet)
Knob
Nail Guide
Magazine Cover
Magazine Assembly
Air Plug(Sold separately)
Cap
BodyTrigger
AA
Nail Guide
Feeder
Feeder Piston
Section A-A
Nail Stopper
125 7
3
4
3
6
8
9

1110
ACCEPTABLE NAILS TESTING THE NAILER
DANGER
WARNING
Only nails shown in the Table below can be driven with this Nailer.
NOTE:
Before actually beginning the nailing work, test the Nailer by using the check list below. Conduct the
tests in the following order.
If abnormal operation occurs, stop using the Nailer and contact a Carpenter power tools immediately.
⑴DISCONNECT AIR HOSE FROM NAILER.
REMOVE ALL NAILS FROM NAILER.
ALL SCREWS MUST BE TIGHTENED. If any screws are loose, tighten them.
Operators and others in work area MUST wear
safety glasses with side shields which conforms to ANSI Z87.1
specications.
Never use Nailer unless push lever is operating properly.
Model No. CCN65Z contact us 1-888-666-1887
TYPES OF NAILS
OPERATING INSTRUCTIONS
1-3/4"
2-1/2"
45
65
Shank dia:0.092"-0.099"
Ø2.3mm-Ø2.5mm
Head dia:0.212"-0.232"
Ø5.4mm-Ø5.9mm
STANDARD ACCESSORIES
Safety glasses
Allen wrench for M6 screw
Allen wrench for M5 screw
Allen wrench for M4 screw
Nose cap "No-mar push lever
attachment" (It is attached in the
magazine assembly)
1
2
3
4
5
1
1
1
1
11 2 3 4 5

1312
ADJUSTING AIR PRESSURE
WARNING
Adjust the air pressure at recommended operating pressure 70 – 120 psi (4.9 – 8.3 bar 5 – 8.5
kgf/cm
2
) according to the length of nails and the hardness of workpiece.
The correct air pressure is the lowest pressure which could do the job. Using the Nailer at a higher
than required air pressure unnecessarily over stresses the Nailer.
THE PUSH LEVER AND TRIGGER MUST MOVE SMOOTHLY.
(2) Adjust the air pressure to 70 psi (4.9 bar 5 kgf/cm2). Connect the air hose.
Do not load any nails in the Nailer.
⑶With finger off the trigger, depress the push lever against the workpiece.
Do not exceed 120 psi (8.3 bar 8.5 kgf/cm
2
).
THE NAILER MUST NOT LEAK AIR.
Hold the Nailer downward and pull the trigger.
THE NAILER MUST NOT OPERATE.
⑷Without touching the trigger, depress the push lever against the workpiece.
Pull the trigger.
THE NAILER MUST OPERATE.
⑸With the Nailer off the workpiece, pull the trigger. Depress the push lever against the
workpiece.
THE NAILER MUST OPERATE.
⑹If no abnormal operation is observed, you may load nails in the Nailer.
Drive nails into the workpiece that is the same type to be used in the actual application.
THE NAILER MUST OPERATE PROPERLY.
THE NAILER MUST NOT OPERATE.
Model No. CCN65Z contact us 1-888-666-1887
OPERATING INSTRUCTIONS
Do not connect
air hose
Push Lever
Trigger
Pull Trigger
Do not pull Trigger
Depress push Lever

1514
LOADING NAILS
WARNING
NOTE: Be careful not to deform the collated wires and not to disengage the nails with the guide
surface,otherwise the nail guide may not close correctly.
⑴Press the knob down and swing the nail guide open; open the magazine cover
⑵Adjust the position of the nail holder according to the nail length.
The nail may not feed smoothly if the nail holder is not correctly adjusted.
⑶Place the nail coil in the magazine.
Insert the first nail into the magazine opening.
⑷ ①Uncoil enough nails to reach the driving hole
②Insert the first nail into the driving hole and the second nail between the two pawls
of the feeder.
③Fit the nail heads in the guide slot
④Pulling the nails to the right, swing the nail guide closed.
①Turn the nail holder about 90 degrees counterclockwise.
②Move the nail holder up and down to align the top of the nail holder with a mark on
the holder shaft in accordance with the length of the nails being used.
③Turn the nail holder 90 degrees clockwise until you hear "click"
When loading nails into Nailer,
1.Do not pull trigger;
2.Do not depress push lever;
3.Keep Nailer pointed downward.
Model No. CCN65Z contact us 1-888-666-1887
OPERATING INSTRUCTIONS
23
1
First Nail
Driving Hole
Guide Slot
Nail Guide
Pawl
Guide Suface
Feeder
1
23
Magazine Opening
Magazine Opening
Magazine
Nail
First Nail

1716
NAILER OPERATION
METHODS OF OPERATION
WARNING
DANGER
⑸Close the magazine cover.
Pulling the nails to the right, swing the nail guide closed.
⑹Grip the nail guide and knob with finger.
⑺Lock the knob completely.
Read section titled “SAFETY”(pages 4 – 6).
Operators and others in work area MUST wear safety glasses
with side shields which conforms to ANSI Z87.1 specications.
NEVER point tool at yourself or others in work area.
Keep ngers AWAY from trigger when not driving nails to avoid accidental ring.
Choice of triggering method is important. Please read and understand.
This Nailer is equipped with the push lever and does not operate unless the push lever is
depressed (upward position).
There are two methods of operation to drive nails with this Nailer.
They are:
1.Intermittent operation (Trigger fire):
2.Continuous operation (Push lever fire):
⑴Intermittent operation (Trigger fire)
①Position the nail outlet on the workpiece with finger off the trigger.
②Depress the push lever firmly until it is completely depressed.
③Pull the trigger to drive a nail.
④Remove finger from the trigger.
To drive another nail, move the Nailer along the workpiece and repeat this
procedure.
“METHODS OF OPERATION” found below.
●Never place your hands or feet closer than 8 inches (200 mm) from ring head when using.
●Do not drive nails on top of other nails or with Nailer at too steep of an angle; nails can ricochet
and hurt someone.
●In order to avoid double re or unwanted ejection of a nail due to bouncing of the Nailer.
①Do not push Nailer on workpiece with strong force;
②Take Nailer away from workpiece using recoil;
③Release trigger quickly when performing trigger fire.
●Do not drive nails into thin boards or near corners and edges of workpiece. Nails can be driven
through or away from workpiece and hit someone.
●Never drive nails from both sides of a wall at the same time. Nails can be driven into and through
the wall and hit a person on the opposite side.
●Never use Nailer which is defective or operating abnormally.
●Do not use Nailer as hammer.
●Disconnect air hose from Nailer when:
①It is not in use;
②Leaving work area;
③Moving it to another location; and handing it to another person.
This Carpenter nailer has a STANDARD CONTACT TRIP MECHANISM (Bounce Fire). An OPTIONAL
SEQUENTIAL TRIP MECHANISM kit (SINGLE SHOT) is available.
THE STANDARD CONTACT TRIP MECHANISM (Bounce Fire) is for use where rapid fastener
placement is desired and must be operated in accordance with the following “Methods of
Operation”.
Model No. CCN65Z contact us 1-888-666-1887
OPERATING INSTRUCTIONS
1
Nail Guide
2
Knob
3

1918
WARNING
THE OPTIONAL SEQUENTIAL TRIP MECHANISM (SINGLE SHOT PARTS) is for use where precision
fastener placement is desired and must be operated in accordance with the following “Method of
Operation”.
You must first depress the push lever (upward position) where you wnat to drive a nail and
then pull the trigger. After the each nail is driven, completely release the trigger and lift the
tool off the work surface. An OPTIONAL SEQUENTIAL TRIP MECHANISM may reduce the possibility
of bodily injury to you or others in the work area. This is because it is less likely to drive an
unwanted nail if you keep the trigger pulled and accidentally bump the push lever against
yourself or others. An OPTIONAL SEQUENTIAL TRIP MECHANISM may also reduce the speed of
operation compared to the standard contact trip mechanism.
NOTE:
Both STANDARD CONTACT TRIP MECHANISM and OPTIONAL SEQUENTIAL TRIP MECHANISM are
safe if used as described above and accroding to all warnings and instructions.
Always handle nails and package carefully.
If dropped, the collated nails may break or come loose. In such cases, do not use the nails because,
if used in that condition, nail feed may become faulty and result in missed nails or jamming of the
nails.
After nailing:
⑴Disconnect air hose from the Nailer;
⑵ Remove all nails from the Nailer;
⑶ Supply a few drops (approximately 2 cc (.12 in3)) of iubricant into the air plug
on the Nailer;
⑷Open the petcock on the air compressor tank to drain any moistures.
●Keep your nger off the trigger except during fastening operation, because serious
injury could result if the push lever accidentally contacts you or others in work area.
●Keep hands and body away from the discharge area. The nailer with contact trip
mechanism may bounce from the recoil of driving a fastener and unwanted subsequent
fastener may be driven, possibly causing injury.
●Some types of loaded nails can spark out of the muzzle during a nail
driving operation. Exericise caution!
⑵Continuous operation (Push lever fire)
①Pull the trigger with the Nailer off the workpiece.
②Depress the push lever against the workpiece to drive a nail.
③Move the Nailer along the workpiece with a bouncing motion.
④Each depression of the push lever will drive a nail.
As soon as the desired number of nails have been driven, remove your finger from
the trigger.
Model No. CCN65Z contact us 1-888-666-1887
OPERATING INSTRUCTIONS
Trigger
Push Lever
Previously pull
the trigger
3
1

2120
ADJUSTING THE NAILING DEPTH
To assure that each nail penetrates to the same depth,be sure that:
⑴The air pressure to the Nailer remains constant(regulator is installed and
working properly).
⑵The Nailer is always held firmly against the workpiece.adjust the nailing
in the following order.
①DISCONNECT AIR HOSE FROM NAILER.
CHANGING THE EXHAUST DIRECTION
The direction of the exhaust vent can be changed by turning the top cover
CUTTING OFF THE SHEET
Tear off the output sheet in the direction of the arrow when using the sheet collated nails.
USING THE NOSE CAP
Change the Method Of Operation
If you like to protect the surface of workpiece against scratches or markings made by the push lever,
attach the accessory nose cap to the push lever.
①DISCONNECT AIR HOSE FROM NAILER.
②Put the nose cap to the toe of the push lever.
NOTE:
●The nose cap may reduce nailing depth due to its thickness .Re-adjustment of nailing depth is
required.
②If nails are driven too deep,turn the adjuster to the shallow side.
Adjustments are in half-turn increments.
If nails are driven too shallow,turn the adjuster to the deep side.
Model No. CCN65Z contact us 1-888-666-1887
OPERATING INSTRUCTIONS
Adjuster
5
1
Do not connect
air hose
Push Lever
Nose Cap
1
Do not connect
air hose
Bump
Sequential

2322
MAINTENANCE
WARNING
NOTE: The information contained in this Manual is designed to assist you in the safe
maintenance of the Nailer.
Some illustrations in this Manual may show details or attachments that differ
from those on your own Nailer.
1. Clearing a jam
Remove a jammed nail in the following order:
(1) DISCONNECT AIR HOSE.
(2) Open the nail guide.
Insert a rod into the outlet.
Tap the rod with a hammer.
Remove the jammed nail with a slotted screw driver.
Open the nail guide and remove dust. Lubricate the sliding groove of the feeder and shafts.
Read section titled “SAFETY” (pages 4 – 6).
Disconnect air hose and remove all nails from
Nailer when doing maintenance and inspection and
clearing a jam.
MAINTENANCE AND INSPECTION
2. Inspecting the push lever
⑴DISCONNECT AIR HOSE.
⑵Clean the push lever sliding part.
Lubricate it with lubricant.
⑶Cut the deformed collated with nippers. Correct the deformation.
In case of frequent jam, contact Canpenter authorized service center.
3. Inspecting the feeders
⑴DISCONNECT AIR HOSE.
⑵ Clean the knob sliding part.
Lubricate it with lubricant.
Model No. CCN65Z contact us 1-888-666-1887
MAINTENANCE
MAINTENANCE
Hammer
rod
outlet
1Disconnect
air hose
Nail Slotted Screw Drive
Nose
Push
1Disconnect
air hose
Lubricate
Lever
Nail Guide
Knob 1Disconnect
air hose

2524
SERVICE AND REPAIRS
CAUTION
WARNING
Only service personnel trained by Carpenter, distributor or employer shall repair the Nailer.
Use only parts supplied or recommended by Carpenter for repair.
All quality Nailers could eventually require servicing or replacement of parts because of wear from
normal use.
NOTE: Specifications are subject to change without any obligation on the part of Carpenter.
Maintenance chart (See page 26)
Operator troubleshooting (See page 26)
Check that nail stopper (A) and nail stopper (B) slide smoothly by pusing them with nger.
If not smooth, nails can be driven at an irregular angle and hurt someone.
Lubricate the feeding surfaces of the nose and the nail guide after cleaning.
This promotes smooth operation and prevents rust.
4. Inspecting the magazine
⑴DISONNECT AIR HOSE.
⑵Clean the magazine. Remove dust or wooden tips which may have
accumulated in the magazine.
5. Storing
When not in use for an extended period, apply a thin coat of the lubricant to the steel parts
to avoid rust.
Do not store the Nailer in a cold weather environment. Keep the Nailer in a warm area.
When not in use, the Nailer should be stored in a warm and dry place.
Keep out of reach children.
6. WARNING LABEL
Change the WARNING LABEL if missing or damaged. A new WARNING LABEL is available from a
Carpenter authorized service center.
Warning
Label
Model No. CCN65Z contact us 1-888-666-1887
MAINTENANCE
MAINTENANCE
Nail guide
Nail Stopper
Nose
Feeder

2726
Maintenance chart
ACTION
Drain air line filter daily.
Keep lubricator filled.
Clean filter element-then blow air
through filter in direction opposite
to normal flow.
Clean magazine and feeder
mechanism.
Keep push lever working properly.
Lubricate the Nailer after nailing
Drain air compressor.
WHY
Prevent accumulation of
moisture and dirt.
Keep the Nailer lubricated.
Prevent clogging of filter
with dirt.
Prevent a jam
Promote operator safety and
efficient Nailer operation.
Extend the Nailer life.
Keep the Nailer operate
properly.
HOW
Open manual petcock.
Fill with lubricant.
Follow manufacturer’s
instructions.
Blow clean daily
Blow clean daily
Supply 2-3 drops of lubricant
into the nailer
Open petcock on air
compressor tank.
Operator troubleshooting
Most minor problems can be resolved quickly and easily using the table below.
If problems persist,contact a Carpenter for assistance.
PROBLEM
Nailer operates,but
no nail is driven
Weak drive.
Slow to cycle.
Drives too deep
Skipping nails.
Intermittent feed.
Nails jam
Driven nail is bent.
Drives properly
during normal
operation,but does
not drive fully at
faster nailing speeds.
POSSIBLE CAUSES
Check for a jam.
Check for proper nails.
Check air pressure.
---
Driver blade worn
Piston O-ring worn or damaged
Check air pressure.
Check for proper nails.
Check function of nail feeder per page
15.
---
Check position of nail holder
in manazine per page11.
Piston O-ring cut or heavily worn
Check for proper nails.
Driver blade worn
Check inside diameter of air hose.
SOLUTIONS
Clear a jam per page 22
Clean and lubricate.
Use only recommended nails.
Increase air pressure.(Do not
exceed 120 psi(8.3bar 8.5kg/cm2)
Use the lubricant.
Contact Carpenter for replacement.
Reduce air pressure.(Adjust 70-
120psi)
Use only recommended nails.
Clean and lubricate.
Use lubricant.
Adjust nail holder to proper
position.
Contact Carpenter for replacement.
Use only recommended nails.
Contact Carpenter for replacement.
Use larger air hose.
Model No. CCN65Z contact us 1-888-666-1887
TROUBLESHOOTING
EXPLODED VIEW
Check function of feeder per page15.

2928
Model No. CCN65Z contact us 1-888-666-1887
PARTS LIST
PARTS LIST
53
54
55
56
57
58
59
60
61
62
63
64
65
66
67
68
69
70
71
72
73
74
75
76
77
78
79
80
81
82
83
84
85
86
87
88
89
90
91
92
93
94
95
96
97
501
502
503
504
505
506
sleeve
O-ring 6.1*1.8
O-ring 6.4*2
O-ring 9*1.8
Swtich spring
Trigger Plunger B
O-ring 2.4*1.6
O-ring 20*1.8
Trigger Valve Bushing
Magazine Bushing
Hex.Socket HD.Bolt M5x10
Feed Piston Cover
Gasket
O-ring 11.2*1.8
o-ring
Feed Piston
Nose
Sleeve
Nut M5
Driver guide cover
Feeder Shaft
Feeder
Shaft
O-ring 8.75*1.8
Hex. Socket HD.Bolt M6x25
Nail Guide Shaft
Spring
Nail Guide Cover
Hex. Socket HD.Bolt M4x10
Nail Guide Cover
Spring
Trigger handle
Roll Pin 3*12
Cover Pin
O-ring 4*1.8
Spring
Nail Stopper
Spring washer 6
Magazine
I-Nut M5
Pin
Feeder Shaft Ring
Magazine Cover
Label
Magazine
Oil pot
Hex M5/4mm
Hex M6/5mm
Hex M8/6mm
Safety glasses
Manual
Hex. Socket
Top Cover
Hex. Socket HD. Bolt M5x30
Hex. Socket HD. Bolt M5x10
Exhaust Cover
Gasket
Spring
O-ring 32.6*2.5
O-ring 43*2.65
Head Cap
swtich valve sealing
spring seat
O-ring 34.5*3.55
Piston
Ratchet Spring
O-ring 44.5*2.5
Cylinder Plate
O-ring 63.6*2.5
O-ring 45*3.55
Cylinder
Gunbody
Grip Rubber
O-ring 36.5*2.65
End cap
Air inlet plug 3/8"
Dust Cap
shift rod
Roll Pin 3*28
O-ring 5.15*1.5
guide holder
Sping
Plunger
Piston Bumper
O-ring 40.5*2
Adjusting screw
Rock pin 3
Pushing Lever
Tip sleeve
Safety Guard
Trigger
pin 2.5*16
Shift knob
pin 3*10
Spring
steel ball DW=4
pin 3*30
pin 3*22
Washer D=5
Hex.Socket HD.Bolt M5x25
O-ring 14*1.8
Valve Bushing
O-ring 16*1.6
1
2
3
4
5
6
7
8
9
10
11
12
13
14
15
16
17
18
19
20
21
22
23
24
25
26
27
28
29
30
31
32
33
34
35
36
37
38
39
40
41
42
43
44
45
46
47
48
49
50
51
52
1
1
4
1
1
1
1
1
1
1
1
1
1
1
1
1
1
1
1
1
1
1
1
1
1
1
1
2
2
1
1
1
1
1
1
1
1
2
1
1
1
1
1
1
1
1
1
3
2
1
1
1
1
1
1
1
1
1
2
1
1
1
2
1
1
1
1
1
1
1
1
1
1
1
2
1
4
1
1
2
2
1
1
1
2
1
2
1
1
4
1
1
1
1
1
2
1
1
1
1
1
1
1

Popular Nail Gun manuals by other brands

DeWalt
DeWalt 20V MAX DCN890 instruction manual

Bostitch
Bostitch BTFP2350 instruction manual

Campbell Hausfeld
Campbell Hausfeld Maxus MXN20100 operating instructions

Arrow Group Industries
Arrow Group Industries PT23G instruction manual

Makita
Makita DFN350 instruction manual

RIDGID
RIDGID R09894 Operator's manual