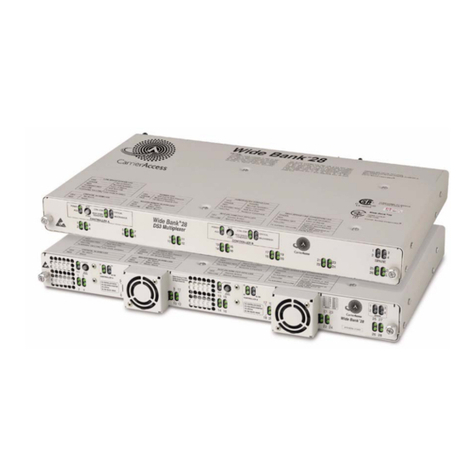
Carrier Access Wide Bank 28 DS3 User manual

Wide Bank 28 DS3
QUICK START GUIDE
Product Number: 002-0139-0500
Product Release: 2.4
July 2004

Copyright 2004 Carrier Access Corporation. All rights reserved.
The information presented in this manual is subject to change without notice and does not represent
a commitment on the part of Carrier Access Corporation. The hardware and software described
herein are furnished under a license or non-disclosure agreement. The hardware, software, and
manual may be used or copied only in accordance with the terms of this agreement. It is against the
law to reproduce, transmit, transcribe, store in a retrieval system, or translate into any medium –
electronic, mechanical, magnetic, optical, chemical, manual, or otherwise – any part of this manual
or software supplied with the Wide Bank 28 for any purpose other than the purchaser’s personal use
without the express written permission of Carrier Access Corporation.
Wide Bank and the Carrier Access Logo are registered trademarks of Carrier Access Corporation.
All other brand or product names are trademarks or registration trademarks of their respective
companies or organizations.
Contact Information:
Carrier Access Corporation
5395 Pearl Parkway
Boulder, CO 80301-2490
Corporate Phone: (800) 495-5455
Fax: (303) 443-5908
www.carrieraccess.com
Customer Support Direct: (800) 786-9929
E-mail: [email protected]

QUICK START GUIDE
In this Guide
Overview
Physical Installation
Electrical Connections and Cabling
Provision Services
Maintenance Commands
LED Status Indicators
Fault Isolation
Quick Start Guide

4 July 2004 Wide Bank 28 DS3 - Release 2.4
Quick Start
Overview
Overview
This Wide Bank® 28 DS3 Quick Start Guide is intended for experienced installers and
users who do not need the detailed installation and setup instructions provided in the
User Manual. For detailed information and instructions, refer to the following chapters
in the User Manual, included on the CD-ROM disk in the shipping box.
zChapter 3 – Technical Specifications
zChapter 4 – Physical Installation
zChapter 5 – Electrical Installation and Cabling
zChapter 6 – Configuration
zChapter 7 – Diagnostics and Troubleshooting
zChapter 8 – CLI Commands and Messages
zChapter 10 – Maintenance
zChapter 12 – Alarm Reporting
Physical Installation
Ensure adequate clearance and spacing for thermal cooling. For detailed information,
refer to Chapter 4 in the Wide Bank 28 DS3 User Manual.
•FFO-Equipped Units. Only units equipped with the Fan Faceplate Option can be
mounted flush together without any free air space between units.
•Non-FFO Units, Horizontal Mounting. Ensure 1 RU (1.75 inches) minimum free
air space between units and 4 RU minimum space between each group of 4 units.
•Non-FFO Units, Vertical Mounting. Requires Carrier Access Vertical Mount
Crossbars, which provide proper spacing between units.

Wide Bank 28 DS3 - Release 2.4 July 2004 5
Quick Start
Electrical Connections and Cabling
For detailed information, refer to Chapter 5 in the Wide Bank 28 DS3 User Manual.
1. Power Connection. ALWAYS Connect BOTH –48VDC Connectors, and connect
the ground lugs to the building ground.
2. Connect High-Speed DS3 and Low-Speed DS1/E1 Cables. Attach ferrite RF
suppressors to low-speed cables.
3. Connect Ethernet, RS-232 Management, TL1 Alarming and Management,
and Alarm Outputs, if used. Attach ferrite RF suppressors to RS-232 cable.
MJ/MN
(Major/Minor)
Alarm
Critical
Link OK
(LED)
Ethernet
HIGH
SPEED
IN
OUT
Primary
(Working)
IN
OUT
Secondary
(Protection)
GND
RTN
-48V
AB
Power
TL1
Alarming
External
Clock Input
RS-232
Management
Port
LOW SPEED
External
Grounding
Lugs
DS1/E1 Drain
Wires
LOW SPEED
DS1/E1 IN
DS1/E1 OUT
(44.736 Mbps)

6 July 2004 Wide Bank 28 DS3 - Release 2.4
Quick Start
Provision Services
Provision Services
zCLI Tips and Tricks
zStarting CLI Session
zVerifying Status
zSetup Commands
Initial provisioning normally uses the local Craft RS-232 CLI management port. (The
RS-232 port must be used to set up the Ethernet and TL1 ports for remote
management.)
For detailed information, refer to Chapter 6 in the Wide Bank 28 DS3 User Manual.
CLI Tips and Tricks
The following tips and tricks can be helpful when using the Command Line
Interface:
zIf you initiate a craft RS-232 session and find that a Telnet session is already
active, you can cancel (kill) the conflicting session by pressing CTRL+k.
zYou can back up (reverse) through the last three commands that were issued
by pressing CTRL+r, and move forward by pressing CTRL+f.
zWhen the screen scrolling stops with a more... message, pressing Enter
advances the scroll one line, and pressing the space bar advances the scroll one
page. For continuous scrolling (no stops), set the screen lines to zero by
entering the command screen 0.
zTo stop a long scroll from completing, press Esc.

Wide Bank 28 DS3 - Release 2.4 July 2004 7
Quick Start
Provision Services
Starting CLI Session
1. Connect PC to Craft RS-232 Port on Wide Bank 28 DS3 connector panel.
2. Set PC terminal interface for: 9600 baud, 8 data bits, no parity bit, one stop bit,
no flow control.
3. Press the Enter key to initialize connection and produce the Command Line
prompt.
4. Log into the Wide Bank, if required, by providing a user name and password.
NOTE: For convenience in new installations, the Wide Bank is shipped
with security turned off. For information about setting up security for the
Wide Bank, see Chapter 6 in the Wide Bank 28 DS3 User Manual.
If the Ethernet and TL1 ports have already been configured for remote
management, you can also use a CLI/Telnet session or TL1 session. See Chapter 5
in the Wide Bank 28 DS3 User Manual for detailed informations.
Verifying Status
1. Initiate self-test of all DS3, DS1, and cooling fan circuits with the following
command:
test all
2. Display current alarms with the following command:
alarms
3. Display current configuration settings with the following command:
config

8 July 2004 Wide Bank 28 DS3 - Release 2.4
Quick Start
Provision Services
Setup Commands
NOTE: Low-speed connections can be DS1 or E1. The following
examples of commands refer only to DS1, but the same information applies
to E1 as well, except that there are only three E1 channels per card,
numbered 1-3, 5-7, 9-11, etc.
Setup Commands
Notes: Asterisk * indicates default setting.
Brackets [ ] enclose optional settings.
Braces { } enclose required settings.
Italics indicate variable names.
1 – DS3 Path
1 – Controller
1 – DS3 Path
2 – Controllers
2 – DS3 Paths
2 – Controllers
CONTROLLER SETUP:
Protection DS3:
protect ds3 {off|on}
arm {off|on*}
Revertive DS3:
revertive ds3 {off|on}
Protection DS1:
protect ds1 {off|on*)
Revertive DS1:
revertive ds1 {off|on*)
Autocopy:
autocopy {off|on*}
Alarm Output Relay Contacts:
alarmout {nc|no*}
off
off
off
off*
on*
on*
on
on
on|off

Wide Bank 28 DS3 - Release 2.4 July 2004 9
Quick Start
Provision Services
Setup Commands Comments
FAN FACEPLATE OPTION (FFO):
ffo present {off*|on}
Enables and disables the Fan Faceplate Not
Present alarm.
Note: When an FFO-capable controller is
powered up, or a fan faceplate is removed and
reinstalled, the controller will detect the fan
faceplate and set ffo present on.
HIGH-SPEED DS3 PORT SETUP:
Framing:
ds3 framing {m23*|cbit}
Timing:
ds3 clock {line|internal*|external}
Build-out:
ds3 length {short*|long}
Threshold:
ds3 threshold {4|5|6|off*}
Circuit ID:
ds3 circuitid "id"
Loopdetect
ds3 loopdetect {off|on*}
External source must be 44.736 Mbps.
Short is < 50 ft., Long is ≥ 50 ft.
LCV=10–n where n=3 to 6.
DS3 C-BIT ID SETUP:
ds3 equipmentid "identifier"
ds3 facilityid "identifier"
ds3 frameid "identifier"
ds3 gennumber "number"
ds3 locationid "identifier"
ds3 portnumber "number"
ds3 unit "unit"
Note: Used only with DS3 C-bit Framing.
Set DS3 Equipment ID.
Set DS3 Facility ID.
Set DS3 Frame ID.
Set DS3 Generator Number.
Set DS3 Location ID.
Set DS3 Port Number.
Set DS3 Unit ID.

10 July 2004 Wide Bank 28 DS3 - Release 2.4
Quick Start
Provision Services
LOW-SPEED PORT SETUP:
Low-speed mode:
lsmode {ds1*|ds1ls|e1ls}
Linecode:
ds1 nlinecode {ami|b8zs*}
Buildout:
ds1 nlength dsxnnn
Circuit ID:
ds1 ncircuitid "identifier"
Loopdetect:
ds1 nloopdetect {off*|on}
Disable Unused DS1s:
ds1{n|all} disable
Automatic in-service detection:
ds1 auto/in service {off*|on|delay hours}
ds1 ains {off*|on|delay hours}
n=1..28, range (e.g., 5-8), or all channels.
For E1 cards, change mode to e1ls and replace
ds1 with ls in the following commands.
E1 linecode is fixed at HDB3.
E1 buildout is fixed. DS1 buildouts dsxnnn =
dsx0*,dsx110,dsx220,dsx330,dsx440,dsx550.
Set DS1 Circuit ID.
Disabling DS1s prevents alarms. Disable all
DS1s, then enable each as it is connected.
Detects new low-speed service connections
and inhibits LOS alarms until a new service
has been connected for the specified delay.
Release 2.40 uses ds1 ains.
IP ADDRESSES FOR SNMP & TELNET:
ip address xxx.xxx.xxx.xxx
ip mask xxx.xxx.xxx.xxx
ip gateway xxx.xxx.xxx.xxx
ip nms1 xxx.xxx.xxx.xxx
ip nms2 xxx.xxx.xxx.xxx
ip nms3 xxx.xxx.xxx.xxx
ip ppp xxx.xxx.xxx.xxx
ip route {ethernet*|ppp xxx.xxx.xxx.xxx}
snmp name "Wide Bank 28 M13 Multiplexer"
snmp location "Wide Bank 28 Location"
snmp contact "Wide Bank 28 Contact"
snmp getcomm "public"
snmp setcomm "public"
snmp trapcomm "public"
xxx = 0-255.
Fields in quotes are stored as character strings
and must be entered with the quotes.
Set Network Maintenance System addresses.
ip ppp and ip route are valid only when Wide
Bank is configured for C-bit framing.
SNMP values are defaults.
Setup Commands Comments

Wide Bank 28 DS3 - Release 2.4 July 2004 11
Quick Start
Provision Services
SYSTEM TIME AND DATE:
date mm/dd/yyyy
time hh:mm:ss
Sets the date and time so that the alarm reports
and the logs will make sense.
Note: Time and Date are reset when unit is
powered up.
CLEAR STATISTICS AND LOGS:
clear {all|ds1 [n|range|all]
|ds3|log [standby]|wtr}
n= 1-28, range = n-n(as in 5-8).
wtr clears 5 minute wait-to-restore period.
Setup Commands Comments

12 July 2004 Wide Bank 28 DS3 - Release 2.4
Quick Start
Maintenance Commands
For a quick list of all CLI commands, use the help command. For more information on
a specific command, type the command followed by help. See Chapter 8 of Wide Bank
28 DS3 User Manual for detailed information.
The following tables and commands are for low-speed mode DS1. When using the
other modes (DS1LS and E1LS), replace ds1 command with ls.
Maintenance Operation Commands
Checking Configurations alarmout Display Alarm Output Contact Setting
controller Display Controller Settings
config Display All Settings
ds1 [n|range|all] Set/Display Low-speed Settings
n=1..28, range (e.g., 5-8), or all channels
ds3 Set/Display DS3 Settings
equipment Display the Equipment List
status Display Status of Interface(s)
version Display Controller Software Version
Checking Alarms, Logs, and
Performance
alarms Display Active Alarms
log Display the Alarm History Log
clear Clear Statistics or Logs
hour Display 1-Hour Performance
day Display Day (24-Hour) Performance
Managing Controller Memory temp copy Temporarily save Current Configuration
Settings
restore Restore Settings with defaults, temp
copy, or tftp file
copy Copy Settings from Active to Standby
Controller Card
save tftp Copy Settings to FTTP Server File
switch Switch to Standby Controller Card

Wide Bank 28 DS3 - Release 2.4 July 2004 13
Quick Start
Maintenance Commands
Testing Equipment ds3 Set/Display DS3
equipment Apply Equipment Loopback to DS3
line Apply Line Loopback to DS3
payload Apply Payload Loopback to DS3
send Send a Code toward DS3 Network
loopdetect [off|on]Set detection of loop codes on or off
ds1 {n|range|all} Set/Display Low-speed Settings
n=1..28, range (e.g., 5-8), or all channels
equipment Apply low-speed Equipment Loopback
line Apply Line Loopback to low-speed
metallic Apply low-speed Metallic Loopback
move Move low-speed channel to Spare
loopdetect [off|on]Set detection of loop codes on or off
send Send a Code toward low-speed drop
test Perform selected self-test(s)
ping ipaddr [n] [d] Send IP Ping to ipaddr up to ntimes with
dmilliseconds delay between pings
results Display Results of Last Test(s)
Maintenance Operation Commands

14 July 2004 Wide Bank 28 DS3 - Release 2.4
Quick Start
LED Status Indicators
Status LED indicators on the Wide Bank 28 DS3 Control Panel provide a visual means
of identifying system status, high-speed DS3 line condition, low-speed DS1/E1 line
status, and Ethernet link status. (See next page for LED meanings.) For more
information about Wide Bank 28 DS3 alarms and reporting, see Chapter 7 of Wide
Bank 28 DS3 User Manual.
Low Speed Status LEDs 1-28
Spares
High Speed Controller BHigh Speed Controller A
1-4 5-8 25-2821-24
POWER
ACO
CTRL STAT
CRITICAL
MAJOR/MINOR
HIGH SPEED CONDITION
9-12 13-16 17-20
Standard Faceplate
(1-4)
Fan Faceplate FAN A FAN B
Ethernet Link LED
Rear View

Wide Bank 28 DS3 - Release 2.4 July 2004 15
Quick Start
LED Status Indicators
CR - CRITICAL ALARM
LED
State Meaning
OFF
RED
No Alarms
Traffic-Affecting Fault
MJ/MN - MAJOR/MINOR ALARM
LED
State Meaning
OFF
YELLOW
RED
No Alarms
Minor Alarm
Major Alarm
CS - CTRL STAT
(DS3 CONTROLLER STATUS)
LED
State Meaning
OFF
GREEN
RED
RED Flashing
YELLOW
Standby
Normal (Active) Operation
Alarm Condition
Self-Test Fail
Network Loopback
HS - HIGH SPEED LINE CONDITION
(DS3 CONDITION)
LED
State Meaning
GREEN
RED
RED Flashing
YELLOW
YELLOW Flashing
Normal Operation
Loss of Signal
LOF or AIS Received
Remote Alarm Detection
Line Code Violation,
Frame Bit Error, or
Parity Error
ACO - ALARM CUTOFF
LED
State Meaning
OFF
YELLOW
Alarms Active
Alarms Suppressed
LS - LOW SPEED STATUS
(DS1, E1 & SPARE CIRCUITS)
LED State Meaning
OFF
GREEN
RED
RED Flashing
YELLOW
YELLOW Flashing
Off Line
Normal Operation
Loss of Signal or
Metallic Loopback
Self-Test Fail
Line or Equipment Loopback
Line Code Violation
ETHERNET STATUS
(On Rear Panel)
LED
State Meaning
OFF
GREEN
No Power or No Link
Link OK
POWER
LED State Meaning
OFF -48V Input Power Is High,
Low or Missing, or -48V
Internal Power Failed
GREEN
RED
Normal Operation
5V Onboard Power
Supply Failed

16 July 2004 Wide Bank 28 DS3 - Release 2.4
Quick Start
Fault Isolation
Fault Isolation
Test and loop-backs provided on the low-speed (LS)
side. LS cards can be DS1 or E1, but not both in
same unit. Tests can be commanded locally via
CLI or remotely through Telnet. For LS mode,
substitute “ls [n]” in the examples below.
LOGICAL
Relays Trans-
ceiver
LS Card
Relays Trans-
ceiver
Spare LS Card
METALLIC
Line Loop-backs for the DS1 Line Loop-back for the DS3
Relays
Trans-
ciever
M13
Framer
LOGICAL
Equipment Loop-back for the DS1
Selector Relays
Trans-
ciever
M13
Framer
Relays Trans-
ceiver
LS Card
DS1 Self-Test (Lasts 1/4 Sec.)
Selector Relays
Trans -
ciever
M13
Framer
Relays Trans-
sceiver
LS Card
DS3 Self-Test (Lasts 1/4 Sec.)
Selector Relays
Trans-
ciever
M13
Perform
Self-Test
Relays Trans-
ceiver
LS Card
Perform Self-Test
on QDSX IC
Relays Trans-
ceiver
LS Card
Selector Relays
Trans-
ciever
M13
Framer
External
Loop
External
Loop
Test and loop-backs provided on the high-speed (HS)
side. HS card is DS3 Controller. Tests can be com-
manded locally via CLI or remotely through Telnet.
COMMAND: ds1 [n] equipment on
Equipment Loop-back for the DS3
COMMAND: ds3 equipment on
COMMAND: test ds1 [n] COMMAND: test ds3
COMMAND: ds3 line onLOGICAL COMMAND: ds1 [n] line on
METALLIC COMMAND: ds1 [n] metallic on
COMMAND: ds1 [n] send prbs [drop | network] COMMAND: ds3 send prbs
Toward DS3Toward DS1/E1
Loop-back
Toward DS1/E1
Loop-back
Toward DS1/E1s
Loop-back
Toward DS3
Send AIS
Toward DS3
Send AIS
Toward DS1/E1
DS1 Diagnostic DS3 Diagnostic
Send PRBS
Toward DS3
Send PRBS
Toward DS1/E1
Send AIS
Toward DS1/E1
Loop-back
Toward DS3
Send
AIS
Toward
DS3
Send AIS
Toward DS3
Send AIS on DS1
Toward DS3
Send AIS
Toward DS1/E1
Selector
Send AIS
Toward DS1/E1
One
DS1
within
DS3
Send AIS
Toward DS1/E1
Relays Trans-
ceiver
LS Card
Other manuals for Wide Bank 28 DS3
2
Table of contents
Other Carrier Access Multiplexer manuals
Popular Multiplexer manuals by other brands

RAZORBILL
RAZORBILL MP240 user manual

American Dynamics
American Dynamics DigiMux DG4004 Quick setup guide

Panasonic
Panasonic WJMP404 - MULTIPLEX UNIT operating instructions

Fiberplex
Fiberplex WDM16 user manual

Agilent Technologies
Agilent Technologies E8462A user manual

Lucent Technologies
Lucent Technologies Metropolis DMXtend installation manual