Sanyo MPX-CD4P User manual

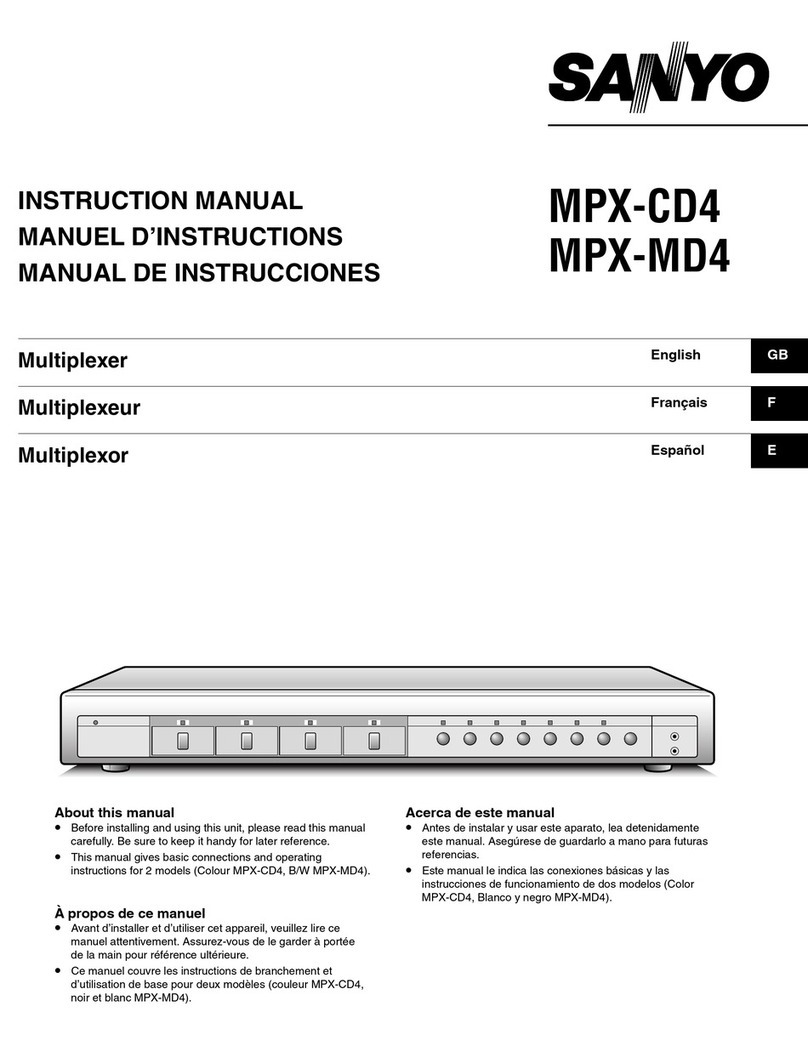
INSTRUCTION MANUAL MPX-CD4P
MPX-MD4P
Multiplexer English GB
Multiplexer Deutsch D
Multiplexeur Français F
Multiplexor Español E
Multi distributore Italiano I
About this manual
•Before installing and using this unit, please read this manual
carefully. Be sure to keep it handy for later reference.
•This manual gives basic connections and operating
instructions for 2 models (Colour MPX-CD4P, B/W
MPX-MD4P).
Über diese Anleitung
•Lesen Sie bitte diese Bedienungsanleitung vor der
Installation und der Verwendung des Gerätes sorgfältig
durch. Bewahren Sie die Anleitung zum späteren
Nachschlagen auf.
•In dieser Anleitung werden die Anschlüsse und die
Bedienungsanleitungen für 2 Modelle (Farbe MPX-CD4P,
Schwarzweiß MPX-MD4P) beschrieben.
À propos de ce manuel
•Avant d’installer et d’utiliser cet appareil, veuillez lire ce
manuel attentivement. Assurez-vous de le garder à portée de
la main pour référence ultérieure.
•Ce manuel couvre les instructions de branchement et
d’utilisation de base pour deux modèles (couleur MPX-CD4P,
noir et blanc MPX-MD4P).
Acerca de este manual
•Antes de instalar y usar este aparato, lea detenidamente este
manual. Asegúrese de guardarlo a mano para futuras
referencias.
•Este manual le indica las conexiones básicas y las
instrucciones de funcionamiento de dos modelos (Color
MPX-CD4P, Blanco y negro MPX-MD4P).
Nota su questo manuale
•Leggere attentamente questo manuale prima di passare
all’installazione ed all’uso di questo apparecchio.
•Questo manuale contiene istruzioni per i principali
collegamenti ed il funzionamento di due modelli (il modello a
colori MPX-CD4P, ed il modello in bianco e nero MPX-MD4P).
L8FH5/XE (MPX-CD4P, MD4P GB) 1999. 12. 2

PRECAUTION
WARNING: TO REDUCE THE RISK OF FIRE OR
ELECTRIC SHOCK, DO NOT EXPOSE THIS
APPLIANCE TO RAIN OR OTHER MOISTURE.
To avoid electrical shock, do not open the cabinet.
Refer servicing to qualified personnel only.
If the power supply cord (AC power cord) of this
appliance is damaged, it must be replaced. Return to a
SANYO Authorised Service Centre for replacement of
the cord.
Location
For safe operation and satisfactory performance of your
multiplexer, keep the following in mind when selecting a place
for its installation:
•Shield it from direct sunlight and keep it away from sources of
intense heat.
•Avoid dusty or humid places.
•Avoid places with insufficient ventilation for proper heat
dissipation. Do not block the ventilation holes at the top and
bottom of the multiplexer. Do not place the unit on a carpet
because this will block the ventilation holes.
•Install the multiplexer in a horizontal position only.
•Avoid locations subject to strong vibrations.
•Avoid moving the multiplexer between cold and hot locations.
•Do not place the multiplexer directly on top of a monitor TV,
as this may cause playback or recording problems.
Avoiding Electrical Shock and Fire
•Do not handle the power cord with wet hands.
•Do not pull on the power cord when disconnecting it from an
AC wall outlet. Grasp it by the plug.
•If any liquid is spilled on the multiplexer, unplug the power
cord immediately and have the unit inspected at a
factory-authorised service centre.
•Do not place anything directly on top of this multiplexer.
SERVICE
This unit is a precision instruments and if treated with care, will
provide years of satisfactory performance. However, in the event
of a problem, the owner is advised not to attempt to make
repairs or open the cabinet. Servicing should always be referred
to your dealer or Sanyo Authorized Service Centre.
CAUTION
Danger of explosion if battery is incorrectly replaced.
Replace only with the same or equivalent type recommended
by the manufacturer.
Discard used batteries according to the manufacture’s
instructions.
L8FH5/XE (MPX-CD4P, MD4P GB) 1999. 12. 2
English 1

CONTENTS
PARTS NAMES . . . . . . . . . . . . . . . . . . . . . . . . . . . . 3
FRONT PANEL . . . . . . . . . . . . . . . . . . . . . . . . . . . . 3
REAR PANEL . . . . . . . . . . . . . . . . . . . . . . . . . . . . . 4
CONNECTION . . . . . . . . . . . . . . . . . . . . . . . . . . . . . 5
BASIC CONNECTIONS . . . . . . . . . . . . . . . . . . . . . . 5
CONNECTIONS TO THE S-VIDEO
TERMINALS . . . . . . . . . . . . . . . . . . . . . . . . . . . . . . 5
REMOTE CONTROLLER CIRCUIT
CONNECTIONS . . . . . . . . . . . . . . . . . . . . . . . . . . . . 6
INSTALLING THE RACK MOUNTING
BRACKETS . . . . . . . . . . . . . . . . . . . . . . . . . . . . . . . 6
BASIC OPERATIONS . . . . . . . . . . . . . . . . . . . . . . . 7
MODE SWITCHING . . . . . . . . . . . . . . . . . . . . . . . . . 7
SECURITY LOCK FUNCTION . . . . . . . . . . . . . . . . 8
SETTINGS BACKUP FUNCTION . . . . . . . . . . . . . . 8
RESET FUNCTION . . . . . . . . . . . . . . . . . . . . . . . . . 8
LIVE PICTURE MODE . . . . . . . . . . . . . . . . . . . . . . . 9
4 DIVISIONS SPLIT SCREEN OPERATIONS . . . 10
FULL SCREEN OPERATIONS . . . . . . . . . . . . . . . 12
SEQUENTIAL DISPLAY OPERATIONS . . . . . . . . 14
MONITOR 2 OPERATIONS . . . . . . . . . . . . . . . . . . 14
VCR PLAYBACK MODE . . . . . . . . . . . . . . . . . . . . 15
4 DIVISIONS SPLIT SCREEN OPERATIONS . . . 16
FULL SCREEN OPERATIONS . . . . . . . . . . . . . . . 18
SEQUENTIAL DISPLAY OPERATIONS . . . . . . . . 20
MENU SETTING MODE . . . . . . . . . . . . . . . . . . . . 21
LANGUAGE SETTING . . . . . . . . . . . . . . . . . . . . . 22
CLOCK AND SUMMER TIME SETTING . . . . . . . . 23
CAMERA TITLE SETTING . . . . . . . . . . . . . . . . . . 24
ALARM SETTING . . . . . . . . . . . . . . . . . . . . . . . . . 25
SENSOR SETTING . . . . . . . . . . . . . . . . . . . . . . . . 26
TIMER SETTING . . . . . . . . . . . . . . . . . . . . . . . . . . 28
CLOCK, TITLE DISPLAY AND MONITOR
SETTINGS . . . . . . . . . . . . . . . . . . . . . . . . . . . . . . . 29
VCR SIGNAL INPUT/OUTPUT AND
COMPUTER CONTROL SETTING . . . . . . . . . . . . 31
ALARM DATA DISPLAY . . . . . . . . . . . . . . . . . . . . 33
ALARMS OPERATIONS . . . . . . . . . . . . . . . . . . . . 34
EXTERNAL ALARMS . . . . . . . . . . . . . . . . . . . . . . 34
VIDEO LOSS ALARM . . . . . . . . . . . . . . . . . . . . . . 34
RS232C CONTROL . . . . . . . . . . . . . . . . . . . . . . . . 35
CONNECTION . . . . . . . . . . . . . . . . . . . . . . . . . . . . 35
INTERFACE SPECIFICATIONS . . . . . . . . . . . . . . 35
COMMANDS . . . . . . . . . . . . . . . . . . . . . . . . . . . . . 35
SPECIFICATIONS . . . . . . . . . . . . . . . . . . . . . . . . . 39
FEATURES
•Duplexing function that allows 4 divisions split screen display
even during live picture recording
•High speed single field switching
•Normal live picture display in 4 divisions split screen
•Video sensor and active recording functions for recording
only when necessary
•Video loss warning function that can switch the display to
colour bars or to a frozen image
•Timer function for recording live pictures only when required
•Computer control function using an RS232C connection
•Still image and zoom display modes in 4 divisions split
screen and full screen display modes
•2 monitor outputs and S-VHS input/output terminals
•Up to 100 alarm recordings log on-screen display
ACCESSORIES
1Power cord x1
2Fixer Power cord tie x1
3Rack mounting brackets bolts x4
23
L8FH5/XE (MPX-CD4P, MD4P GB) 1999. 12. 2
2English
PARTS NAMES
FRONT PANEL
This unit is not equipped with a power switch. The power is turned on/off when the supplied power cord is connected/disconnected at
the power source.
1POWER indicator
2Camera select buttons and camera indicators
Use these buttons to select the picture from the
corresponding camera. Also, when in 4 divisions split
screen, 4 divisions zoom, still image or sequential display
modes, press one of these buttons to return to the normal
picture full screen display of the corresponding camera.
3MON2 button and indicator
Press this button to set the output at monitor 2.
4STILL button and indicator
In 4 divisions split screen, 4 divisions zoom or full screen
display modes, press this button to freeze the displayed
image. Press the button one more time to cancel.
5ZOOM button and indicator
In 4 divisions split screen or full screen display modes,
press this button for a 2x zoomed in image. Press the
button one more time to cancel.
6SEQUENCE button and indicator
In 4 divisions split screen or full screen display modes,
press this button for an automatic sequential full screen
display of the pictures.
7QUAD button and indicator
In full screen display or sequential display modes, press this
button to switch to 4 division display mode. The default
display mode is 4 division display mode.
8LIVE button and indicator
Press this button to select the live input mode.
9VCR button and indicator
Press this button to select the VCR playback input mode.
FMENU button
Press this button to display the menus. Press repeatedly to
select the different menus in order. Buttons 3to 9are
used for menu control (for more information, please refer to
page 7).
GALL RESET button
HMENU RESET button (see page 8)
1234
MON 2 STILL ZOOM
SHIFT EXIT NEXT
SEQUENCE QUAD LIVE VCR MENU
H
MENU RESET
G
ALL RESET
POWER
23456789F1
L8FH5/XE (MPX-CD4P, MD4P GB) 1999. 12. 2
English 3

PARTS NAMES
REAR PANEL
1IN/OUT (Camera input/output) terminals
Connect the cameras cable to the IN terminals.
You can use the OUT terminal to output the camera signal
input at the IN terminal.
2MONITOR 1 (Monitor 1 output) terminal
3MONITOR 2 (Monitor 2 output) terminal
4VCR IN (Video cassette recorder input) terminal
5VCR OUT (Video cassette recorder output) terminal
6S-VHS VCR IN (VCR S-VIDEO signal input) terminal
7S-VHS VCR OUT (VCR S-VIDEO signal output) terminal
8MONITOR 1 (Monitor 1 S-VIDEO signal output) terminal
9RS232C (RS232C) terminal
To control this unit using a personal computer, connect the
computer serial terminal to this terminal using a 9-pin
D-SUB cable (sold separately).
FCONTROL terminal
GBattery compartment
HPower cord holder
Using the supplied tie, attach the power cord to the holder
as illustrated.
IAC Power socket
Insert the power cord female plug firmly into this socket.
When the other plug of the power cord is connect to a live
power source, the POWER indicator on the front panel will
light.
NOTE: Model MPX-MD4P does not have S-VIDEO IN, OUT
terminals.
(RS232C terminal)
Pin No. Signal Function Signal direction
1–– –
2RXD Data reception Computer →Multiplexer
3TXD Data transmission Multiplexer →Computer
4–– –
5GND Ground –
6–– –
7RTS Request to send Multiplexer →Computer
8–– –
9–– –
(CONTROL terminal)
Pin Signal
GGround
CCommon
R1 Remote input 1
R2 Remote input 2
CCommon
SSwitching input (DC 5V)
CGround
AAlarm output (DC 5V)
CCommon
1Alarm input 1
2Alarm input 2
3Alarm input 3
4Alarm input 4
CCommon
1
IN OUT
2
IN OUT
3
IN OUT
4
IN OUT IN1 2 OUT
IN OUT
S-VHS
VCR
MONITOR 1 RS232C
CONTROL
GC
R1 R2
CSCAC1234C
16789F
HI
CAMERA
VCR
MONITOR
2345
G
9876
54321
L8FH5/XE (MPX-CD4P, MD4P GB) 1999. 12. 2
4English

CONNECTION
Before making any connection, make sure all the devices are turned off.
Before making the connections, please refer to the instruction manual accompanying each device. If the devices are not connected
properly, that may cause a fire and/or damages.
BASIC CONNECTIONS
CONNECTIONS TO THE S-VIDEO TERMINALS
If connections are made to the S-VHS terminals, they will have the priority.
1
IN OUT
2
IN OUT
3
IN OUT
4
IN OUT
CAMERA
IN1 2 OUT
IN OUT
S-VHS
VCR
MONITOR 1
CONTROL
GC
R1 R2
CSCAC1234C
12
34
External alarm sensors
(door bell, interphone, etc.)
Monitors (sold separately)
Video input
terminal
Video input
terminal
Video output
terminal
Video input
terminal
Timelapse VCR (sold separately) Alarm input
terminal
Switching output
terminal
Computer
VIDEO IN
VIDEO OUT
CAMERA IN
Signal flow
(See page 35)
VCR
MONITOR
COM
COM
COM
IN12 OUT
IN OUT
S-VHS
VCR
RS232C
CONTROL
GC
R1 R2
CSCAC1 23 4C
MONITOR 1
VCR
MONITOR
12
34
Monitor 1 (sold separately)
S-VIDEO input
terminal
Timelapse VCR (sold separately)
S-VIDEO output terminal
S-VIDEO input terminal
L8FH5/XE (MPX-CD4P, MD4P GB) 1999. 12. 2
English 5

CONNECTION
REMOTE CONTROLLER CIRCUIT CONNECTIONS
Use the layout below to make a remote controller and make the connections to the remote input pins (R1, R2) of the
CONTROL terminal as indicated. This will permit remote controlled operation of this unit.
INSTALLING THE RACK MOUNTING BRACKETS (SOLD SEPARATELY)
To mount this unit onto a rack, please use the rack mount hardware (model VA-RACMK 1) sold separately.
1Insert the head of two of the supplied bolts into the
keyhole opening on the side of the unit.
Insert the head of the bolt in the larger side, then slide it to
the smaller side of the opening.
2Align the slot on the mounting bracket with the two
bolts.
Make sure the bolts have not moved from their position,
then place a flat washer, a locking washer, and fix with a
nut.
NOTE:
Make sure to use the bolts provided with this unit, as the
bolts provided with the rack mount hardware are too short.
3Install the second mounting bracket on the opposite
side, then attach the unit onto the rack using the rack
mount bolts.
SW 5
SW 6
SW 7
SW 8
SW 9
SW 10
SW 11
SW 12
220Ω
220Ω
300Ω
360Ω
470Ω
680Ω
820Ω
1.2kΩ
: Menu selection
: VCR playback
: Live picture
: 4 divisions split
screen
: Monitor 2
: Camera sequential
display
: Zoom
: Still image
SW 1: Camera 1
SW 2: Camera 2
SW 3: Camera 3
SW 4: Camera 4
220Ω
220Ω
300Ω
360Ω
RS232C
CONTROL
GC
R1 R2
CSCAC1234C
SW: switch
1
2
3
L8FH5/XE (MPX-CD4P, MD4P GB) 1999. 12. 2
6English

BASIC OPERATIONS
MODE SWITCHING
When the unit is connected to a power source, the default display mode will be as follows: live picture from the four cameras
will be displayed in a 4 divisions split screen on monitor 1, and sequentially, full screen on monitor 2. You can use the VCR,
LIVE and MENU buttons to switch to the desired mode (see below for further information).
LIVE picture mode VCR playback mode LIVE picture mode Menu mode
When the power on
Live Picture Mode
When the LIVE button is pressed, the live (direct) picture from
the cameras connected to the camera input terminals (1 –4) on
the unit rear panel, will be displayed. While in live picture mode
you can use the still and zoom functions (see page 9).
NOTE:
•The unit will automatically start in the live picture or VCR
playback display mode (4 divisions split screen, full screen or
sequential display) last selected. Therefore, when a mode is
selected, the display mode will remain the same.
•If a camera is not connected at one of the input terminals,
“NO VIDEO”will be displayed on the monitor screen.
VCR Playback Mode
Start playback on the VCR. If the video signal is correctly
recorded, the VCR playback image will be displayed on monitor
1 when the VCR button is pressed. While in VCR playback
mode you can use the still and zoom functions (see page 15).
NOTE: If playing back a tape not recorded through this unit,
“NO ID”will be displayed on the monitor screen.
Menu Mode
Press the MENU button to display the menu. The buttons used
for menu control (see page 21) are indicated below.
Menu control buttons
1c, l(VCR, LIVE) button
Use these buttons to move the cursor to the right or down.
•cbutton: will move the cursor towards the right.
•lbutton: will move the cursor down.
2+, – (QUAD, SEQUENCE) buttons
Use these buttons to select numbers, letters, symbols.
•+button: for forward selection
•–button: for backward selection
3NEXT (ZOOM) button
To select a sub-menu in order to set the title position, etc. Press
the NEXT button to switch between the menu and the sub-menu.
4EXIT (STILL) button
To exit the menu mode.
5SHIFT (MON2) button
Use this button and the cor lbuttons to move the cursor to
the left or up.
•Press and hold the SHIFT button, then press the c
button to move the cursor to the left.
•Press and hold the SHIFT button, then press the l
button to move the cursor up.
VCR
(LANGUAGE/LANG./SPRACHE)
ENGLISH
FRANCAIS
DAUTSCH
MENULIVE
NO VIDEO
NO ID
MON 2 STILL ZOOM
SHIFT EXIT NEXT
SEQUENCE QUAD LIVE VCR MENU
MENU RESET
ALL RESET
5 4 32 1
L8FH5/XE (MPX-CD4P, MD4P GB) 1999. 12. 2
English 7

BASIC OPERATIONS
SECURITY LOCK FUNCTION
This function lets you lock the camera live picture mode or VCR
playback mode, so that it cannot be switched to another mode.
Camera Live Picture Mode Lock
Press the LIVE button for about 3 seconds.
A buzzer will be heard, and the VCR and MENU buttons will not
operate if pressed. If the buttons are pressed, a buzzer will be
heard.
VCR Playback Mode Lock
Press the VCR button for about 3 seconds.
A buzzer will be heard, and the LIVE and MENU buttons will not
operate if pressed. If the buttons are pressed, a buzzer will be
heard.
Canceling the Security Lock
To cancel the security lock, press the same (LIVE or VCR)
button again for about 3 seconds. A buzzer will be heard and the
mode will be unlocked.
SETTINGS BACKUP FUNCTION
This unit is equipped with a backup battery (lithium battery) to
maintain the clock settings. When the unit is used under normal
conditions, the backup battery is recharged. The battery is fully
recharged after a minimum of about 30 hours, and will maintain
the clock settings for up to 30 days.
NOTE: The settings may not be maintained properly if the
backup battery has been recharged for less than 30
hours when the power goes off.
Battery Life
If the power is turned off for about one hour or more, when the
power is restored, the (CLOCK SET) menu is displayed so the
clock settings can be checked.
If the clock settings are reset to: 01-01-2000 SAT 00:00:00, that
may indicate that the battery is dead and must be replaced.
Replacing the Battery
To replace the battery, please consult your dealer. After the
battery has been replaced, press the ALL RESET button, then
in the (CLOCK SET) menu set the date and time (see page 23).
RESET FUNCTION
The menus can be reset or cleared.
Using the MENU RESET Button
A: While a menu is displayed, press the MENU RESET button
to reset all the values of the displayed menu to the default
values.
B: If no menu is displayed, press the MENU RESET button to
reset the time to the nearest hour.
For example, between 10:30:00 and 11:29:59 the clock
will be reset to 11:00:00.
Using the ALL RESET button
Press this button to reset the following:
•Reset the time and date in the (CLOCK SET) menu to the
default setting.
•The display mode on monitor 1 will return to 4 divisions split
screen (default mode).
•The display mode on monitor 2 will return to sequential, full
screen (default mode).
NOTE: If the multiplexer does not function properly, press
the ALL RESET button.
Please note that all the settings mentioned above
will be reset.
LIVE VCR MENU
VCR LIVE MENU
LIVE VCR MENU
MENU RESET
ALL RESET
L8FH5/XE (MPX-CD4P, MD4P GB) 1999. 12. 2
8English

LIVE PICTURE MODE
Press the LIVE button.
The live pictures from the cameras connected to the CAMERA IN terminals on the unit back
panel will be displayed on monitor 1.
Refer to the diagrams below for the buttons to press in order to select the desired operation
mode.
If recording, the signal at the VCR OUT terminal will switch according to the selected
operation mode.
Please refer to (VCR SET) on page 31, for more information on settings for recording.
MONITOR 1 DISPLAYS AND FUNCTIONS
MONITOR 2 DISPLAYS AND FUNCTIONS
LIVE
LIVE
Monitor 1
(4 divisions split screen)
(Still image)
STILL
4
(P10)
(Zoomed in image)
ZOOM
4
(P10)
(Automatic sequential display)
SEQUENCE
(P14)
(Full screen)
1
(P12)
(Still image)
(Zoomed in image)
STILL
ZOOM
(Zoomed in still image)
STILL
STILL
01
s
zzszsz
ZOOM
4
(P11)
4
(Zoomed in still image)
(Zoom range setting)
(Zoom)
(P12)
(P12)
QUAD
Monitor 2
(Automatic sequential display)
MON 2
3
SEQUENCE
(Automatic sequential display)
(Full screen)
L8FH5/XE (MPX-CD4P, MD4P GB) 1999. 12. 2
English 9

4 DIVISIONS SPLIT SCREEN OPERATIONS
(Live picture on monitor 1)
Press the QUAD button.
The 4 divisions split screen display mode will be selected.
Example 1: To freeze the image from camera 4
1Press the STILL button.
The STILL indicator flashes and the still image display mode is selected.
2Press the camera select 4 button.
The camera 4 indicator flashes, the image from camera 4 is frozen, and “S”
flashes on-screen.
☞To cancel the still image display mode
Press the camera select 4button one more time, then press the STILL button.
The camera 4 indicator and the STILL indicator go off.
Example 2: To zoom in the image from camera 4
1Press the ZOOM button.
The ZOOM indicator flashes and the zoomed in image display mode is selected.
2Press the camera select 4 button.
The camera 4 indicator flashes, the image from camera 4 is zoomed in, and “Z”
flashes on-screen.
☞To cancel the zoomed in image display mode
Press the camera select 4button one more time, then press the ZOOM button.
The camera 4 indicator lights and the ZOOM indicator goes off.
QUAD
4
STILL
4
ZOOM
L8FH5/XE (MPX-CD4P, MD4P GB) 1999. 12. 2
10 English

4 DIVISIONS SPLIT SCREEN OPERATIONS (Live picture on monitor 1)
•cbutton:
will move the frame to the right
•SHIFT button + cbutton:
will move the frame to the left
•lbutton:
will move the frame down
•SHIFT button + lbutton:
will move the frame up
Example 3: To zoom in the image from camera 4 and set
the zoom range
You can select the portion of the image to zoom in. The default zoomed in area is the
centre of the image, but if a different zoom range is selected it will be memorized until
changed or cancelled.
1Press the ZOOM button.
The ZOOM indicator flashes and the zoomed in image display mode is selected.
2Press the camera select 4 button for about 3 seconds.
In full screen mode, “Z”(flashes) and the zoom range frame are displayed.
NOTE: If during the zoom range setting, the frame displayed in full screen
display mode is not moved for about 10 seconds, the display mode will
automatically return to 4 divisions split screen display mode.
To return to the setting mode, press the camera select 4button again, for
about 3 seconds.
3Press the c(or l) button to move the zoom range frame to the desired
area of the image.
4Press the camera select 4 button.
The area selected by the zoom range frame is now zoomed in.
If necessary, follow the same procedure to set the zoom range for the other
cameras.
NOTE: You can switch from zoomed in mode to normal (no zoom) mode by
pressing the camera select 4button repeatedly.
☞To cancel the zoomed in image display mode.
Press the ZOOM button.
Example 4: To freeze the zoomed in image from camera 4
1Press the ZOOM button.
The ZOOM indicator flashes and the zoomed in image display mode is selected.
2Press the camera select 4 button.
The camera 4 indicator flashes, the image from camera 4 is zoomed in, and “Z”
flashes on-screen.
3Press the STILL button.
The STILL indicator flashes and the ZOOM indicator lights.
4Press the camera select 4 button.
The camera 4 indicator flashes, the zoomed in image from camera 4 is frozen,
and “SZ”flashes on-screen.
NOTE: A still image cannot be zoomed in.
☞To cancel the still and zoomed in image display mode.
Press the camera select 4button, then press the STILL button.
Press the camera select 4button, then press the ZOOM button.
☞To cancel all the still image displays and zoomed in image displays.
Multiple still image displays and the zoomed in displays can be set from the 4
divisions split screen, to cancel all at once, press the STILL button, then press
the ZOOM button.
4
ZOOM
1
2
VCRLIVE
SHIFT
3
Z
4
4
4
ZOOM
4
STILL
L8FH5/XE (MPX-CD4P, MD4P GB) 1999. 12. 2
English 11

FULL SCREEN OPERATIONS (Live picture on monitor 1)
Press a camera select (1 –4) button.
The live pictures from the selected camera will be displayed full screen.
Example 5: To freeze the image from camera 2
1Press the camera select 2 button.
The camera 2 indicator lights, the image from camera 2 is displayed.
2Press the STILL button.
The STILL indicator flashes, the image from camera 2 is frozen, and “S”flashes
on-screen.
☞To cancel the still image display mode
Press the STILL button. “S”is erased and the normal display mode returns.
Example 6: To zoom in the image from camera 3
1Press the camera select 3 button.
The camera 3 indicator lights, the image from camera 3 is displayed.
2Press the ZOOM button.
The ZOOM indicator flashes, the image from camera 3 is zoomed in, and “Z”
flashes on-screen.
NOTE: The zoomed in area will be as set by the zoom range frame (See
example 7 on page 13).
☞To cancel the zoomed in image display mode
Press the ZOOM button. “Z”is erased and the normal display mode returns.
1 2 3 4
2
STILL
02 S
3
ZOOM
ZZ0303
L8FH5/XE (MPX-CD4P, MD4P GB) 1999. 12. 2
12 English

FULL SCREEN OPERATIONS (Live picture on monitor 1)
•cbutton:
will move the frame to the right
•SHIFT button + cbutton:
will move the frame to the left
•lbutton:
will move the frame down
•SHIFT button + lbutton:
will move the frame up
Example 7: To zoom in the image from camera 4 and set
the zoom range
You can select the portion of the image to zoom in. The default zoomed in area is the
centre of the image, but if a different zoom range is selected it will be memorized until
changed or cancelled.
1Press the camera select 4 button.
The camera 4 indicator lights, the image from camera 4 is displayed.
2Press the ZOOM button.
The ZOOM indicator flashes, the image from camera 4 is zoomed in, and “Z”
flashes on-screen.
3Press the camera select 4 button for about 3 seconds.
The zoomed in image will switch to the normal display mode, and the zoom range
frame is displayed.
NOTE: If the zoom range frame is not moved for about 10 seconds, the display
will automatically return to the normal zoomed in mode.
To display the zoom range frame again, press the camera select 4button
for about 3 seconds.
4Press the c(or l) button to move the zoom range frame to the desired
area of the image.
5Press the camera select 4 button.
The area selected by the zoom range frame is now zoomed in.
If necessary, follow the same procedure to set the zoom range for the other
cameras.
☞To cancel the zoomed in image display mode.
Press the ZOOM button. “Z”is erased and the normal display mode returns.
While in zoom mode, if the camera select button is pressed one more time,
depending on the movement of the subject, the image may be more or less
clear. Pressing the camera select button repeatedly will produce the
following according to the image conditions.
•Image with little or no movement
The image of a large subject will be clear, the picture quality of moving areas
of the image will be coarse.
•Image with normal movement (people or vehicles)
The moving objects in the image will be clear, the picture quality of areas of
the image with little movement will be coarse.
Example 8: To freeze the zoomed in image from camera 2
1Press the camera select 2 button.
The camera 2 indicator lights, the image from camera 2 is displayed.
2Press the ZOOM button.
The image from camera 2 is zoomed in, and “Z”flashes on-screen.
3Press the STILL button.
The STILL indicator flashes and the ZOOM indicator lights. The zoomed in image
is frozen, and “SZ”flashes on-screen.
☞To cancel the still and zoomed in image display mode.
Press the STILL button, then press the ZOOM button.
4
ZOOM
1
2
3
4
VCRLIVE
SHIFT
4
04 Z
Z
Z
4
5
Z
2
STILL
ZOOM
Z 2
Z 2
Z 2
SZ 2
SZ 2
SZ 2
L8FH5/XE (MPX-CD4P, MD4P GB) 1999. 12. 2
English 13

SEQUENTIAL DISPLAY OPERATIONS
(Live picture on monitor 1)
Sequential display of each camera pictures at 1 second
interval
Press the SEQUENCE button.
The pictures from each camera are displayed sequentially at 1 second interval. The
camera select indicators (1 –4) light sequentially according to the displayed camera.
NOTE:
•The sequential display speed (image interval) is set to 1 second in the (MONITOR
SET) menu. To change the sequence speed setting, refer to “MON1 SEQ. TIMER”
on page 30.
•Only the channels where a camera is connected will be displayed. Empty channels
will be skipped automatically.
MONITOR 2 OPERATIONS
Press the MON2 button.
The monitor 2 mode is selected and the MON2 indicator lights. A camera live picture
will be displayed sequentially or full screen on monitor 2.
The monitor 2 display mode is memorized and the last one previously used will be
automatically selected.
A: SEQUENTIAL DISPLAY MODE OPERATIONS
Press the camera select 2 button.
The camera 2 indicator lights, the picture from camera 2 is displayed on monitor 2.
B: FULL SCREEN DISPLAY MODE OPERATIONS
Press the SEQUENCE button.
The SEQUENCE indicator lights, sequential display mode is selected.
☞To cancel the monitor 2 operations
Press the MON2 button.
•The previously selected display mode (full screen or sequential display) will be
selected.
•Live pictures will be displayed in a 4 divisions split screen on monitor 1.
TO DISPLAY ON MONITOR 2 THE SAME IMAGE AS ON
MONITOR 1
This function can be used to monitor the images from a second location.
In the (MONITOR SET) menu, set the item “MON2 ←MON1”to “Y”(see page 30).
NOTE: When this setting is used, the MON2 button will not operate.
SEQUENCE
MON 2
Monitor 1 Monitor 2
2
SEQUENCE
A
B
MON2
MON2
Live picture will be displayed on monitor 2
even during VCR playback mode.
L8FH5/XE (MPX-CD4P, MD4P GB) 1999. 12. 2
14 English

VCR PLAYBACK MODE
Press the VCR button.
The VCR playback mode is selected. When a tape is played back, the recording of the live
pictures will be displayed on monitor 1.
During VCR playback mode, there will be no signal output at the VCR OUT terminal.
MONITOR 1 DISPLAYS AND FUNCTIONS
MONITOR 2 DISPLAYS AND FUNCTIONS
While the recorded pictures are displayed on monitor 1, a live picture will be displayed on monitor 2.
VCR
LIVE
Monitor 1
(4 divisions split screen)
(Still image)
STILL
4
(P16)
(Zoomed in image)
ZOOM
4
(P16)
(Automatic sequential display)
SEQUENCE
(P20)
(Full screen)
1
(P18)
(Still image)
(Zoomed in image)
STILL
ZOOM
(Zoomed in still image)
STILL
STILL
01
s
zzszsz
ZOOM
4
(P17)
4
(Zoomed in
still image)
(Zoom range setting)
(Zoom)
(P18)
(P18)
QUAD
VCR
(4 divisions split screen)
Monitor 1
(Full screen)
01
(Full screen)
01
MON 2
4
SEQUENCE
(Full screen)
04
(Automatic sequential display)
Monitor 2: Live picture
L8FH5/XE (MPX-CD4P, MD4P GB) 1999. 12. 2
English 15

4 DIVISIONS SPLIT SCREEN OPERATIONS
(VCR playback on monitor 1)
Press the QUAD button.
The 4 divisions split screen display mode will be selected.
Example 1: To freeze the recorded image from camera 4
1Press the STILL button.
The STILL indicator flashes and the still image display mode is selected.
2Press the camera select 4 button.
The camera 4 indicator flashes, the recorded image from camera 4 is frozen, and
“S”flashes on-screen.
☞To cancel the still image display mode
Press the camera select 4button one more time, then press the STILL button.
The camera 4 indicator and the STILL indicator go off.
Example 2: To zoom in the recorded image from camera 4
1Press the ZOOM button.
The ZOOM indicator flashes and the zoomed in image display mode is selected.
2Press the camera select 4 button.
The camera 4 indicator flashes, the recorded image from camera 4 is zoomed in,
and “Z”flashes on-screen.
☞To cancel the zoomed in image display mode
Press the camera select 4button one more time, then press the ZOOM button.
The camera 4 indicator lights and the ZOOM indicator goes off.
QUAD
4
STILL
4
ZOOM
L8FH5/XE (MPX-CD4P, MD4P GB) 1999. 12. 2
16 English

4 DIVISIONS SPLIT SCREEN OPERATIONS
(VCR playback on monitor 1)
•cbutton:
will move the frame to the right
•SHIFT button + cbutton:
will move the frame to the left
•lbutton:
will move the frame down
•SHIFT button + lbutton:
will move the frame up
Example 3: To zoom in the recorded image from camera 4
and set the zoom range
You can select the portion of the recorded image to zoom in. The default zoomed in
area is the centre of the image, but if a different zoom range is selected it will be
memorized until changed or cancelled.
1Press the ZOOM button.
The ZOOM indicator flashes and the zoomed in image display mode is selected.
2Press the camera select 4 button for about 3 seconds.
In full screen mode, “Z”(flashes) and the zoom range frame are displayed.
NOTE: If during the zoom range setting, the frame displayed in full screen
display mode is not moved for about 10 seconds, the display mode will
automatically return to 4 divisions split screen display mode.
To return to the setting mode, press the camera select 4button again, for
about 3 seconds.
3Press the c(or l) button to move the zoom range frame to the desired
area of the image.
4Press the camera select 4 button.
The area selected by the zoom range frame is now zoomed in.
If necessary, follow the same procedure to set the zoom range for the other
cameras.
NOTE: You can switch from zoomed in mode to normal (no zoom) mode by
pressing the camera select 4button repeatedly.
☞To cancel the zoomed in image display mode.
Press the ZOOM button.
Example 4: To freeze the zoomed recorded in image from
camera 4
1Press the ZOOM button.
The ZOOM indicator flashes and the zoomed in image display mode is selected.
2Press the camera select 4 button.
The camera 4 indicator flashes, the recorded image from camera 4 is zoomed in,
and “Z”flashes on-screen.
3Press the STILL button.
The STILL indicator flashes and the ZOOM indicator lights.
4Press the camera select 4 button.
The camera 4 indicator flashes, the zoomed in recorded image from camera 4 is
frozen, and “SZ”flashes on-screen.
NOTE: A still image cannot be zoomed in.
☞To cancel the still and zoomed in image display mode.
Press the camera select 4button, then press the STILL button.
Press the camera select 4button, then press the ZOOM button.
☞To cancel all the still image displays and zoomed in image displays
Multiple still image displays and the zoomed in displays can be set from the 4
divisions split screen, to cancel all at once, press the STILL button, then press
the ZOOM button.
4
ZOOM
1
2
VCRLIVE
SHIFT
3
Z
4
4
4
ZOOM
4
STILL
L8FH5/XE (MPX-CD4P, MD4P GB) 1999. 12. 2
English 17

FULL SCREEN OPERATIONS
(VCR playback on monitor 1)
Press a camera select (1 –4) button.
The recorded pictures from the selected camera will be displayed full screen.
Example 5: To freeze the recorded image from camera 2
1Press the camera select 2 button.
The camera 2 indicator lights, the recorded image from camera 2 is displayed.
2Press the STILL button.
The STILL indicator flashes, the recorded image from camera 2 is frozen, and “S”
flashes on-screen.
☞To cancel the still image display mode
Press the STILL button. “S”is erased and the normal display mode returns.
Example 6: To zoom in the recorded image from camera 3
1Press the camera select 3 button.
The camera 3 indicator lights, the recorded image from camera 3 is displayed.
2Press the ZOOM button.
The ZOOM indicator flashes, the recorded image from camera 3 is zoomed in,
and “Z”flashes on-screen.
NOTE: The zoomed in area will be as set by the zoom range frame. (See
example 7 on page 19)
☞To cancel the zoomed in image display mode
Press the ZOOM button. “Z”is erased and the normal display mode returns.
1 2 3 4
2
STILL
02 S
3
ZOOM
ZZ0303
L8FH5/XE (MPX-CD4P, MD4P GB) 1999. 12. 2
18 English

FULL SCREEN OPERATIONS (VCR playback on monitor 1)
•cbutton:
will move the frame to the right
•SHIFT button + cbutton:
will move the frame to the left
•lbutton:
will move the frame down
•SHIFT button + lbutton:
will move the frame up
Example 7: To zoom in the recorded image from camera 4
and set the zoom range
You can select the portion of the recorded image to zoom in. The default zoomed in
area is the centre of the image, but if a different zoom range is selected it will be
memorized until changed or cancelled.
1Press the camera select 4 button.
The camera 4 indicator lights, the recorded image from camera 4 is displayed.
2Press the ZOOM button.
The ZOOM indicator flashes, the recorded image from camera 4 is zoomed in,
and “Z”flashes on-screen.
3Press the camera select 4 button for about 3 seconds.
The zoomed in image will switch to the normal display mode, and the zoom range
frame is displayed.
NOTE: If during the zoom range setting, the frame displayed is not moved for
about 10 seconds, the display mode will automatically return to zoomed
in display mode.
To return to the setting mode, press the camera select 4button again, for
about 3 seconds.
4Press the c(or l) button to move the zoom range frame to the desired
area of the image.
5Press the camera select 4 button.
The area selected by the zoom range frame is now zoomed in.
If necessary, follow the same procedure to set the zoom range for the other
cameras.
☞To cancel the zoomed in image display mode.
Press the ZOOM button. “Z”is erased and the normal display mode returns.
Example 8: To freeze the zoomed in recorded image from
camera 2
1Press the camera select 2 button.
The camera 2 indicator lights, the recorded image from camera 2 is displayed.
2Press the ZOOM button.
The recorded image from camera 2 is zoomed in, and “Z”flashes on-screen.
3Press the STILL button.
The STILL indicator flashes and the ZOOM indicator lights. The zoomed in image
is frozen, and “SZ”flashes on-screen.
☞To cancel the still and zoomed in image display mode.
Press the STILL button, then press the ZOOM button.
4
ZOOM
1
2
3
4
VCRLIVE
SHIFT
4
04 Z
Z
Z
4
5
Z
2
STILL
ZOOM
ZZ
SZ
SZ
SZ
L8FH5/XE (MPX-CD4P, MD4P GB) 1999. 12. 2
English 19
This manual suits for next models
1
Table of contents
Other Sanyo Multiplexer manuals

Sanyo
Sanyo MPX-MS10P User manual

Sanyo
Sanyo MPX-CD162 User manual

Sanyo
Sanyo MPX-MS92P User manual

Sanyo
Sanyo MPX-MD16P User manual

Sanyo
Sanyo MPX-CD92P User manual

Sanyo
Sanyo MPX-MS10P User manual

Sanyo
Sanyo MPX-CD163 User manual

Sanyo
Sanyo MPX-CD92 User manual

Sanyo
Sanyo MPX-CD4 User manual

Sanyo
Sanyo MPX-CD16P User manual
Popular Multiplexer manuals by other brands

Moog
Moog 903 troubleshooting guide

Panasonic
Panasonic WJ-FS309 operating instructions

Quark-Elec
Quark-Elec QK-A034-B manual

ArcVision Technology
ArcVision Technology ARC-19516 user manual

Net to Net Technologies
Net to Net Technologies IP Broadband Loop Carrier 4000 Hardware installation guide

ADTRAN
ADTRAN MX2810 M13 Specifications