manuals.online logo
Brands
  1. Home
  2. •
  3. Brands
  4. •
  5. Carrier
  6. •
  7. Heat Pump
  8. •
  9. Carrier 50HX Guide User manual

Carrier 50HX Guide User manual

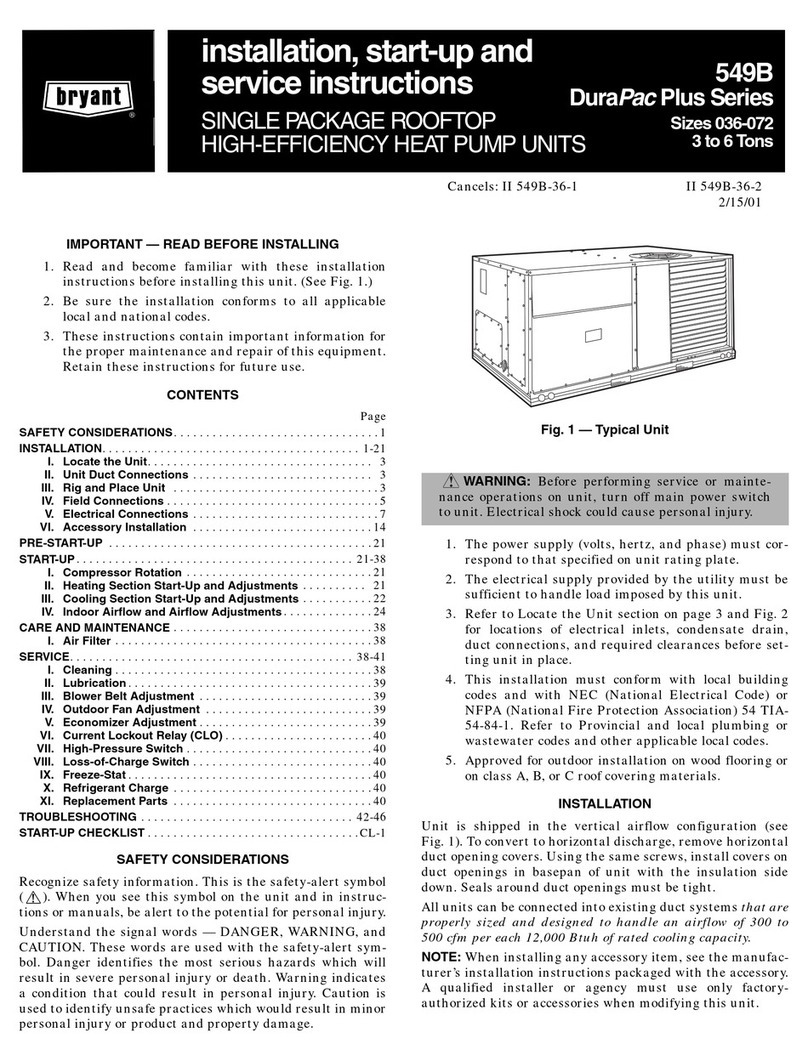
50HX
Single-Packaged Heat Pump Units
A Guide to Operating and
Maintaining Your Heat
Pump Unit
TT - '_
¥!I [,I-1,1,1R[_
NOTE TO INSTALLER:
This manual should be left with the equipment owner. Before performing recommended maintenance, be sure
main power switch to unit is turned off. Electrical shock
could cause personal injury.
Models 50HX Packaged Heat Pump Units Without Base Rail
Models 50HX Packaged Heat Pump Units With Optional Base Rail
Manufacturer reserves the right to discontinue, or change at any time, specifications or designs without notice and without incurring obligations.
PC 101 Catalog No. 535-00090 Printed in U.S.A Form OM50-39 Pg 1 1/03 Replaces: 50HS,HX-1SO
WELCOME TO EFFICIENT
YEAR-ROUND COMFORT
Congratulations on your excellent choice and sound invest-
ment in home comfort!
Your new heat pump represents both the latest in engineer-
ing development and the culmination of maW years of ex-
perience fiom one of the most reputable manufacturers of
colnfort systems.
Your new unit is among the most reliable home comfort prod-
ucts available today. To assure its dependability, spend just
a few minutes with this booklet now. Learn about the op-
eration of your heat pump and the small amount of main-
tenance it takes to keep it operating at its peak efficiency.
With minimal care, your heat pump will provide you and
your family with satisl_ing home comt\_rt both now and
for years to come.
IMPORTANT FACTS
To better protect your investlnent and to eliminate unnec-
essary service calls, familiarize yourself with the following
facts:
f'!_ IJ,'l'Jl;t,' IRid
hnproper installation, adjustlnent, aheration, sel-vice,lnain-
tenance, or use can cause explosion, fire, electrical shock,
or other conditions which may cause personal injury or
property damage. Refer to this manual. For assistance
or additional inforlnation consult a qualified installer,
sela:ice agency, distributor, or branch. The qualified in-
staller or agency must use only factory-authorized kits
or accessories when modifying this product.
• Your heat pump system should never be operated without
a clean air filter properly installed. Plan to inspect the filter
periodically. A clogged air filter will increase operating costs
and shorten the life of the unit.
• Supply-air and return-air registers should not be blocked.
Drapes, furniture, and toys are some of the items commonly
found obstructing grilles. Restricted airflow lessens the unit's
efficiency and life span.
• Outdoor units lnust have unrestricted airflow. Donor cover
the unit, lean anything against it, or stand upon it. Do not
allow grass clippings, leaves, or other debris to accumulate
around or on top of the unit. Maintain a 12-in. minimum
clearance bewveen the outdoor unit and tall grass, vines, shrubs,
et cetera.
• Your multipurpose indoor thermostat is the control center
for your heat pmnp system. You should familiarize yourself
with its proper operation. Attempting to control the system
by other means for instance, switching the electrical sup-
ply power ON and OFF may cause damage to the unit.
• Thermostat "jiggling" causes rapid-cycling, which is po-
tentially damaging to the compressor. Do not move the tem-
perature selector on the thermostat for any reason for at least
5 minutes after the compressor has shut oil"
• You may find that you can maintain greater personal com-
fort by running the fan continuously. "Air pockets" can form
due to the structure of the building, placement of registers,
et cetera. These air pockets may be too cool or warm for
your liking. Continuous fan operation minimizes any tem-
perature differences. Also, systems equipped with electronic
air cleaners and/or humidifiers oiler the added benefits of
having the air contilmously cleaned year-round, and humidi-
fied during the winter season.
• Your heat pump will remove humidity fioln your home
during the cooling season. After a few minutes of operation,
you should be able to see water trickle fiom the condensate
drain. Check this occasionally to be sure the drain system is
not clogged. Of course, don't expect to see much drainage
if you live in a very dry climate.
OPERATING YOUR HEAT PUMP
The operation of your heat pump system is controlled by the
indoor thermostat. You simply adjust the thermostat and it
maintains the indoor temperature at the level you select. Most
thermostats for heat pump systems include temperature con-
trol selector, FAN switch, and SYSTEM switch. EMER-
GENCY HEAT control is usually provided with the SYSTEM
switch.
The temperature control selector is a dial or button(s) that allows
you to establish the telnperature that you wish to maintain
for your personal comfort. Some thermostats possess two tem-
perature control selectors: one for setting the temperature de-
sired during the cooling cycle, and one to set the heating
operation temperature. Typical settings are 78 degrees Fahr-
enheit t\_r cooling and 68 degrees for heating.
The FAN switch oilers two options for controlling the blower:
AUTO and ON. When set to AUTO, the blower will run dur-
ing the time the heat pump is operating. When the FAN switch
is set at the ON position, the blower will run continuously.
Typically, the SYSTEM switch on your thermostat oilers the
following selections: COOL, OFF, and HEAT. Your thermo-
stat may also have another selection, AUTO. The heat pump
will not operate when the SYSTEM switch is set at the OFF
position. With the SYSTEM switch set at COOL, your heat
pump will operate in its cooling mode when the indoor tem-
perature rises above the level that you wish to maintain. With
the SYSTEM switch set at the HEAT position, your heat pump
will provide warmth whenever the indoor temperature falls
below the level that you have selected.
The AUTO selection found on some thermostats provides
for automatic changeover between cooling and heating cycles.
With the SYSTEM switch set in the AUTO position, the cool-
ing mode is activated when the indoor telnperature rises above
the thermostat cooling telnperature setting, or the heating mode
will be activated when the indoor telnperamre drops below
the thermostat setting for the heating cycle.
Depending on your winter heating needs, your home corn-
tort system may include supplementary electric resistance
heat. If it does, your system will turn on electric resistance
heat only as necessary to meet your heating needs during
defrost cycles or when outdoor temperatures are low. In the
event of a heat pump malfunction, you can use the EMER-
GENCY HEAT setting on your thermostat to manually se-
lect electric resistance heat. Heat pump heating is deactivated
when EMERGENCY HEAT is selected. Because electric re-
sistance heat consumes more electricity than the heat pump's
normal heating mode, selecting EMERGENCY HEAT will
result in higher electricity costs. If it becomes necessary to
use EMERGENCY HEAT to provide heat, call your dealer
t\_r service as soon as is practical.
See your thermostat owner's manual for additional
int\mnation.
COOLING CYCLE
When operating in the cooling cycle, your heat pump will
mn until the indoor temperature is lowered to the level you
have selected. On extremely hot days, your heat pump will
mn for longer periods at a time and have shorter "off"
periods than on moderate days.
The following are typical conditions that add extra heat and/or
humidity to your home. Your heat pump will work longer to
keep your home comfortable under these conditions:
• Entrance doors are frequently opened and closed
• Laundry appliances are being operated
• A shower is running
• More than the usual number of people are present in the
home
• More than the normal number of electric lights are in use
• Drapes are open on the sunw side of the home
HEATING CYCLE
With the SYSTEM switch of your indoor thermostat set to
the HEAT position, the heat pmnp wilt operate in its heating
mode until room temperature is raised to the level you have
selected. Of course, the heating unit will have to operate for
longer periods to maintain a comfortable environment on colder
days and nights than on moderate ones.
Defrost Cycle -- When your heat pump is providing heat
to your home and the outdoor temperature drops below
45 degrees Fahrenheit, moisture may begin to freeze on the
surface of the outdoor coil. If allowed to build up, this ice
would impede aii_ow across the coil and reduce the amount
of heat absorbed tiom the outside air. So, to maintain energy-
etticient operation, your heat pump has an automatic defrost
cycle.
The deliost cycle starts at a preset time interval of 30 min-
utes. Defrost wilt start at the preset time only if the ice is
suNcient to interfere with normal heating operation.
After the ice is melted from the outdoor coil, or after a
maximum of 10 minutes in the Defrost mode, the unit will
automatically switch back to normal heating operation.
Do not be alarmed if steam or log appears at the outdoor
unit during the defrost cycle. Water vapor from the melting
ice may condense into a mist in the cold outside air.
Emergency Heat -- The EMERGENCY HEAT setting on
your thermostat refers to any supplementary heating
appliance that may be included in your home comfort sys-
tem. Operation of the EMERGENCY HEAT source may be
required if heating demands exceed the capacity of the heat
pump, or if the heat pump malfunctions.
The word Emergency on your thermostat display will show
if Emergency mode is selected. This indicates that the heat pump
is off and the supplemental heating source is operating.
The AUXHEAT display will show under normal operation
when the second stage of heat is operating.
•Do not operate your unit in the heating mode when outdoor
telnperatures are above 66°F unless you set your therlnostat
to emergency heat lnode.
S
During the heating season, switch to EMERGENCY HEAT
if the electricity to your outdoor unit is off for more than
30 minutes for any reason (i.e., power outage). Leave the
switch in the EMERGENCY HEAT position t\_r an amount
of time equal to that during which the power was olt_ It is
not necessary to exceed 12 hours. If you cannot determine
how long the power has been o11;leave the switch in the
EMERGENCY HEAT position for 8 hours.
PERFORMING ROUTINE MAINTENANCE
With the proper maintenance and care, your heat pump will
operate economically and dependably. Maintenance can be
accomplished easily by referring to the following directions.
However, before pert\_rming maintenance, consider these
important safety precautions:
• DISCONNECT ALL ELECTRICAL POWER TO THE
HEAT PUMP BEFORE REMOVINGACCESS PANELS TO
PERFORM SERVICE OR MAINTENANCE.
NOTE: THERE MAY BE MORE THAN ONE ELECTRI-
CAL DISCONNECT SWITCH.
• ALTHOUGH SPECIAL CARE HAS BEEN TAKEN
TO MINIMIZE SHARP EDGES IN THE CONSTRUC-
TION OF YOUR UNIT, BE EXTREMELY CAREFUL
WHEN HANDLING PARTS OR REACHING INTO THE
UNIT.
MAIN
CHECK THE AIR FILTER
A dirty air filter wilt cause excessive strain on the compres-
sor and blower motor. This can cause the components to over-
heat and automatically shut do,am. In the extreme, the com-
ponents will tail and need to be replaced. To avoid inefficient
or tailed operation of your unit, CHECK THE FILTER(S)
EVERY 3 TO 4 WEEKS. Replace filter(s) when necessary,
or clean the filter(s) if you have the reusable type.
Disposable filters should be replaced by similar, new filters
of the same dimensions.
Reusable, permanent filters should be washed in a solution
of cotd water and mild detergent, then rinsed and thoroughly
dried. THE FILTER MUST BE COMPLETELY DRY BE-
FORE BEING REINSTALLED. To avoid prolonged shut-
do,am of your unit while a filter is drying, you should have
an extra filter on hand. This would allow you to rotate be-
tween the two with minimal downtime tbr your comfort sys-
tem. Extra filters may be purchased fioln your dealer.
The filter(s) and filter rack for a packaged system are sup-
plied and installed by the contractor or dealer. Typically, the
filter(s) and rack are located in the return-air duct at the out-
door unit or behind the return-air grille(s). Have your dealer
show you the location of your filter(s) and the procedures
for removal and replacement.
If you have any questions about the removal and/or cleaning
of your filter(s), contact your dealer for assistance.
If grass clippings, leaves, shrubbery, and debris are kept away
fiom the unit, minimal care should be sulticient to keep the
system functioning properly. However, if the outdoor coil
becomes dirty, use a brush or vacuum cleaner and soft brush
attachment to clean the exterior surface. If dirt is trapped
deep in the coil, contact your dealer t\_r service.
UNIT SUPPORT
Your packaged unit should be lnaintained at a level position.
If its support should shift or settle so that the unit is no longer
level, you should correct the condition. Relevel it prolnptty
to assure condensate drainage out of the unit. If you notice
that water or ice collects beneath the unit, arrange _\_rit to
be drained away from the unit.
BEFORE YOU REQUEST A SERVICE CALL
BEFORE YOU CALL FOR SERVICE, CHECK FOR
THESE EASILY SOLVED PROBLEMS:
Check the indoor and outdoor disconnect switches. Veril_
that circuit breakers are ON or that fuses have not blown.
Check for sui_cient airflo,a: Check the air filter(s) for any
accumulations of dirt. Check tbr blocked return-air or supply-
air grilles. Be sure grilles are open and unobstructed.
Check the settings on your indoor therlnostat. If you desire
cooling, see that the telnperature control selector is set be-
low room temperature and the SYSTEM switch is on the
COOL orAUTO position. If you require warlnth, be sure the
telnperature control selector is set above room telnperature
and the SYSTEM switch is at HEAT or AUTO. The FAN
switch should be set at ON for continuous blower operation
or AUTO if you wish the blower to function only while the
unit is operating.
If your comfort system still Ihils to operate, contact your ser-
vicing dealer for troubleshooting and repairs. Specil_ your
apparent problem, and state the model and serial nmnbers
of your equipment. (You should have them recorded on this
page.) With this information, your dealer may be able to of-
fer helpful suggestions over the phone, or save valuable time
through knowledgeable preparation for the service call.
REGULAR DEALER MAINTENANCE
In addition to the routine maintenance that you perform, your
home comibrt system should be inspected remllarly by a prop-
erty trained service technician. The inspection (preferably
each year, but at least every other year) should include the
_\)llowing:
• Routine inspection if air filter(s). Replacement or cleaning
as required.
• Inspection and cleaning of the blower wheel, housing, and
motor. Sel-vice should include proper lubrication of these
components.
• Inspection and, if required, cleaning of indoor and out-
door coils.
• Inspection of the indoor coil drain pan, plus the drain line.
Service should include cleaning if required.
• A check of all electrical wiring and connections.
• Ache& for secure physical connections of individual com-
ponents within units.
• Operational check of the system to deterlnine actual work-
ing condition. Necessary repair and/or adjustment should be
pert\_rlned at this time.
WARRANTIES
Unit 50HX has a separate warranty located at
the back of this book. Be sure to read the warranty
carefully to deterlnine the coverage for your unit.
FOR THE RECORD
Record the model, product, and serial numbers of your new
equipment in the spaces provided below. This information,
along with the other ready-reference facts requested belo,a;
wilt be necessary should you ever require information or
selaTice.
Date Installed
Dealer Name
Address
City
State
Telephone
Installation Data
Zip
Product No.
Model No.
Serial No.
Heater, if applicable:
Part No.
Unit Data
Kilowatt Rating
Copyright 2003 Carrier Corporation
Manufacturer reserves the right to discontinue, or change at any time, specifications or designs without notice and without incurring obligations.
Book 1 14 PC 101 Catalog No 535-00090 Printed in U.S.A. Form OM50-39 Pg 4 1 - 0 3
iReplaces: 50HS,HX-ISO
i
Tab 5a 5a

Other manuals for 50HX Guide

1

Other Carrier Heat Pump manuals

Carrier bryant 607C-C User manual

Carrier

Carrier bryant 607C-C User manual

Carrier 38E User manual

Carrier

Carrier 38E User manual

Carrier AQUAZONE 50PSH Dimensions and installation guide

Carrier

Carrier AQUAZONE 50PSH Dimensions and installation guide

Carrier AQUAZONE 50PCH Dimensions and installation guide

Carrier

Carrier AQUAZONE 50PCH Dimensions and installation guide

Carrier 38YKB Operation manual

Carrier

Carrier 38YKB Operation manual

Carrier WeatherExpert 50LC14 User manual

Carrier

Carrier WeatherExpert 50LC14 User manual

Carrier PH4G Instruction Manual

Carrier

Carrier PH4G Instruction Manual

Carrier 50JZ 024-060 Assembly Instructions

Carrier

Carrier 50JZ 024-060 Assembly Instructions

Carrier 38TH Instructions and recipes

Carrier

Carrier 38TH Instructions and recipes

Carrier 25VNA8 infinity 18VS User manual

Carrier

Carrier 25VNA8 infinity 18VS User manual

Carrier AQUAZONE 50HQL072-120 Dimensions and installation guide

Carrier

Carrier AQUAZONE 50HQL072-120 Dimensions and installation guide

Carrier Deluxe 38YZA Instructions and recipes

Carrier

Carrier Deluxe 38YZA Instructions and recipes

Carrier 50VT-B Instruction Manual

Carrier

Carrier 50VT-B Instruction Manual

Carrier AquaSnap 61AF 022 Manual

Carrier

Carrier AquaSnap 61AF 022 Manual

Carrier 50KQA Operation manual

Carrier

Carrier 50KQA Operation manual

Carrier WeatherMaker 50FCQ 14 Series User manual

Carrier

Carrier WeatherMaker 50FCQ 14 Series User manual

Carrier Infinity 25VNA4 User manual

Carrier

Carrier Infinity 25VNA4 User manual

Carrier 38YSA Instructions and recipes

Carrier

Carrier 38YSA Instructions and recipes

Carrier Infinity 50XT Instruction Manual

Carrier

Carrier Infinity 50XT Instruction Manual

Carrier CHS183-243 User manual

Carrier

Carrier CHS183-243 User manual

Carrier 38YDA Instructions and recipes

Carrier

Carrier 38YDA Instructions and recipes

Carrier 51QC User manual

Carrier

Carrier 51QC User manual

Carrier 38VTA040 Dimensions and installation guide

Carrier

Carrier 38VTA040 Dimensions and installation guide

Carrier 38BYC Series Operation manual

Carrier

Carrier 38BYC Series Operation manual

Popular Heat Pump manuals by other brands

Lennox LHT180 installation instructions

Lennox

Lennox LHT180 installation instructions

IDEAL Ground Source Installation and operating

IDEAL

IDEAL Ground Source Installation and operating

Immergas AUDAX PRO 5 Instructions and warnings

Immergas

Immergas AUDAX PRO 5 Instructions and warnings

Johnson Controls YD360 installation manual

Johnson Controls

Johnson Controls YD360 installation manual

Immergas MAGIS COMBO PLUS V2 Series INSTRUCTIONS AND RECOMMENDATIONS FOR THE INSTALLER

Immergas

Immergas MAGIS COMBO PLUS V2 Series INSTRUCTIONS AND RECOMMENDATIONS FOR THE INSTALLER

Trane 4TTR3 Installation and operation manual

Trane

Trane 4TTR3 Installation and operation manual

Electrolux EXH09HL1W user manual

Electrolux

Electrolux EXH09HL1W user manual

MICROWELL HP 1100 GREEN INVERTER PRO Installation and user manual

MICROWELL

MICROWELL HP 1100 GREEN INVERTER PRO Installation and user manual

Nibe S1155PC user manual

Nibe

Nibe S1155PC user manual

Allied 4SHP15LE Service manual

Allied

Allied 4SHP15LE Service manual

BMC GW024 installation instructions

BMC

BMC GW024 installation instructions

Unico IS18G050 installation instructions

Unico

Unico IS18G050 installation instructions

Daikin Altherma 3 R F Installer's reference guide

Daikin

Daikin Altherma 3 R F Installer's reference guide

Dometic CARAVAN B3200 Installation & operating instructions

Dometic

Dometic CARAVAN B3200 Installation & operating instructions

Lochinvar Amicus Installation, Commissioning, User and Maintenance Instructions

Lochinvar

Lochinvar Amicus Installation, Commissioning, User and Maintenance Instructions

Oilon RE 35 Installation and operation manual

Oilon

Oilon RE 35 Installation and operation manual

Trane CONQUEST CGAX Series Installation operation & maintenance

Trane

Trane CONQUEST CGAX Series Installation operation & maintenance

HydroTherm DYNAMIC-SS/X8/OP manual

HydroTherm

HydroTherm DYNAMIC-SS/X8/OP manual

manuals.online logo
manuals.online logoBrands
  • About & Mission
  • Contact us
  • Privacy Policy
  • Terms and Conditions

Copyright 2025 Manuals.Online. All Rights Reserved.