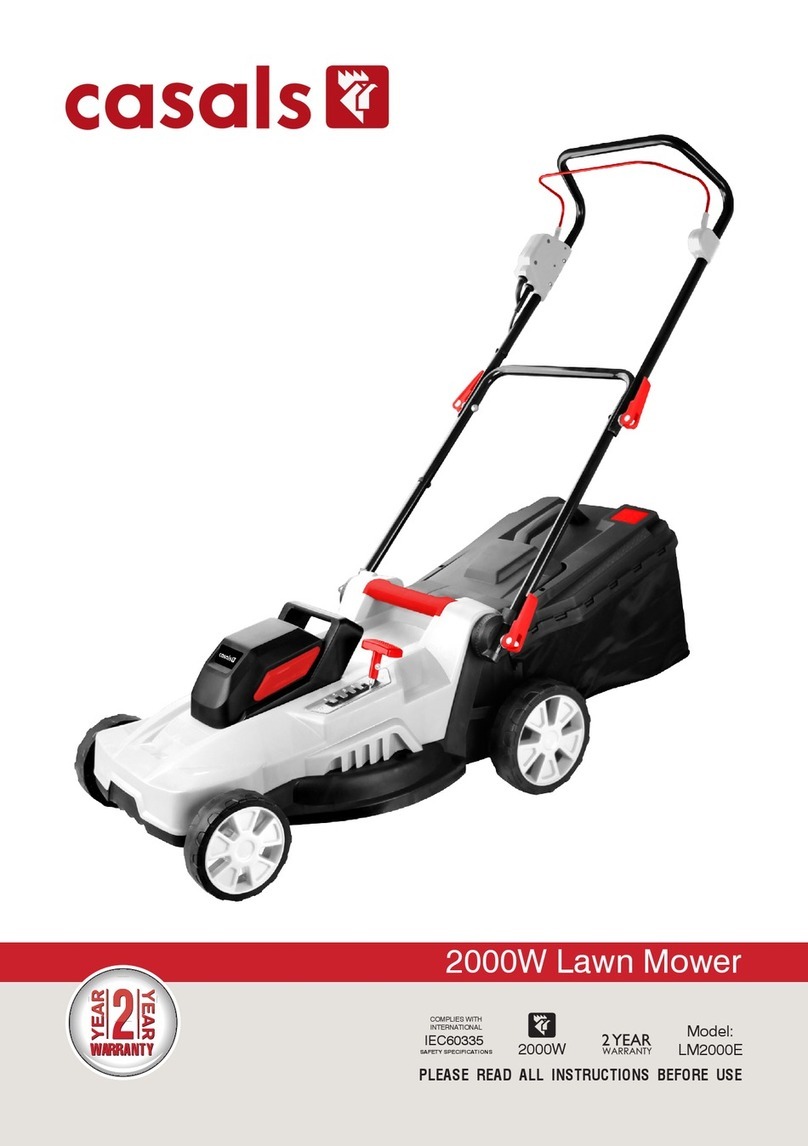
Casals LM1600EA User manual

1600W Lawnmower
PLEASE READ ALL INSTRUCTIONS BEFORE USE
Model:
LM1600EA
COMPLIES WITH
INTERNATIONAL
IEC60335
SAFETY SPECIFICATIONS 1600W
WARRANTY
WARRANTY

IMPORTANT:
Thank you for purchasing a Casals Electric
Lawn mower (hereinafter referred to as the
“Power tool”). This manual will assist you in
operating and maintaining your power tool.
This manual is the latest version. With the
continuous improvement and upgrading of
this product, the manufacturer reserves the
right to modify this manual without notice.
The manufacturer shall assume no liability
for incorrect information contained in this
manual. This manual is an integral part
of the power tool. When the power tool is
transferred to others, this manual should
be handed over to the new owner. The
users should pay special attention to these
instructions.
IMPORTANT:
The range of CASALS Outdoor Power tools
is safe and reliable, but incorrect use of
these products may cause personal injury
and or damage to your machine. Please
read this manual thoroughly before attempt-
ing to operate or assemble as this product
is required to operate strictly in accordance
with this manual.
WARNING
Read and understand all instructions. Save
these instructions. Failure to follow all in-
structions listed below may result in electric
shock, fire and or serious injury. The term
‘power tool’ in all of the warnings below
refers to your mains-operated (corded)
power tool.
KNOW YOUR LAWN MOWER
Read this manual carefully, observing the
recommended safety instructions before,
during and after using your lawn mower.
Following these simple instructions will also
maintain your lawn mower in good working
order. Familiarize yourself with the controls
on your mower before attempting to operate
it, but above all, be sure you know how to
stop your mower in an emergency. Retain
this user manual and all other literature with
your mower for future reference.
SYMBOLS MARKED ON THE PRODUCT
Read this instruction book
carefully before using the
lawn mower and keep it in a safe
place for future reference.
Keep bystanders away.
Beware of sharp blades. Blades
continue to rotate after the motor
is switched off.
Remove the plug from the machine
before maintenance or if cord
damaged.
Keep the supply flexible cord away
from the cutting blades.
CAUTION! Unusable power tools
do not belong with domestic
waste. They must be taken to a
communal collecting point for
environmentally friendly disposal in
accordance with local regulations.
Noise level marking
Your tool noise is not more than
96dB.

DOUBLE INSULATED
Your mower is double insulated.
This means that all external parts
are electrically isolated from the
power supply. This is achieved by
placing an extra insulation barrier
between the electrical and m
chanical parts.
Parts Discription:
1. Motor Assembly
2. Lower Handle
3. Upper Handle
4. Cable clip
5. Securing knob and bolt
6. Height adjustment lever
7. Safety button
8. Trigger ON/OFF switch
9. Grass box
10. Wheel
11. Cable Retaining Hook
Intended Use and Reasonably Foreseeable
Misuse:
The Lawn mower is intended to be used
only for mowing domestic lawns. The Lawn
mower has been designed for use only in
private gardens and is not suitable for use
in public grounds, parks, sports fields or for
agricultural or forestry purposes. Only mow
the lawn when the grass is relatively dry.
Any other use of the lawn mower is consid-
ered inappropriate use. The manufacturer
shall not be liable for any damage or injury
resulting from misuse.
Only the manufacturer’s approved replace-
ment parts and blades are to be used on the
machine. Structural modifications or use of
components not approved by the manufac-
turer will void the warranty and absolve the
manufacturer of any liability.
Even with the intended use of the lawn
mower there is always a residual risk, which
cannot be eliminated.
According to the type and construction
of the lawn mower the following potential
hazards might apply:
- Ejection of stones etc. from the cutting
area (Cutting / injection hazards)
- Injury from the exposed blade during main-
tenance (Cutting hazards)
- Electric shock on contact with non-insulat-
ed electric components,
- Loss of hearing if suitable ear protection is
not worn
Warning: The actual level of vibration while
using the lawn mower may differ from the
level specified in this manual by the manu-
facturer. The following factors may affect
actual level of vibration:
- correct use of the lawn mower
- Proper maintenance of the lawn mower
- selected height of cut
- Sharpness and balance of blade
Make a work plan so that your exposure to
vibration can be limited.
If you experience an unpleasant sensation
or skin discoloration while using the lawn
mower, immediately stop working. Take
sufficient work breaks to prevent hand-arm
vibration syndrome.
Maintain the machine in accordance with the
instructions in the manual.
Do not use of the lawn mower at tempera-
tures below10 °C

1. Training
• Read the instructions carefully. Be familiar
with the controls and the correct use of the
machine.
• Never allow children or people unfamiliar
with these instructions to use the machine.
Local regulations can restrict the age of the
operator.
• Never operate the machine while people,
especially children, or pets are nearby.
• Keep in mind that the operator or user is
responsible for accidents or hazards occur-
ring to other people or their property.
2. Preparation
• While operating the machine always wear
substantial footwear and long trousers. Do
not operate the machine when barefoot or
wearing open sandals. Avoid wearing cloth-
ing that is loose fitting or that has hanging
cords or ties.
• Thoroughly inspect the area where the
machine is to be used and remove all ob-
jects which can be thrown by the machine.
• Before using, always visually inspect the
machine to see that the blade, blade bolt and
the blade assembly are not worn or dam-
aged. Replace worn or damaged compo-
nents in sets to preserve balance. Replace
damaged or unreadable labels.
• Before use check the supply and exten-
sion cord for signs of damage or aging. If
the cord becomes damaged during use,
disconnect the cord from the supply im-
mediately.
DO NOT TOUCH THE CORD BEFORE DIS-
CONNECTING THE SUPPLY.
Do not use the machine if the cord is dam-
aged or worn.
3. Operation
• Operate the machine only in daylight or in
good artificial light.
• Avoid operating the lawn mower in wet
grass.
• Always be sure of your footing on slopes.
• Walk, never run.
• Mow across the face of slopes, never up
and down.
• Exercise extreme caution when changing
direction on slopes.
• Do not mow excessively steep slopes.
•Use extreme caution when reversing or
pulling the appliance toward you.
• Stop the blade(s) if the machine has to
be tilted for transportation, when crossing
surfaces other than grass, and when trans-
porting the machine to and from the area to
be used.
• Never operate the machine with defective
guards or shields, or without safety devices,
for example deflectors and/or the grass col-
lector, in place.
• Switch on the motor carefully according
to instructions and with feet well away from
the blade(s).
• Do not tilt the machine when switching on
the motor.
• Do not start the machine when standing in
front of the discharge opening.
• Do not put hands or feet near or under
rotating parts.
Keep clear of the discharge opening at all
times.
• Ensure that the lawn mower is switched
off when moving from one work area to
another.
• Stop the machine, and remove the plug
from the socket. Make sure that all moving
parts have come to a complete stop:
- Whenever you leave the machine,
- Before clearing blockage or unclogging
chute,
- Before checking, cleaning or working on
the machine,
- After striking a foreign object. Inspect
the machine for damage and make repairs
before restarting and operating the machine,
- If the appliance starts to vibrate abnormally

(Check immediately).
• If the machine starts to vibrate abnor-
mally:
- Immediately inspect for damage,
- replace or repair any damaged parts,
- check for and tighten any loose parts.
4. Maintenance and storage
• Keep all nuts, bolts and screws tight
to ensure the machine is in safe working
condition.
• Check the grass collector frequently for
wear or deterioration.
• During adjustment of the machine be
careful to prevent trapping your fingers
between moving blades and fixed parts of
the machine.
• Always allow the machine to cool down
before storing.
• When servicing the blades be aware that,
even though the power source is switched
off, the blades can still be moved.
• Replace worn or damaged parts for
safety. Use only genuine replacement parts
and accessories.
WARNING
• This appliance is not intended for use by
persons (including children) with reduced
physical, sensory or mental capabilities, or
lack of experience or knowledge, unless they
have been given supervision or instruction
concerning use of the appliance by a person
responsible for their safety.
Children should be supervised to ensure that
they do not play with the appliance.
• This Lawn Mower is designed for the cut-
ting of domestic grass and lawns.
• The Lawn Mower must be fully assembled
before connecting to the power supply.
• When using wear robust footwear and
suitable outdoor clothing.
• Never put your hands into the underside
of the cutting area when the Lawn Mower is
turned on.
• Keep the flexible supply power cable
(cord) away from the blades.
• Before use check the supply power cable
(cord) for signs of damage or ageing.
• Never operate the appliance with damaged
guards or without the guards in place.
• Danger! The cutting blade rotates for
some time after the motor has been turned
off.
• Never start the Lawn Mower when it is
lying on its side.
• When operating always adopt a safe
stance and hold the Lawn Mower firmly,
away from your body keeping hands and
feet safely away from the cutting head.
• Thoroughly inspect the area to be mown,
remove all stones, sticks, string, wire and
any other objects that could hinder your
mowing.
• Always be aware of your footing when
mowing on slopes.
• Mow across the face of slopes, never up
and down.
• Use extreme caution when changing
direction on slopes. Be aware of the cable
position.
• Do not mow excessively steep slopes
where keeping a good footing is difficult.
• Use extreme caution when reversing or
pulling the mower towards you.
• Make sure that the power cable is always
behind the Lawn Mower and away from the
cutting path of the mower.
• Do not use the Lawn Mower in the rain;
never leave the mower out in the rain.
• Avoid mowing wet grass if possible.
• Never pick up or carry the mower while it
is switched on.
• Always turn off the mower and wait for the
cutting blades to stop rotating before moving
from one area to another.
• Always turn off and disconnect from the
power supply before attempting any clean-

ing or maintenance work.
• Make sure that the ventilation openings
are kept clear of grass cuttings and debris.
• Before using the Lawn Mower and after
any impact, check for signs of wear or
damage.
• After use disconnect the power supply,
clean off the grass cuttings from the top and
underside of the mower head.
• Only use the manufacturer recommended
replacement parts and accessories.
• Inspect and maintain the lawnmower
regularly and have any repairs required done
by an authorized repairer.
• Store in a safe secure place out of the
reach of children.
WARNING: Wait until all moving parts are at
a complete standstill before touching them.
The cutting blade continues to rotate after
the Lawn Mower is switched off, a rotating
blade can cause injury.
Electrical Safety
• It is strongly recommended that mains
power be supplied to the Lawn Mower
through a residual current device (RCD)
having a rated residual current rating not
exceeding 30mA.
• Where necessary, use a suitable wa-
terproof extension lead no longer than 25
meters.
• Plugs and connectors must be protected
from getting wet.
• Turn off and remove the plug from the
socket when leaving the Lawn Mower or
when attempting to clear any debris or
blockage.
• Should the supply cable become damaged
in any way turn off the mains power supply
at the socket and immediately unplug the ca-
ble. When the cable is totally disconnected it
can be removed by qualified personnel.
• Do not use in wet conditions. Avoid all
contact with water.
• Power tool plugs must match the outlet.
Never modify the plug in any way.
• Avoid body contact with earthed or
grounded surfaces such as pipes, radia-
tors, ranges and refrigerators. There is an
increased risk of electric shock if your body
is earthed or grounded.
• Do not abuse the power cable (cord).
Never use the power cable for carrying,
pulling or unplugging the lawn mower.
Keep the power cable away from heat, oil,
sharp edges or moving parts. Damaged or
entangled power cables increase the risk of
electric shock.
• When operating a power tool outdoors,
use an outdoor extension power cable suit-
able for outdoor use. Use of a power cable
suitable for outdoor use reduces the risk of
electric shock.
Work Area
• Do not operate lawn mower in explosive
atmospheres, such as in the presence of
flammable liquids, gases, or dust. Power
tools create sparks which may ignite the
dust or fumes.
• Keep children and bystanders away while
operating a lawn mower. Distractions can
cause you to lose control.
Personal Safety
• Stay alert, watch what you are doing and
use common sense when operating a power
tool. Do not use a power tool while you are
tired or under the influence of drugs, alcohol,
or medication. A moment of inattention while
operating power tools may result in serious
personal injury.
• Use safety equipment. Always wear eye
protection.
Safety equipment such as a dust mask, non-
skid safety shoes, hard hat, or hearing protec-
tion used for appropriate conditions will reduce

personal injuries.
• Avoid accidental starting. Ensure the switch
is in the off-position before plugging in.
• Carrying power tools with your finger on the
switch or plugging in power tools that have the
switch on invites accidents.
• Remove any adjusting key or wrench before
turning the tool on. A wrench or a key that is
left attached to a rotating part of the power tool
may result in personal injury.
• Do not overreach. Keep proper footing and
balance at all times. This enables better control
of the power tool in unexpected situations.
• Dress properly. Do not wear loose cloth-
ing or jewellery. Keep your hair, clothing
and gloves away from moving parts. Loose
clothes, jewellery or long hair can be caught
in moving parts.
Power Tool Use and Care
• Do not force the power tool. Use the
correct power tool for your application. The
correct power tool will do the job better and
safer at the rate for which it was designed.
• Do not use the power tool if the switch
does not turn it on and off. Any power tool
that cannot be controlled with the switch is
dangerous and must be repaired.
• Disconnect the plug from the power
source before making any adjustments,
changing accessories, or storing power
tools. Such preventive safety measure
reduces the risk of starting the power tool
accidentally.
• Maintain power tools. Check for misalign-
ment or binding of moving parts, breakage
of parts and any other condition that may
affect the power tool’s operation. If dam-
aged, have the power tool repaired before
use. Many accidents are caused by poorly
maintained power tools.
• Keep cutting tools sharp and clean.
Properly maintained cutting tools with sharp
cutting edges are less likely to bind and are
easier to control.
• Use the power tool, accessories and tool
bits etc., in accordance with these instruc-
tions and in the manner intended for the
particular type of power tool, taking into
account the working conditions and the
work to be performed. Use of the power tool
for operations different from intended could
result in a hazardous situation.
Service
Have your power tool serviced by a quali-
fied repair technician using only identical
replacement parts.
This will ensure that the safety of the power
tool is maintained.
Assembly
Assembly of the Lower Handle
To assemble the lower handles proceeds as
follows:
• Insert the Lower Handle 2 directly into
the locating holes on each side of the Motor
Assembly 1.
Assembly of the Upper Handle 3 and Cable
clip 6
To assemble the Upper Handle proceeds as
follows:
• Position the Upper Handle 3 over the
lower Handle 2 and align the holes. Push
through the two Securing bolts 5. Screw on
the Securing knobs 5 and hand tighten.
• The Securing knob and bolt 5 should be

hand tightened only.
Never use a spanner or any other tool to
tighten them.
Assembly of the Grass box 9.
To assemble the grass box 9 proceed as
follows:
•first, you need align the upper and lower
grass box, and combine them, then you turn
on the machine rear cover, align the hook on
the 2 sides of back machine with the grass
box, put the grass box in the 2 hooks and
then loose the machine rear cover.
All item numbers in bold refer to the illustra-
tion on page 10.
Using your Lawn Mower
Connecting your Lawn Mower
Make sure you use extension lead suitable
for outdoor use (H05VV-F 2X1.0mm2) fitted
to the power supply via leakage-protective
system (RCD).
Connect the lawn mower firstly to the exten-
sion lead
and then connect to the power supply.
• Make sure that the supply cable to the
Switch Box
7 is fitted to the cable restraint as shown
below.
Create a small loop from the cable, push the
loop
through the slot of the cable retaining hook
11, place the loop over the hook, then pull
the cable.
Starting and Stopping your Lawn Mower
To switch the Lawn Mower on proceed as
follows:
• Press and hold in the safety Lock-Off But-
ton located on the Switch Box 7.
• Hold in the Safety Lock-Off Button and
pull the Switch Lever upwards towards the
handle and hold
in this position.
• The motor will now start.
• Release the Safety Lock-off Button.
• To stop the mower simply release the
Switch Lever
and the mower will stop.
Warning: The blades will continue to rotate
for some
time after the mower has been switched
off. Make sure that the blades have come
to complete stop and that you have discon-
nected the mower from the power supply
before carrying out any maintenance.

Height Adjustment
For height adjustment proceeds as fol-
lows:
Warning: Stop, release switch lever and
wait until
the motor stops. The blades continues to
rotate for a few seconds after the machine
is switch off, a rotating blade can cause
injury.
For the first cut of the season, a high cutting
adjustment should be selected.
This machine can be set to five height of cut.
I=25mm II=35mm III=45mm IV=55mm
V=65mm
• Pull Height adjustment lever to the broad-
side.
•Push the adjustment lever to the front or
back.
• When the adjustment lever is in the front,
it is at the highest setting, when in the back,
the height is the lowest.
Note: For long grass, start mowing with the
highest setting and then gradually reduce the
height of cut.
Warning: When mowing, do not allow the
motor to labor, particularly in heavy condi-
tions.
When the motor labors the revolutions of the
motor will drop and you will hear a change
in the motor sound. When this occurs stop
mowing, release the switch lever and raise
the height of cut. Failure to
do so could damage the machine.
NOTE: The motor is protected by a safety
cut–out switch which is activated when
the blade becomes jammed or if the motor
is overloaded. When cut-out occurs, stop
mowing and disconnect the lawn mower
from the power supply. Clear any obstruc-
tion and wait for a few minutes for the safety
cut out switch to reset before continuing to
use the mower. If the mower cuts out again
increase the height of cut to reduce the load
on the motor.
NOTE: The temperature of the motor will rise
quickly,
if the lawn mower frequently jams. If the
motor overheats, the safety cut out switch
will operate and will cut off the power. If this
occurs, you will need to disconnect the lawn
mower from the power supply and wait for
it to cool down completely. You will need
to wait for approximately 1 hour before you
can start using the mower again.
Blade Replacement
• Switch off the lawnmower and disconnect
from the mains supply.
• Before replacing the blade it is advisable
to thoroughly clean the underside of the
machine.
• Always wear work gloves when replac-
ing the blade. Note which way the blade is
fitted. Hold the blade firmly with one hand
and using the spanner to remove the blade
securing bolt anticlockwise.
Remove the blade and thoroughly clean the
area around the shaft.
• To attach the new blade (QT3041
400mm), align the blade onto the drive shaft
ensuring that the mark on the blade is on the
outside and the two studs on the back of the
fan are located into the corresponding two
holes in the blade. Tighten blade securing
bolt clockwise, do not over tighten.
Check to ensure the blade is located cor-
rectly before using the lawnmower.

Grass box:
• The lawnmower is fitted with a grass box.
To attach
the grass box, raise the flap on the mower
body, align the mounting holes on the grass
box with the bulges on the mower body and
press to hear a click.
To remove the grass box, raise the flap on
top of the
grass box, lift the grass box upwards to
detach grass
box from mower body.
Eliminating Faults
The machine fails to operate
• Check the power, and turn the power on
• Check the plug, replace the blown fuse.
• If the overheat protection has activated,
allow the machine to cool down and in-
crease the height of cut before carrying on
The machine leaves ragged finish or motor
labors
• The height of cut is low, increase the
height of cut.
• Cutting blade blunt, replace new blade.
Excessive vibration/noise
• The blade bolt is loose, tighten blade bolt.
• Cutting blade damaged, replace new
blade.
Environmental protection
Do not dispose of the machine, accesso-
ries and packaging simply in the rubbish,
but rather take them to an environmentally
friendly recycling station. This small effort is
good for our environment.
Model Number: LM1600EA
Voltage 230-240V~ 50Hz
Power Input: 1600W
Speed: 3200/min
Cutting Width: 400mm
Cutting height: 25/35/45/55/65
LpA: (Sound Pres-
sure Level)
76.5dB K=3dB
LwA: (Sound Power
Level)
96dB
Grass box Capacity: 40L

2 YEAR GUARANTEE
Casals guarantees that this product has been thoroughly inspected and tested before being dispatched and is
free from mechanical and electrical defects and complies with the applicable safety standards. However, should
defects due to faulty material or workmanship develop, under normal domestic use, within 6 months from the date
of purchase please return the product to the store from where it was purchased for a full refund or replacement.
The following conditions apply:
1. Please ensure you retain your receipt as this must be presented when making a claim under the terms of the
guarantee. It is impossible to determine the guarantee period without proof of purchase, so please keep this
in a safe place.
2. If a refund or exchange is required the product must be complete with all accessories, parts and packaging.
3. Missing parts will render the guarantee void.
4. Upon receipt of your appliance check it for any transport damage to ensure it is safe for use. Return it to the
store as soon as possible for exchange if damaged. The guarantee is void if products are damaged after use,
so please do not use the damaged product.
5. Your product is designed for normal domestic household use. Failure to read and comply with the instructions
for use, cleaning and maintenance will render your guarantee void, so please read these instructions carefully
to ensure your safety, and get the most effective use from the product.
6. Any abuse, negligent, improper use will render the guarantee void and Creative Housewares (Pty) Ltd
will not be liable for any loss or damage.
7. This Guarantee will not apply if this tool is damaged by accident or from normal wear and tear.
8. Any attempted repair, or replacement of unauthorised parts will render the guarantee void, so please contact
an authorised service centre or agent for any service or repair requirements.
9. Accessories such as bits, blades, sanding disc, cutting lines, etc are excluded from this guarantee.
10. Normal consumables parts, such as carbon brushes, bearings, chucks, cord assembly’s, spark plugs,
recoil pulleys and bump head assembly’s are specifically excluded from this guarantee.
Extended 24 Month Limited Guarantee
• Casals takes pride in their product quality and therefore offer an extended 24 month limited guarantee from the
original date of purchase to offer the consumer peace of mind on their purchase.
• Should defects due to faulty material or workmanship develop, under normal domestic use, within 24 months
from the original date of purchase, please return the product to the store from where it was purchased for repair
free of charge.
• Casals will however replace a product, if the cost of the repair is not commercially viable or if their ability to
conduct repair effectively cannot be guaranteed.
• NB: The guarantee on replaced products will be from the original date of purchase.
• All repairs carry a 3 month guarantee even if this falls outside of the 2 year guarantee period. Casals will at-
tempt to conduct repairs within reasonable industry standards but cannot be held responsible or liable for any
circumstances not under their control.
Before returning your product, check for the following:
1. Your household mains supply socket is working and switched on.
2. The mains supply circuit is not overloaded (White trip switch on your DB board is off).
3. You have read the trouble shooting guide in your Instructions for Use.
4. All accessories and parts are present.
If service or repair becomes necessary outside the guarantee period, this service is still available however all
transport/postage, spares and labour costs will be paid by the consumer. All chargeable repairs will require the
consumers’ approval in writing once the quote is accepted. Once the go-ahead has been received Casals will
undertake to conduct the repair within a reasonable time and maintain the condition of the product as received.
For any assistance, service, queries and complaints please contact our Customer Care on 086 111 5006 or e-mail help@
creativehousewares.co.za.

Be on the look-out for these Casals
products at your local outlet:
CD4800RE
DBS900 MFS400 1200EA CS184L
AG115-500 AG115-710 AG230-710 SP1200 JS55A
MFS180 BS76-710 OS150 PL82-650 HAF2000A
CS1200RE IDR500REA ID710REA RHD1050
Durban
35 Adrain Road, Windermere,
Durban, South Africa, 4001
Tell: +27 31 303 3465
Fax: +27 31 303 8259
Johannesburg
Unit 25 & 26 San Croy Office Park
Die Agora Road, Croydon, 1619
Tell: +27 11 392 5652
Fax: +27 11 392 1694
Table of contents
Other Casals Lawn Mower manuals
Popular Lawn Mower manuals by other brands

Husqvarna
Husqvarna LC 137i Operator's manual

Craftsman
Craftsman 917.388380 owner's manual

MTD
MTD Series 080 Operator's manual

MTD
MTD 132-460 Operating/service instructions

Hyundai power products
Hyundai power products HYM40Li330P instruction manual

Goclever
Goclever CITY BOARD KARTING KIT quick start guide