b
2. Mower Flotation Adjustment: See Fig-
ures 4, 5 and 6.
Adjust the mower for proper flotation
a.fter the Height Selector Lever is set
at the desired cutting height. With the
tractor and mower on a level surface,
turn the Depth Control Knob up or down
as necessary to "center" the hanger
pin in the mower lift link flotation slot
with tfie mechanical or hydraulic lift
Iever lowered as far as possible. Ad-
justed in this manner the mower is free
to float up and down over the ground
contour independent of the tractor.
l0fE When turning the Depth Control
Knob, the lift lever must be in the
raised (transport) position so the
lift lever stop plate is not in con-
tact with the depth control rod.
You may find it useful for future
reference to mark the position of
the depth indicator on the decal
when the depth control rod is cor-
rectly adjusted to your desired
cutting height.
3. Mower Blade Bolts:
Before operating the mower for the first
time, check the bolts holding the blades.
THEY MUST BE TIGHT. After the first
8 hours operation, check them again.
Whenever the blades are removed, it
is a good practice to install new lock-
washers under the bolts, and again check
tightness after next B hours operation.
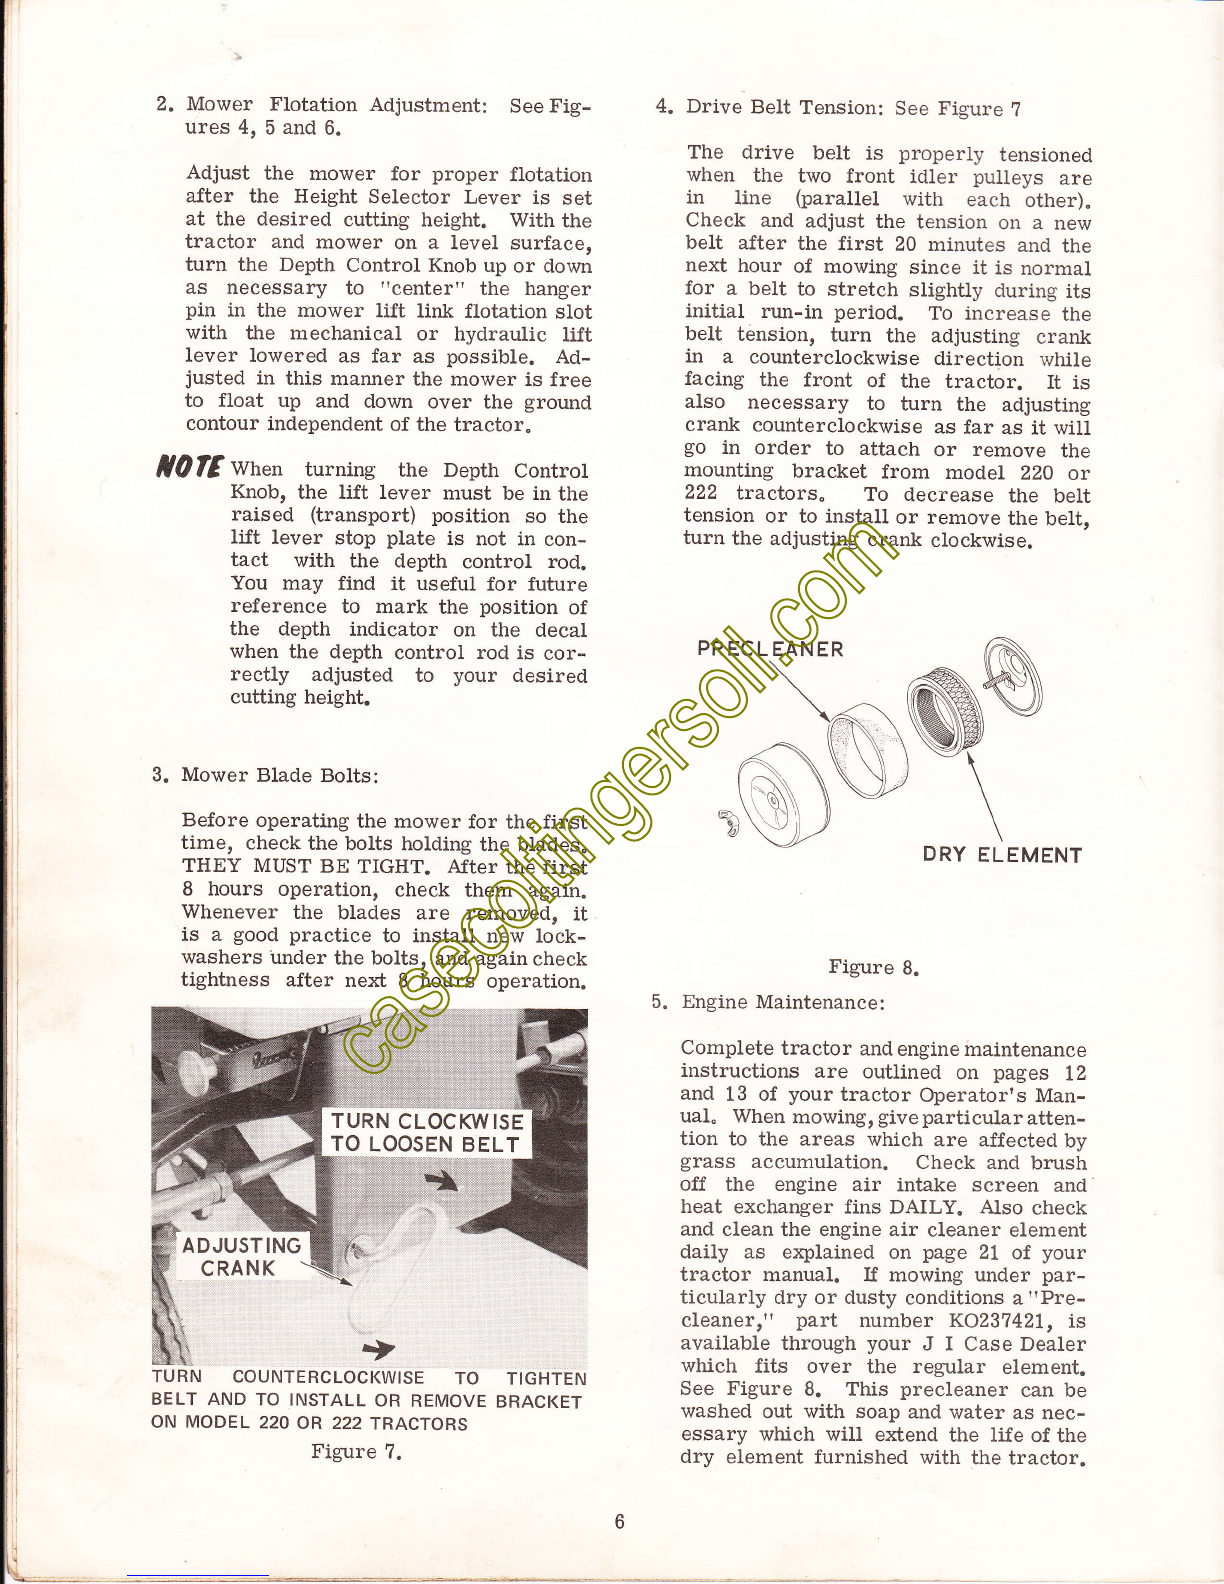
TURN COUNTERCLOCKWISE TO
BELT AND TO INSTALL OR REMOVE
ON MODEL 22O OR 222 TRACTORS
Figure 7.
TIGHTEN
BRACKET
Drive BeIt Tension: See Figure ?
The drive belt is properly tensioned
when the two front idler putleys are
in line (parallel with each other).
Check and adjust the tension on a new
belt after the first 20 minutes and the
next hour of mowing since it is normal
for a belt to stretch slightly during its
initial run-in period. To increase the
belt tension, turn the adjusting crank
in a counterclockwise direction while
facing the front of the tractor. It is
also necessary to turn the adjusting
crank counterclockwise as far as it will
go in order to attach or remove the
mounting bracket from model 220 or
222 tractors. To decrease the belt
tension or to install or remove the belt,
turn the adjusting crank clockwise.
PRECLEANER
DRY ELEMENT
Figure g.
5. Engine Maintenance:
Complete tractor and engine maintenance
instructions are outlined on pages 72
and 13 of your tractor Operator's Man-
ual. When mowing, give particularatten-
tion to the areas which are affected by
grass accumulation. Check and brush
off the engine air intake screen and
heat exchanger fins DAILY. Also check
and clean the engine air cleaner element
daily as e:rplained on page 21 of your
tractor manual. If mowing under par-
ticularly dry or dusty conditions a "Pre-
cleanerr" part number KO23142L, is
available through your J I Case Dea1er
which fits over the regular element.
See Figure B. This precleaner can be
washed out with soap and water as nec-
essary which will extend the life of the
dry element furnished with the tractor.
4.
+
ADJUSTING
CRANK